Looking to add a little more quick-access storage space to your Gen 1 Toyota Tacoma (or other vehicles like Tundra or Sequoia?) Then consider installing a pair of rust-proof aluminum MOLLE panels on your door cards.
It’s an easy install which doesn’t require any special tools and can be completed in about 30 minutes total. Put whatever you want on them, pouches, radios, flashlights – the options are almost endless!
Affiliate notice: The Tacoma Guy is an Amazon and eBay Affiliate. That means we get a small percentage from them if you use the links to purchase the product. It doesn’t increase your cost! If you found this tutorial helpful, please consider using these links to help support this mom & pop business, thank you! Learn more.
Tools Required:
- A set of 1st Gen Tacoma Door Molle Panels (95 – 04)
- Screwdriver and a screw gun to mount the bracket into the trim plate
- A 10mm wrench to hold in some bolts
- A drill and 3/32 and 5/32 drill bits to make holes
- Some painters tape
- Something pointy to make marks where you’ll need to drill the plastic, like a self tapping screw or a scratch awl
Parts Required:
- A set of 1st Gen Tacoma Door Molle Panels (95 – 04) from TEQ Offroad (or whatever model of vehicle you are working on.)
Video Walk-Through:
Check out our step-by-step video tutorial first to get an idea of the process, then you can read the guide below and print it out if you want.
Step-by-Step Guide:
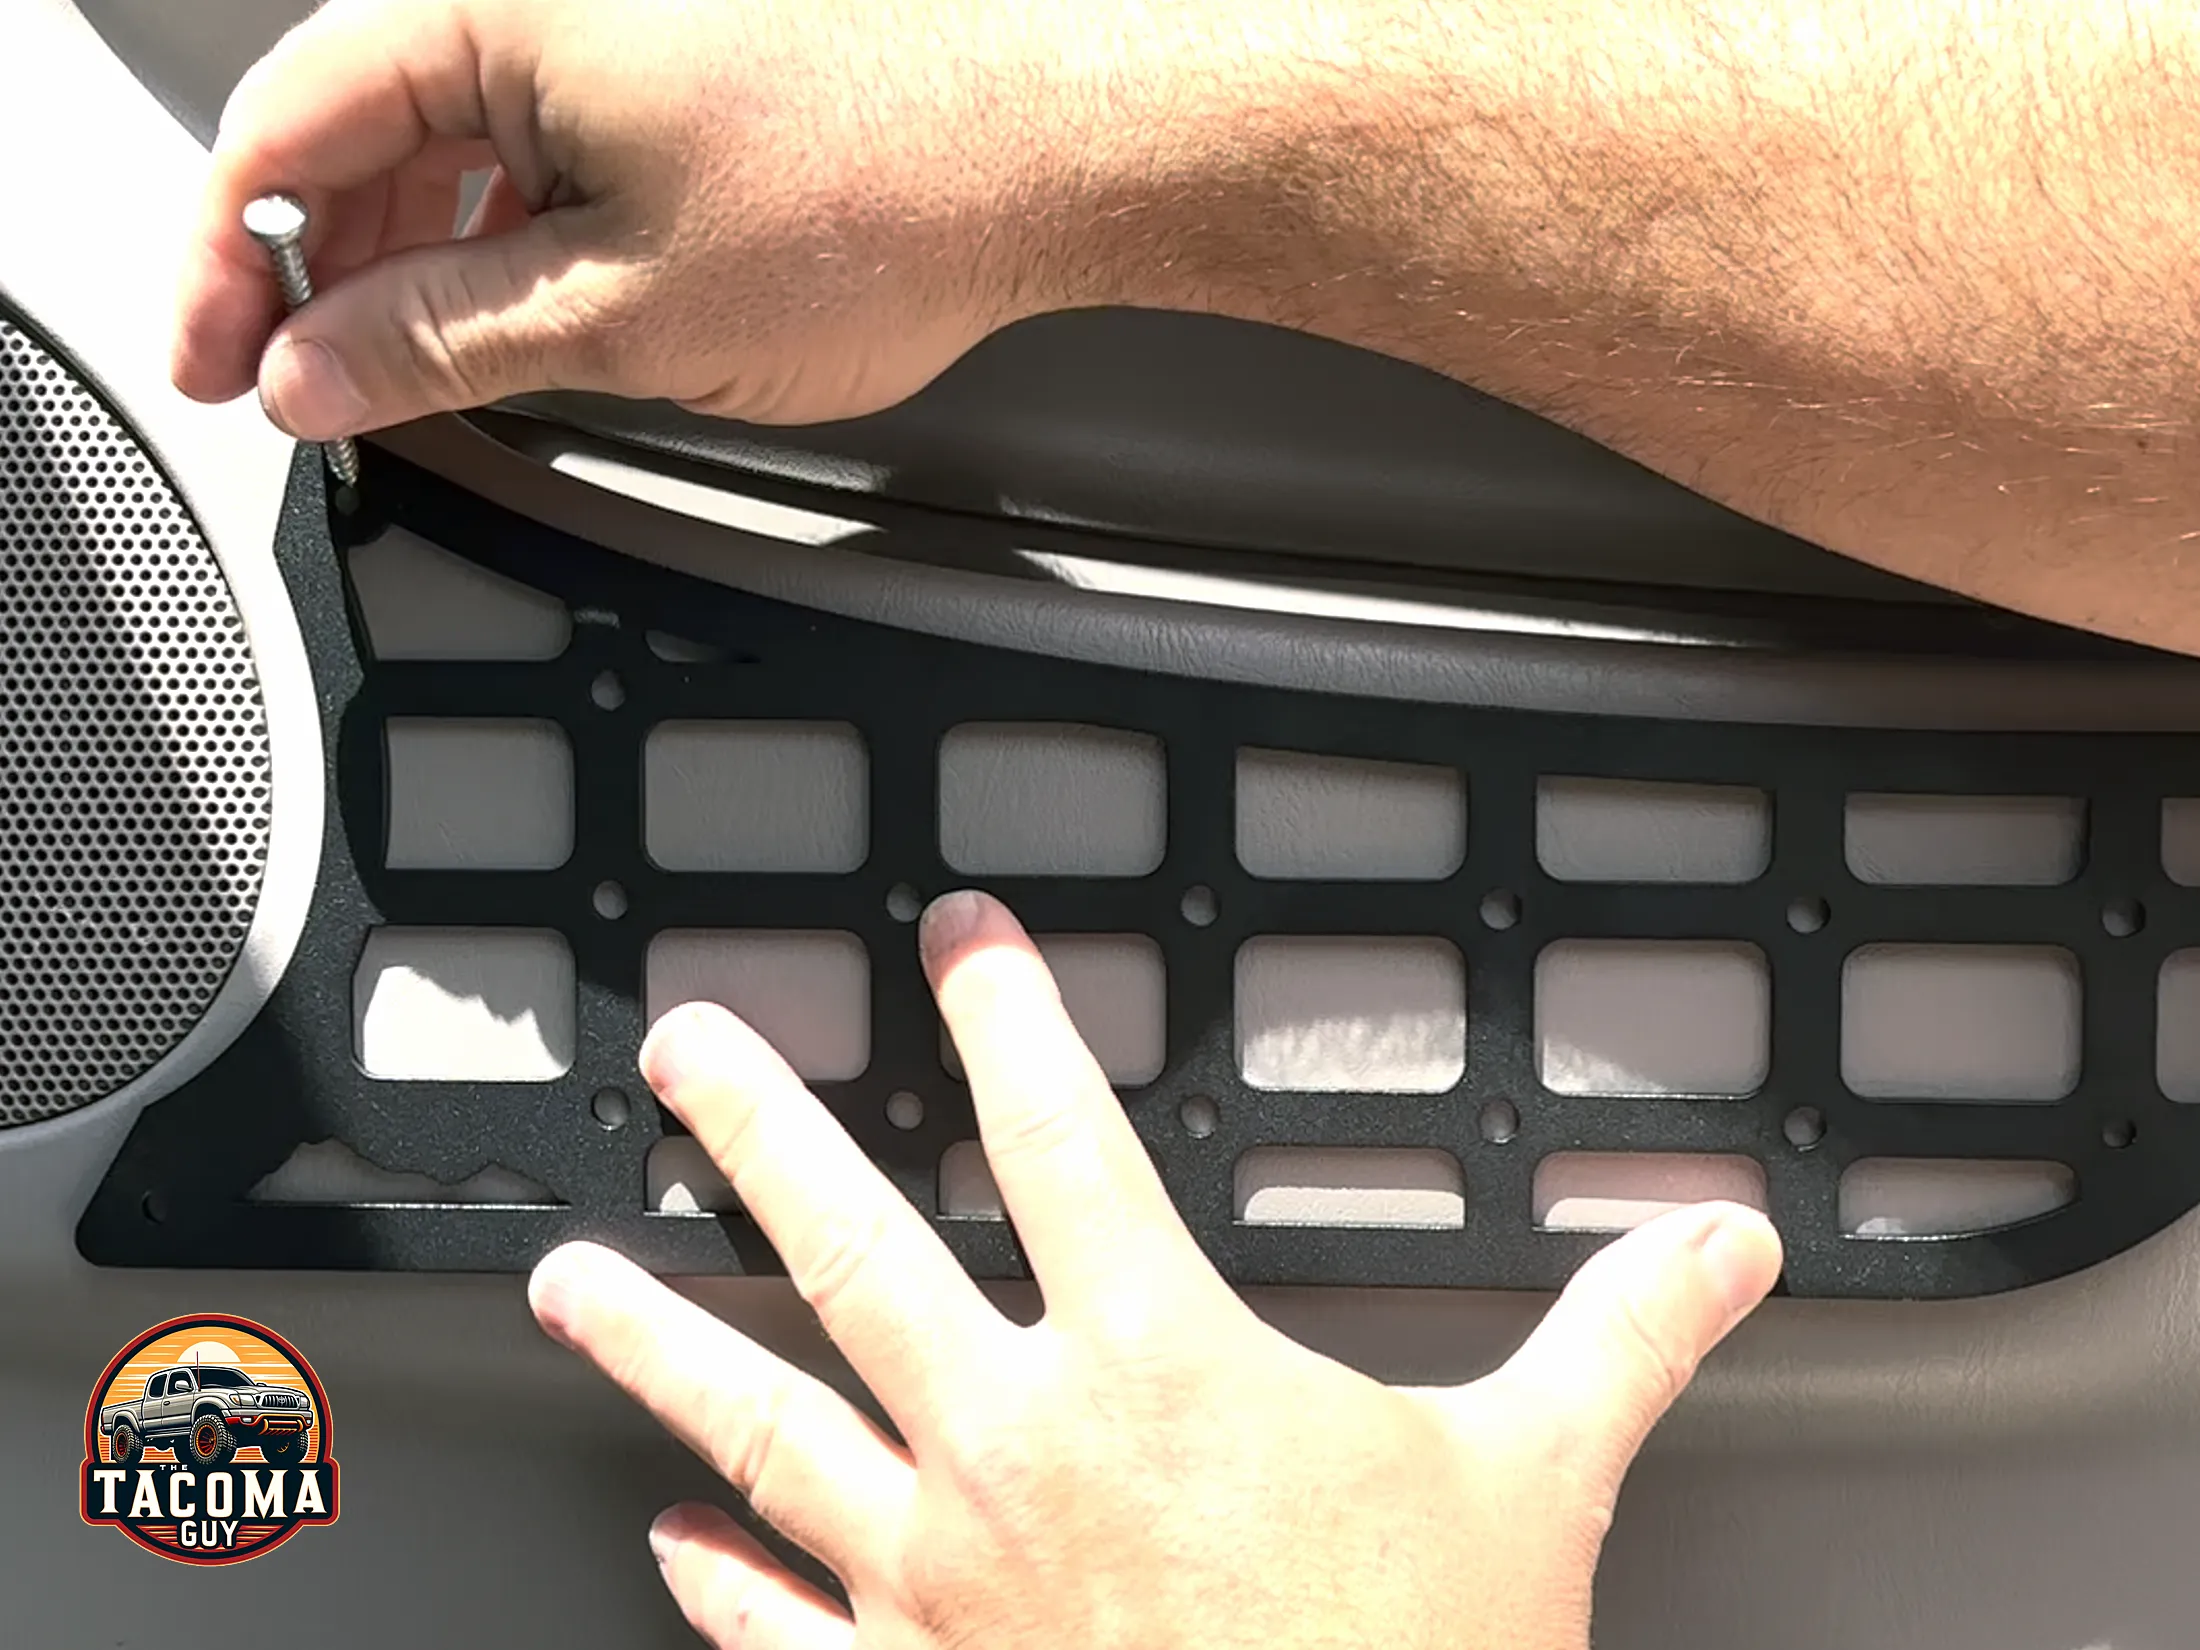
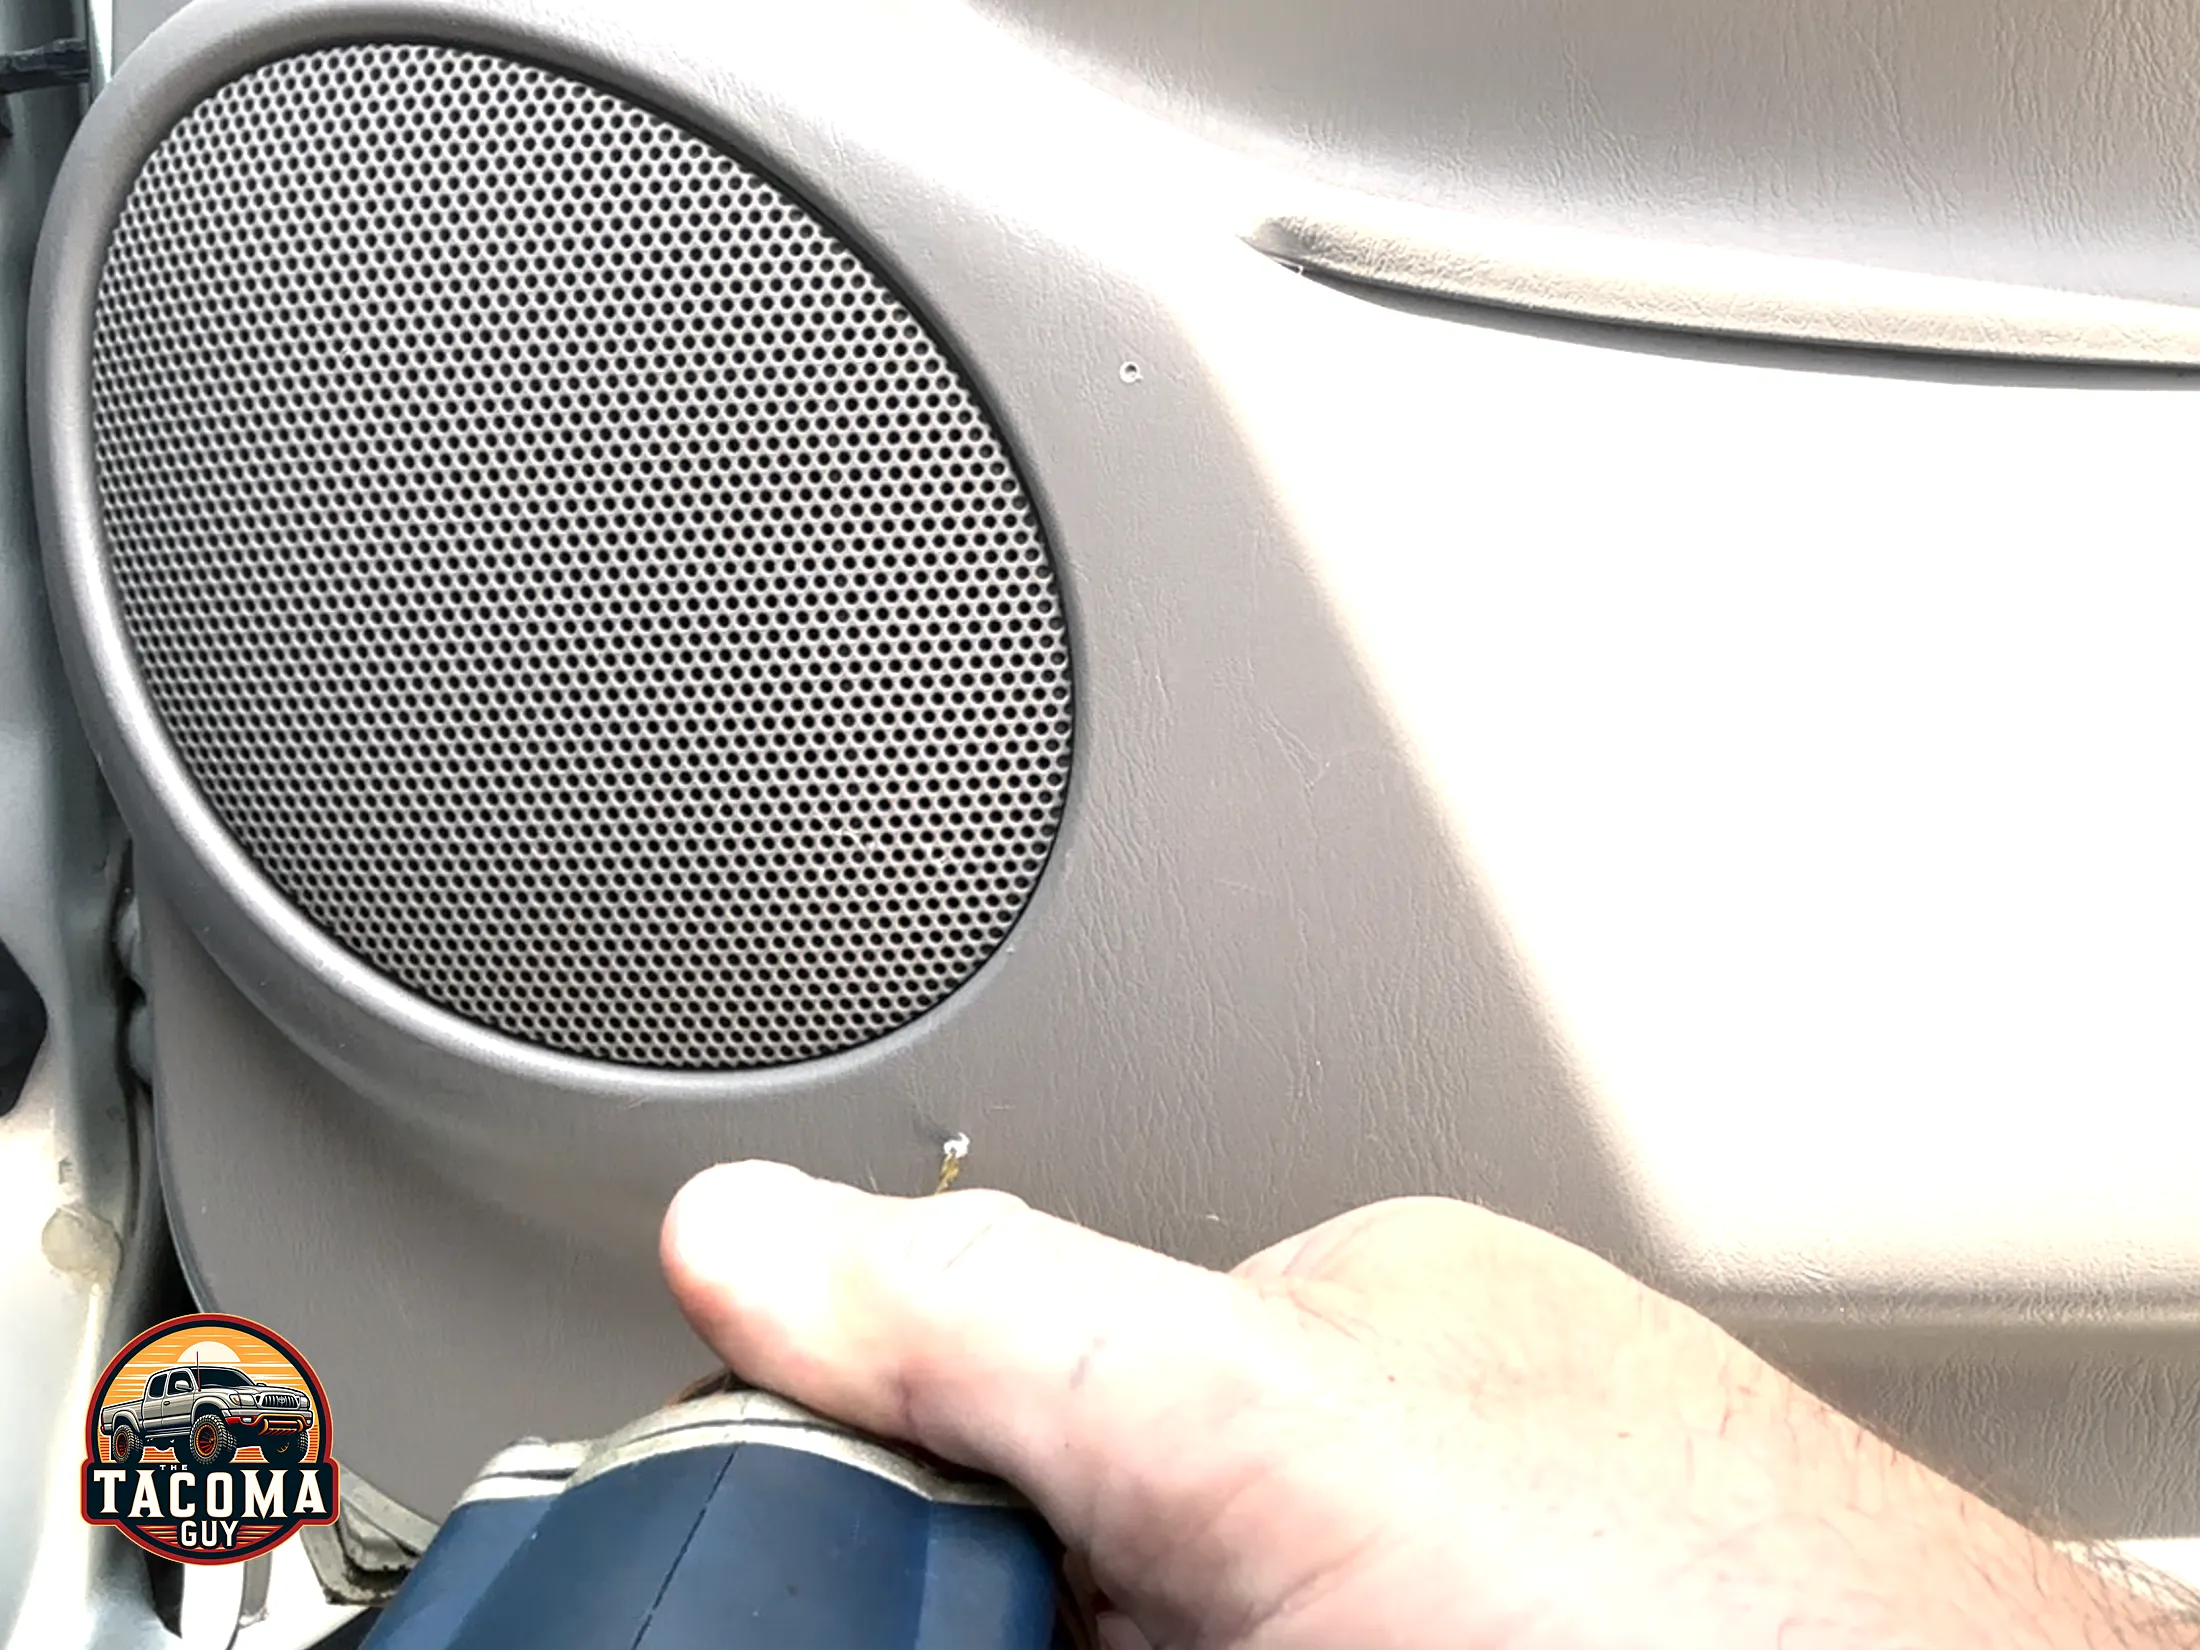
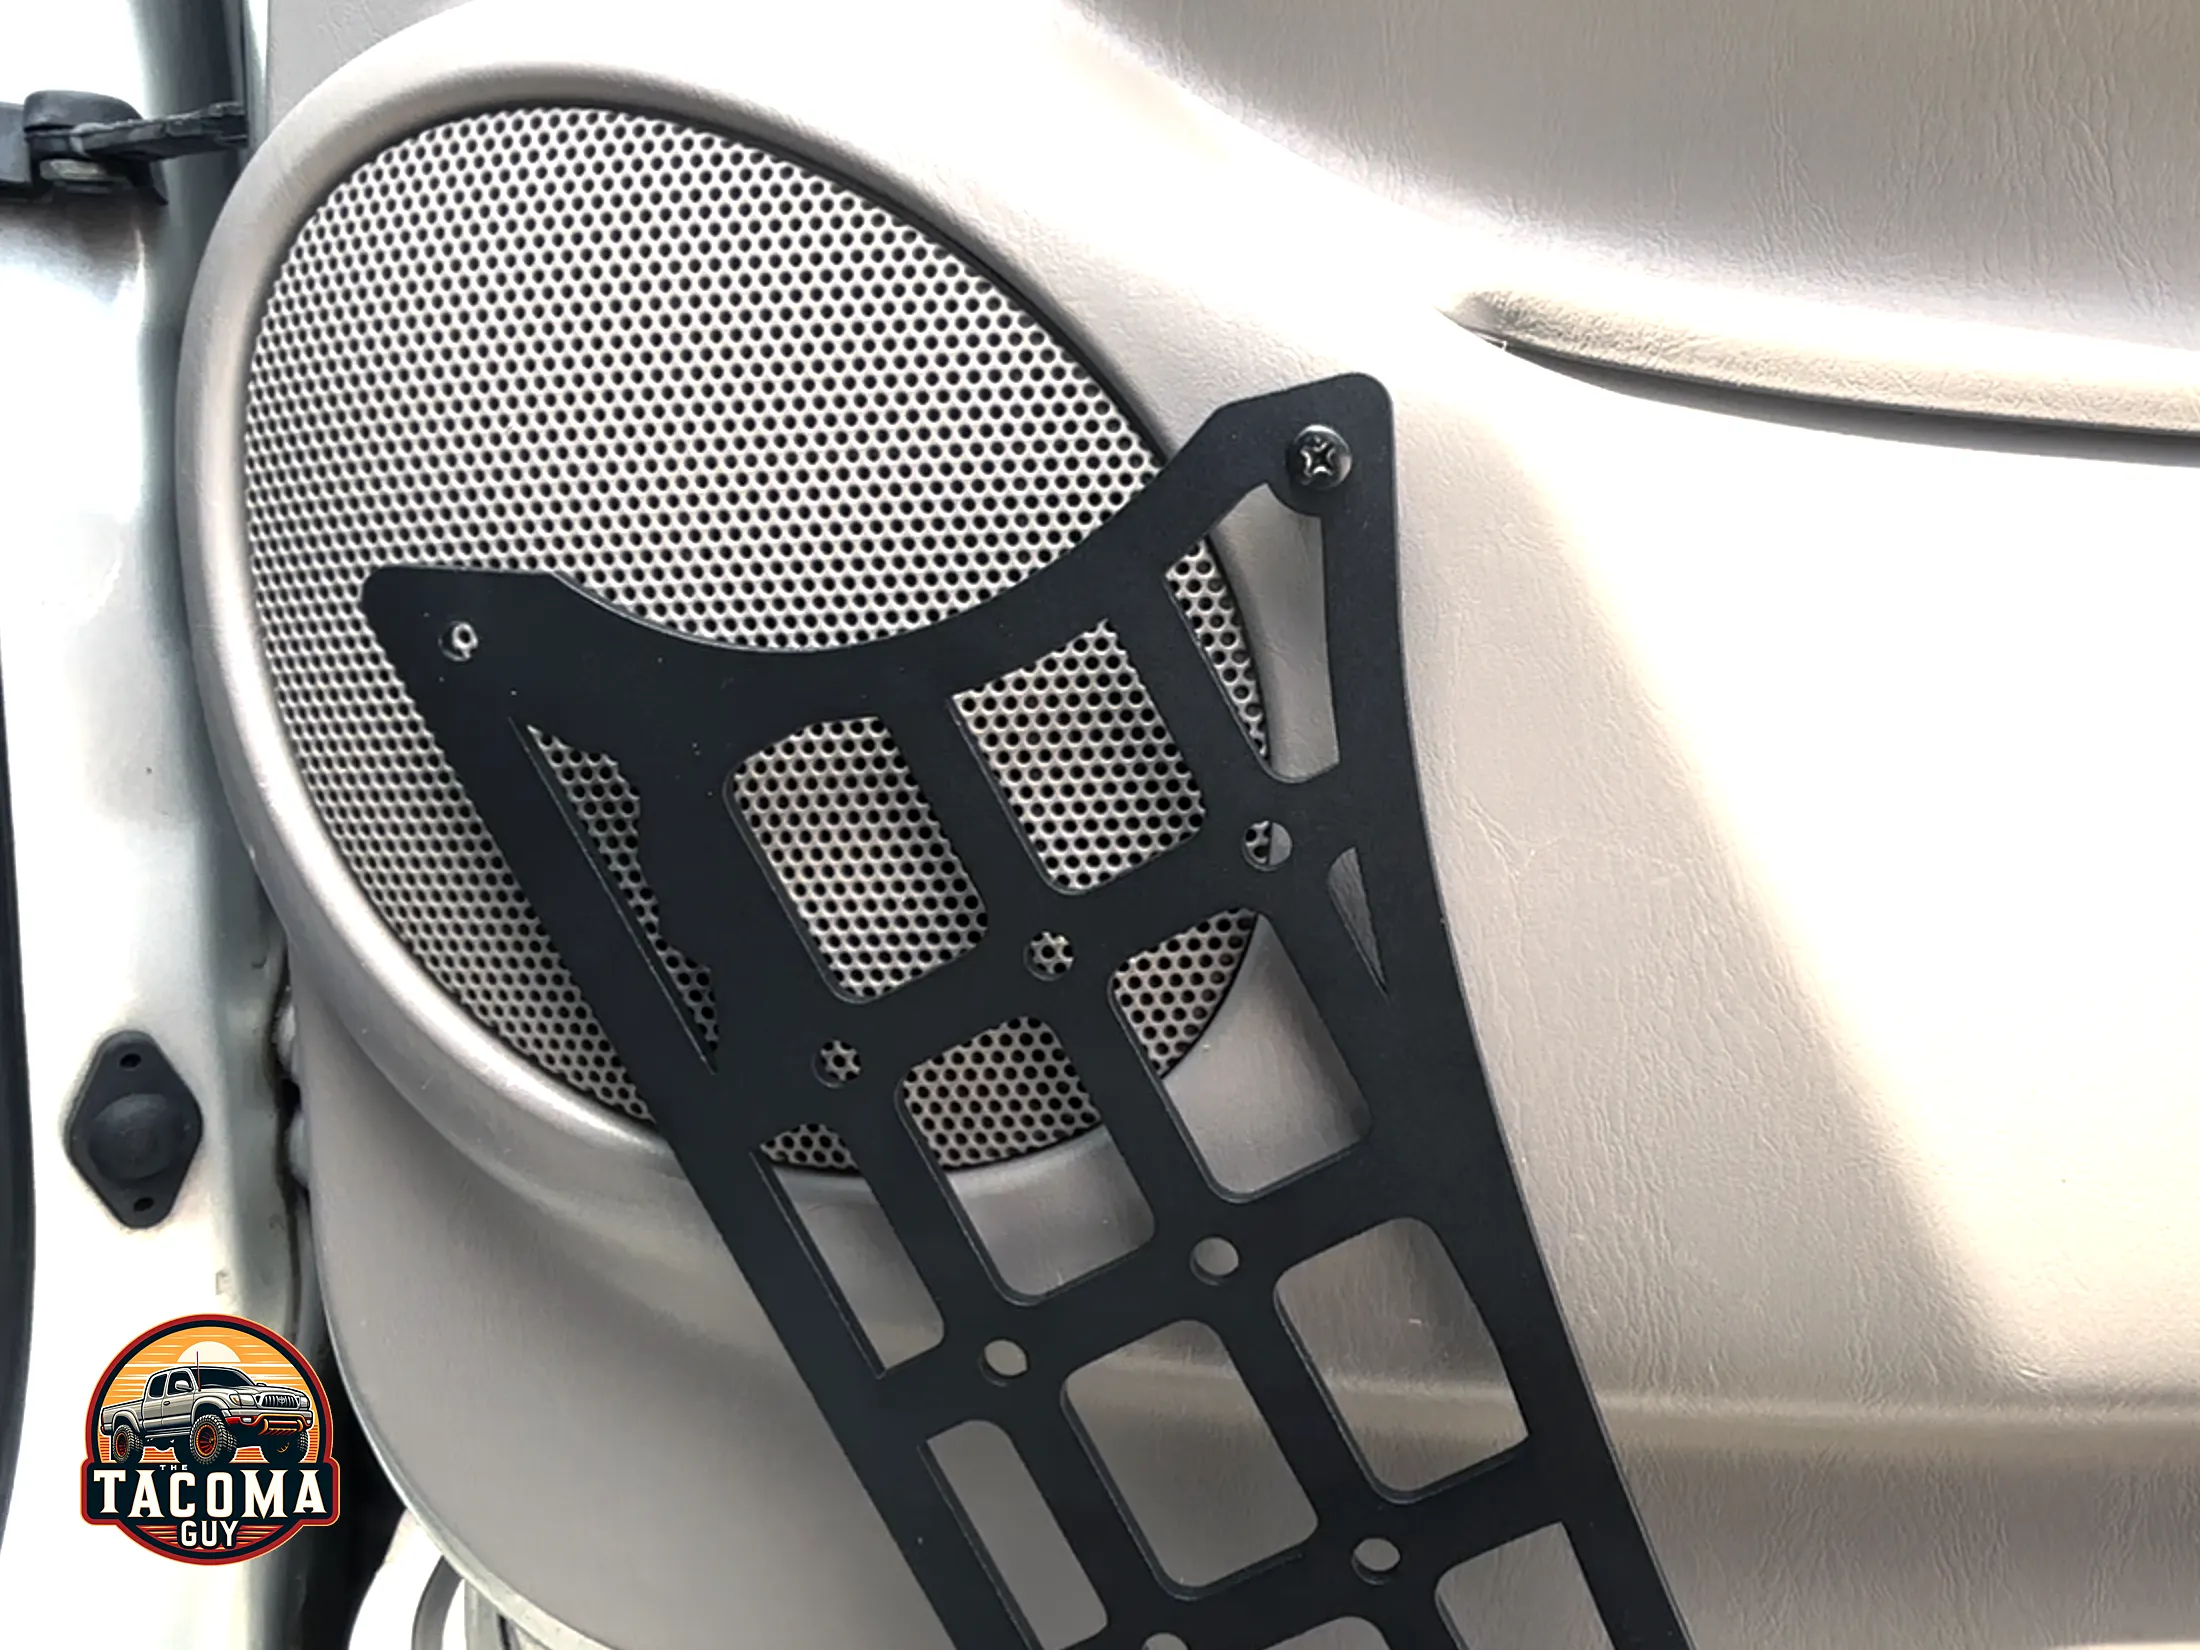
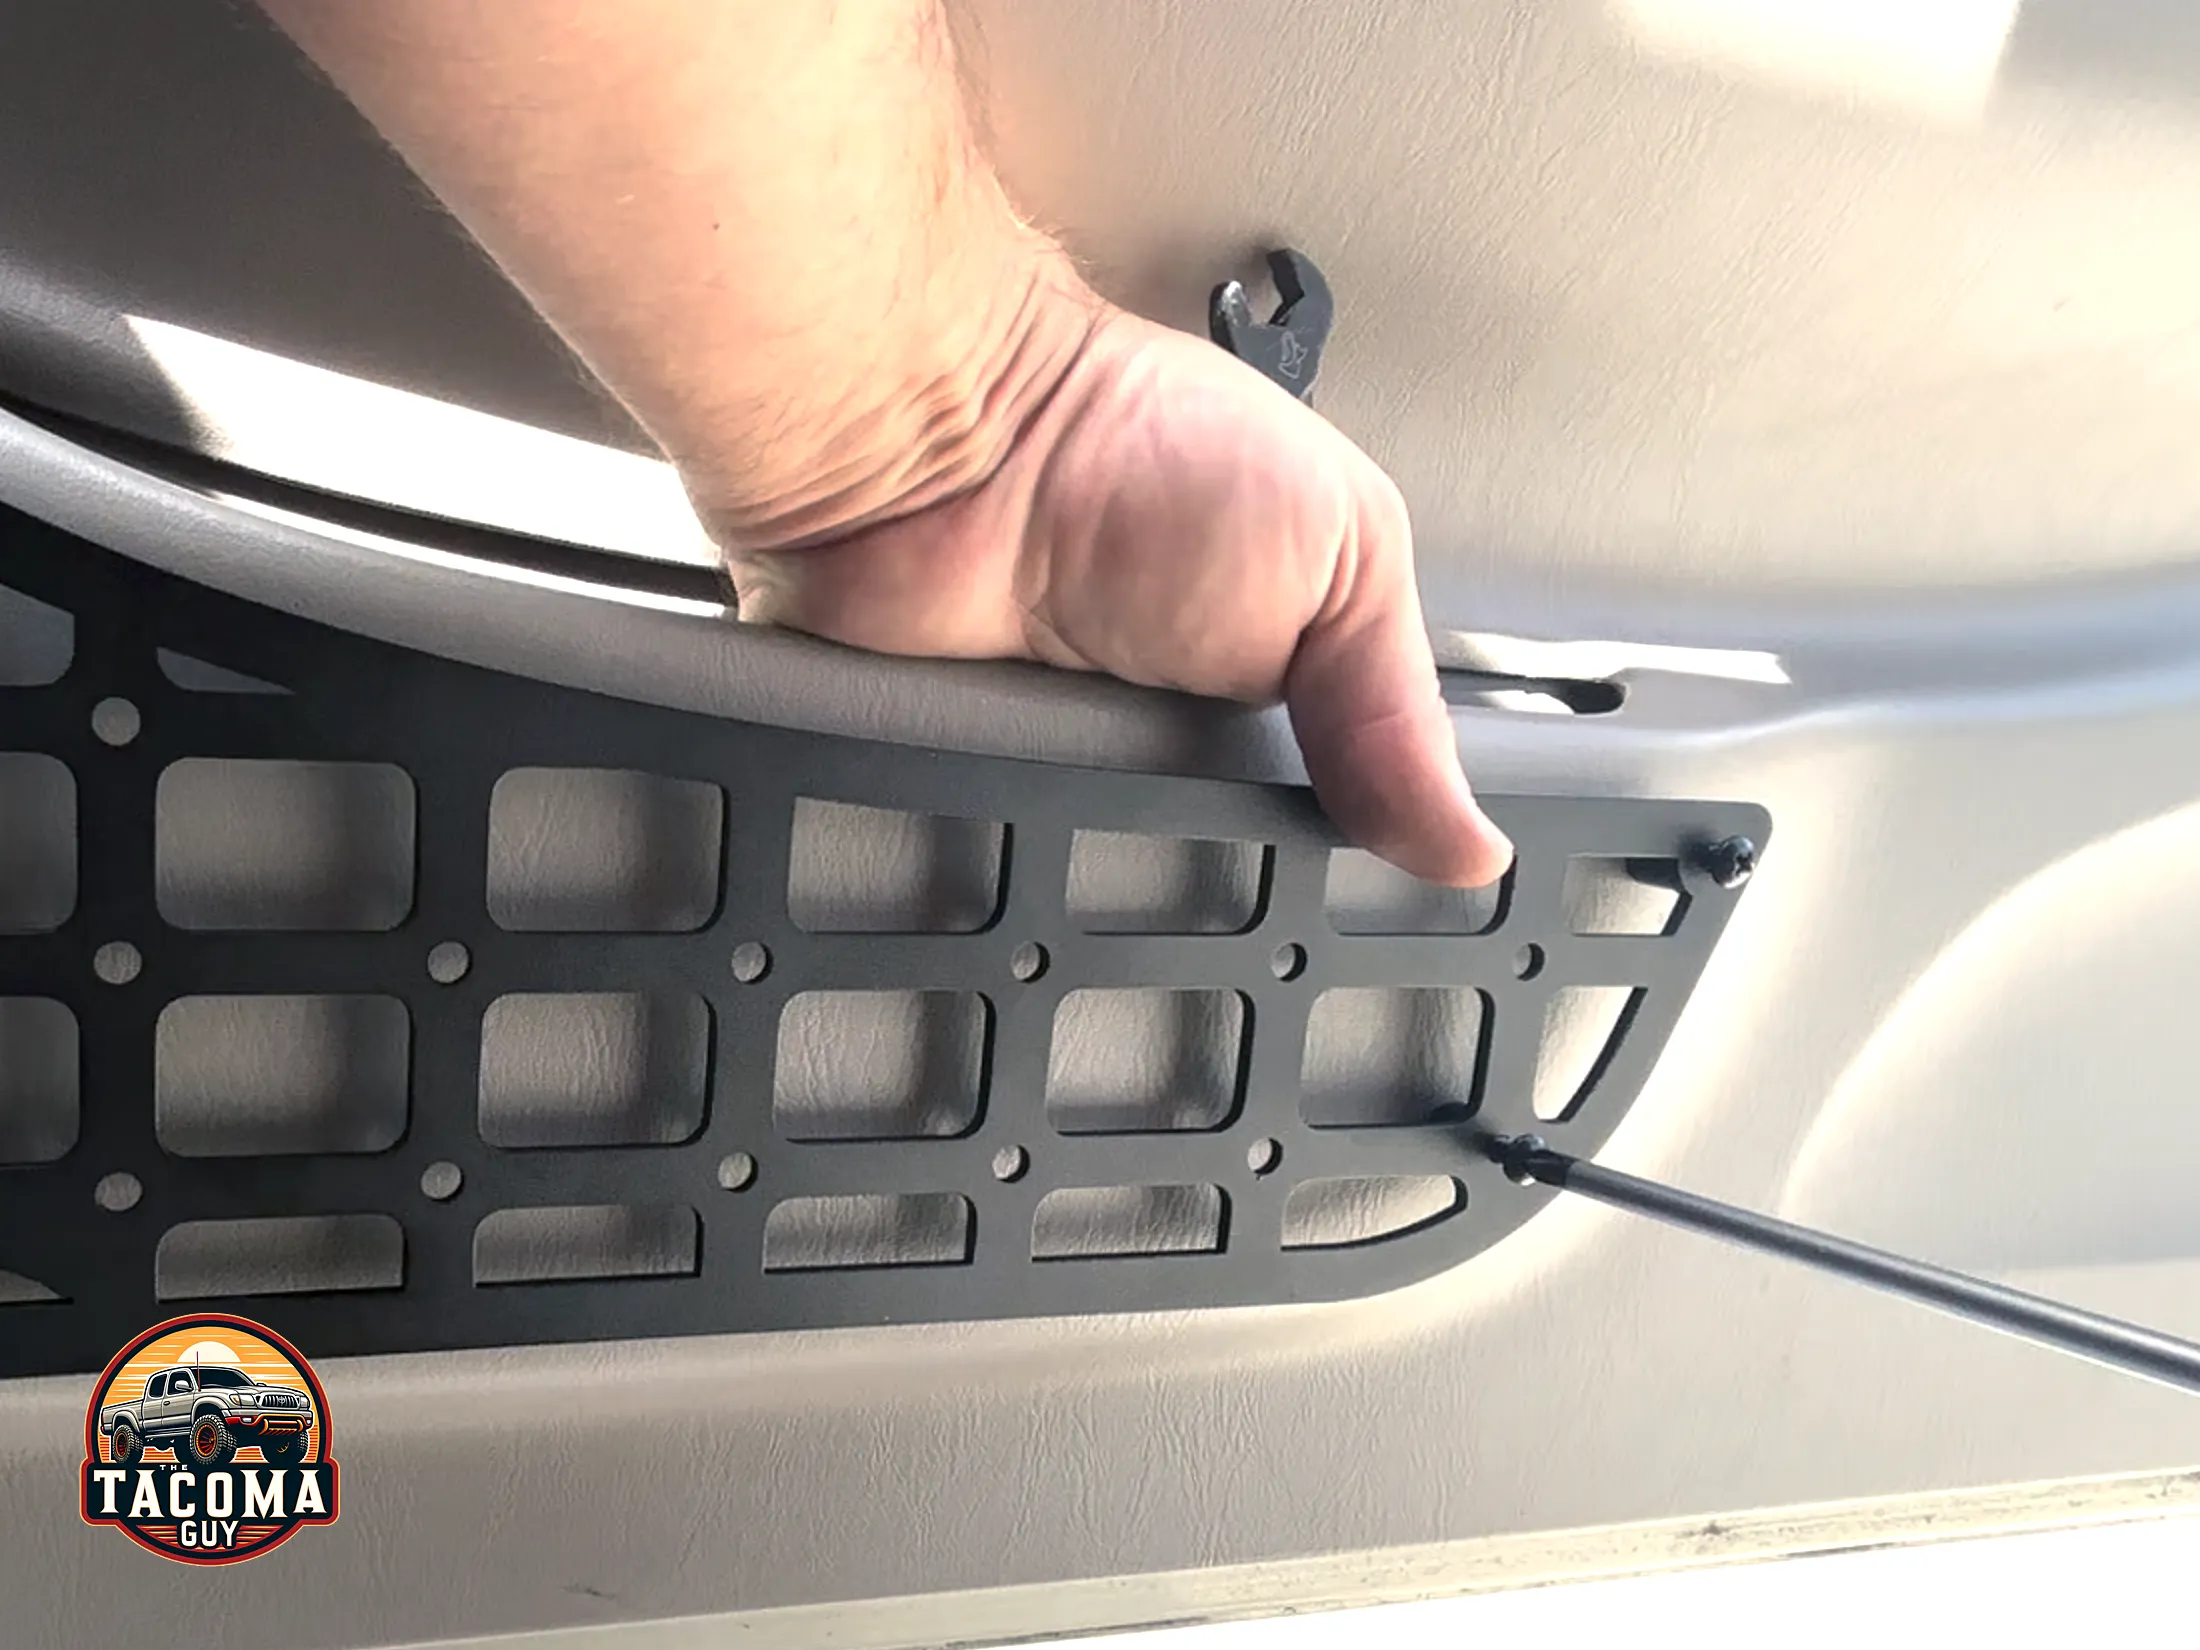
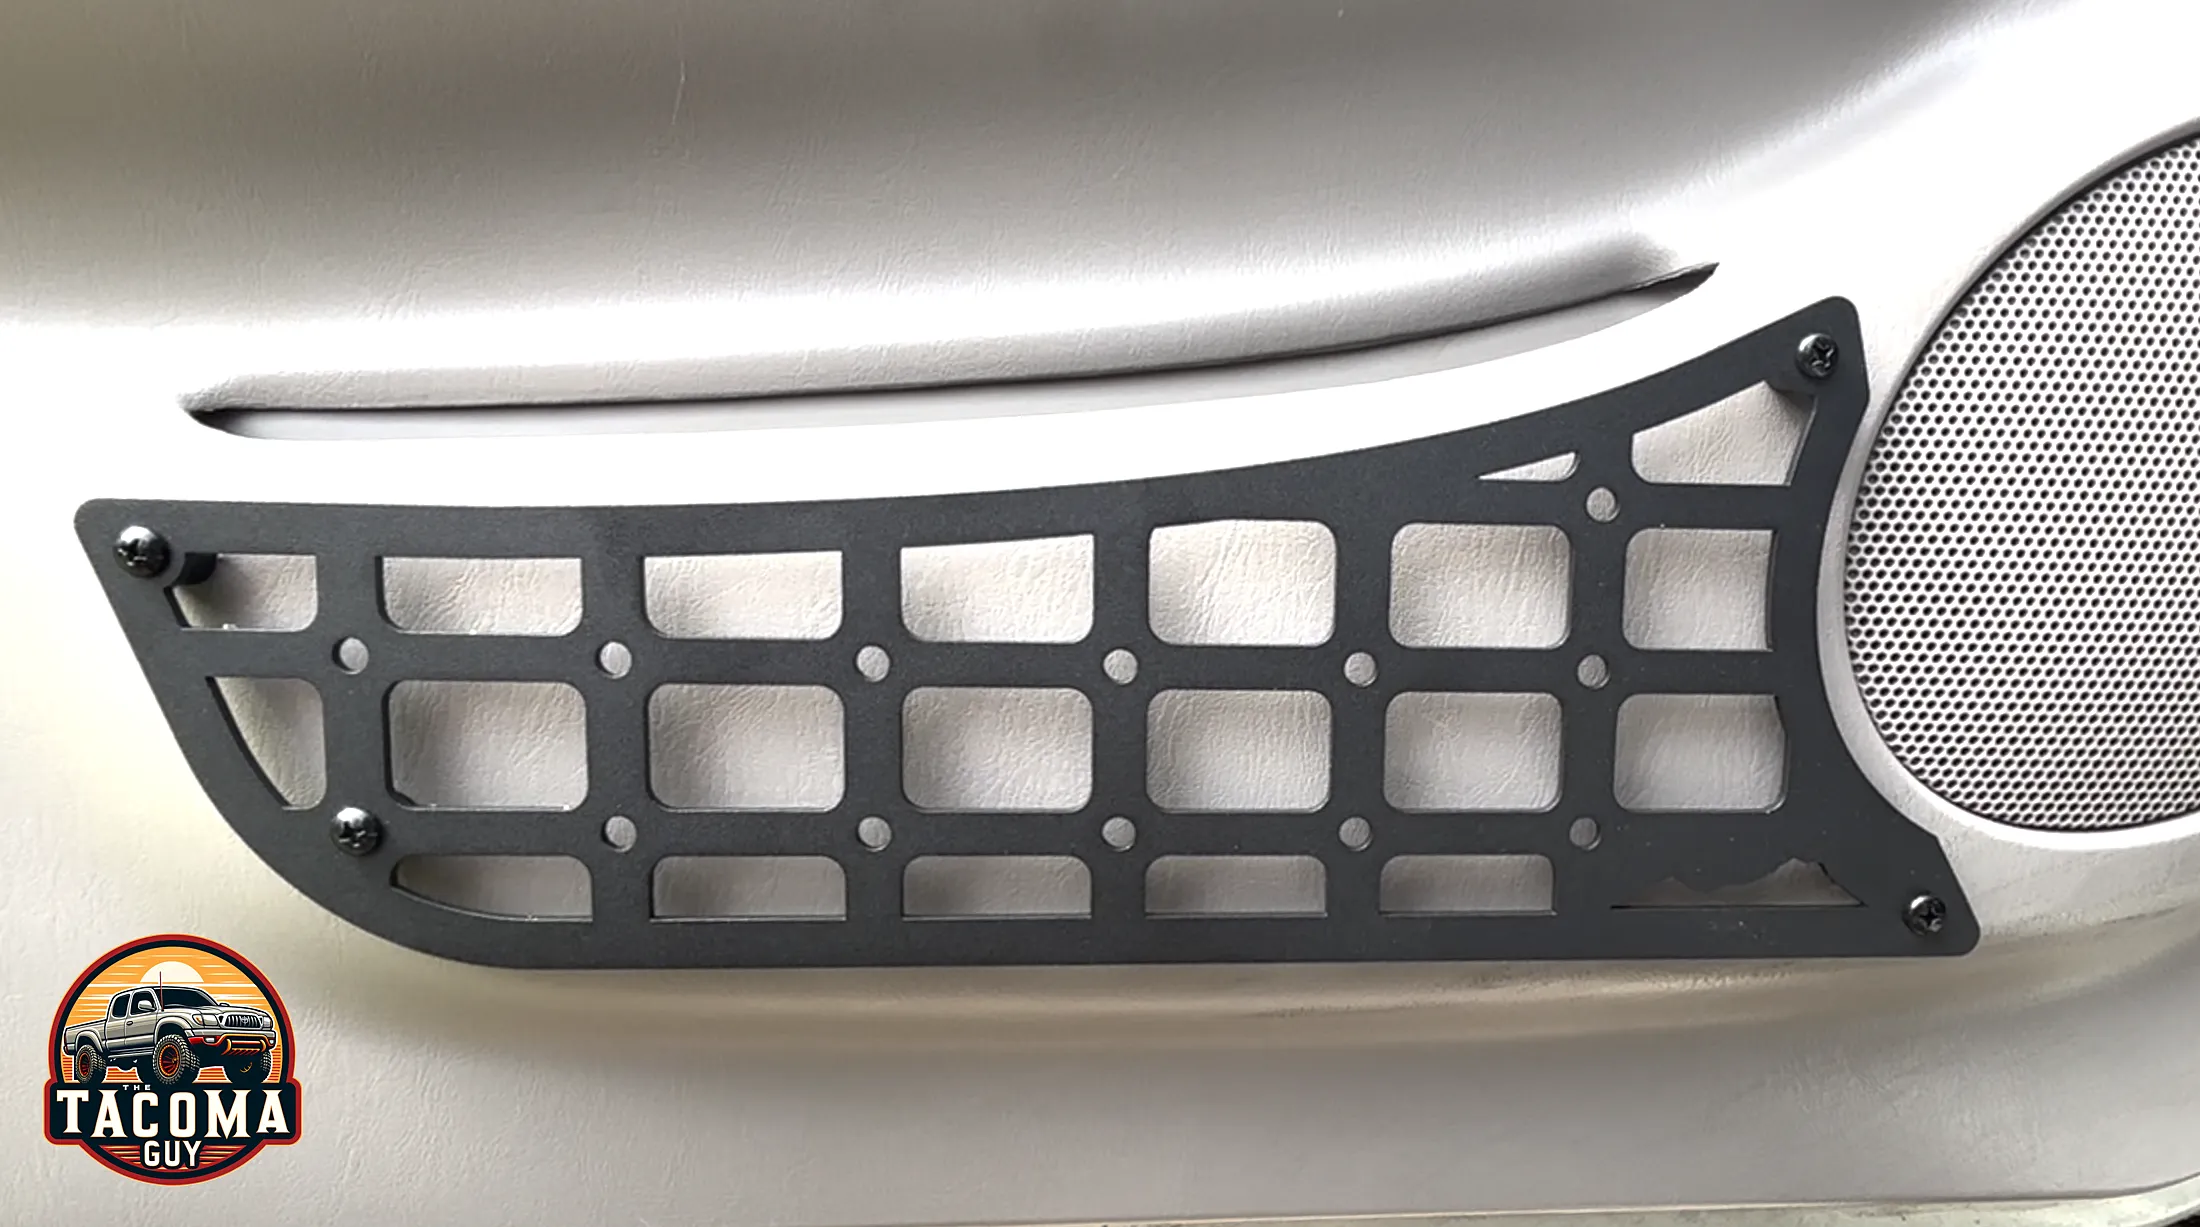
- Hold up the panel to the area of the door you want to install it. You’ll see that it lines up nicely with the speaker grill, and you’ll be about a 1/2 inch away from it. Don’t get too close or you’ll screw into the speaker assembly!
- Using your pointy thing mark the 4 holes on the corners of the panel on the plastic. Just a little mark will do you don’t have to kill it. You could use a marker or something like that if you prefer.
- Using a 3/32 drill bit and a drill, drill holes where you made the marks near the speaker. Be careful around the speaker side – if you feel any resistance you are too close to the speaker.
- These speaker holes will take the 2 self tapping screws that came with the panel. Put one screw into the top corner, slide the spacer over the screw and loosely attach the top screw to the door card. Don’t tighten, just get it started.
- Do the same for the bottom speaker side of the bracket. Insert the self tapping screw, put the spacer over it and loosely tighten.
- I used a screw gun to do this because i found it easier, but again, be gentle. Don’t use the screw gun for the final tightening, use a screwdriver and do it by hand.
- Now the bracket should be supporting itself against the door, loosely.
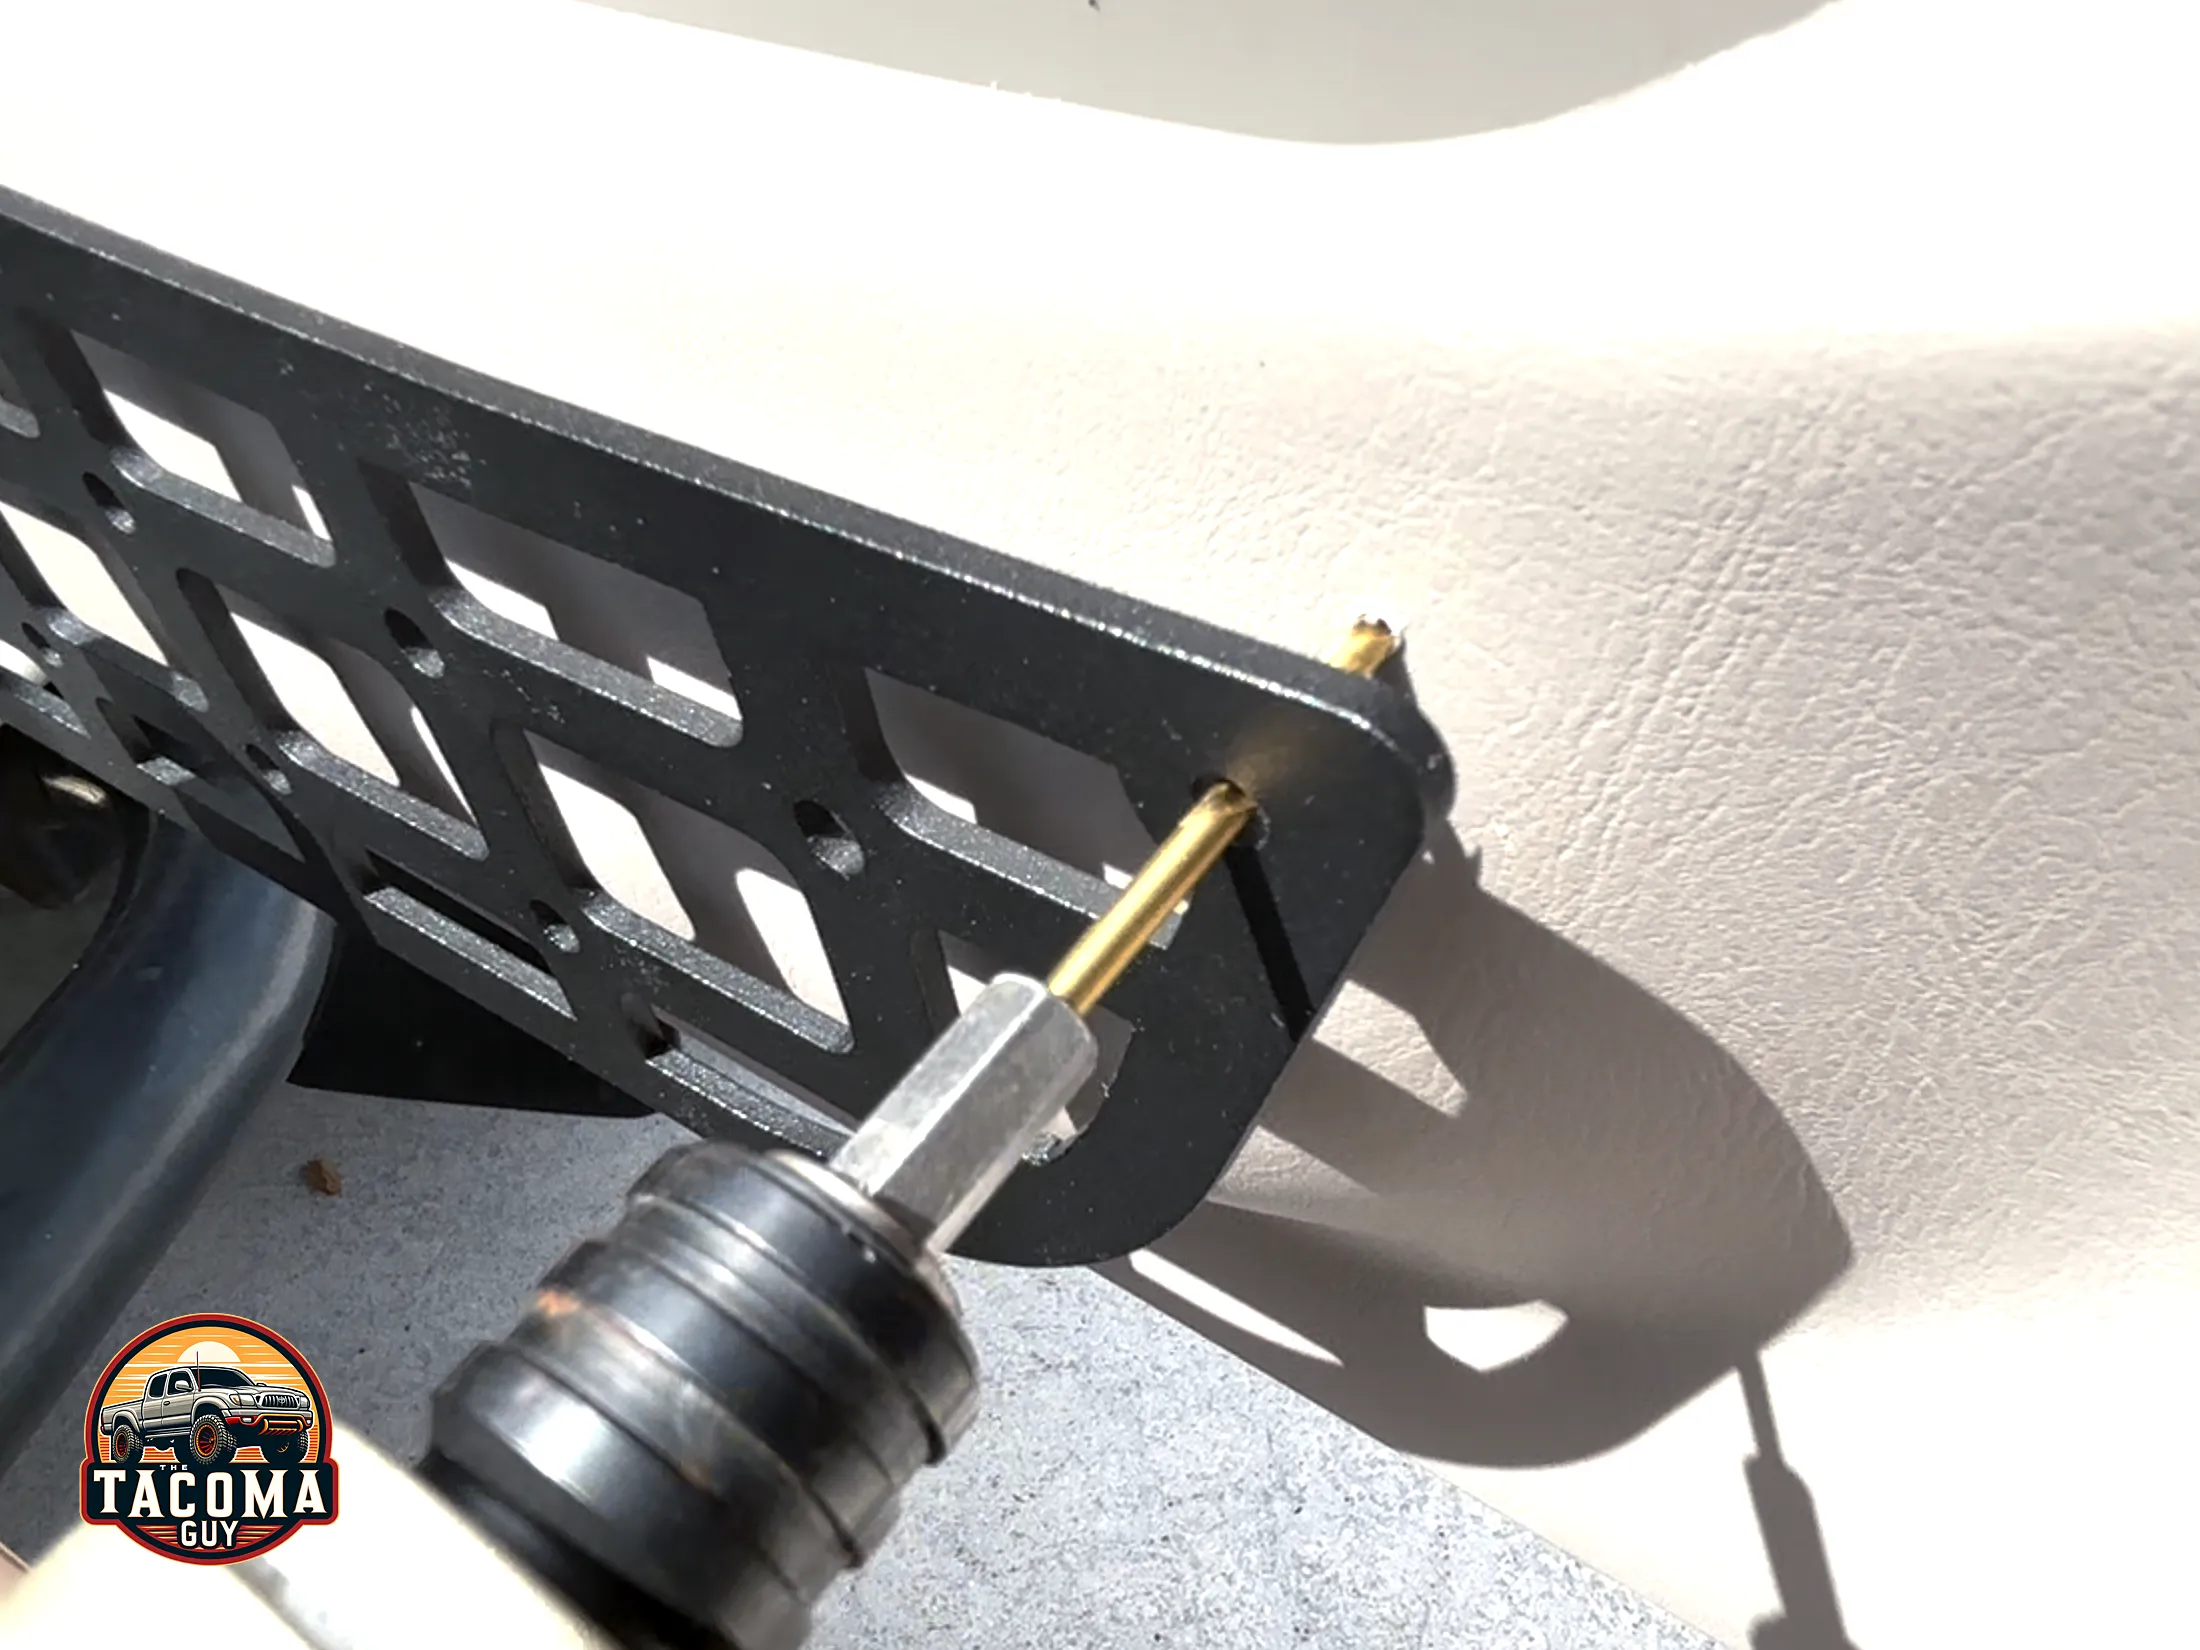
- Grab the 5/32 drill bit and make the holes for the other side of the panel. These holes are bigger because they will accept 2 of the bolts that came with the panel, these are NOT self tapping.
- Insert a bolt into the top part of the bracket, put the spacer over it, and using the screwdriver, tighten just enough to have the bolt start to poke through the backside of the pocket in the door card. You can put your finger back there and feel it coming through. Do NOT go all the way in yet, just get it started.
- Do the same for the bottom bolt.
- Now you have to attach the nuts to these bolts. I did that by getting a 10mm wrench, using the box-end (the closed circle part) with a piece of painters tape on one side to hold the nut in place while lowering it into the door pocket.
- With a little feeling around you should be able to get it onto that bottom bolt pretty easy. Tighten it enough that it catches the bolt and holds it in place. Now you can lift out the wrench and put the top nut on. I was able to do it with just my fingers, I did not need the wrench and the tape for the top nut.
- Once both nuts are in place, put the wrench onto one and tighten it down. Then do the other one.
- Once the bolts are tight, move over to the self-tapping screws and tighten them down. Don’t over do it – when you start to get resistance give it another 1/4 turn at stop.
- Do the other side.
- You’re done! Hang your stuff and show off your “Tactical Tacoma.”