Unlike newer vehicles, the older first generation Toyota Tacomas don’t have screens on them to give you information about things that are happening when you are driving one such as: fuel economy, precise RPM speed, transmission oil temperature, system voltages, etc.
The vehicle has that information, but its hidden in the Engines ECU. You can retrieve it though, using a Scan Gauge II which is inexpensive and super easy to install on your truck (it plugs right into the OBD-II port which sits just above where the gas pedal is.)
Affiliate notice: The Tacoma Guy is an Amazon and eBay Affiliate. That means we get a small percentage from them if you use the links to purchase the product. It doesn’t increase your cost! If you found this tutorial helpful, please consider using these links to help support this mom & pop business, thank you! Learn more.
Tools Required:
- None! You can just plug it in and out when you need it. If you want to install it the way we did, you’ll just need a large drill bit.
Parts Required:
- Scan Gauge II Ultra Compact 3-in-1 Automotive Computer
- Not required but if you want to install on the dash: 4 x 2 Heavy Duty Velcro Strips
Video Walk-Through:
Check out our step-by-step video tutorial first to get an idea of the process, then you can read the guide below and print it out if you want.
Coming soon!
Benefits of a Scan Gauge II:
So why would you want a Scan Gauge II anyway?
Built-in Digital Gauges: (15+ Options)These display real-time metrics via the OBD-II port. Core gauges available on the Gen 1 Tacomas include:
- Fuel Economy: Instant MPG, average MPG, trip MPG, and fuel cost per mile—great for off-road or highway efficiency tweaks.
- Engine Performance: RPM (engine speed), coolant temperature, intake air temperature, throttle position, and calculated horsepower.
- Vehicle Speed and Distance: Current speed, odometer, trip distance, and drive time.
- System Voltages: Battery voltage and alternator output.
Customizable X-Gauges: This is a standout feature for Tacomas—program up to 4 custom gauges using Toyota-specific codes (entered via the device’s buttons). For the 2003 Tacoma:
- Transmission Temperature: Critical for 4×4 models or towing; use X-Gauge code TX:221140 (or similar ISO protocol variant) to monitor ATF temps (normal range: 122–176°F).
- Fuel-Related: Long/short-term fuel trims, O2 sensor voltages, air-fuel ratio.
- Other Toyota-Specific: Potential for tire pressure (if equipped), additional temps, or injector pulse width, though not all sensors (e.g., oil pressure) are directly accessible via OBD-II on stock Tacomas—the ECU doesn’t transmit them, so you’d need aftermarket sensors for that.
- Note: Check the official ScanGauge Toyota X-Gauge list for exact codes; users report reliable trans temp readings on 2.7L/3.4L engines.
Diagnostic Scan Tool
- Read/Clear Codes: Retrieves and displays both pending and set Diagnostic Trouble Codes (DTCs) from the engine ECU—e.g., for check engine light issues like misfires or sensor faults.
- No Advanced Clearing: It won’t reset ABS/airbag codes, but it’s ideal for basic engine diagnostics on the go.
Trip and Fuel Tracking
- 5 Trip Memories: Tracks fuel used, distance, MPG, and cost for multiple trips—useful for comparing city vs. off-road efficiency or towing loads.
- Fuel Log: Logs fills and estimates range based on real-time data.
General Benefits for 2003 Tacoma Owners
- Fuel Savings: Helps optimize driving habits; users report 1–2 MPG gains by monitoring lean/rich conditions.
- Preventive Maintenance: Spot overheating or voltage drops early, especially in off-road or high-mileage trucks.
- Ease of Use: Compact (5″ display), backlit, and mounts up to 6 feet from the OBD port. No apps or Bluetooth needed.
- Limitations: Won’t show MAP sensor data (Tacoma uses MAF instead), oil pressure, or non-engine systems without mods. For deeper diagnostics, pair with a full OBD scanner.
Step-by-Step Guide:
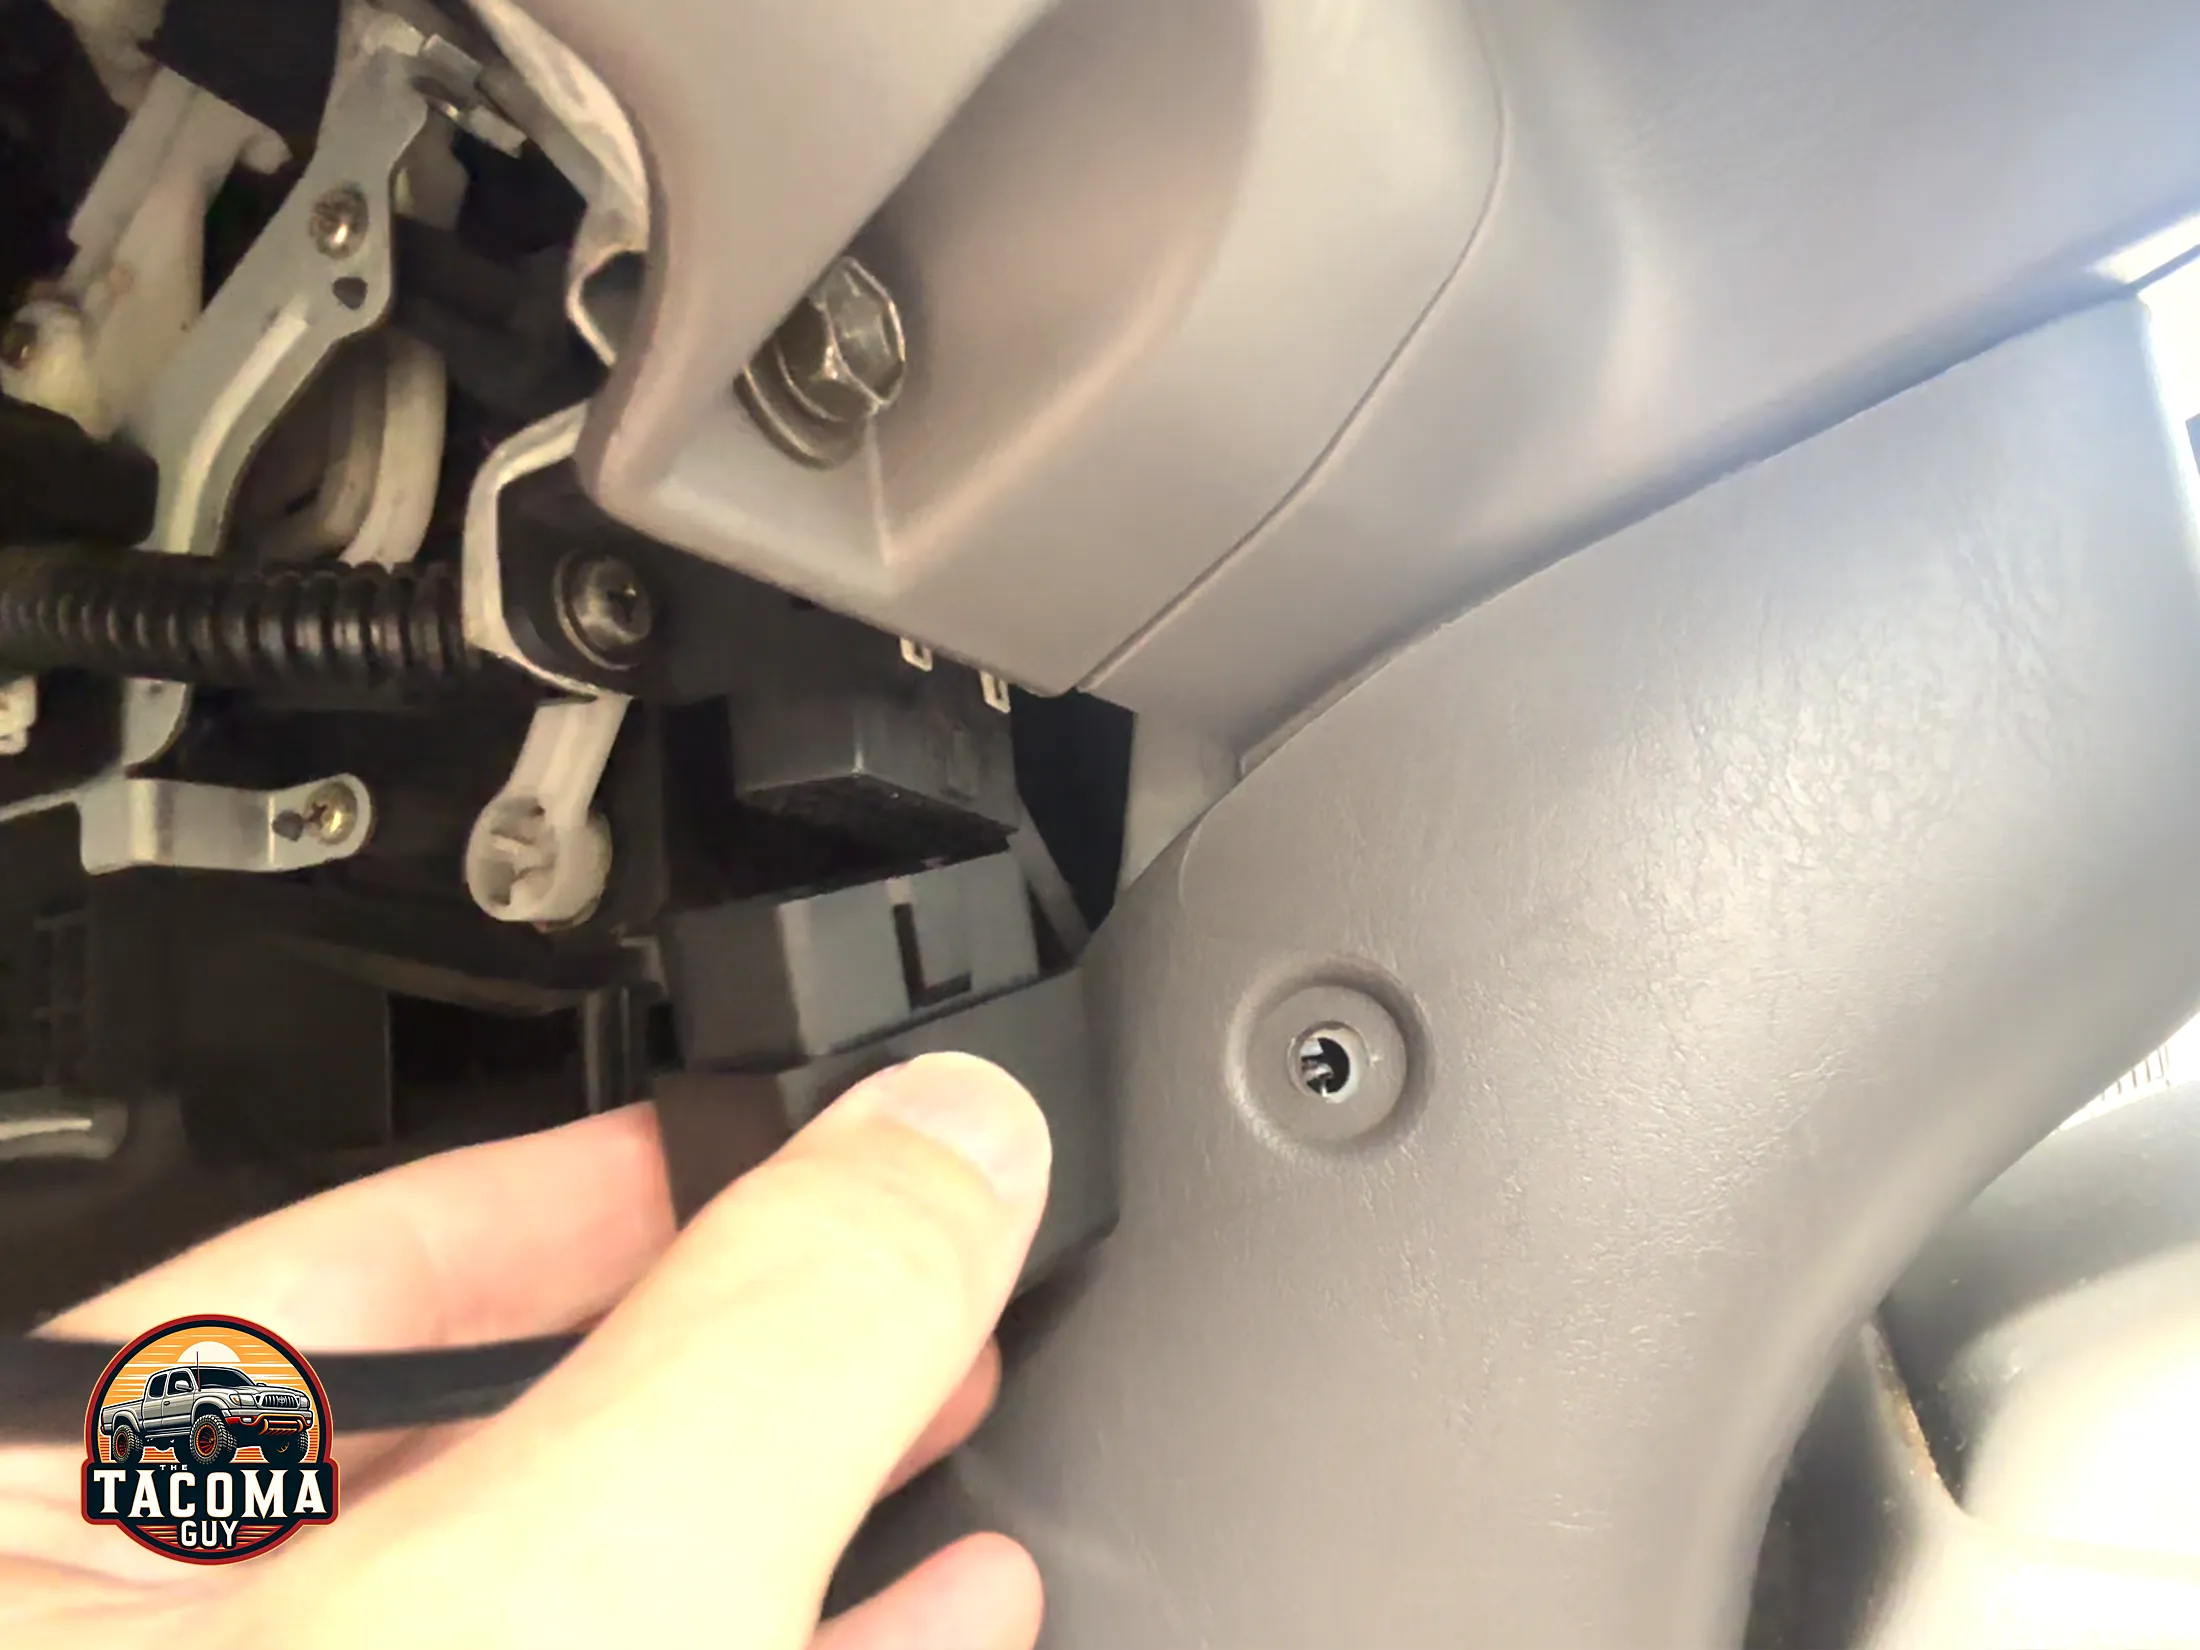
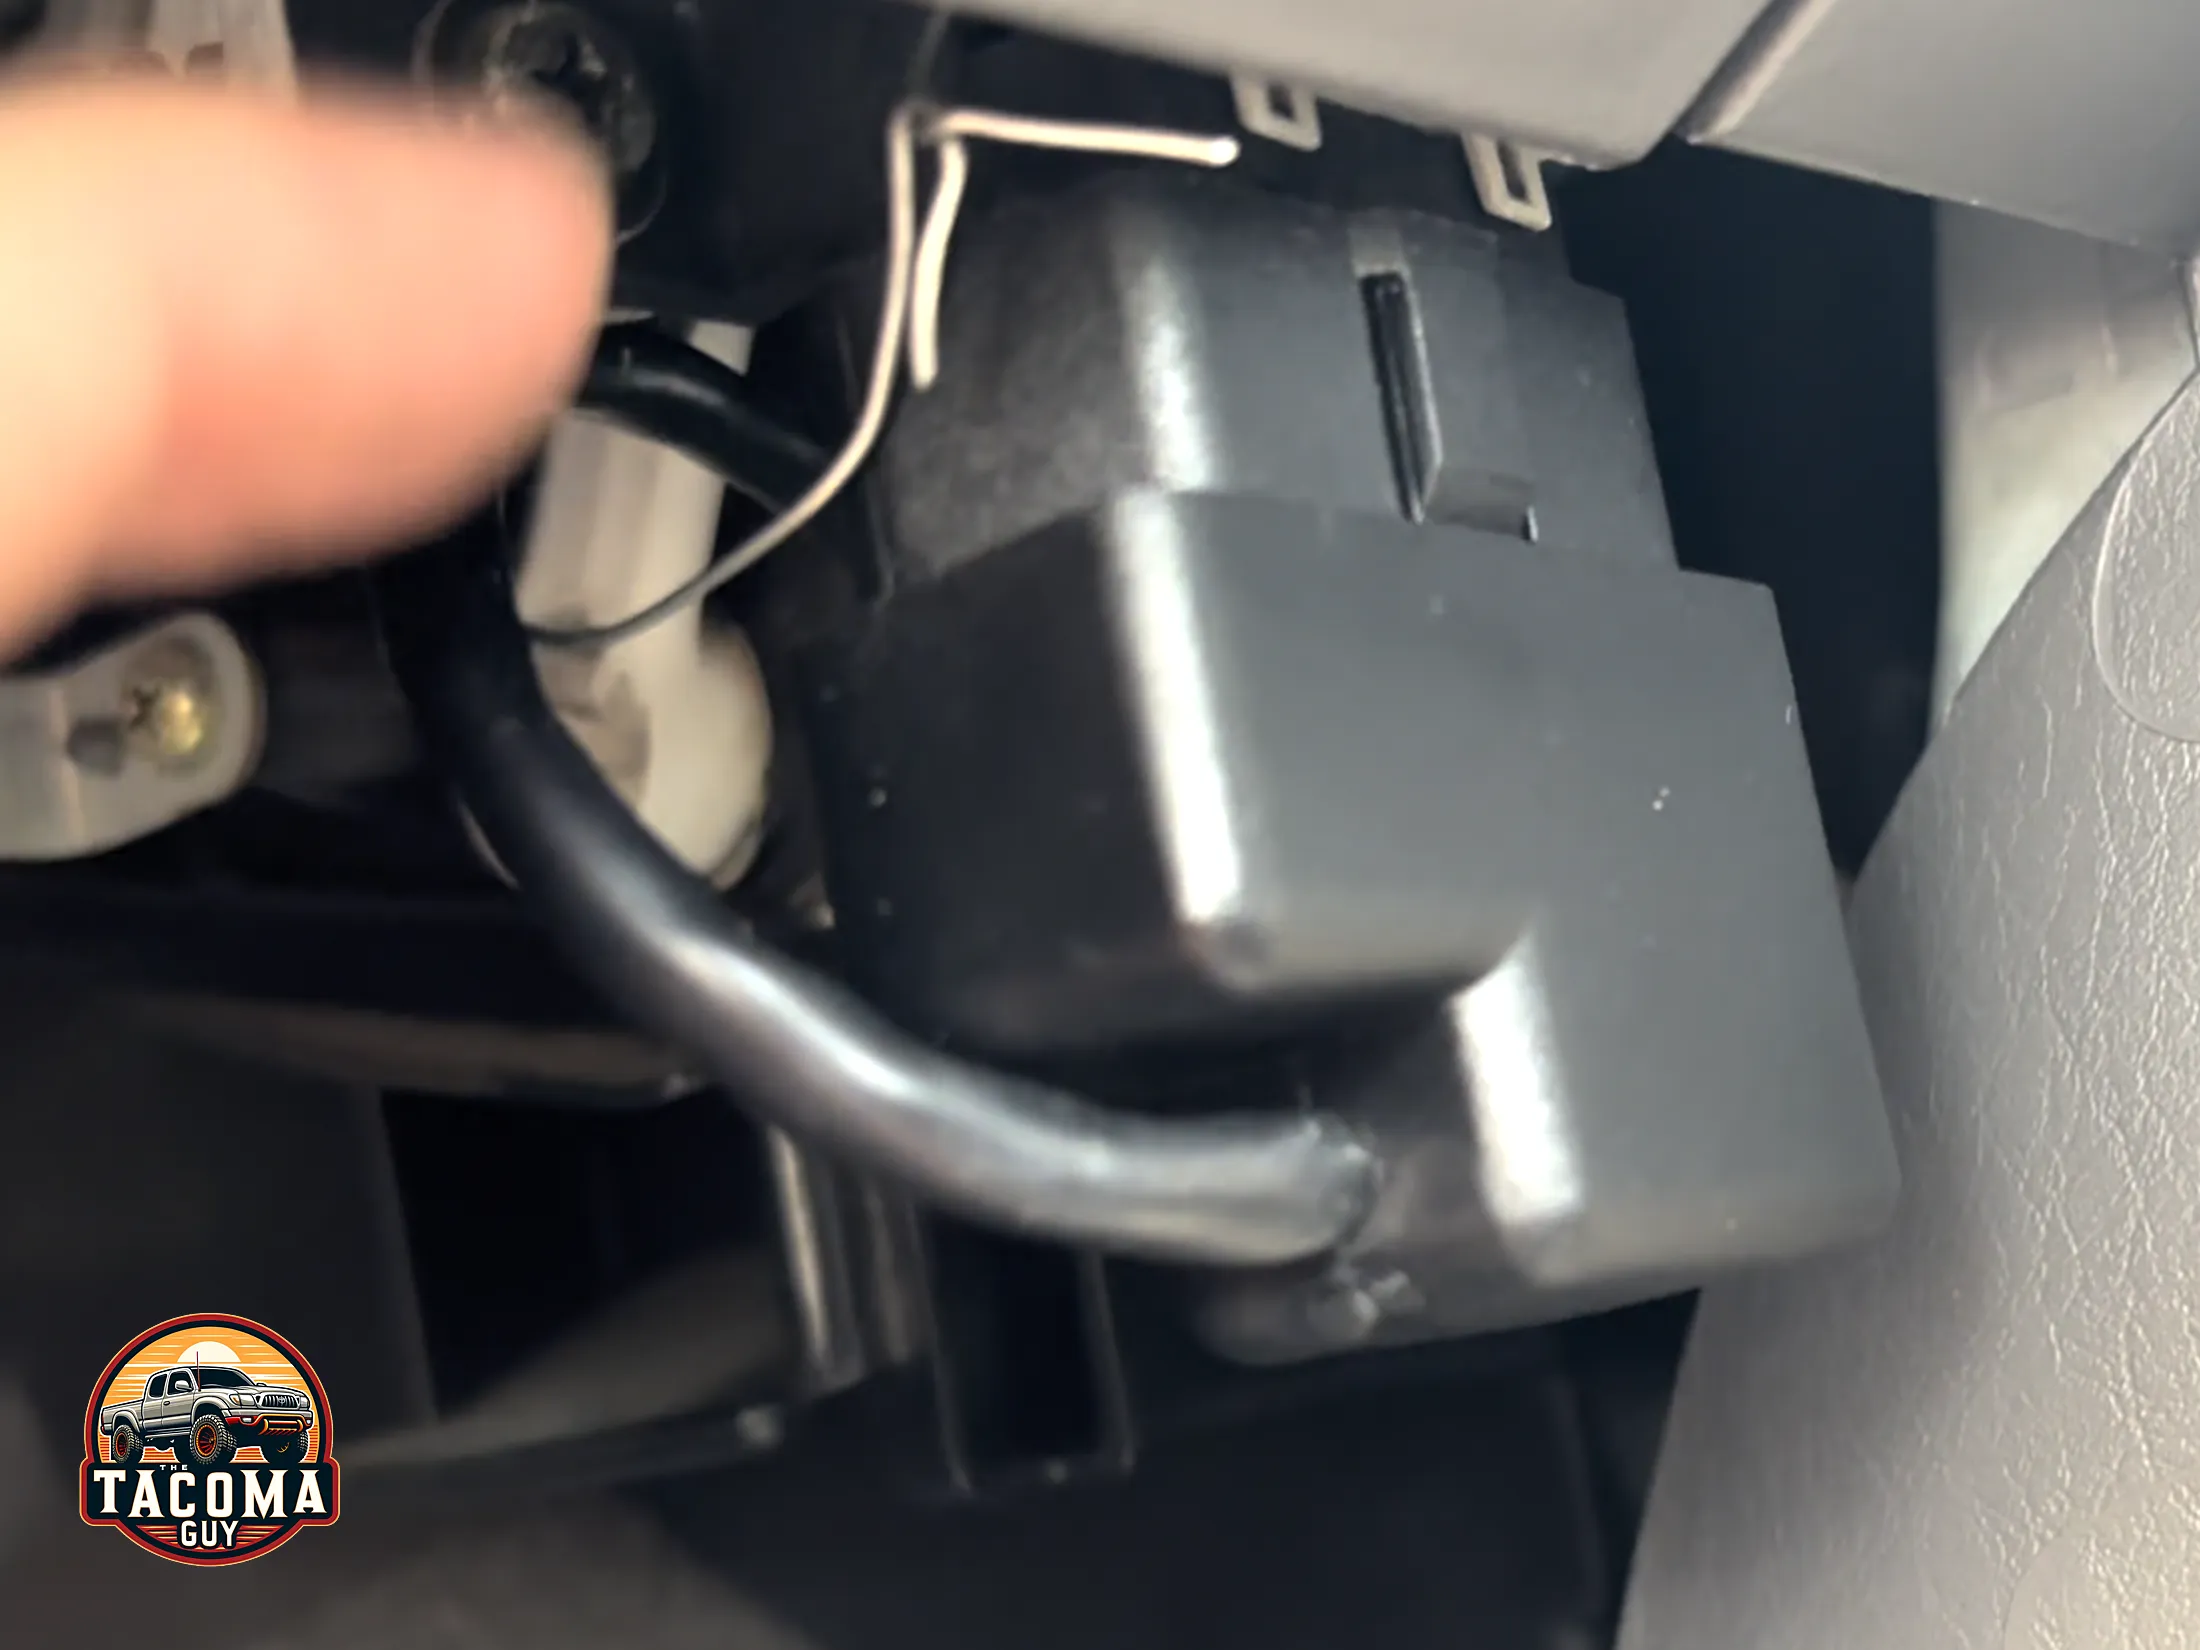
- Find your ODB-II port. It’s under the dash, right below where your right knee sits. There is a black plug there pointing downward (it might have a cap on it.)
- Plug the SGII into it, and start the truck. Wait a second and you are all set!
- If you want to install it the way we did, in a more permanent way then follow the steps below:
- Remove the ash tray, then pull out the bottom of the instrument cluster, where there are 2 12 volt cigarette lighter ports. There are 2 plastic tabs that hold them in on either side, pry those out with a pry tool or small flathead screwdriver
- The tabs will break, thats OK. You don’t need them to put the piece back into place and i’m in and out of there so often anyway I found it best just to leave them off permanently.
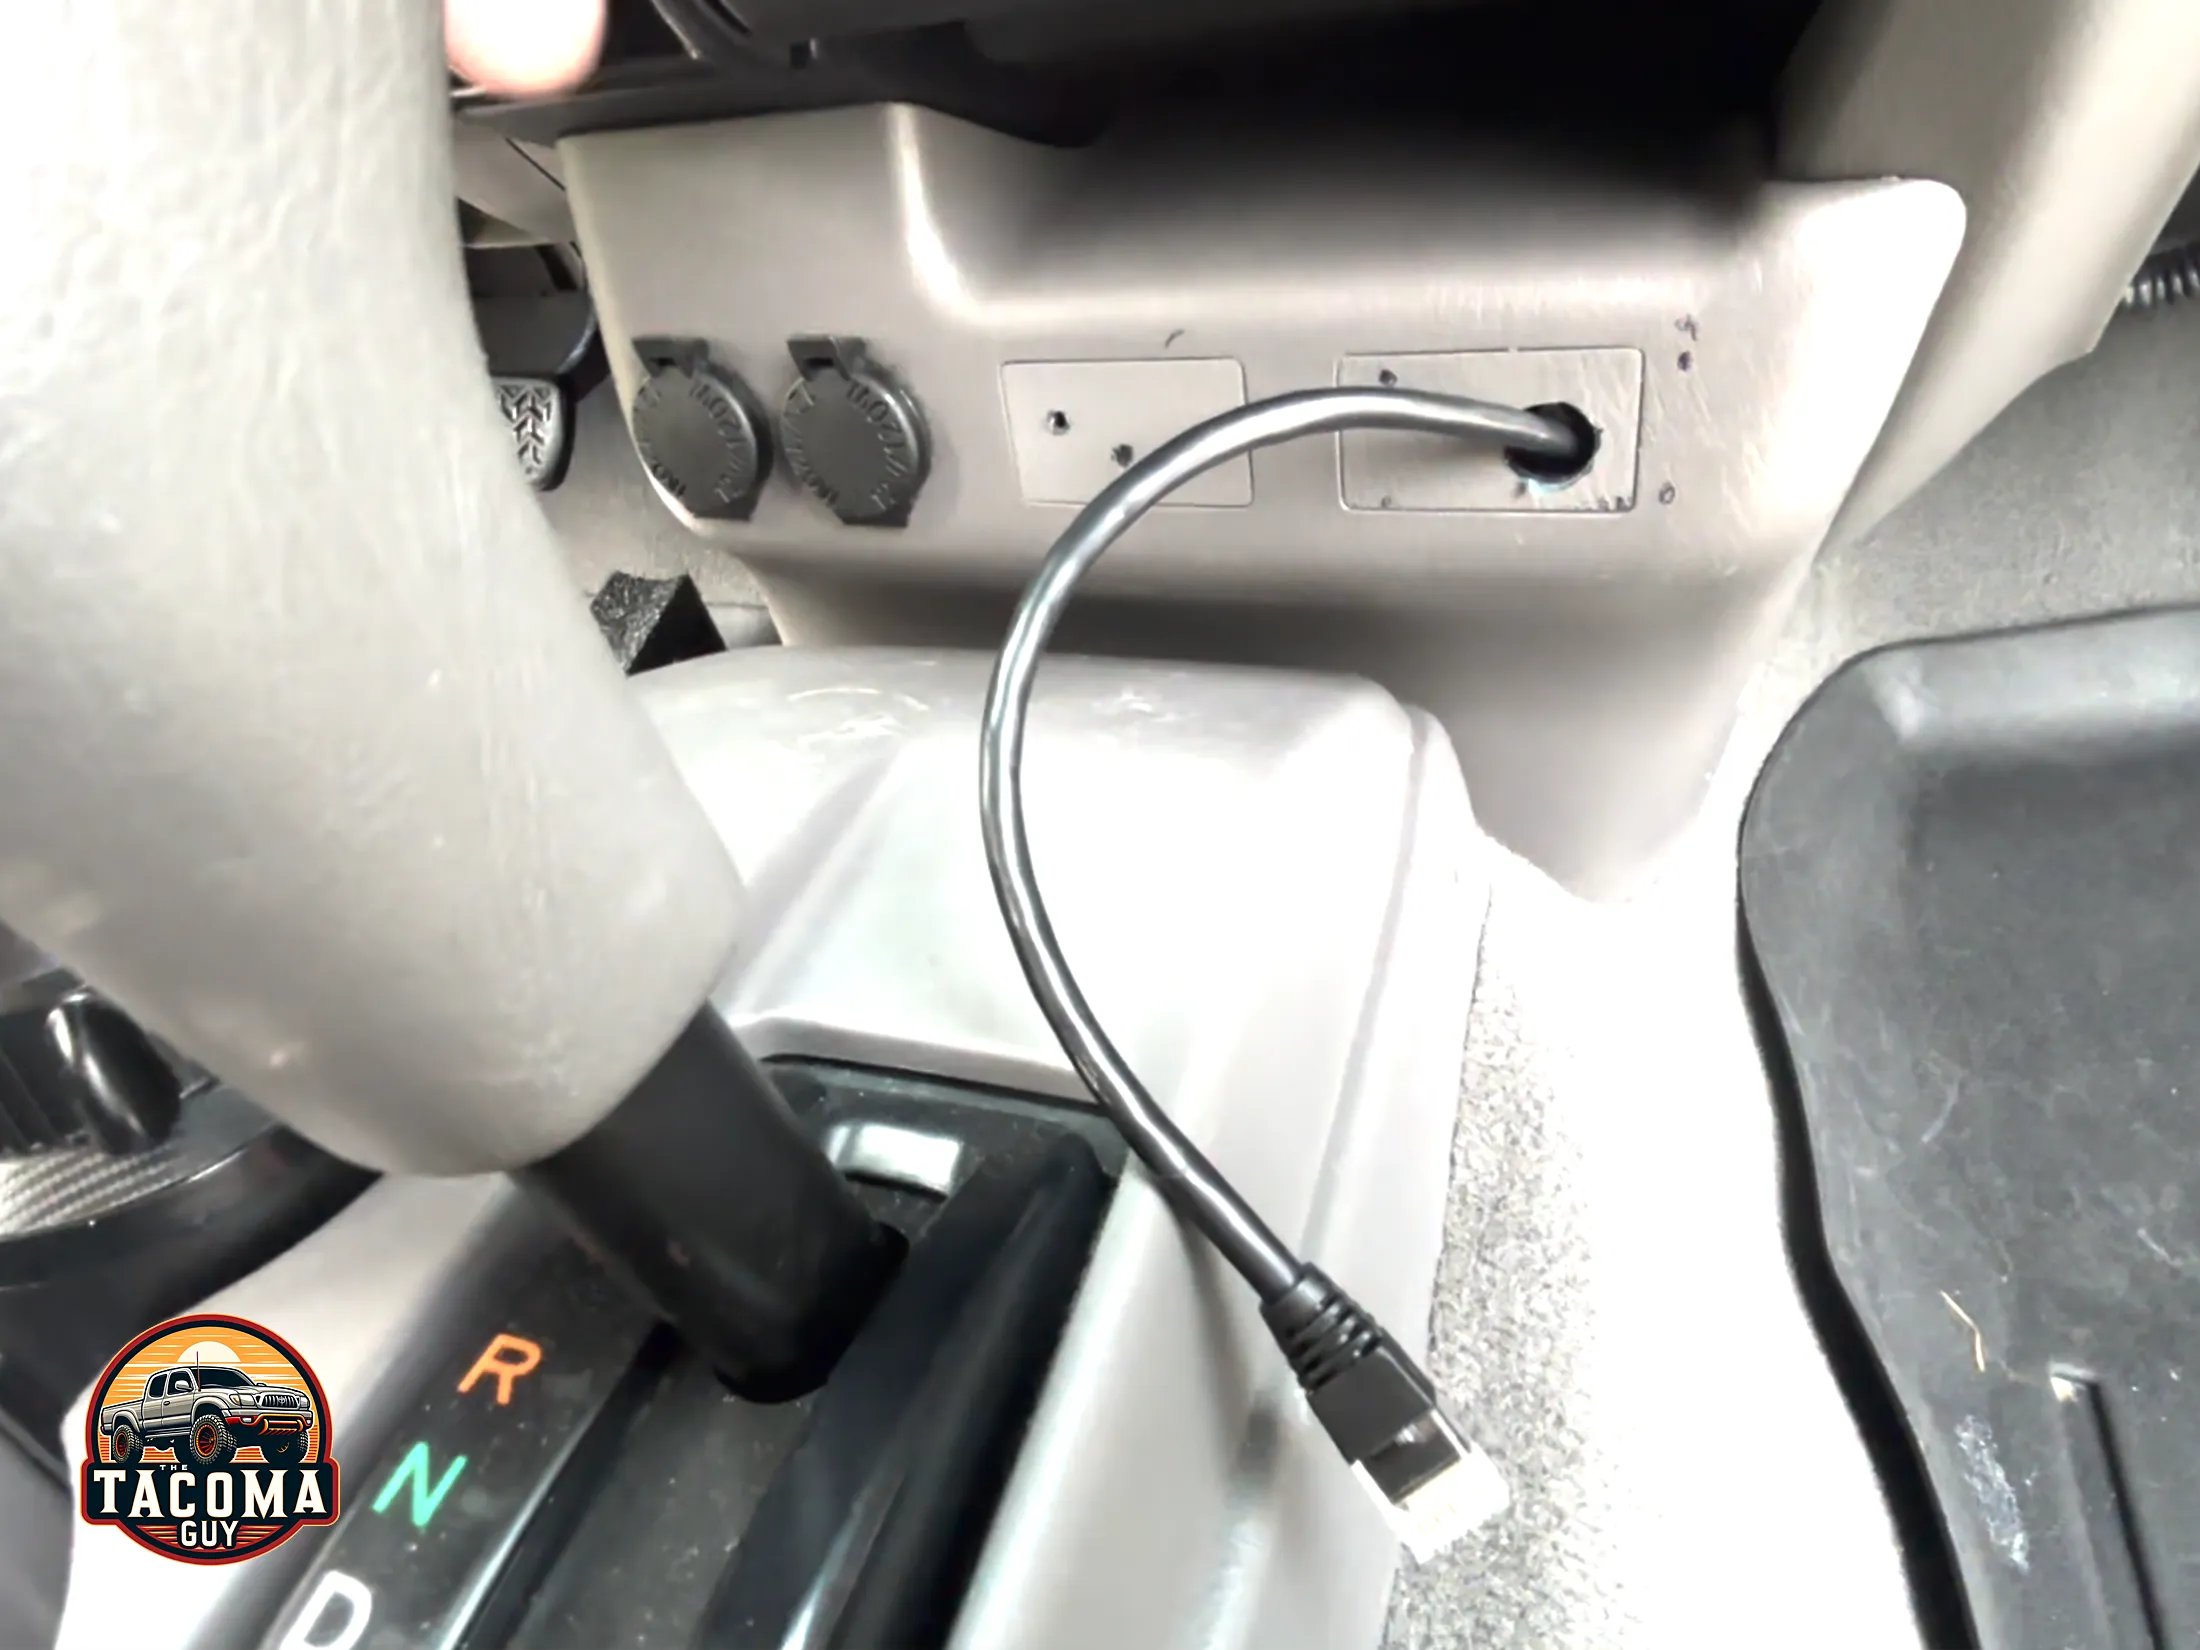
- There are 2 small plastic tabs on that panel. Take one off and drill a hole large enough to allow the head of the SGII cable to pass through.
- Slide the cable though then put the lower dash assembly back in place
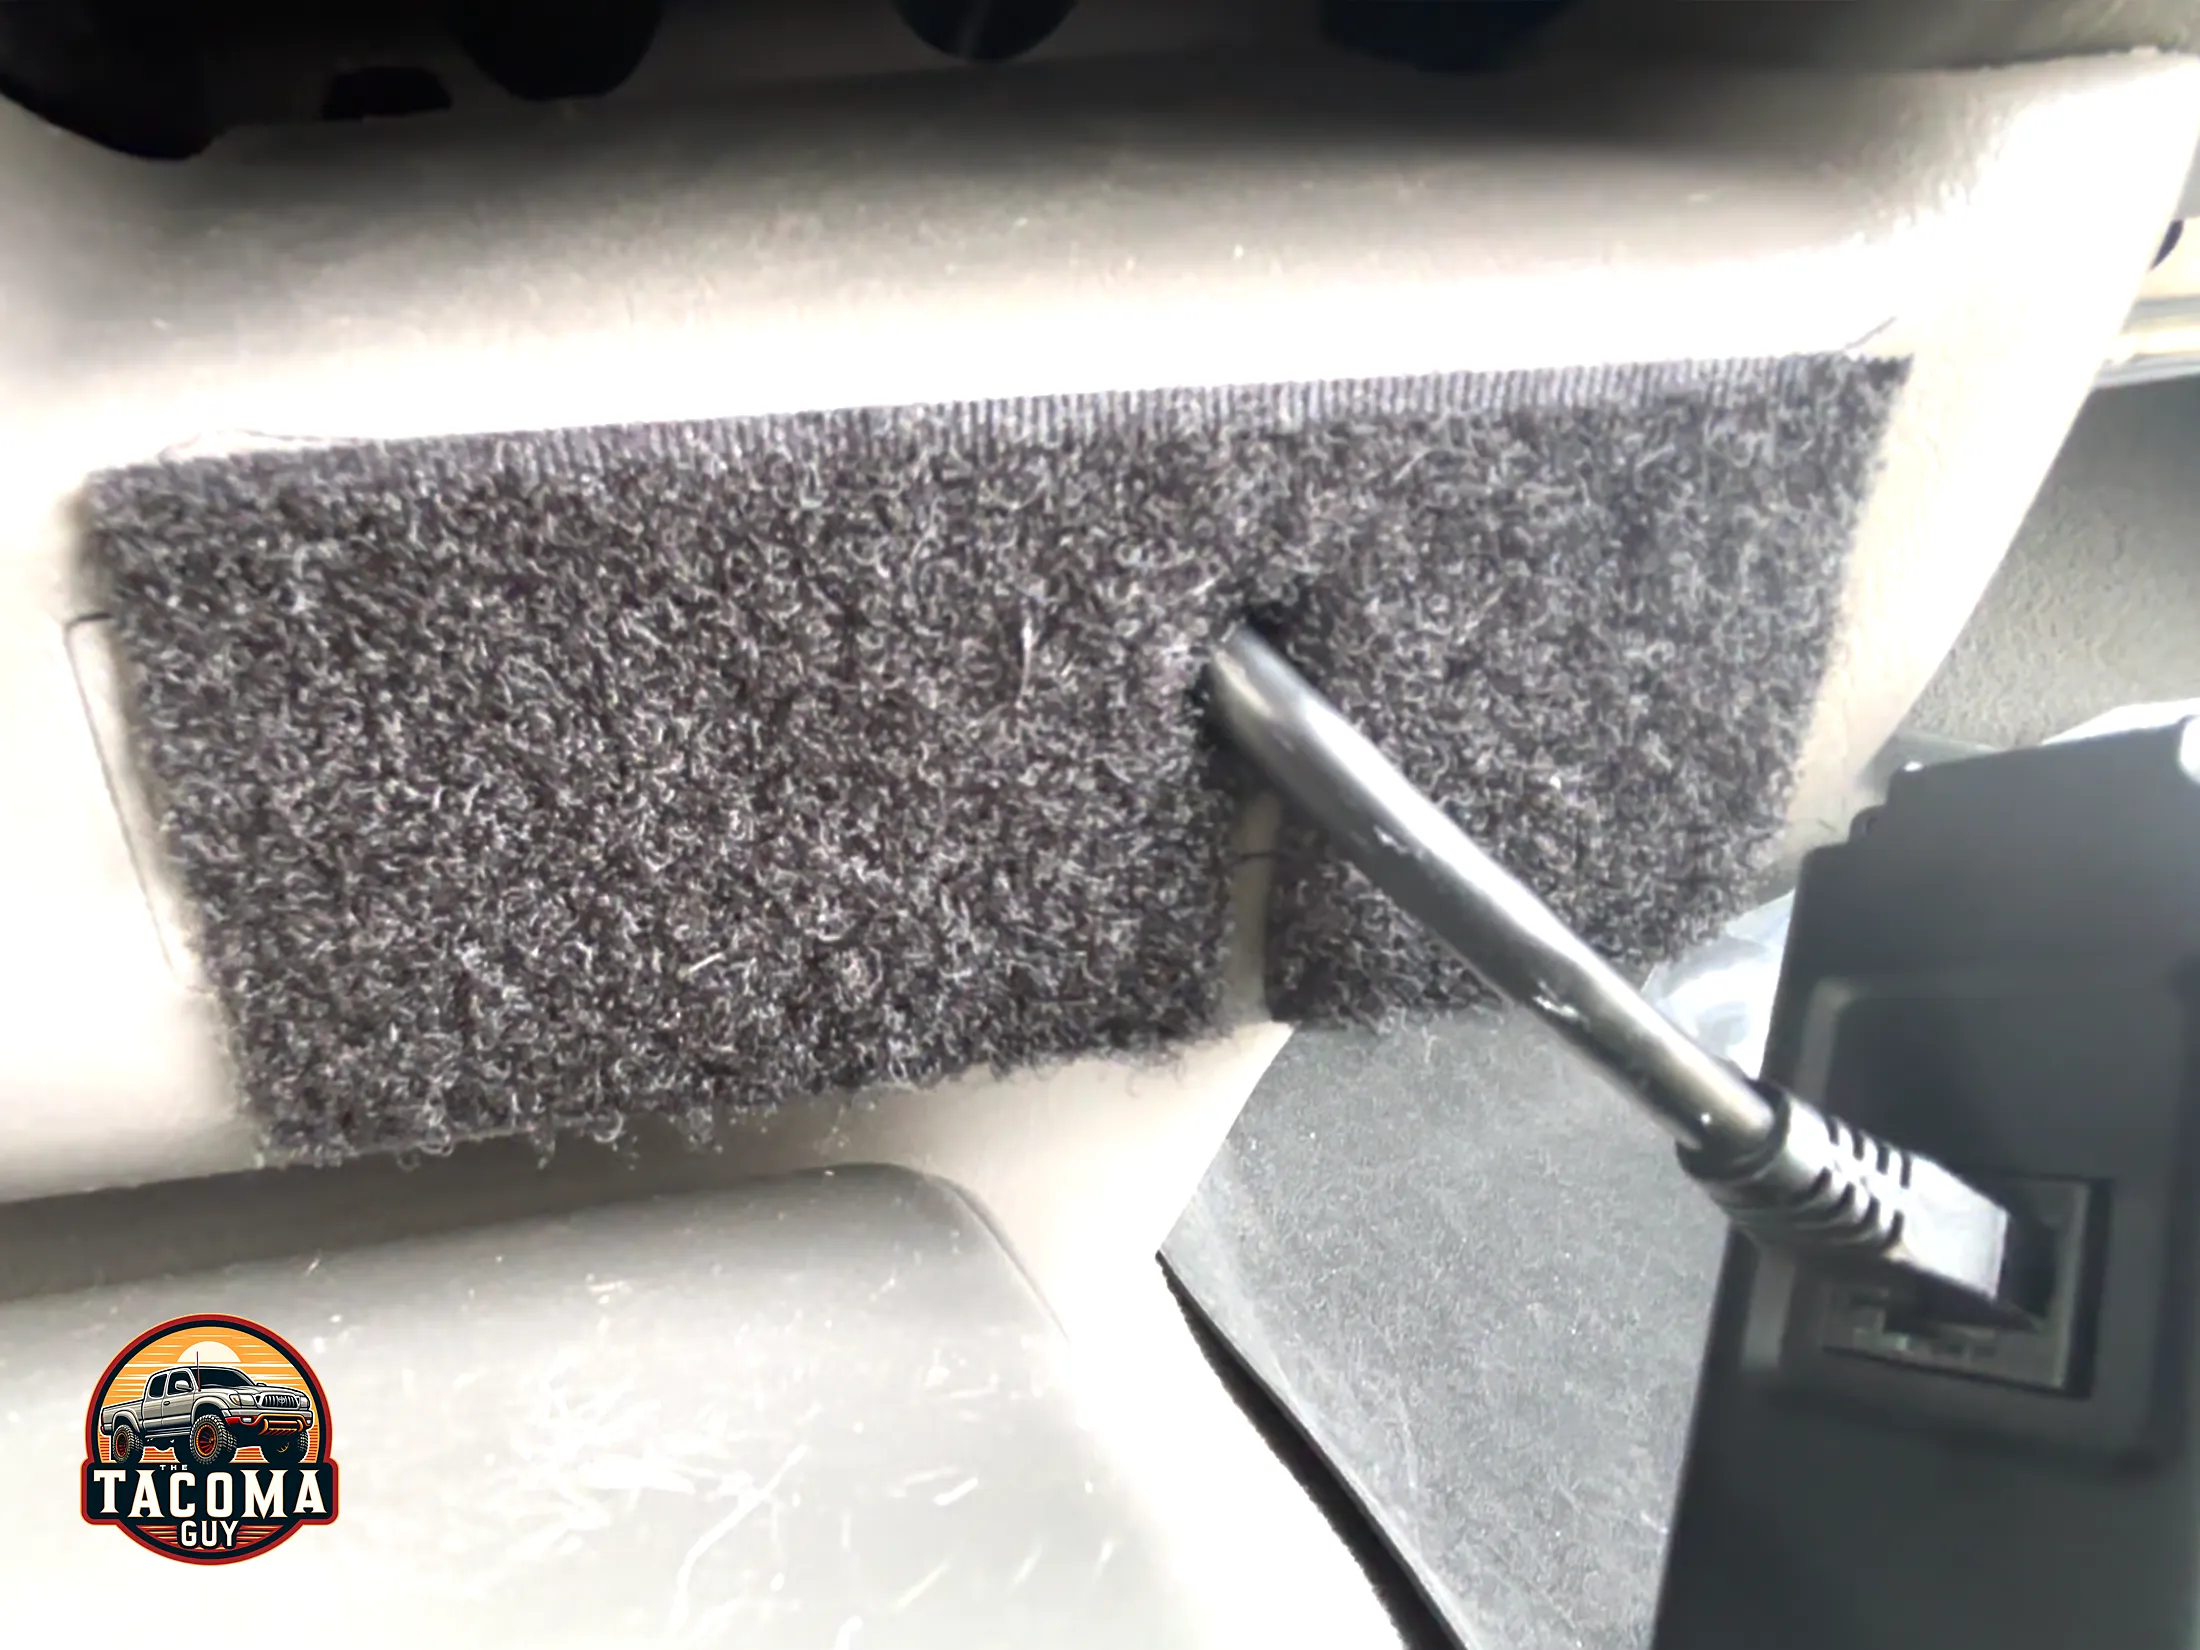
- Cut a piece of the velcro (I used the loop side, the soft fuzzy bit) thats the size of the SGII and cut a slot to side it over the cable and make a small hole so it sits nicely around the cable.
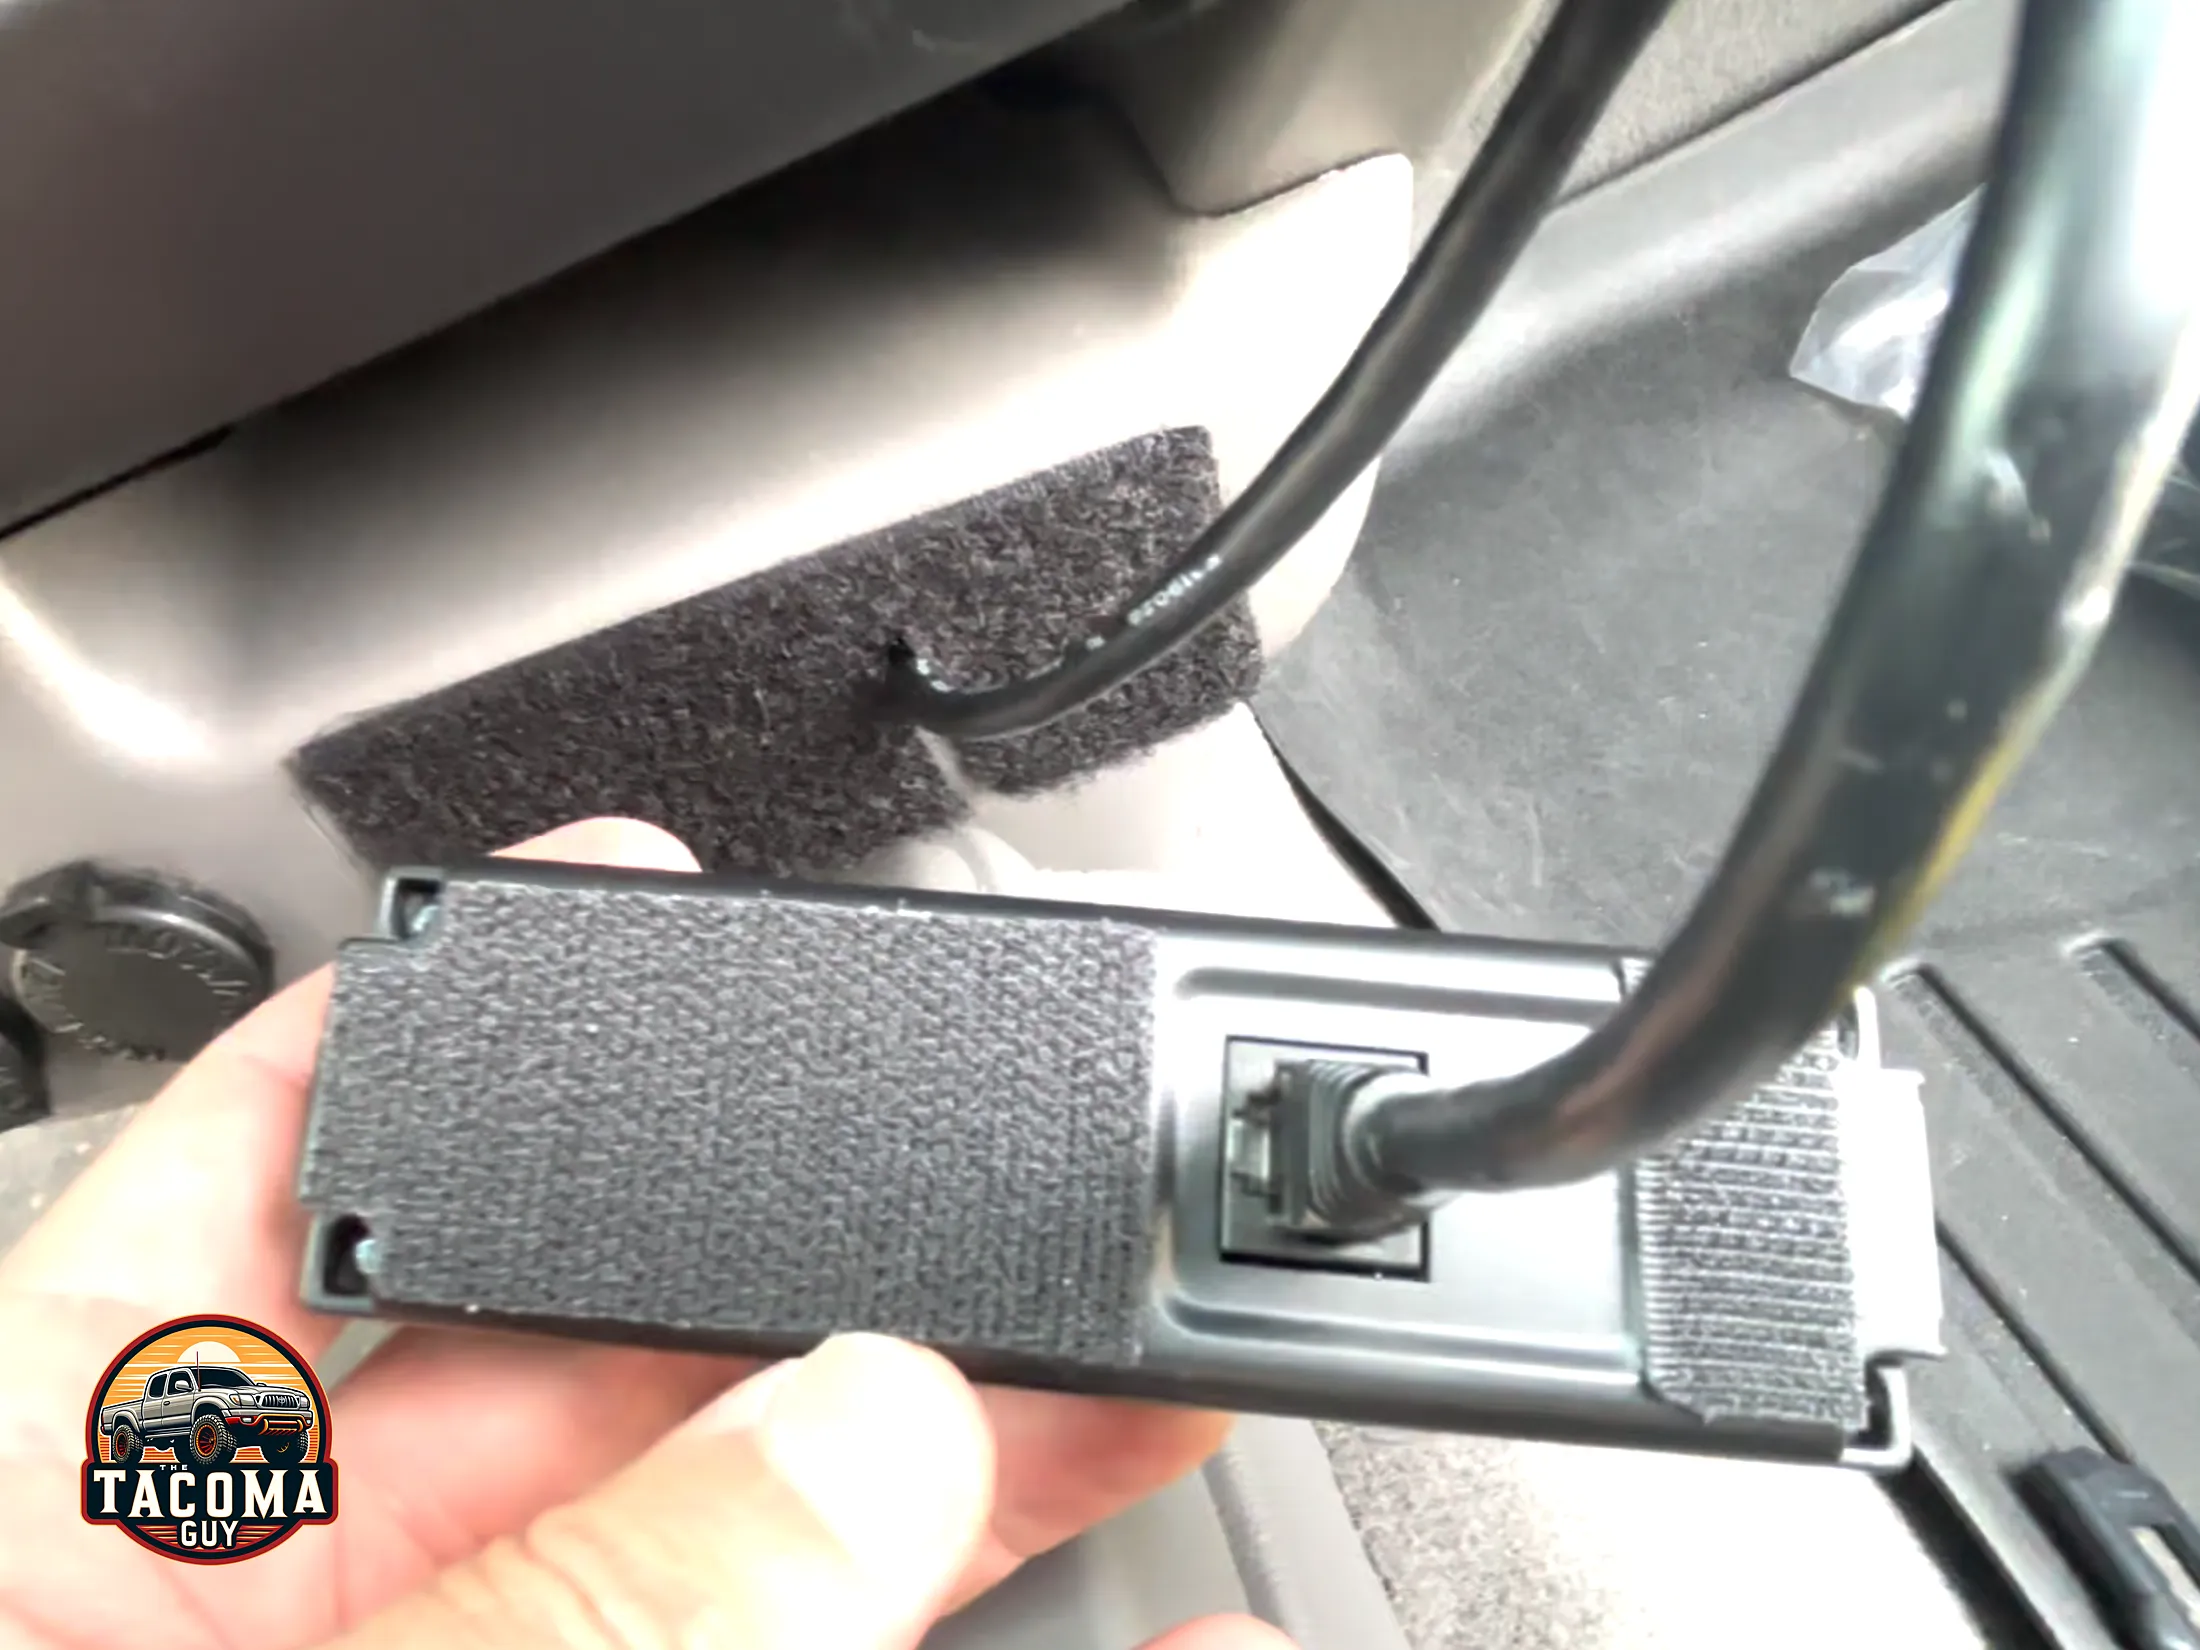
- Cut pieces of the loop velcro and cover the back of the SGII with it.
- Connect the cable, and then press it onto the other side of the velcro.
- I used a small wire to hold the cable in place next to the OBD-II port, that way the wire wouldn’t get in the way while driving. I suggest using something like that or a twist tie, something that can easily be undone without cutting should you ever need to pull out the Scan Gauge II to use in another vehicle to check a code or something. Zip tie would work but then you would have to cut it.