Want to add navigation and a backup camera to your Gen 1 Tacoma but don’t want to replace the radio, or want the navigation screen to be all the way at the bottom of your dashboard? Then this tutorial is for you!
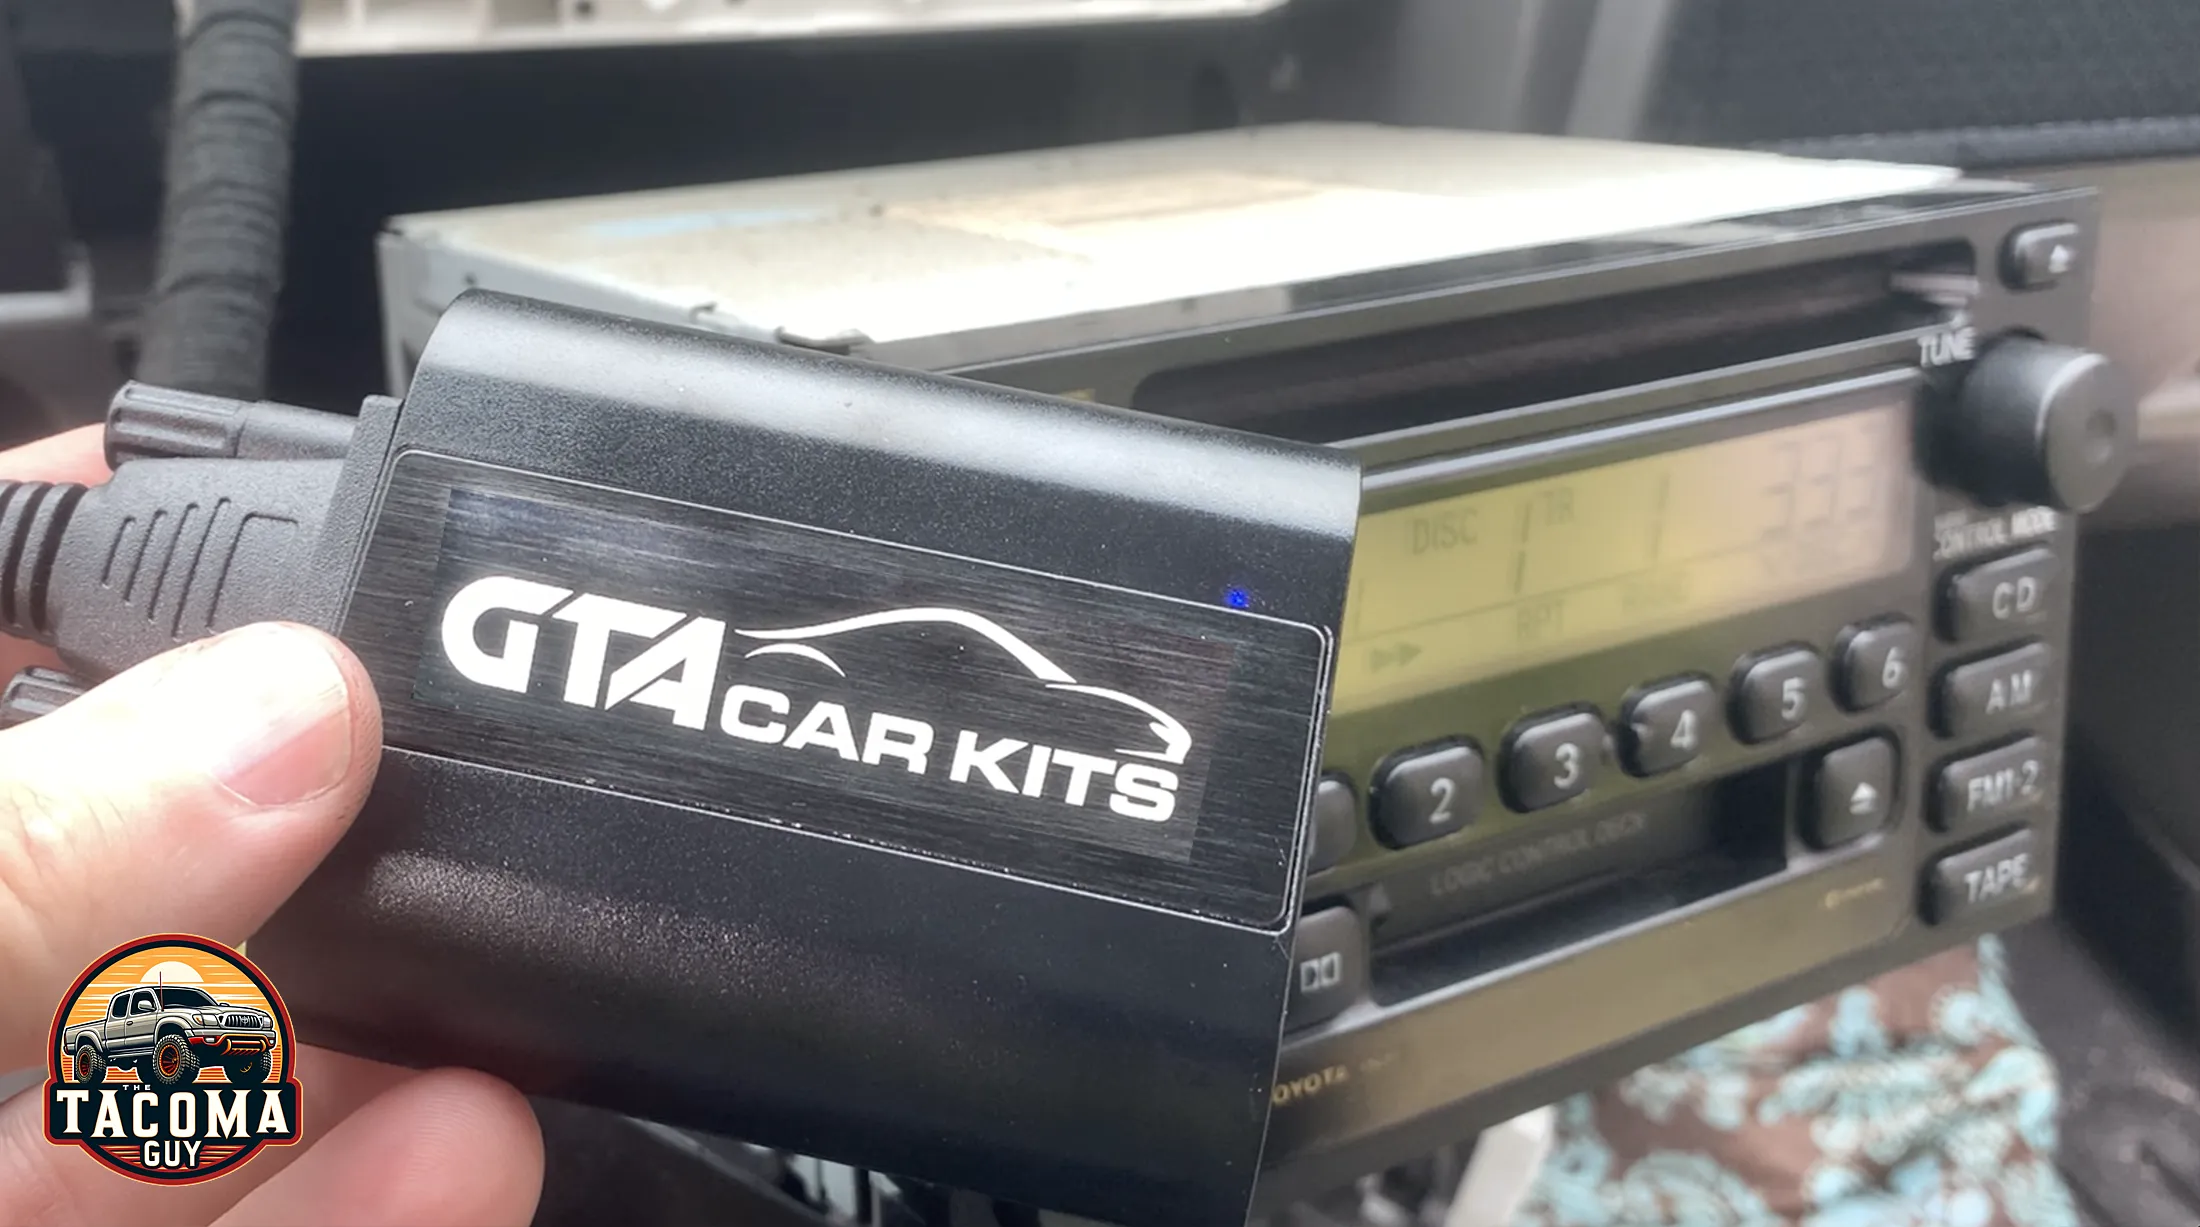
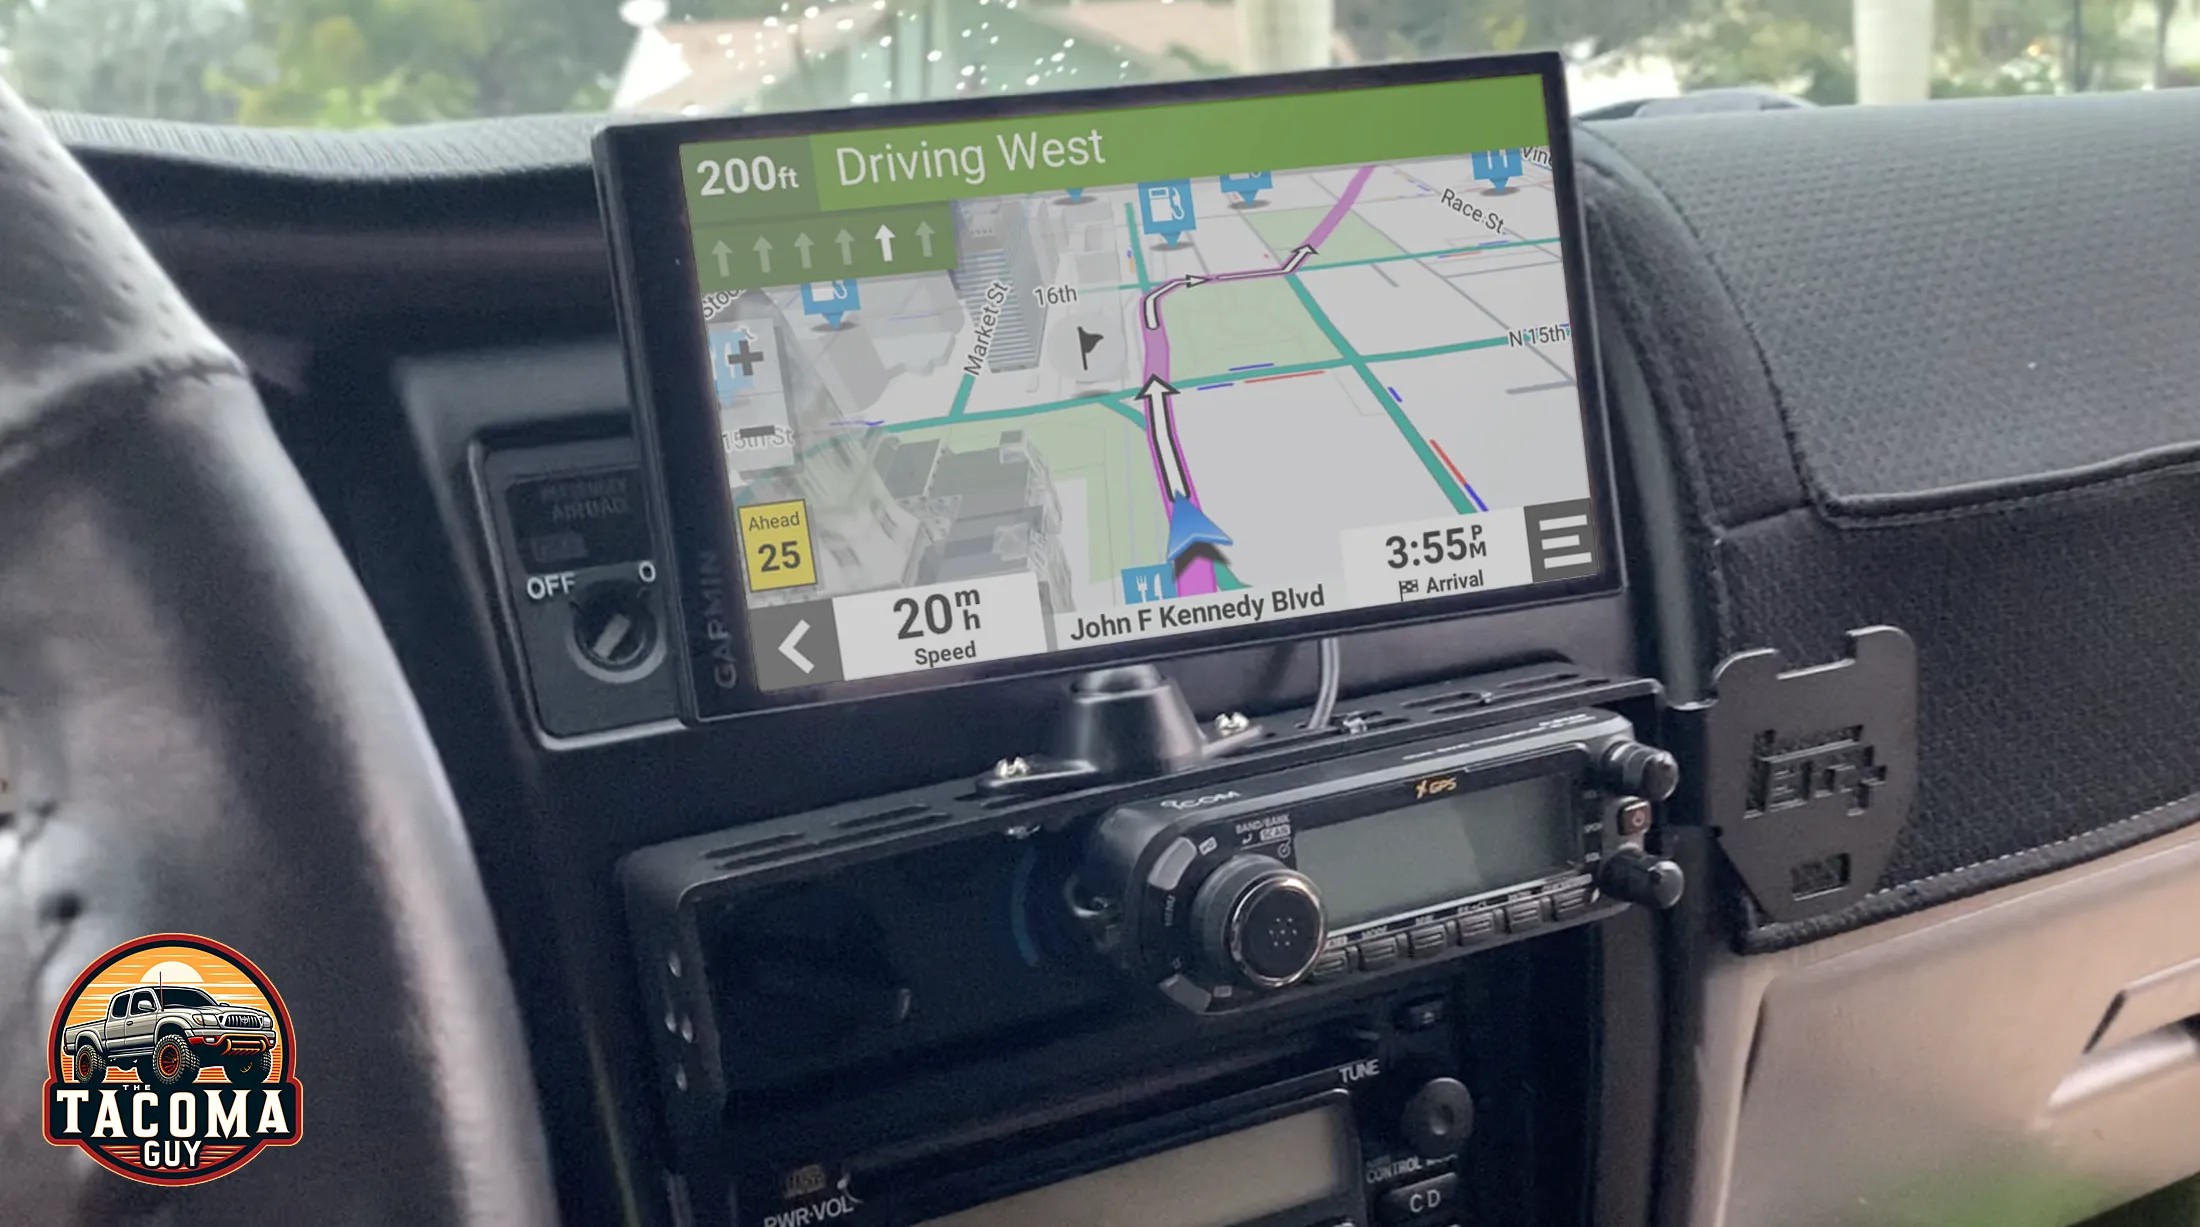
We got ourselves a TEQ Off-Road Center Console Modular Accessory Mount for Toyota Tacoma (1998-2004) so we could mount a Garmin DriveSmart™ 76 up high on the dash and keep our eyes on the road. It also allowed us to keep our factory radio, which works fine, although we did add a Bluetooth module to it for hands free calling.
Affiliate notice: The Tacoma Guy is an Amazon and eBay Affiliate. That means we get a small percentage from them if you use the links to purchase the product. It doesn’t increase your cost! If you found this tutorial helpful, please consider using these links to help support this mom & pop business, thank you! Learn more.
Tools Required:
- Screwdriver or a screw gun to mount the bracket into the trim plate around the temperature controls.
- Ratchet set or wrenches to tighten down the GPS mount
Parts Required:
- TEQ Offroad Center Console Modular Accessory Mount for Toyota Tacoma (1998-2004) search around, we got ours at Aspire.
- Garmin DriveSmart 76: 7″ navigator with USB C charging and Bluetooth
- Garmin BC 40: wireless backup camera which pairs to the DriveSmart 76
- Powerwerx USBbuddy2 Portable Powerpole (12V) to USB (5V) Converter: taps into the battery with Powerpoles and gives us a USB female port to plug the cable for the Navigator into – not necessary for install, see below
- Powerpole connectors, hubs, etc: None of this is really necessary if you are just going to plug your nav into your 12v socket, but i wanted to hide the cables and I am also running power to 2 radios in the truck, so using Powerpoles connected directly to the battery made the most sense for me
- Ram Mount Diamond Plate and Long Ball Adapter for Garmin: these hold the navigation head to the accessory mount.
Video Walk-Through:
Check out our step-by-step video tutorial first to get an idea of the process, then you can read the guide below and print it out if you want.
Step-by-Step Guide:
Install the Accessory Mount
The TEQ Offroad accessory mount is pretty easy to install. You hold the mount up against the dash and install the 8 self tapping screws.
NOTE: if you ever need to replace the radio, or add bluetooth to a Gen 1 tacoma OEM radio, do that work first. Once you install this TEQ bracket, thats 8 more screws you will have to remove to get back there. And you don’t want to loosen the holes up too much in the plastic by taking the bracket in and out a bunch.
Get the correct Ram Mount
Depending on the type of navigation unit you have, these parts may or may not work for you. But if you have the same Garmin DriveSmart 76 then your set with this mount and arm from Ram Mount:
I don’t remember if the Ram plate came with mounting screws and bolts – i seem to think not, so you might need to grab some that fit for the install.
Powering the Navigation
Our navigation uses USB C to power up. You can run the cable from the nav to your accessory outlet in the front, or do what we did, run the power directly to the battery.
In order to do that we got a long USB C cable, I think it was about 4-6 feet. That connects to a Powerwerx USBbuddy2 Portable Powerpole (12V) to USB (5V) Converter which lives in the drivers side kick panel and connects to a PowerPole hub which is connected to the battery. See the video for more details about that.
Add Backup Camera
The only thing left to do if you wanted to is to add a wireless backup camera. We got this one, the Garmin BC 40. It works very well and runs on AA batteries.