If you want to upgrade or replace the shocks on your Gen 1 Toyota Tacoma there are 2 ways to do it. You can just buy the shock and replace that, but you will need to compress the spring in order to remove it.
That can be dangerous if you don’t know what you are doing, since the spring in the strut assembly is under a huge amount of pressure and can cause serious damage if not handled properly.
The other way to do it is to replace the entire strut assembly in one shot. In that case you only have 4 bolts to remove (not counting lug nuts on the wheels) in order to install the new one.
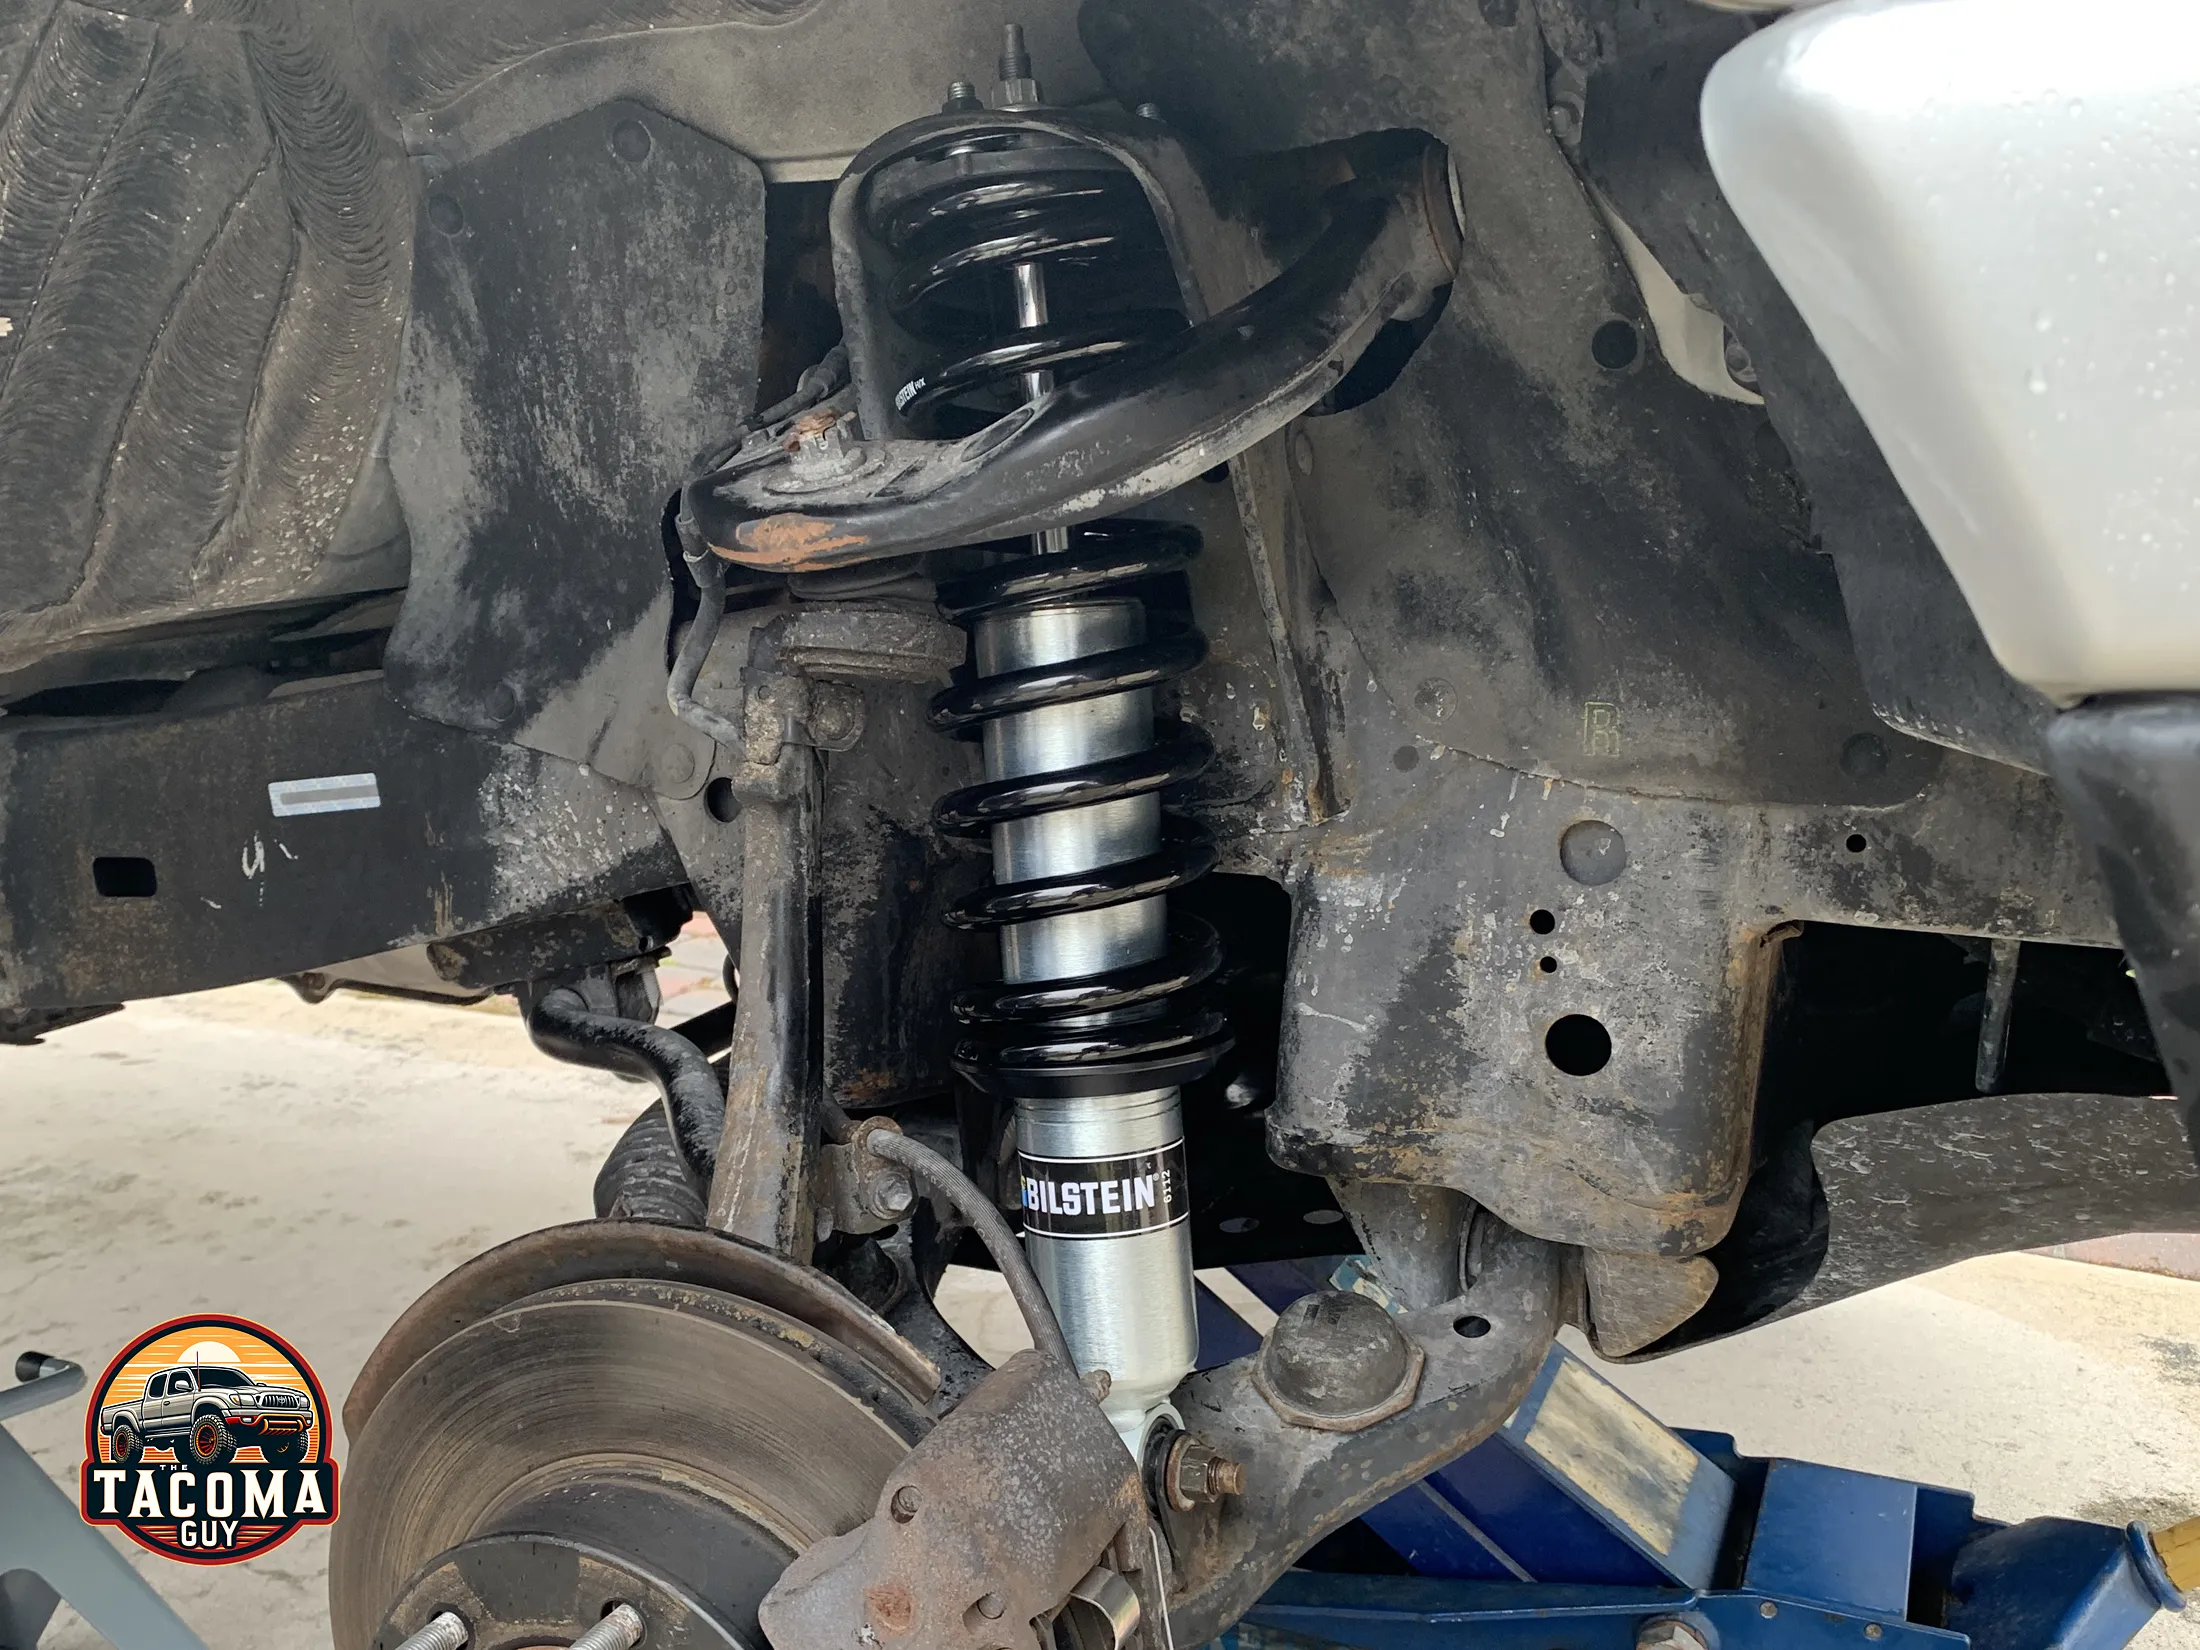
We replaced the stock shocks and struts on my 2003 with Bilstein 6112’s which we got from Shock Surplus. These shocks allowed us to adjust the ride height in the front to even out the rake on the truck after we installed Bilstein 5100’s in the rear Heavy Duty rear leaf spring, 4(3/1) leaves from General Spring.
NOTE: This job is much easier with 2 people. One person to help keep downward pressure on the control arms, while the other installs the assembly. You might be able to do it yourself (I was able to remove the old struts by myself) but installation will be very difficult, unless you have 3 arms!
Affiliate notice: The Tacoma Guy is an Amazon and eBay Affiliate. That means we get a small percentage from them if you use the links to purchase the product. It doesn’t increase your cost! If you found this tutorial helpful, please consider using these links to help support this mom & pop business, thank you! Learn more.
Tools Required:
- Lug Wrench: To remove the wheels w/ 21mm socket. Or use a breaker bar.
- Jack and 6 Ton Jack Stands: To lift and support the vehicle.
- 1/2″ Ratchet and Socket Set: For various nuts and bolts.
- 1/2″ Breaker Bar: To get the stuck bolts off.
- PB Blaster: Penetrating catalyst for seized bolt removal.
- Torque Wrench: 1/2″ To tighten the lug nuts and caliper bolts to the specific torque requirement.
- Pry Bar: we used a 16″ pry bar from Rexbeti
- Loctite (blue): Make sure the nuts don’t come off the bolts!
- New Struts: We got ours from ShockSurplus.com (no affiliation)
Video Walk-Through:
Check out our step-by-step video tutorial first to get an idea of the process, then you can read the guide below and print it out if you want.
Step-by-Step Guide:
Descriptive pictures below this guide!
Preparatory Work:
- Safety First: Park on a level surface, engage the parking brake, and place wheel chocks behind the rear wheels.
- Loosen the Lug Nuts: Use the lug wrench or breaker bar to slightly loosen the lug nuts on the front wheels before lifting the vehicle.
- Lift the Vehicle: Use the jack to lift the front of the Tacoma and then secure it with the 6 ton jack stands for safety.
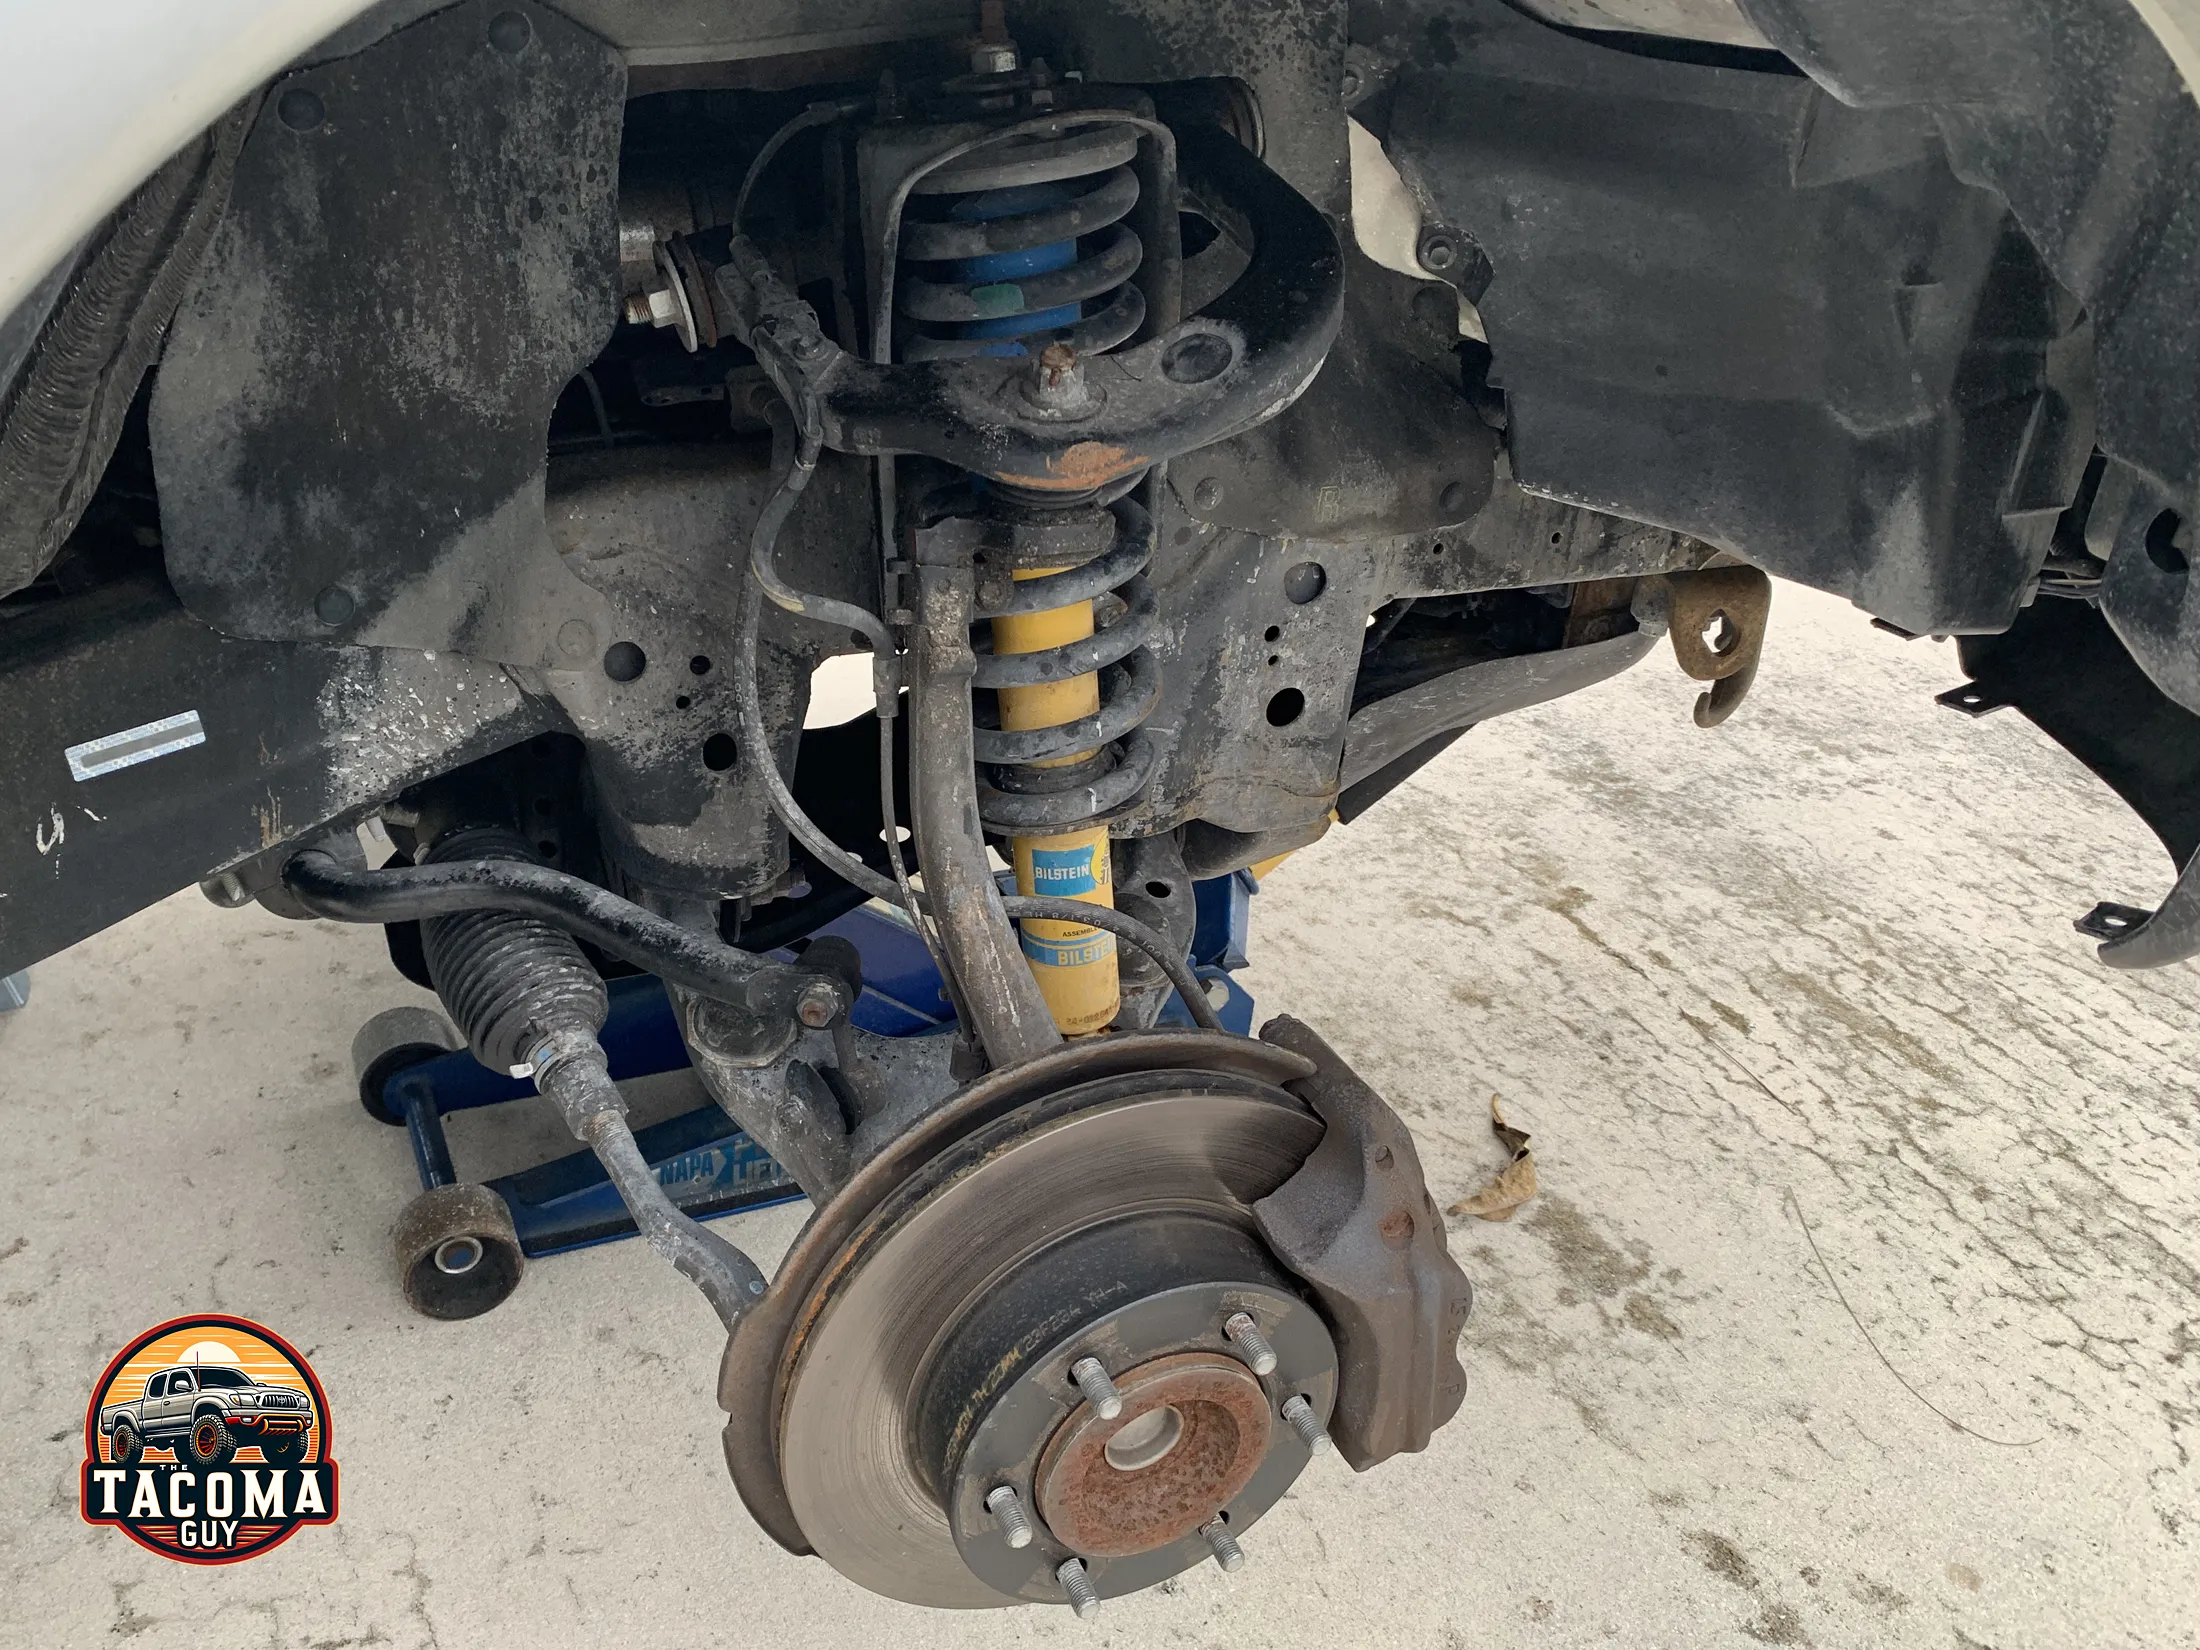
- Remove the Wheels: Take off the front wheels to access the brake assembly. I like to turn the steering wheel out to make it easier to work on the caliper.
- PB Blaster: Spray PB on the 3 bolts at the top of the strut and the main bolt holding it to the lower control on and allow it to penetrate.
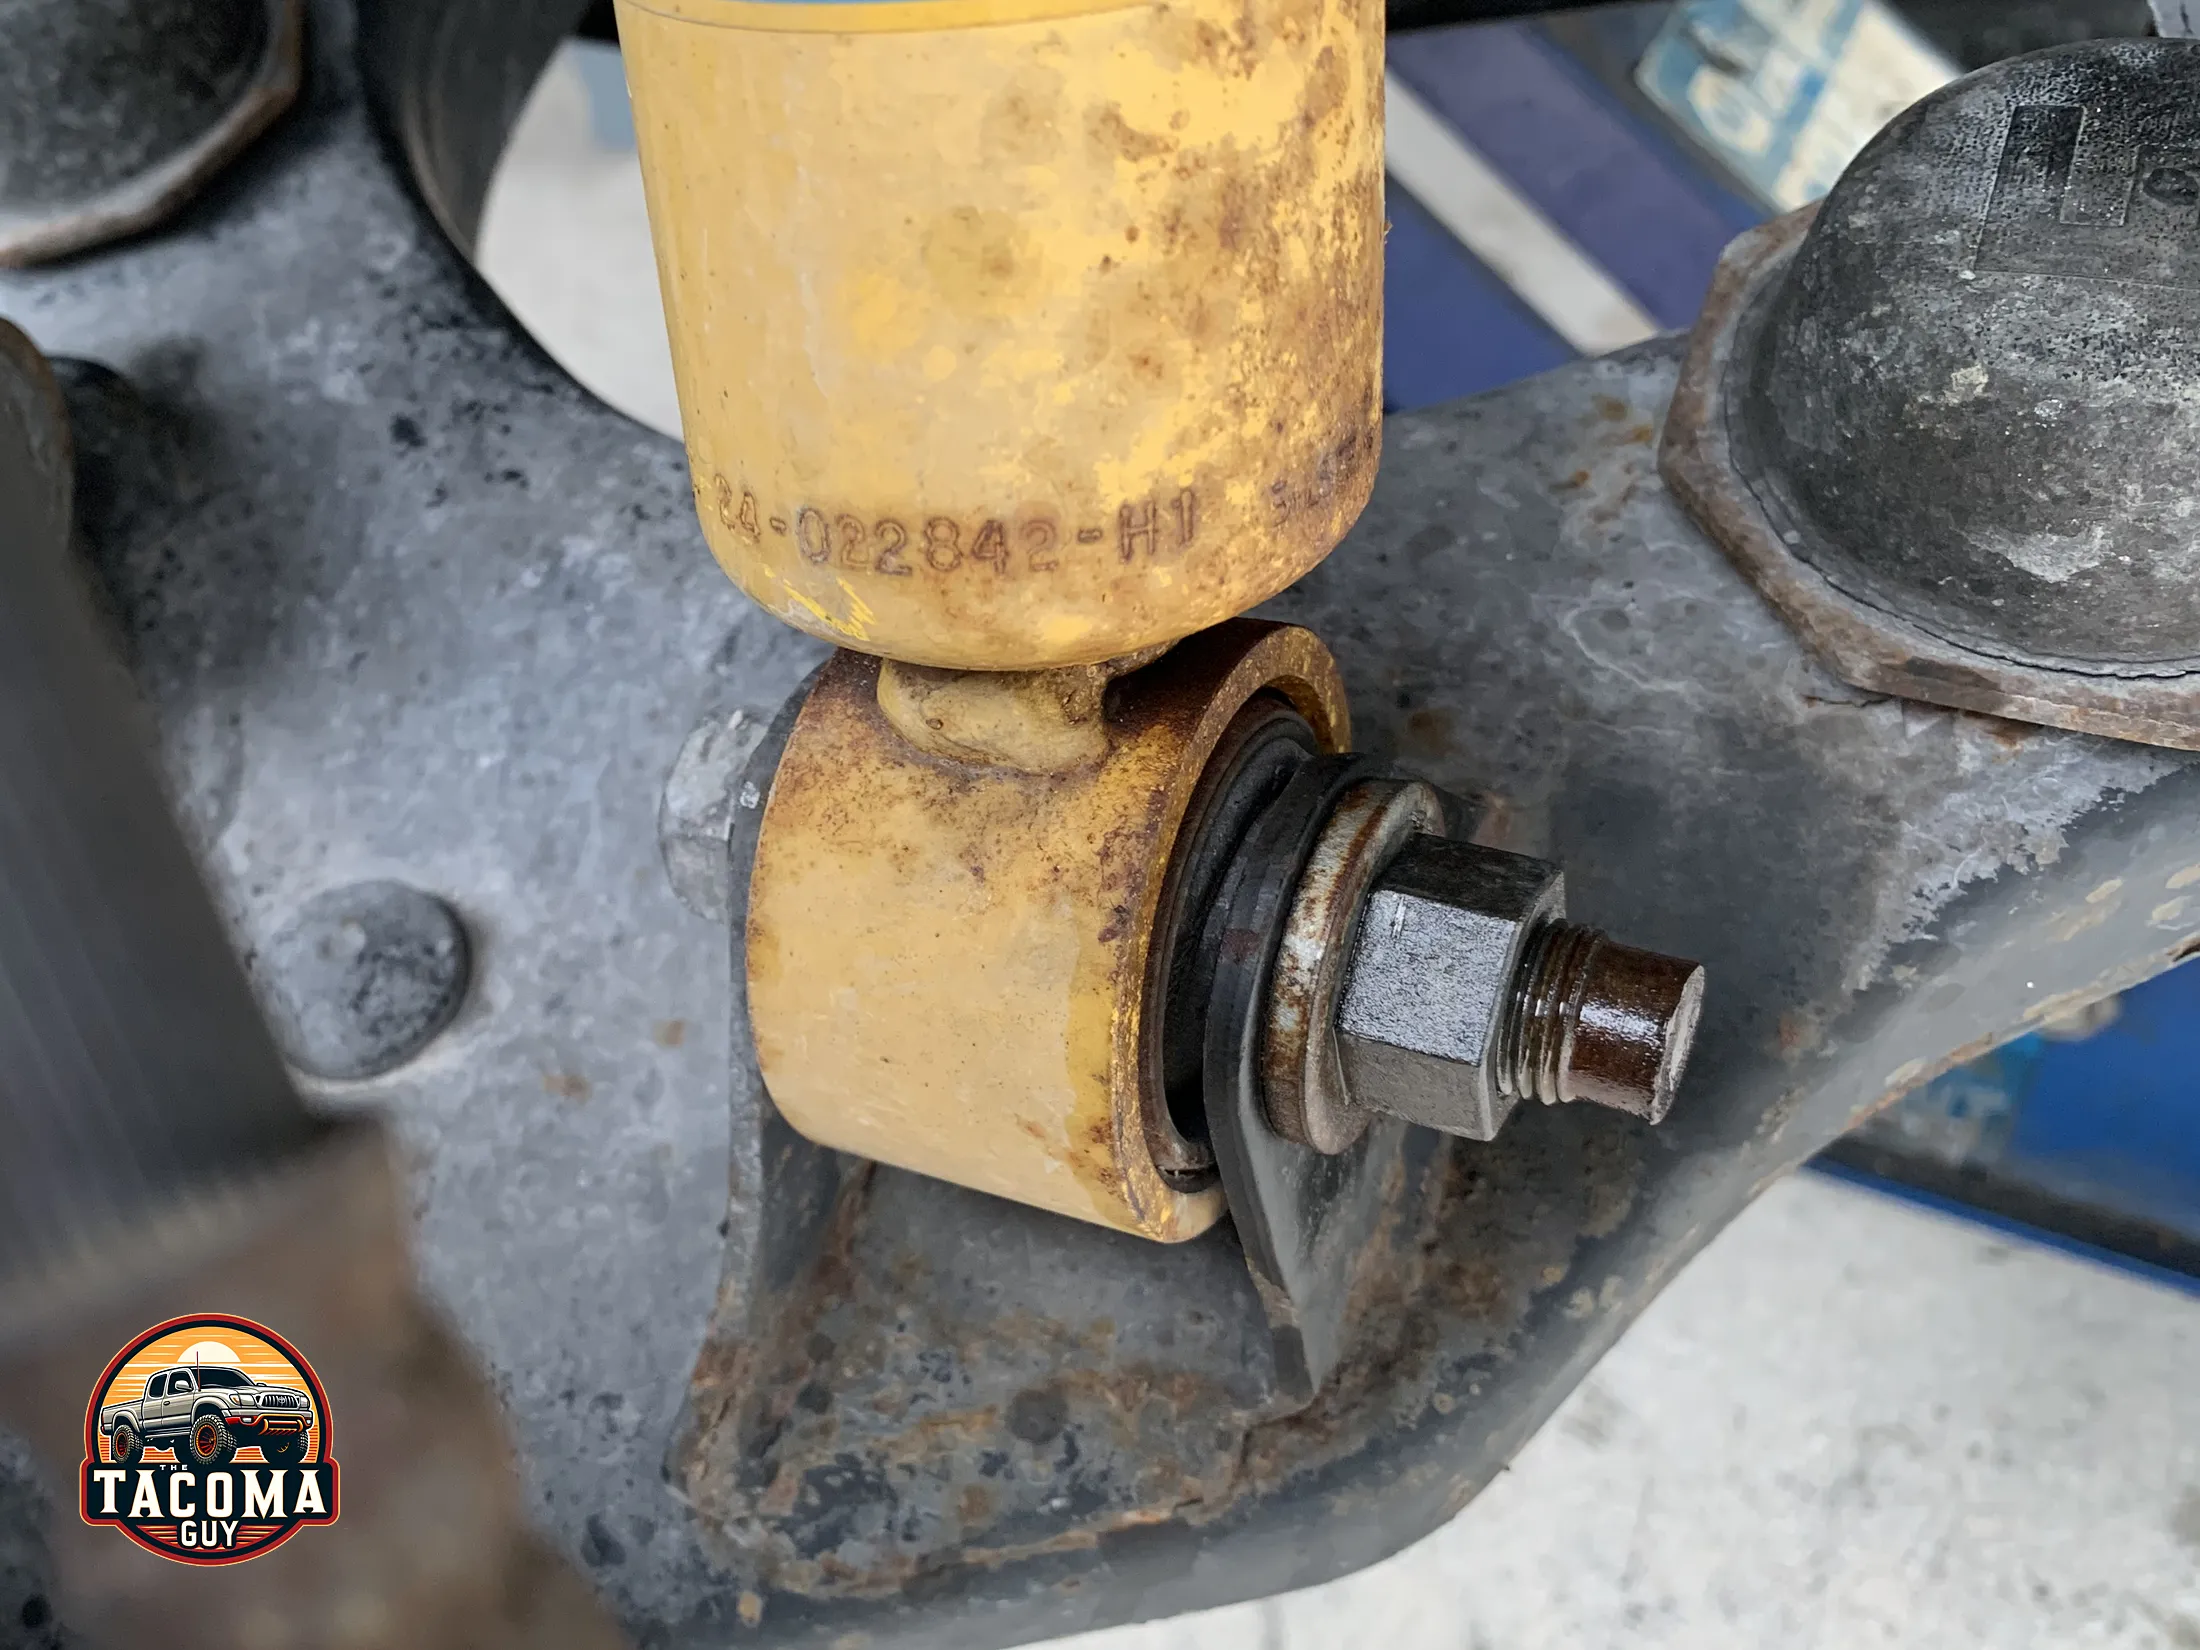
- Remove the Lower Nut: Get a breaker bar with a 19mm socket, remove the nut and washer holding the shock absorber into the lower control arm. Leave the bolt in for now.
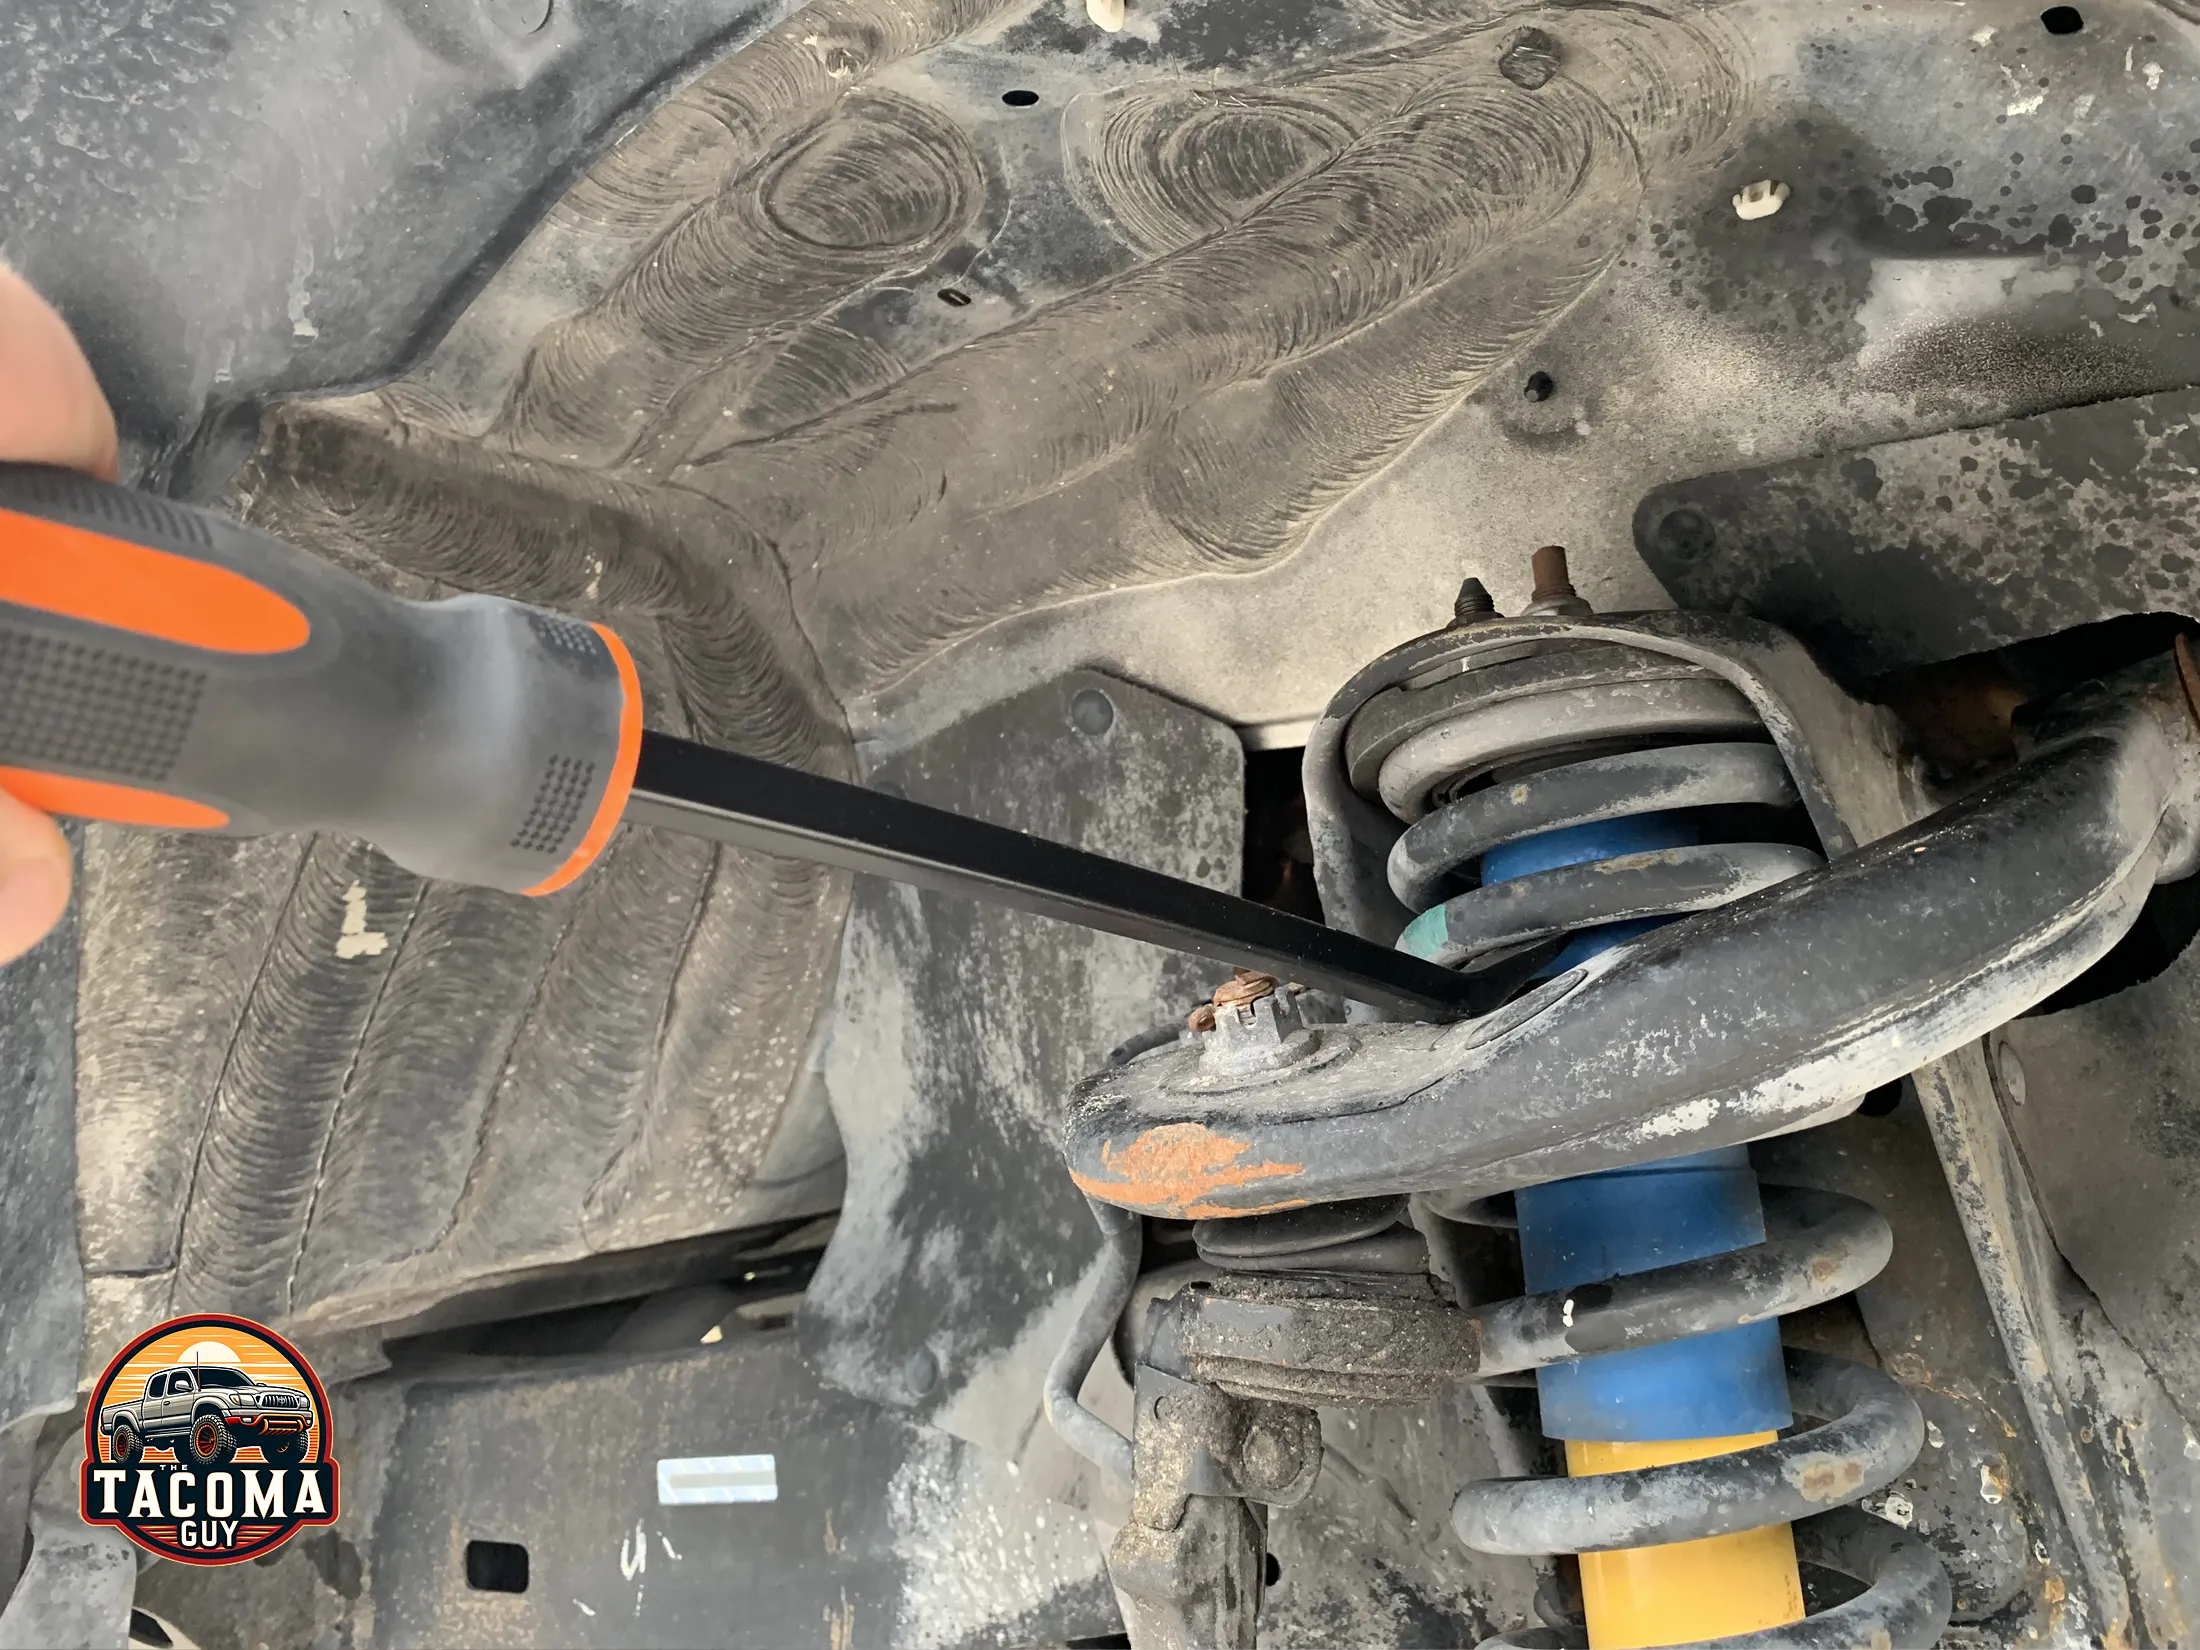
- Drop the UCA, remove the bolt: Using a pry bar, push down on the upper control arm by placing the tip of the pry bar into the spring of the strut. This will also drop the lower control arm and allow you to use a hammer or mallet to remove the bolt from the shock. You might need to use a screwdriver or large pin punch to get the bolt all the way out, while maintaining downward pressure. Having a buddy help out here is good.
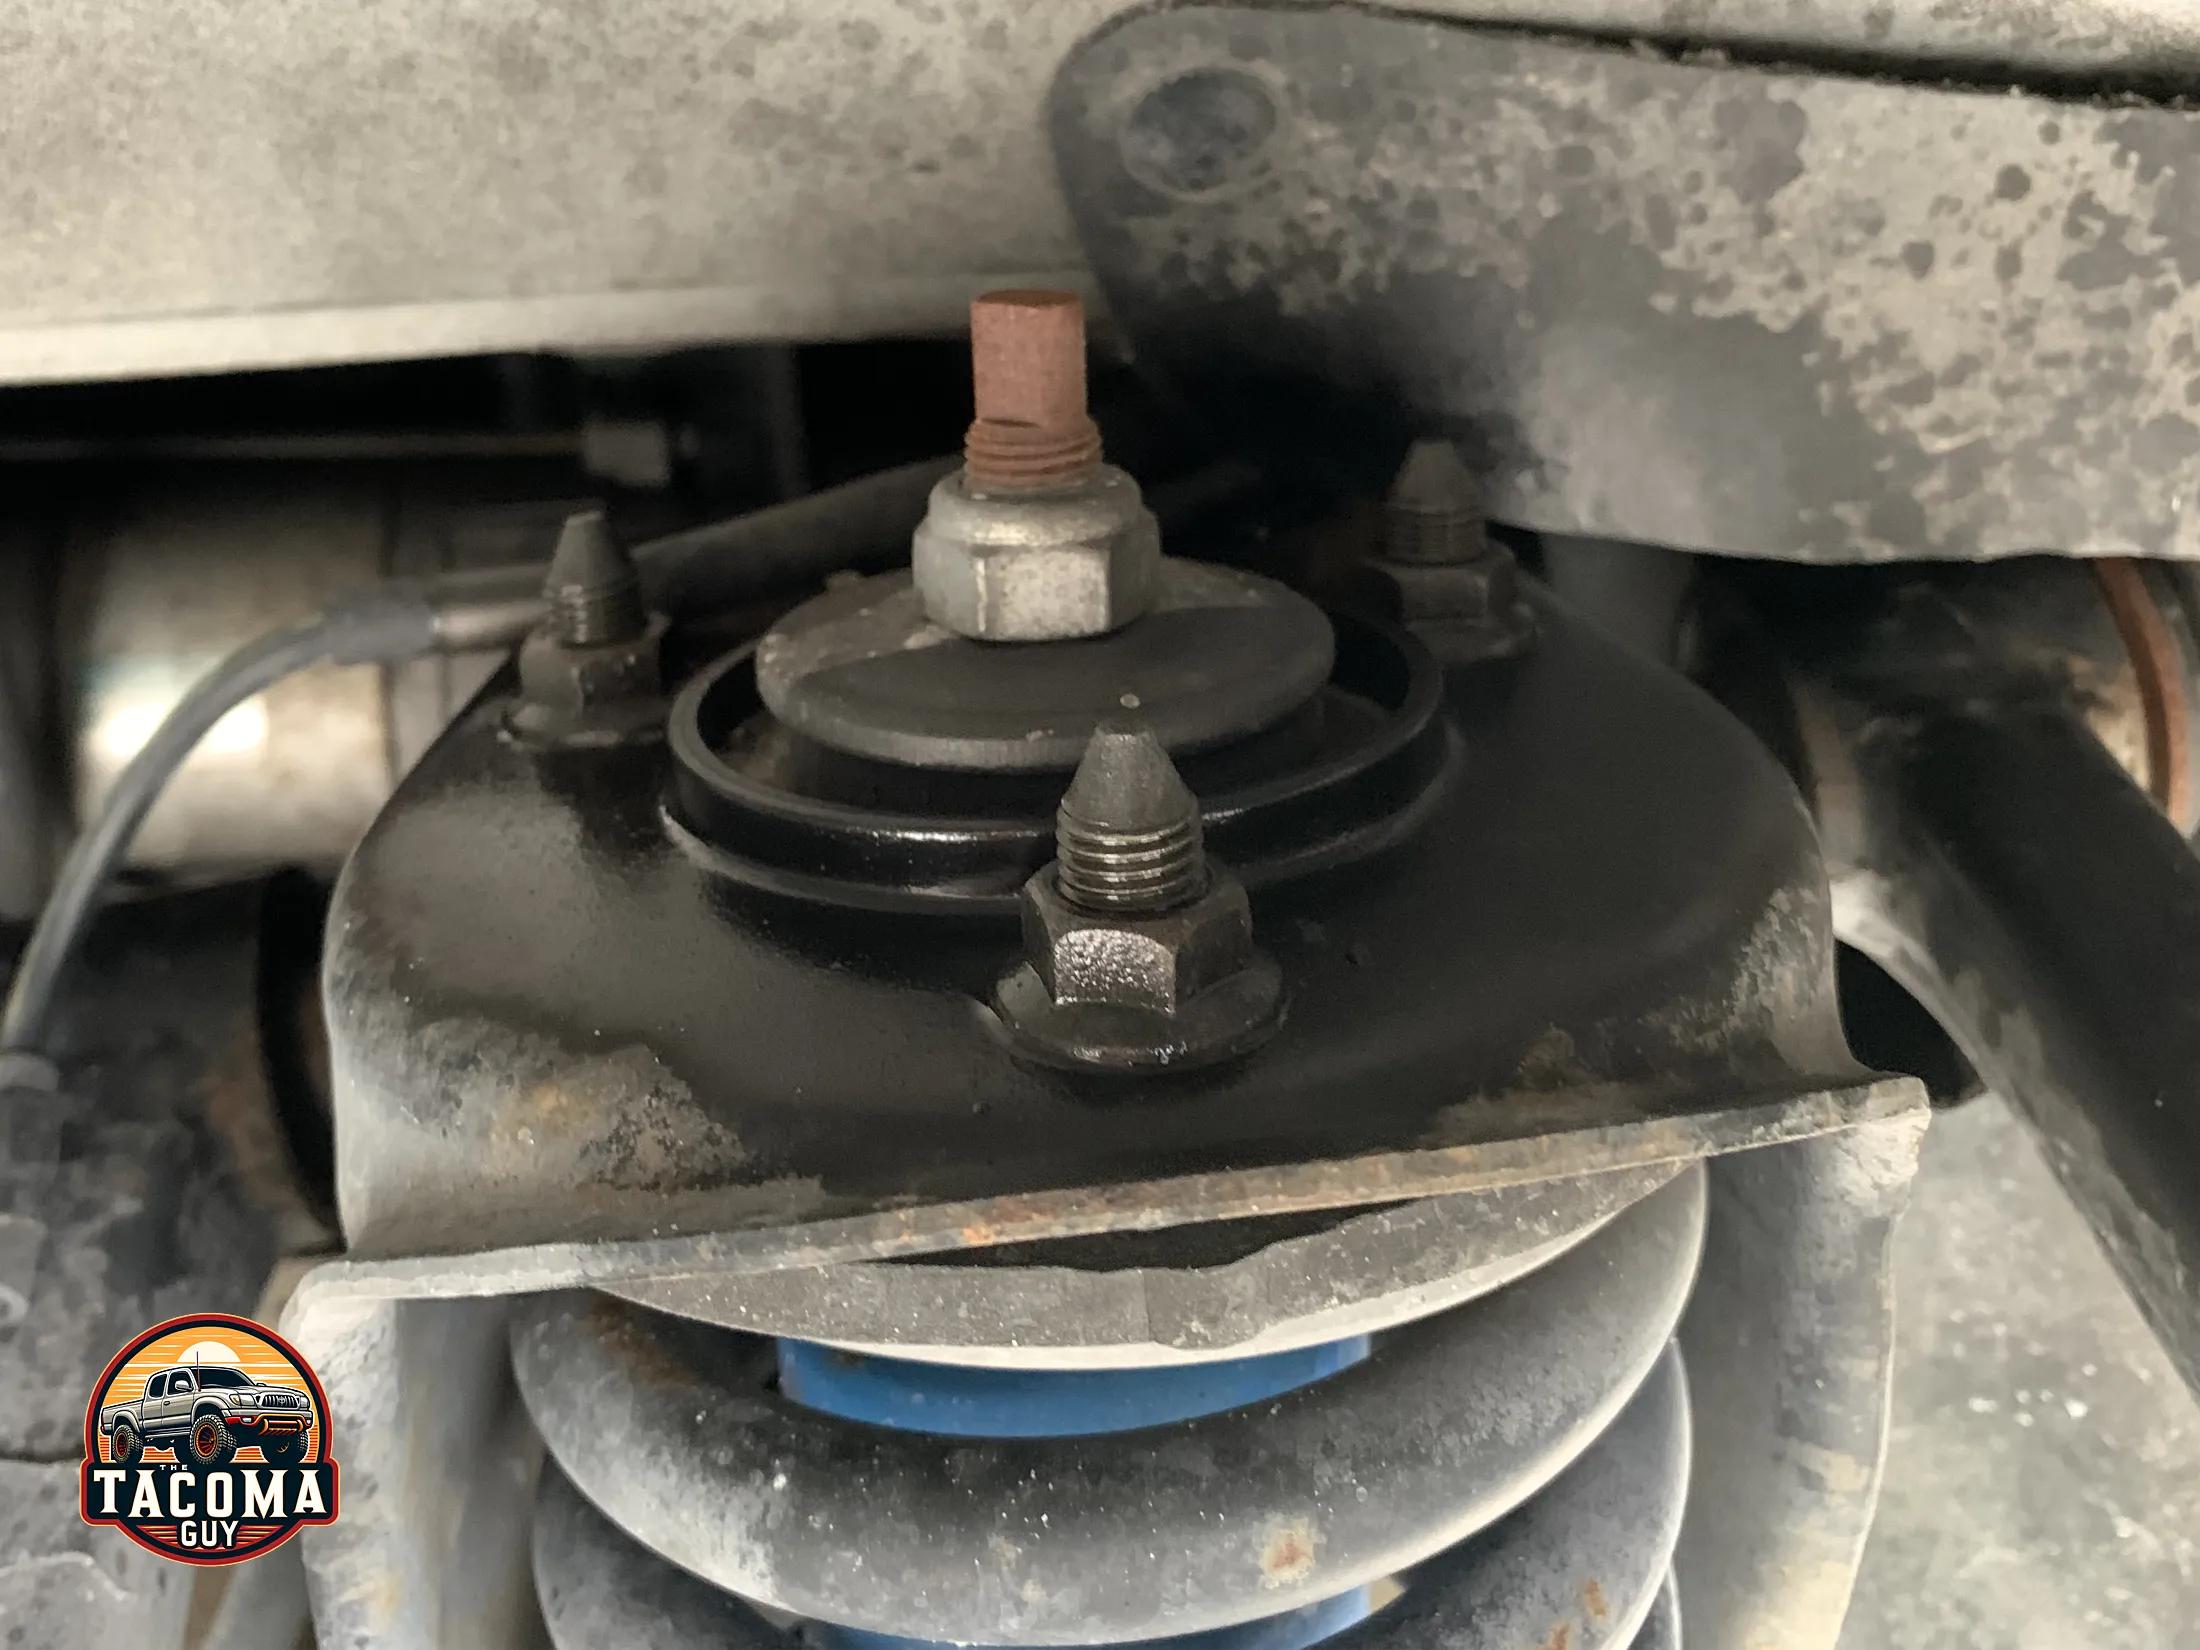
- Remove the Upper Bolts: Remove the three top bolts holding the strut in with a 14mm socket or wrench. Be careful not to strip them. They are on pretty tight and the angle is a little awkward.
- Remove the strut: Now the whole assembly should just drop out and can be removed.
- Place new Strut: Put your new strut into place. Make sure the bolt hole on the bottom lines up correctly, and make sure you are using the right strut – our 6112’s came with 2 different heights, the drivers side spacing clip was a little higher to remove sag on that side of the truck.
- Bolt up the top: Put some blue Loctite on the nuts on the assembly, then put the nuts on. I didn’t tighten mine up all the way just yet.
- Bolt up the bottom: This was the hardest part of the job for us – the new strut needed a lot of finagling to get it to line up into the lower control arm. What wound up helping was using an ratchet extension arm which fit into the holes where the bolt went. This enabled me to apply leverage and get the bolt in, then I was able to hammer it through. You will need someone to help here to hold down on the pry bar, and you might need another set of hands to twist the strut while another person sets the bolt. We did it with 2 but it took us a while. Make sure you put the bolt back in the way you took it out, for us the nut and washer face the front of the truck.
- Torque the Bolts: The bottom bolt is torqued to 61 ft lbs and the top bolts to 47 ft lbs. I had a hard time with one of the top bolts, I couldn’t get my wrench to fit. I used a normal wrench to tighten it as best as I could, then asked the mechanic who did my alignment to check all the bolts the next day. There is some plastic trim there that you can pull out and then replace which will probably give the access you need.
- Do the other side!
Finishing Up:
- Reattach the Wheels: Put the wheels back on and only hand-tighten the lug nuts at this point.
- Lower the Vehicle: Carefully raise the floor jack so you can remove the jack stands, then lower the truck. Use a torque wrench to tighten the lug nuts to the manufacturer’s specifications of 83 ft lbs.
- Get an Alignment: You will need an alignment done after this, you should have seen what my tires looked like, I forgot to take a photo but they were way out of whack. Once the alignment was done the truck settled nicely and I got exactly the 1″ lift I was expecting.