Greasing the driveshaft of your 2004 Toyota Tacoma PreRunner is an important maintenance task that helps ensure the longevity and smooth operation of the driveshaft components.
It’s one of the easiest maintenance items to do on your truck, so no excuses!
Here’s a step-by-step guide to assist you in this process:
Tools and Materials Needed
- Grease gun: I really like the Macnaught Heavy-Duty Pistol Grip Grease Gun with their KYPLUS® Locking Grease Coupler
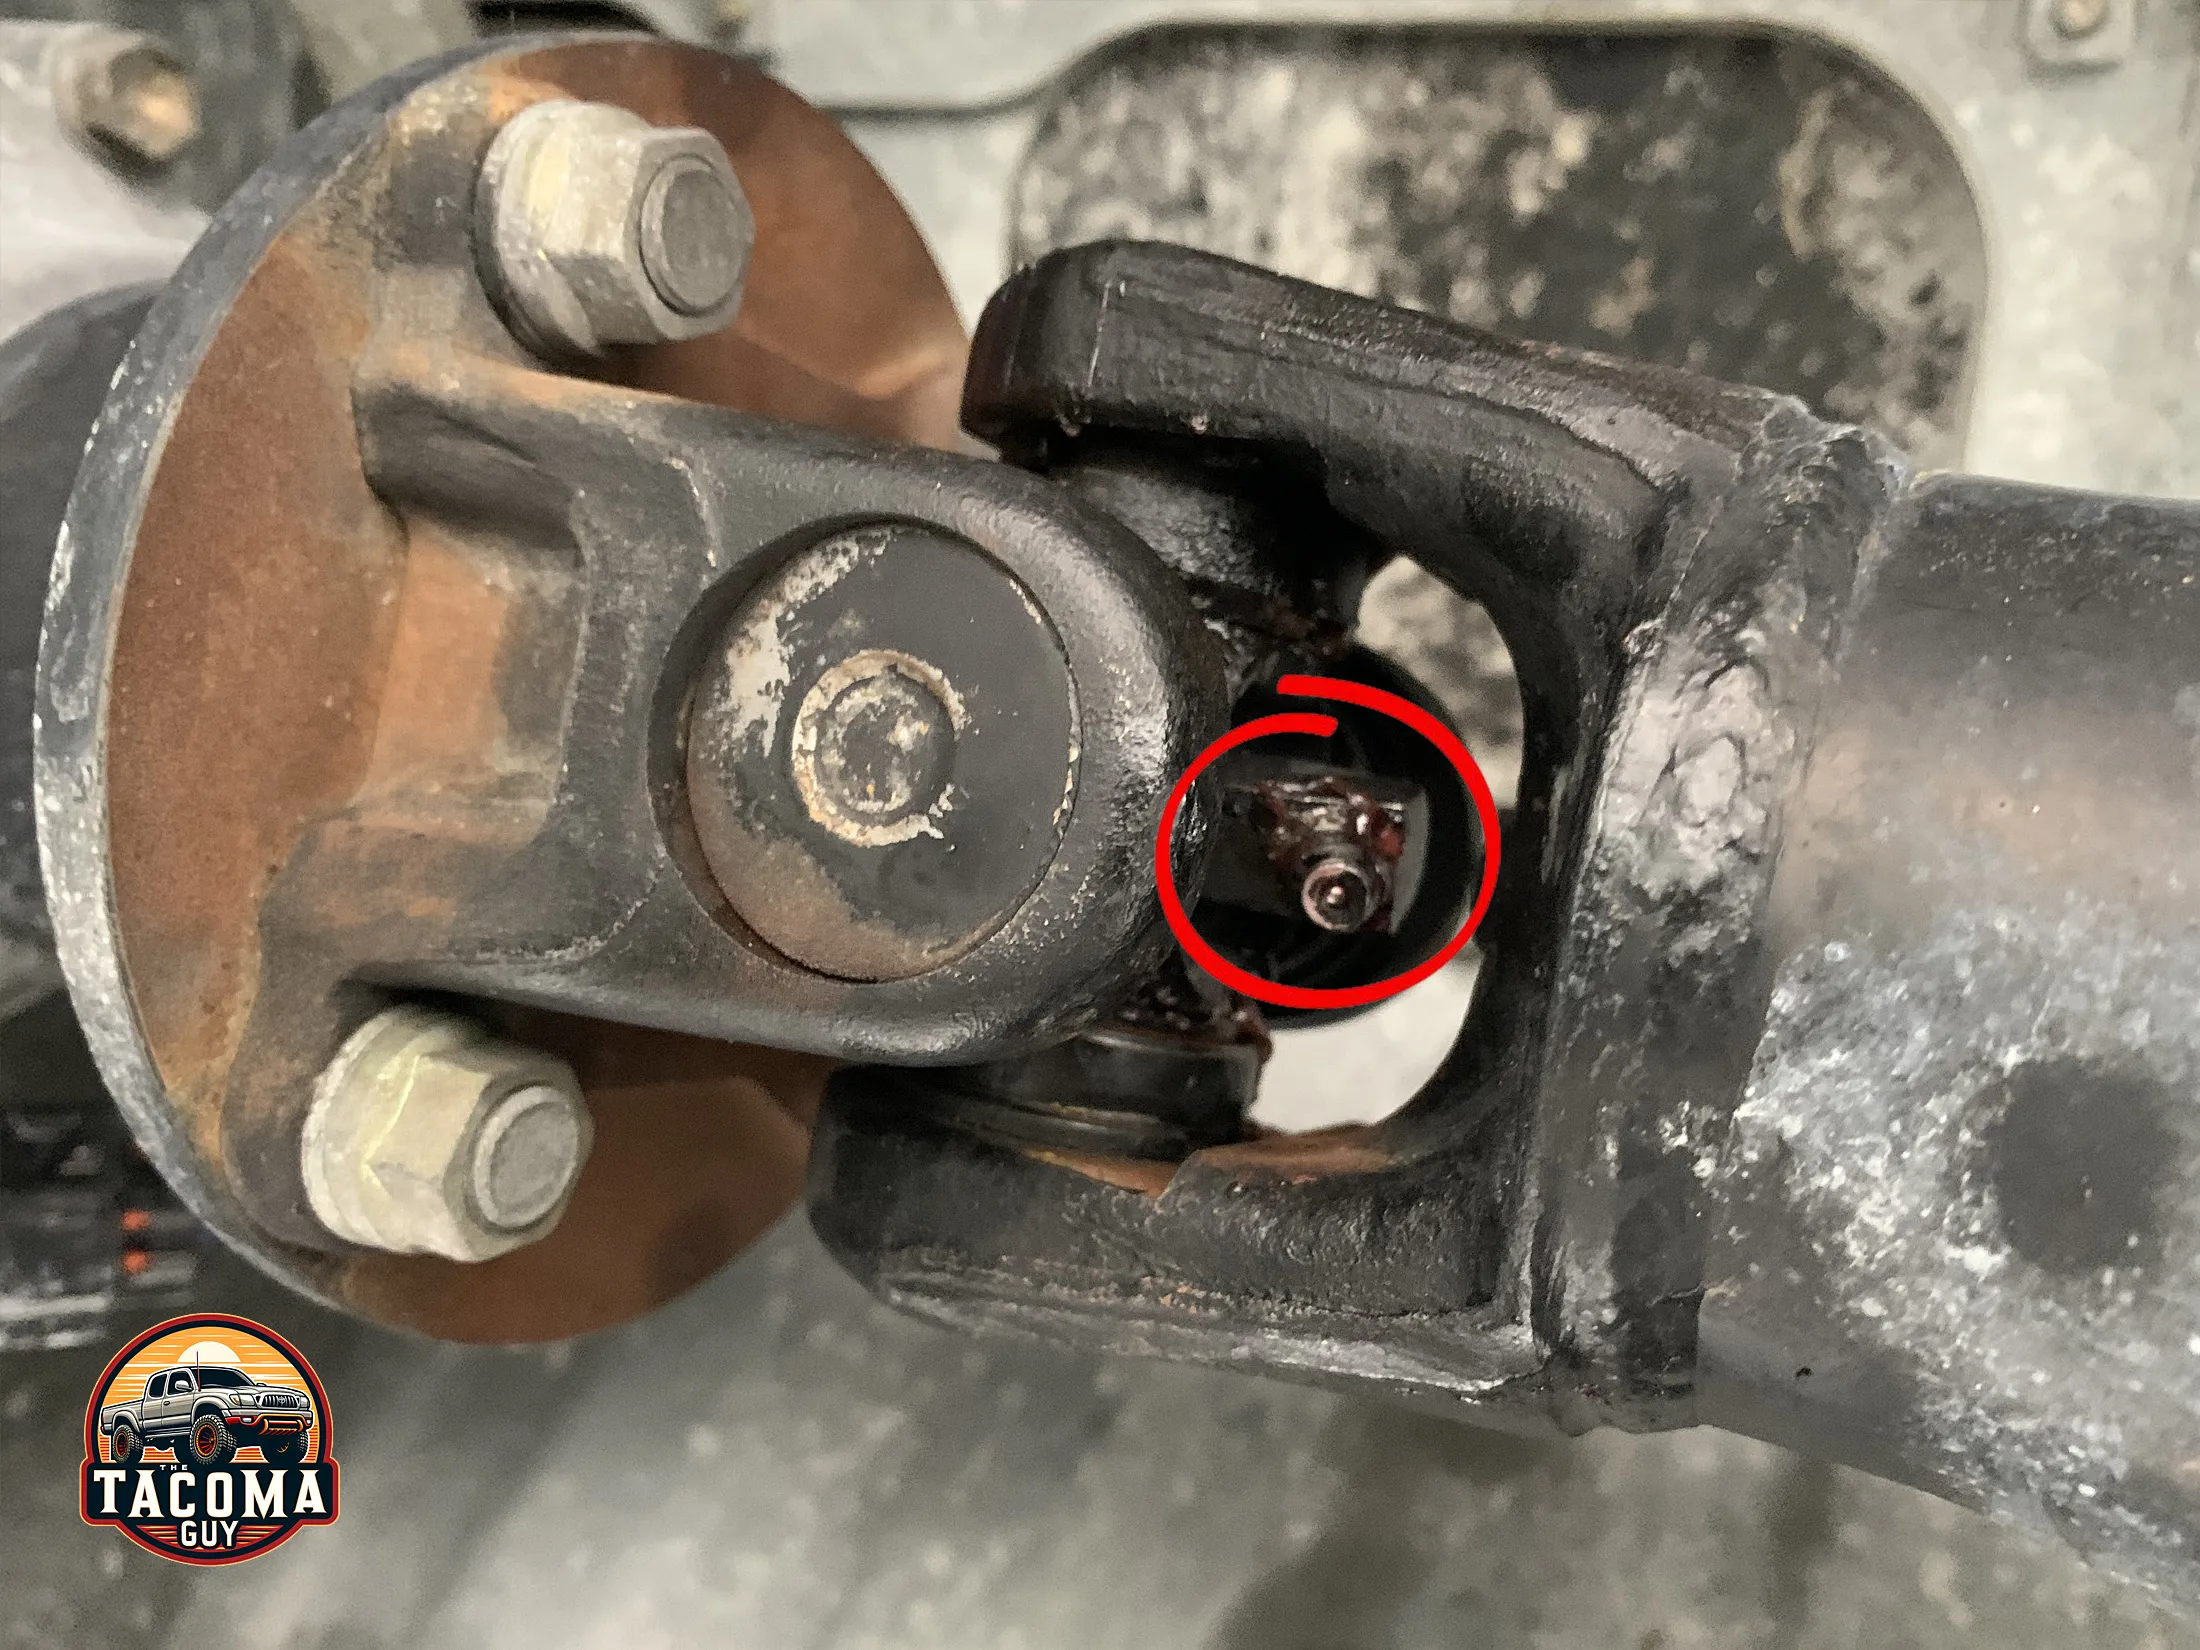
- LockNLube Narrow Needle Dispenser to get the hard to reach zerk in the cardan joint
- Grease: I use Valvoline Multi-Vehicle High Temperature Red Grease on all the zerks, but the technical specifications specifically call for:
Spiders: Lithium base chassis grease, NLGI No. 2
Slide yoke and double cardan joint: Molybdenum-disulfide lithium base chassis grease, NLGI No. 2
You won’t find a definitive answer online as to which grease to use, trust me, I’ve looked everywhere. But if you really want to look long and hard into the lithium vs moly debate abyss, read this. - Rags or Shop Towels
- Safety glasses
- Disposable Gloves
- Jack and jack stands (if necessary for better access)
- Wheel chocks
Affiliate notice: The Tacoma Guy is an Amazon Affiliate. That means we get a small percentage from them if you use the links to purchase the product. It doesn’t increase your cost! If you found this tutorial helpful, please consider using these links to help support this mom & pop business, thank you!
Steps to Grease the Driveshaft
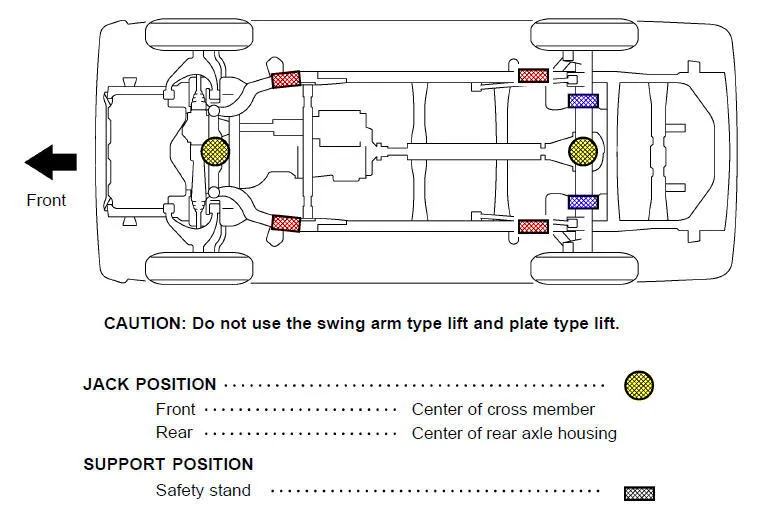
Step 1: Prepare the Vehicle
- Safety First: Park your vehicle on a level surface, apply the parking brake, and chock the wheels for added safety.
- Access the Driveshaft: If necessary, use a jack to lift the vehicle and secure it with jack stands to gain better access to the driveshaft. Always follow safe jacking procedures.
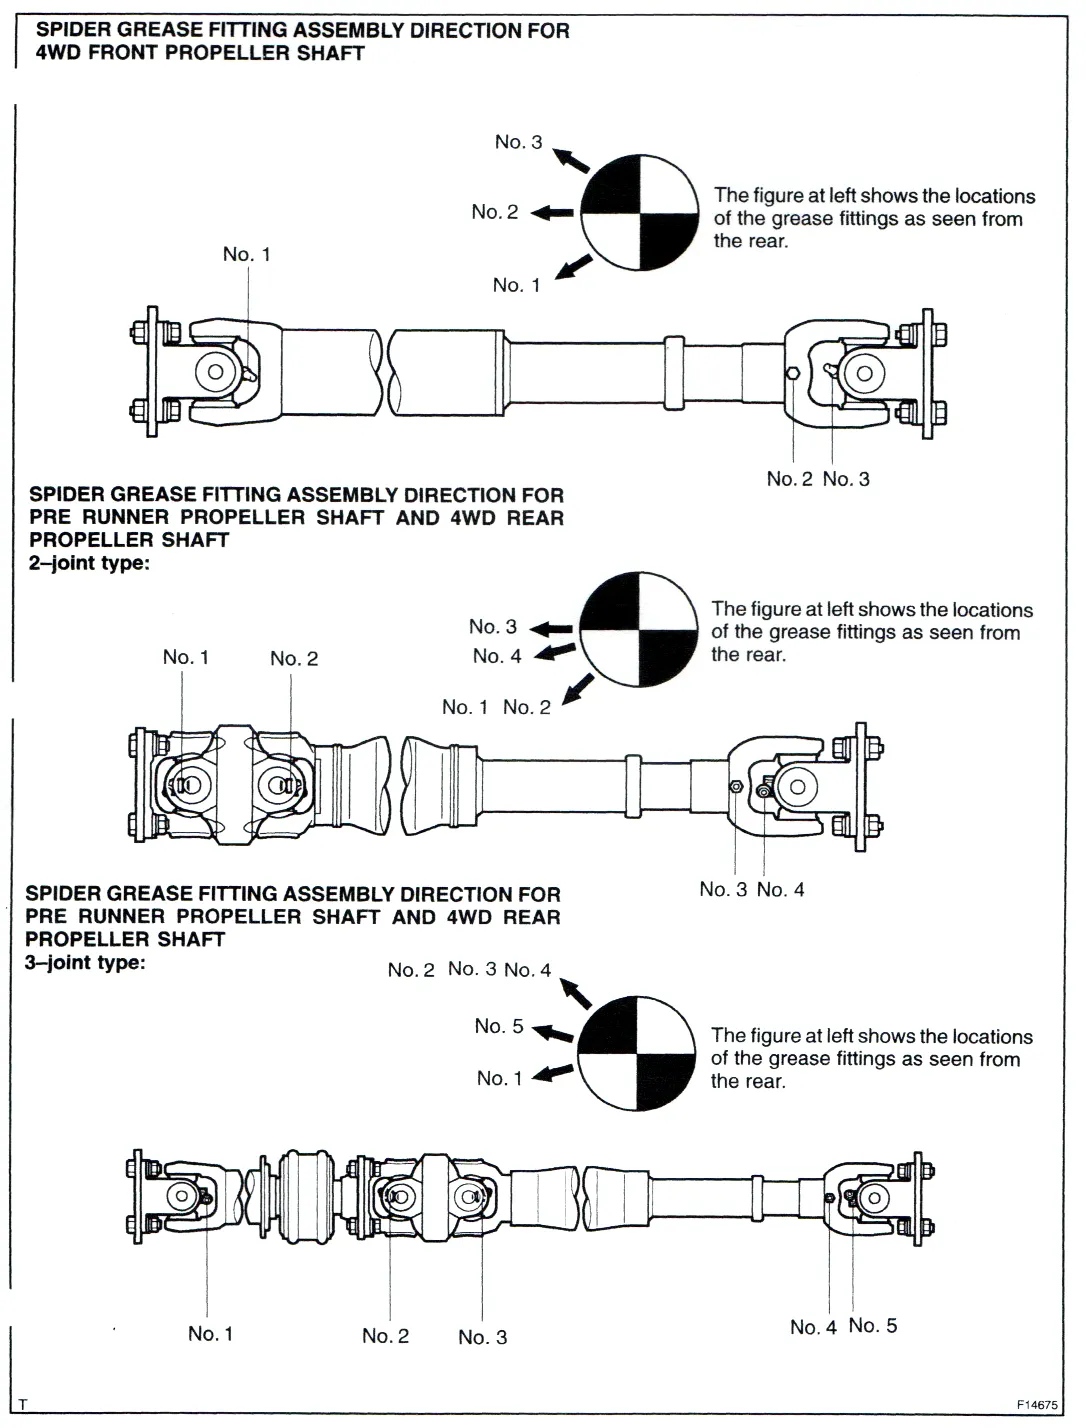
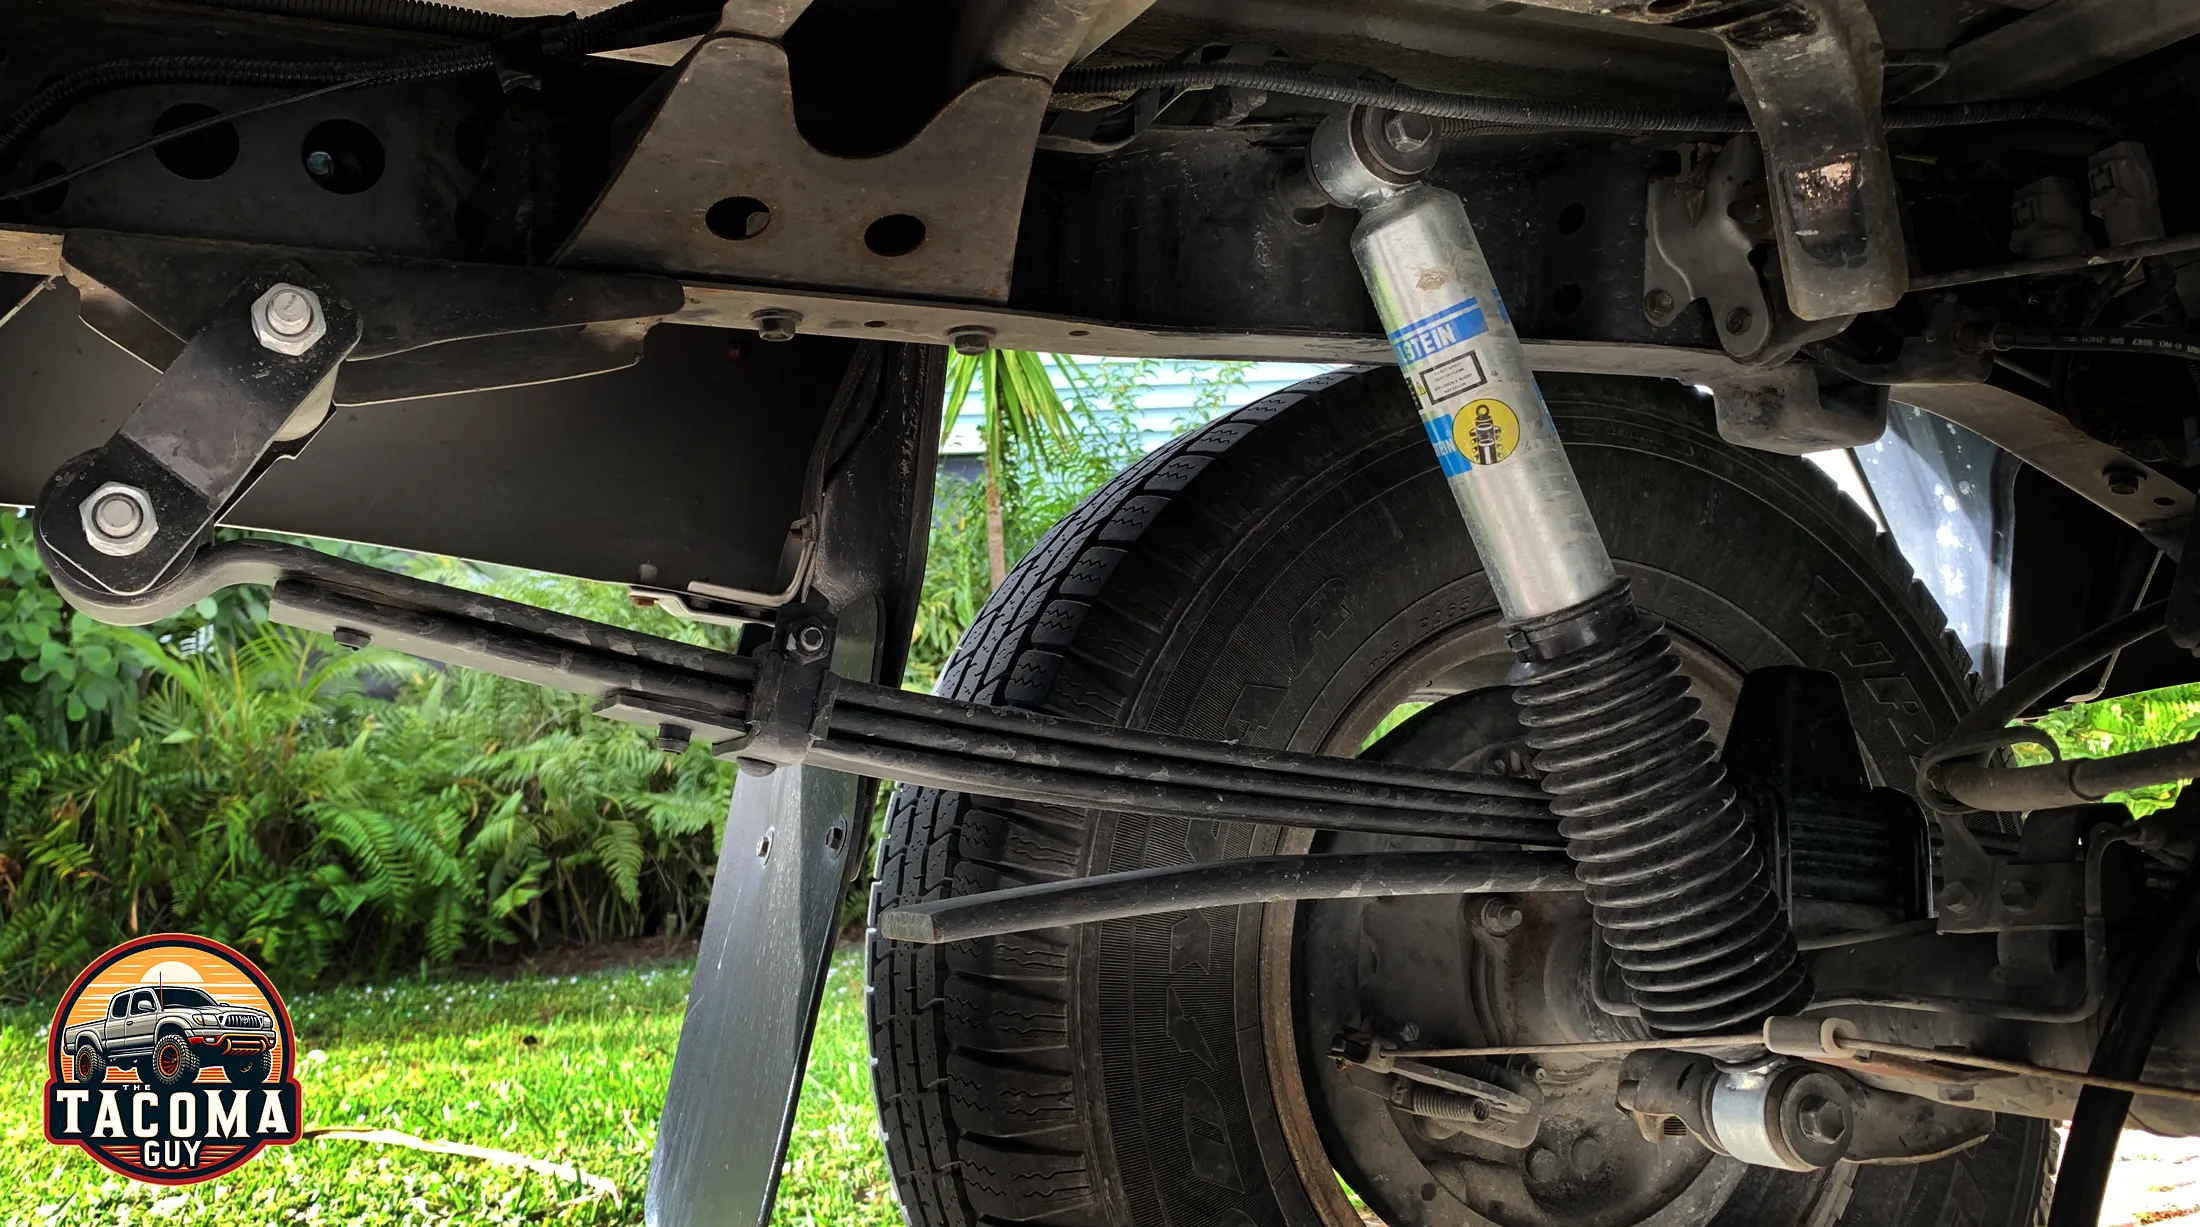
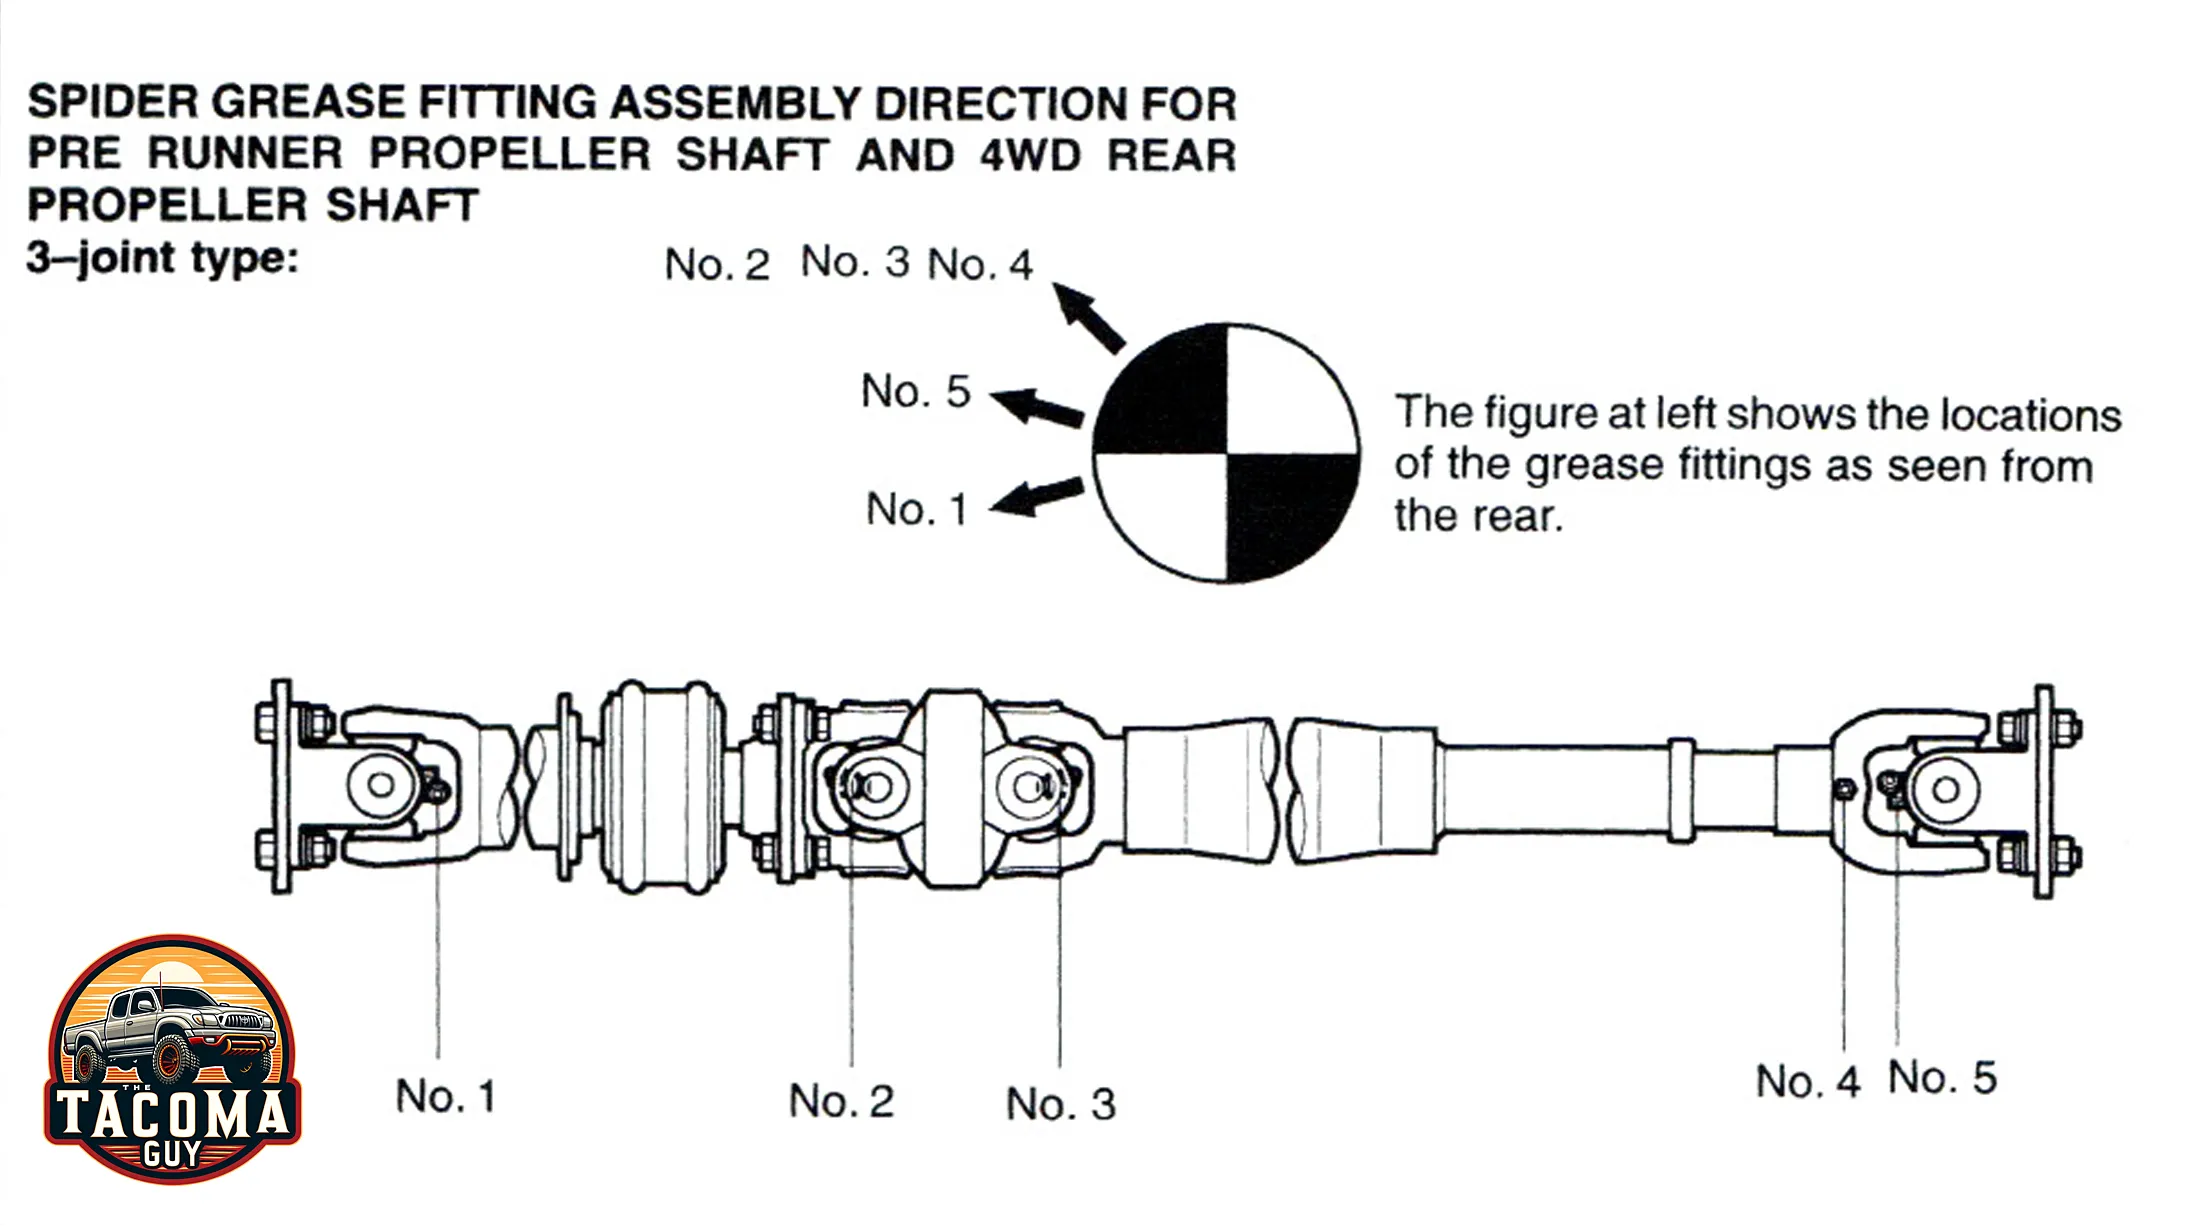
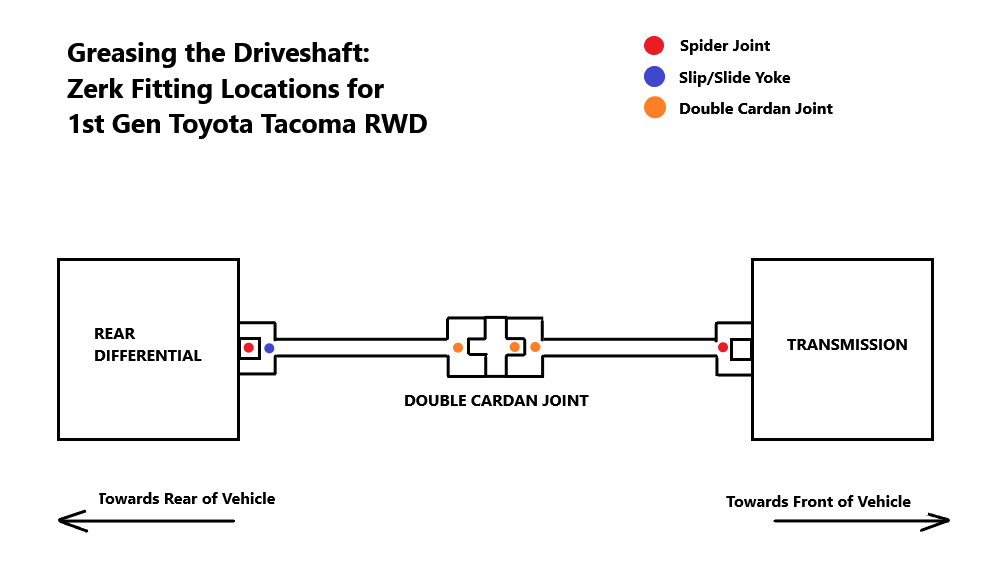
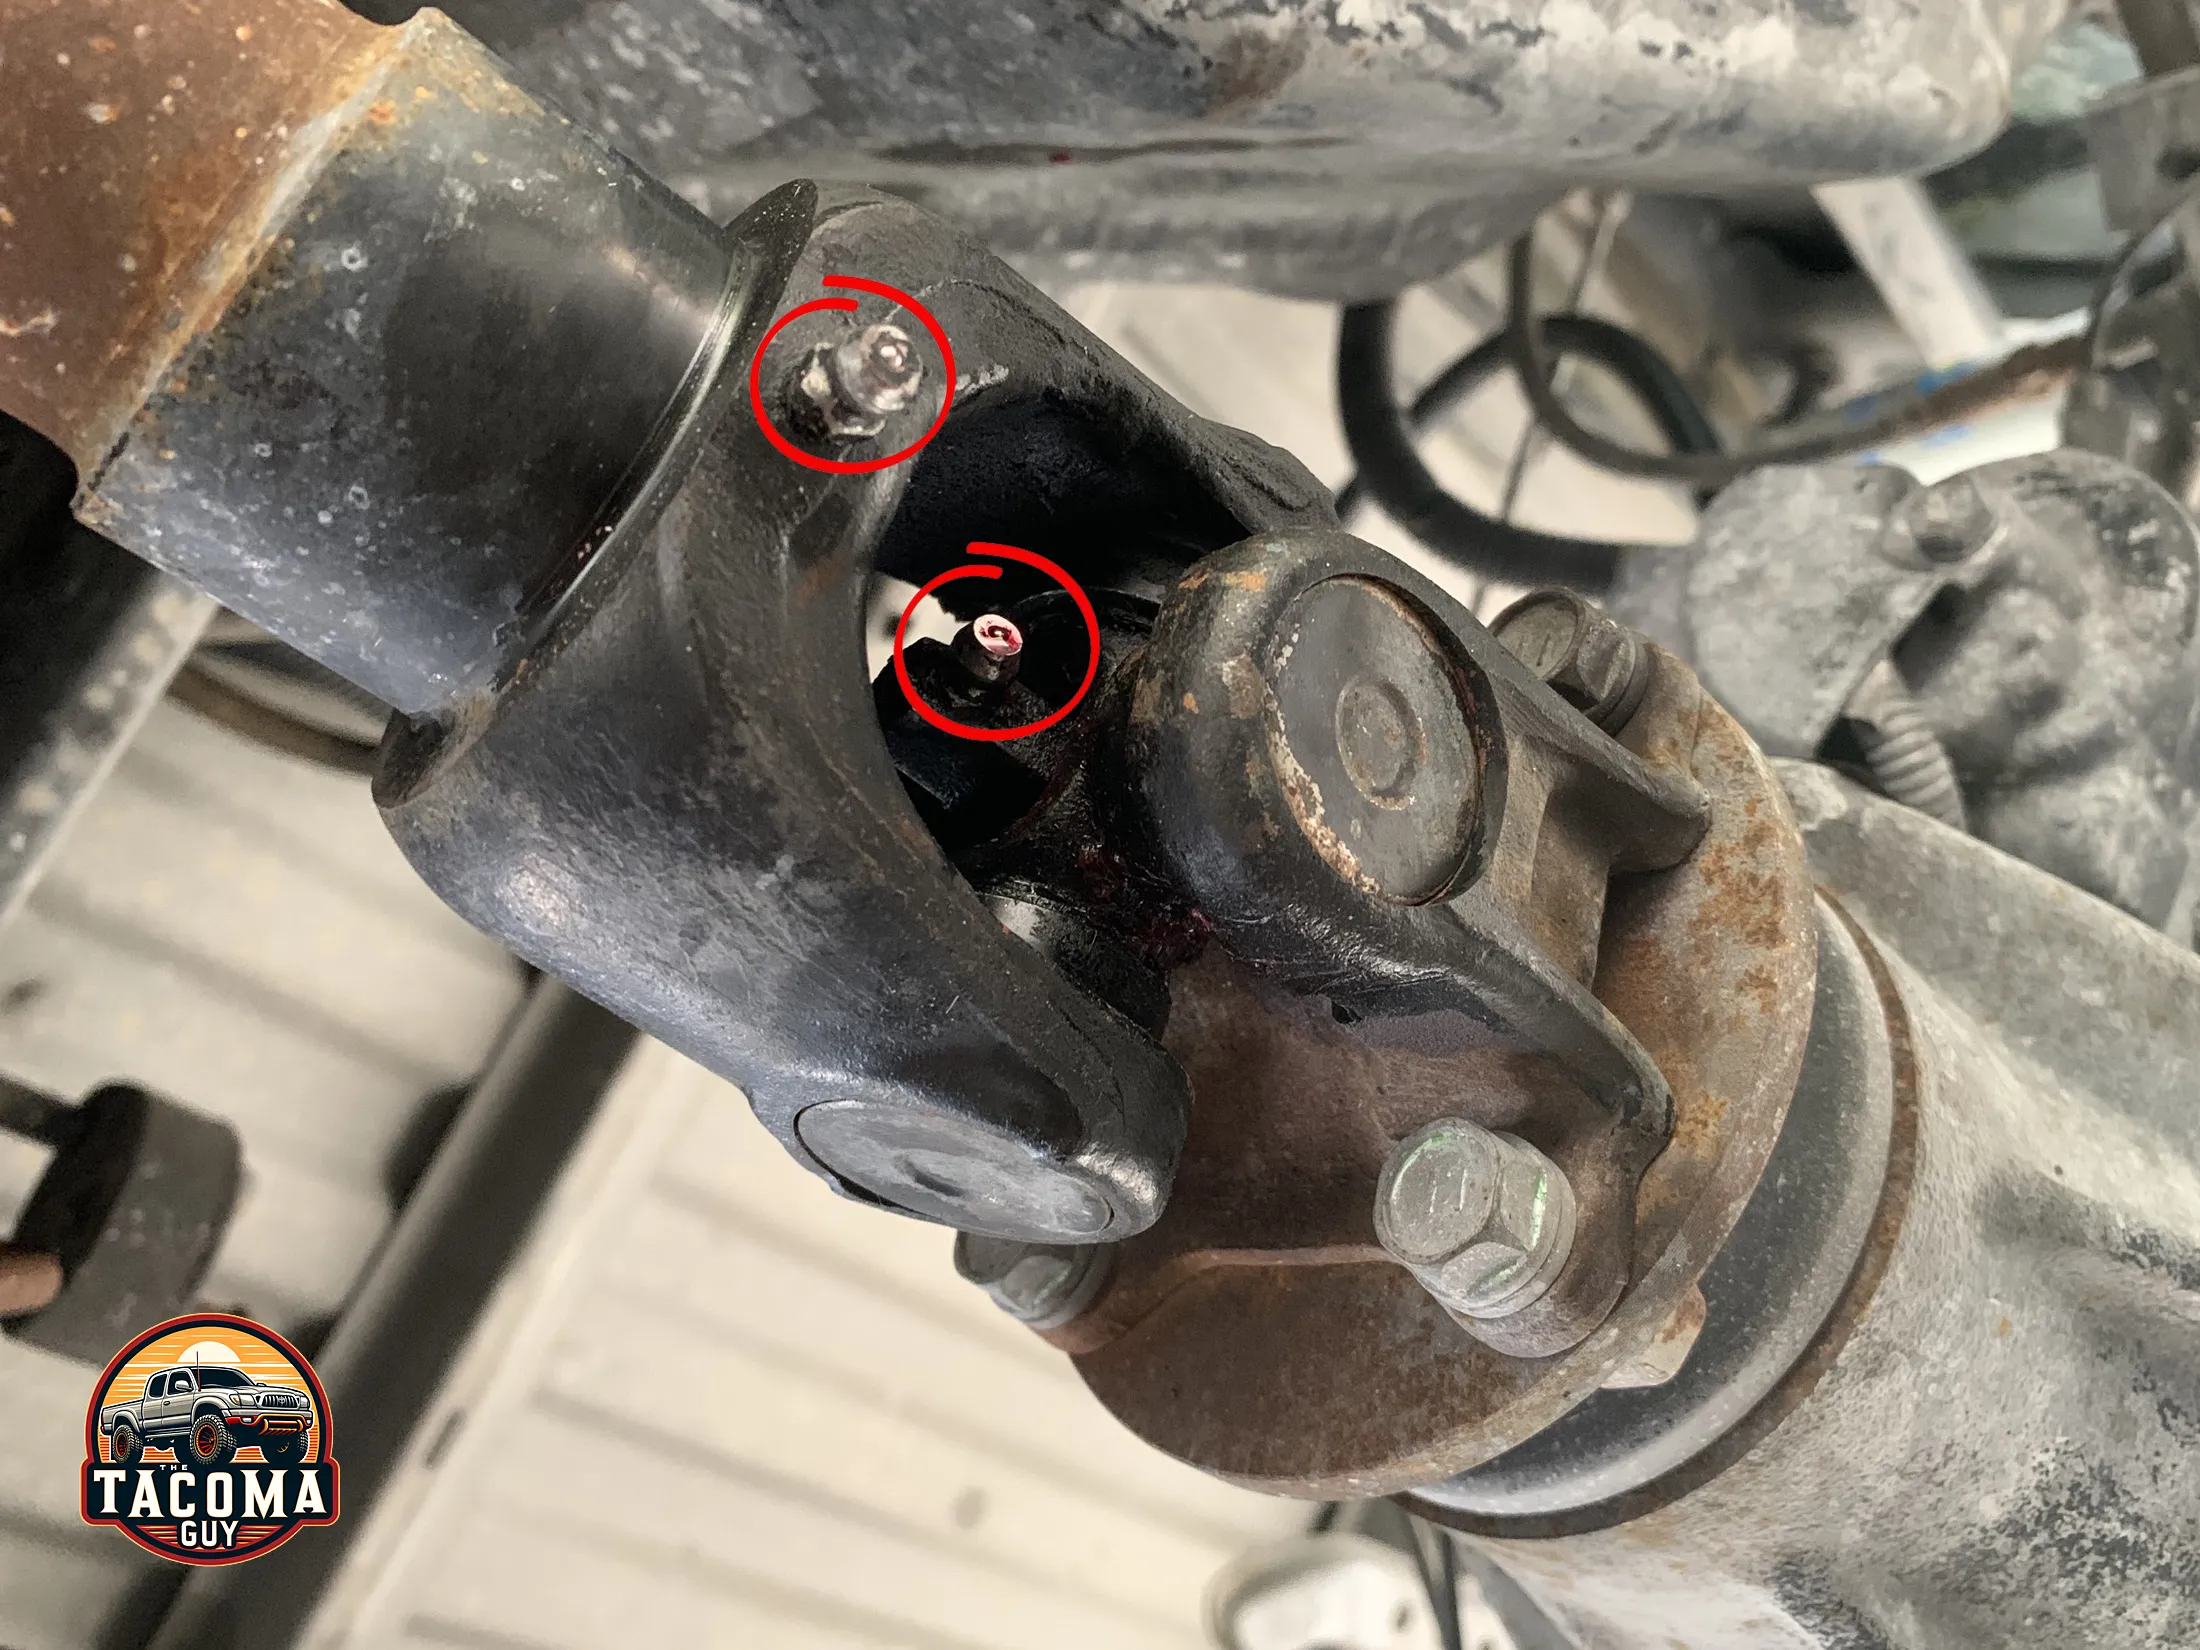
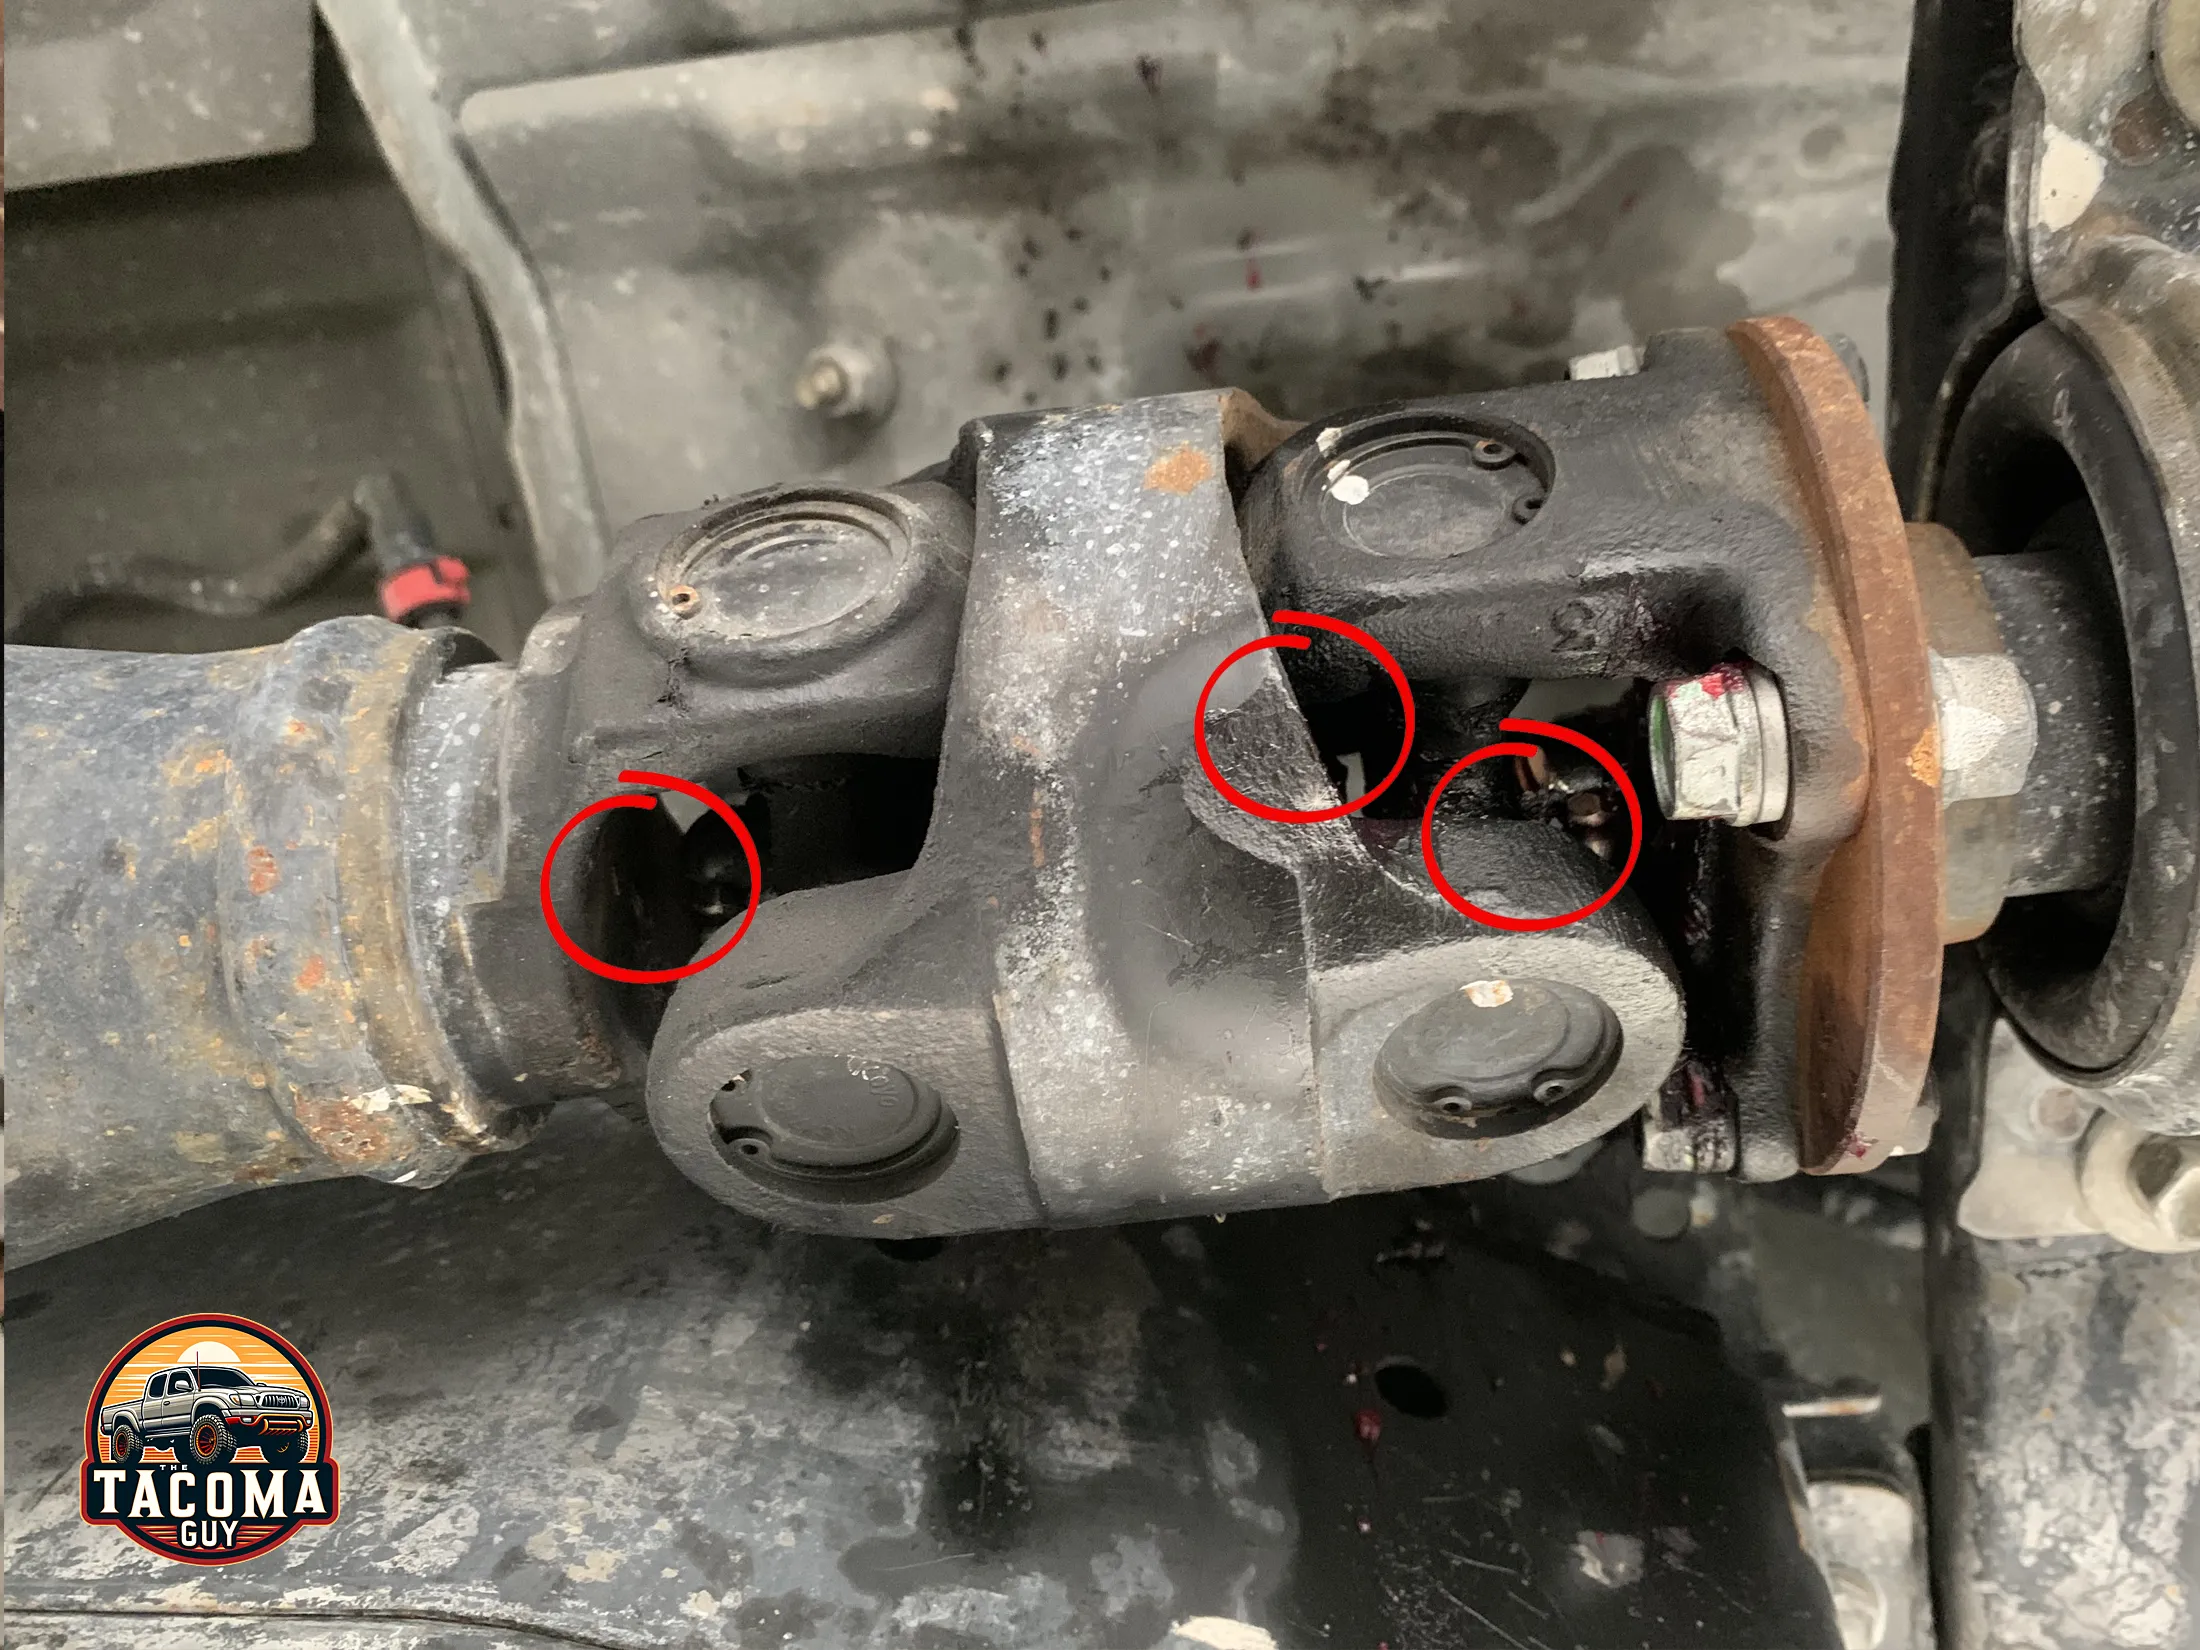
Step 2: Locate the Grease Fittings
- Find the Fittings: Inspect the driveshaft and universal joints (U-joints) for grease fittings (also known as Zerk fittings). These are small, nipple-like protrusions where the grease gun attaches.
- 4WD Owners: you have 2 drive shafts, obviously. Your front drive shaft should have 3 more zerks on there. Grease them up!
Step 3: Clean the Fittings
- Wipe the Fittings: Use a clean rag to wipe any dirt or debris off the grease fittings. This prevents contaminants from entering the bearings.
- What I like to do is spray the bearings down with Formula 88 Cleaner & Degreaser a few times in the days before I plan on greasing, as to allow for a little better clean.
Step 4: Grease the Fittings
- Attach the Grease Gun: Firmly press the nozzle of the grease gun onto the first grease fitting.
- Pump the Grease: Gently pump the grease gun until you see old grease being displaced or until you feel a slight resistance. Avoid over-greasing as this can cause seal damage. You may also hear a noise the old grease makes as it gets pushed out.
- Repeat for Each Fitting: Move to each grease fitting along the driveshaft and U-joints, repeating the greasing process.
- IMPORTANT NOTE: For the Slip/Slide Yoke you only want to pump in grease a few times. You won’t see or hear grease come out of this part so it’s easy to over do it. Just give it 2-3 pumps and call it a day.
Step 5: Check for Excess Grease
- Inspect for Leaks: After greasing, check for any signs of excess grease that may have been forced out of seals or boots. Clean off any excess grease with a rag. I like to hit the area again with Formula 88 Cleaner & Degreaser a few days later, and around the areas where the grease has been flung about.
Step 6: Lower the Vehicle
- Carefully Lower: If you used a jack, carefully lower the vehicle back to the ground and remove the wheel chocks.
Step 7: Test Drive
- Test Drive: Take your vehicle for a short drive to help distribute the grease evenly within the fittings. Listen for any unusual noises that could indicate a problem.
Additional Tips
- Frequency: Check your owner’s manual for the recommended greasing intervals. Regular maintenance is key. I do it every time I get an oil change.
- Right Grease: Make sure to use the correct type of grease as specified for your vehicle.
- Safety Measures: Always wear safety glasses and gloves to protect yourself.
- Dispose Properly: Dispose of used rags and any excess grease in accordance with local environmental regulations.