Replacing the front brake pads and rotors on a Gen 1 Toyota Tacoma or Gen 3 4Runner is pretty easy to do and doesn’t require any special tools or knowledge, so as long as you follow basic safety protocols you should give it a go!
Changing the pads by themselves is really easy, but ideally you’d change the rotors as well since you already have the whole thing apart anyway.
Affiliate notice: The Tacoma Guy is an Amazon Affiliate. That means we get a small percentage from them if you use the links to purchase the product. It doesn’t increase your cost! If you found this tutorial helpful, please consider using these links to help support this mom & pop business, thank you!
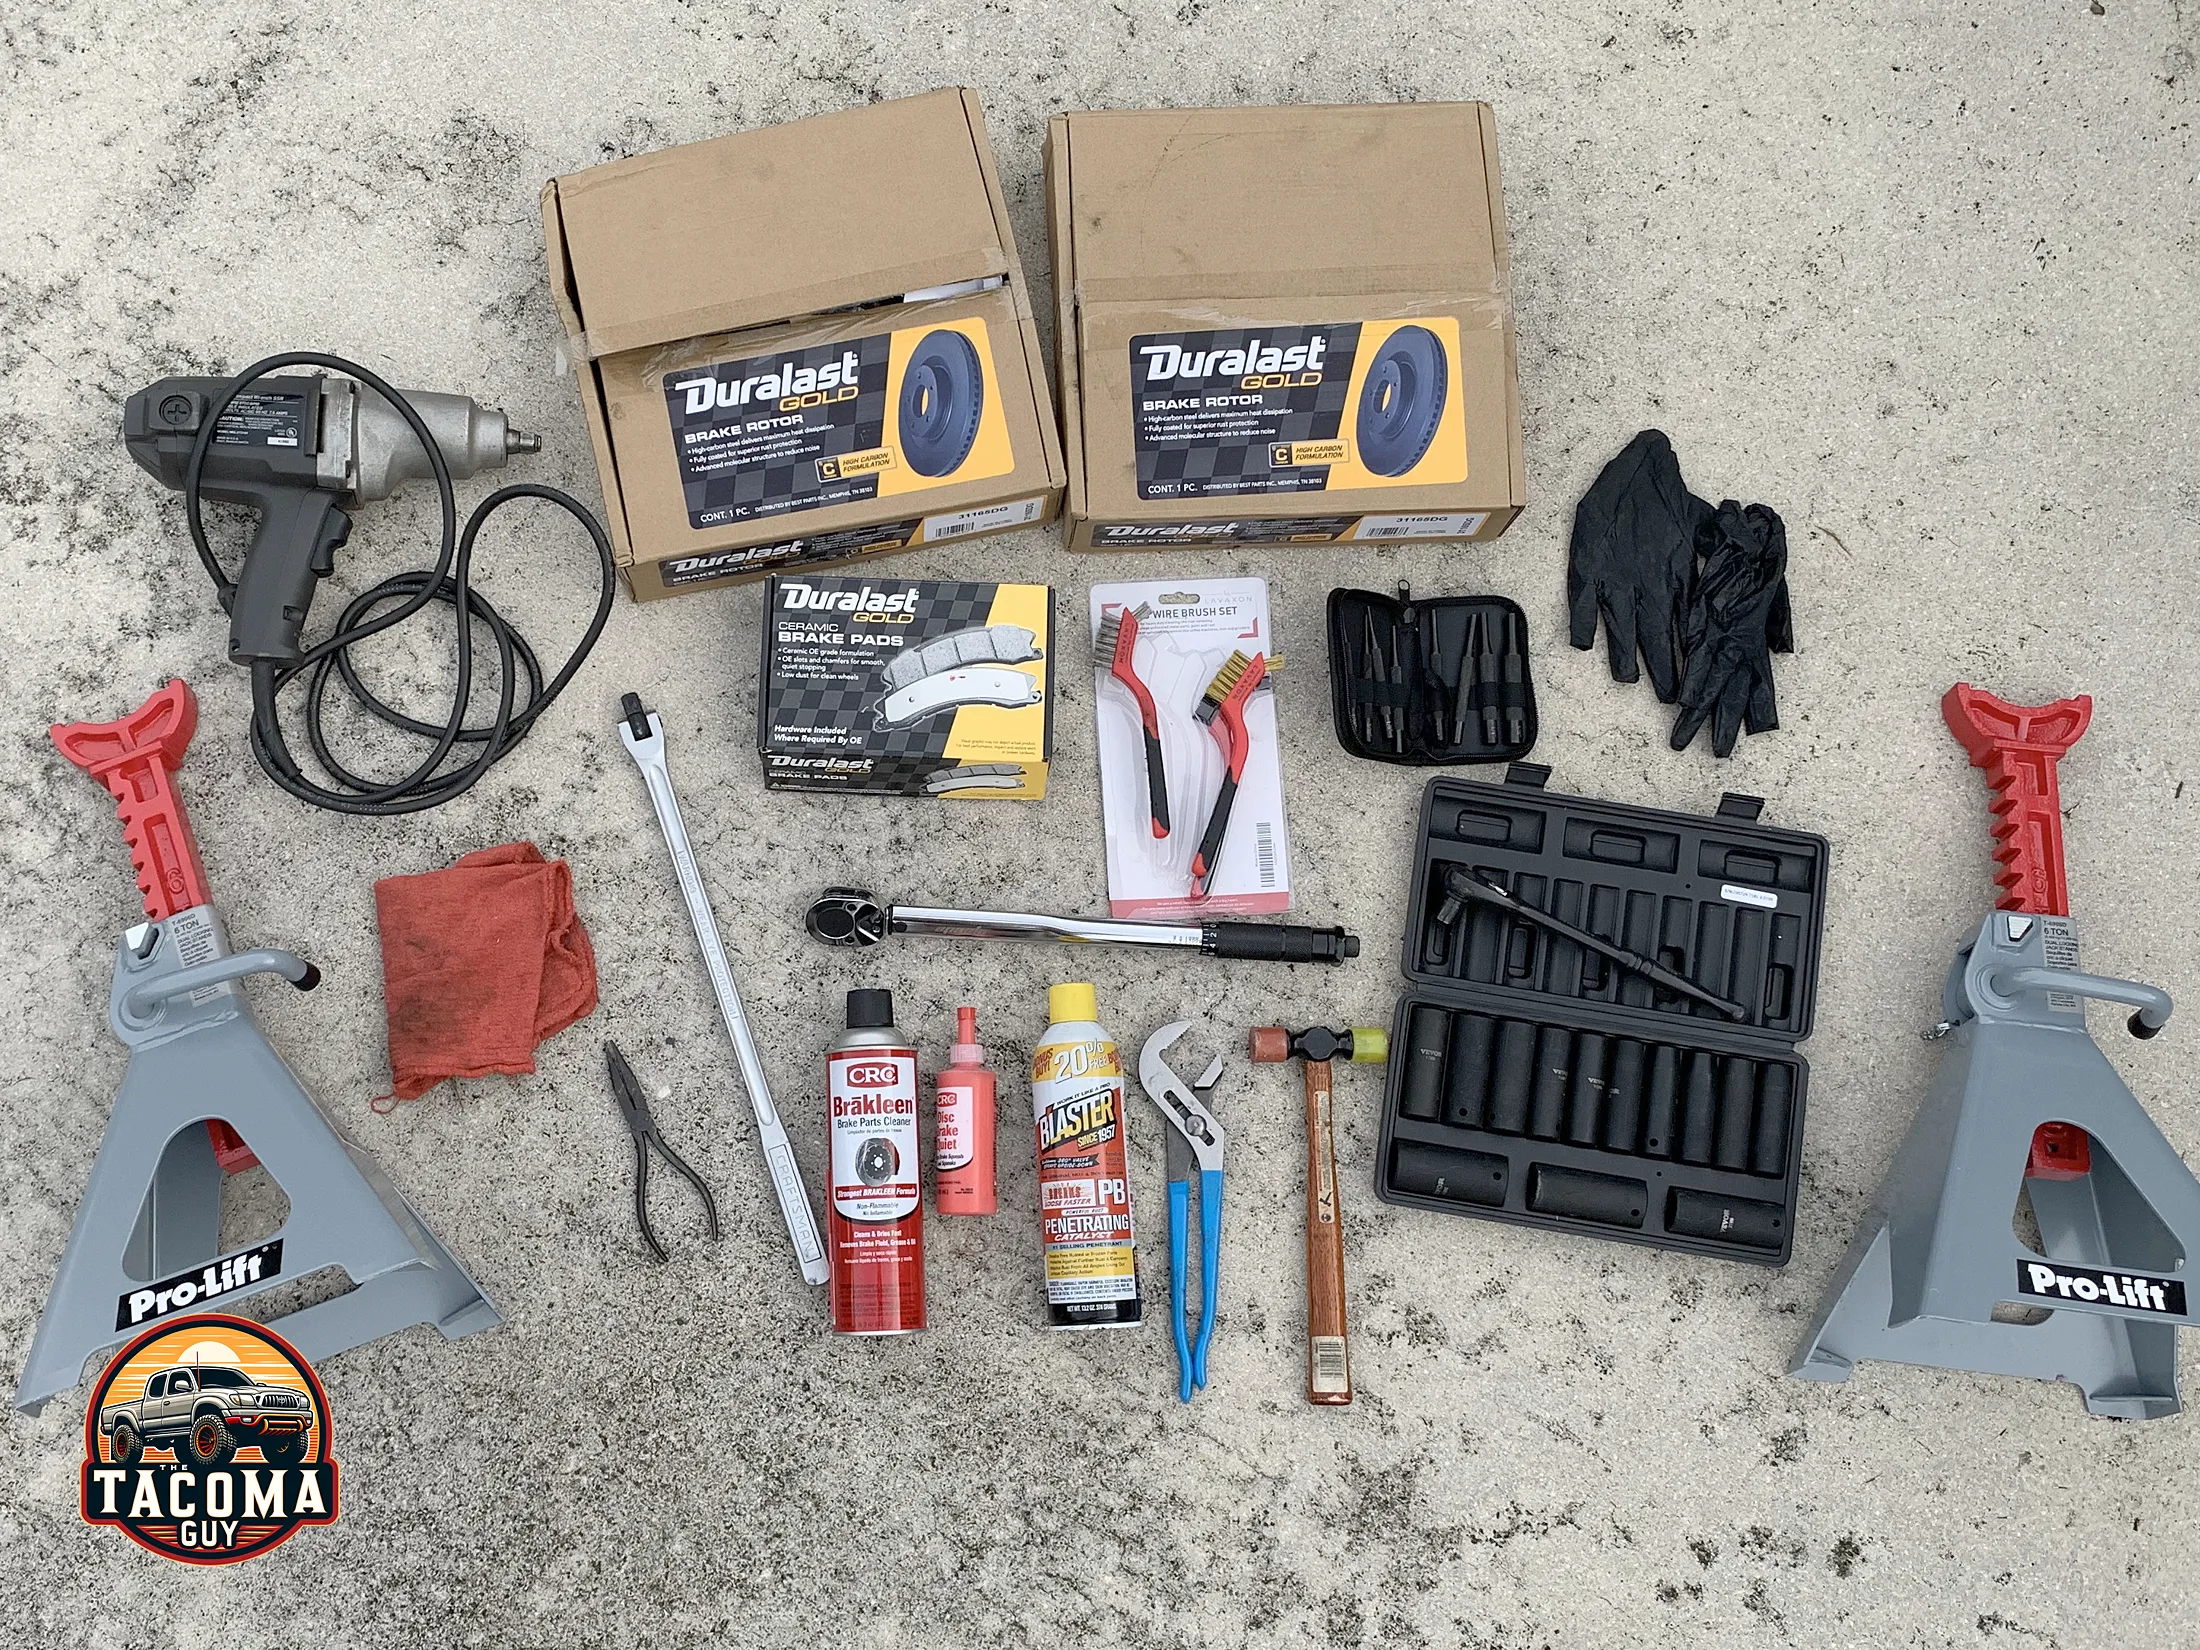
Tools Required:
- Lug Wrench: To remove the wheels w/ 21mm socket. Or use a breaker bar.
- Jack and 6 Ton Jack Stands: To lift and support the vehicle.
- Channel Lock Pliers: To retract the caliper piston.
- 1/2″ Ratchet and Socket Set: For various nuts and bolts.
- 1/2″ Breaker Bar: To get the stuck bolts off.
- PB Blaster: Penetrating catalyst for seized bolt removal.
- Torque Wrench: 1/2″ To tighten the lug nuts and caliper bolts to the specific torque requirement.
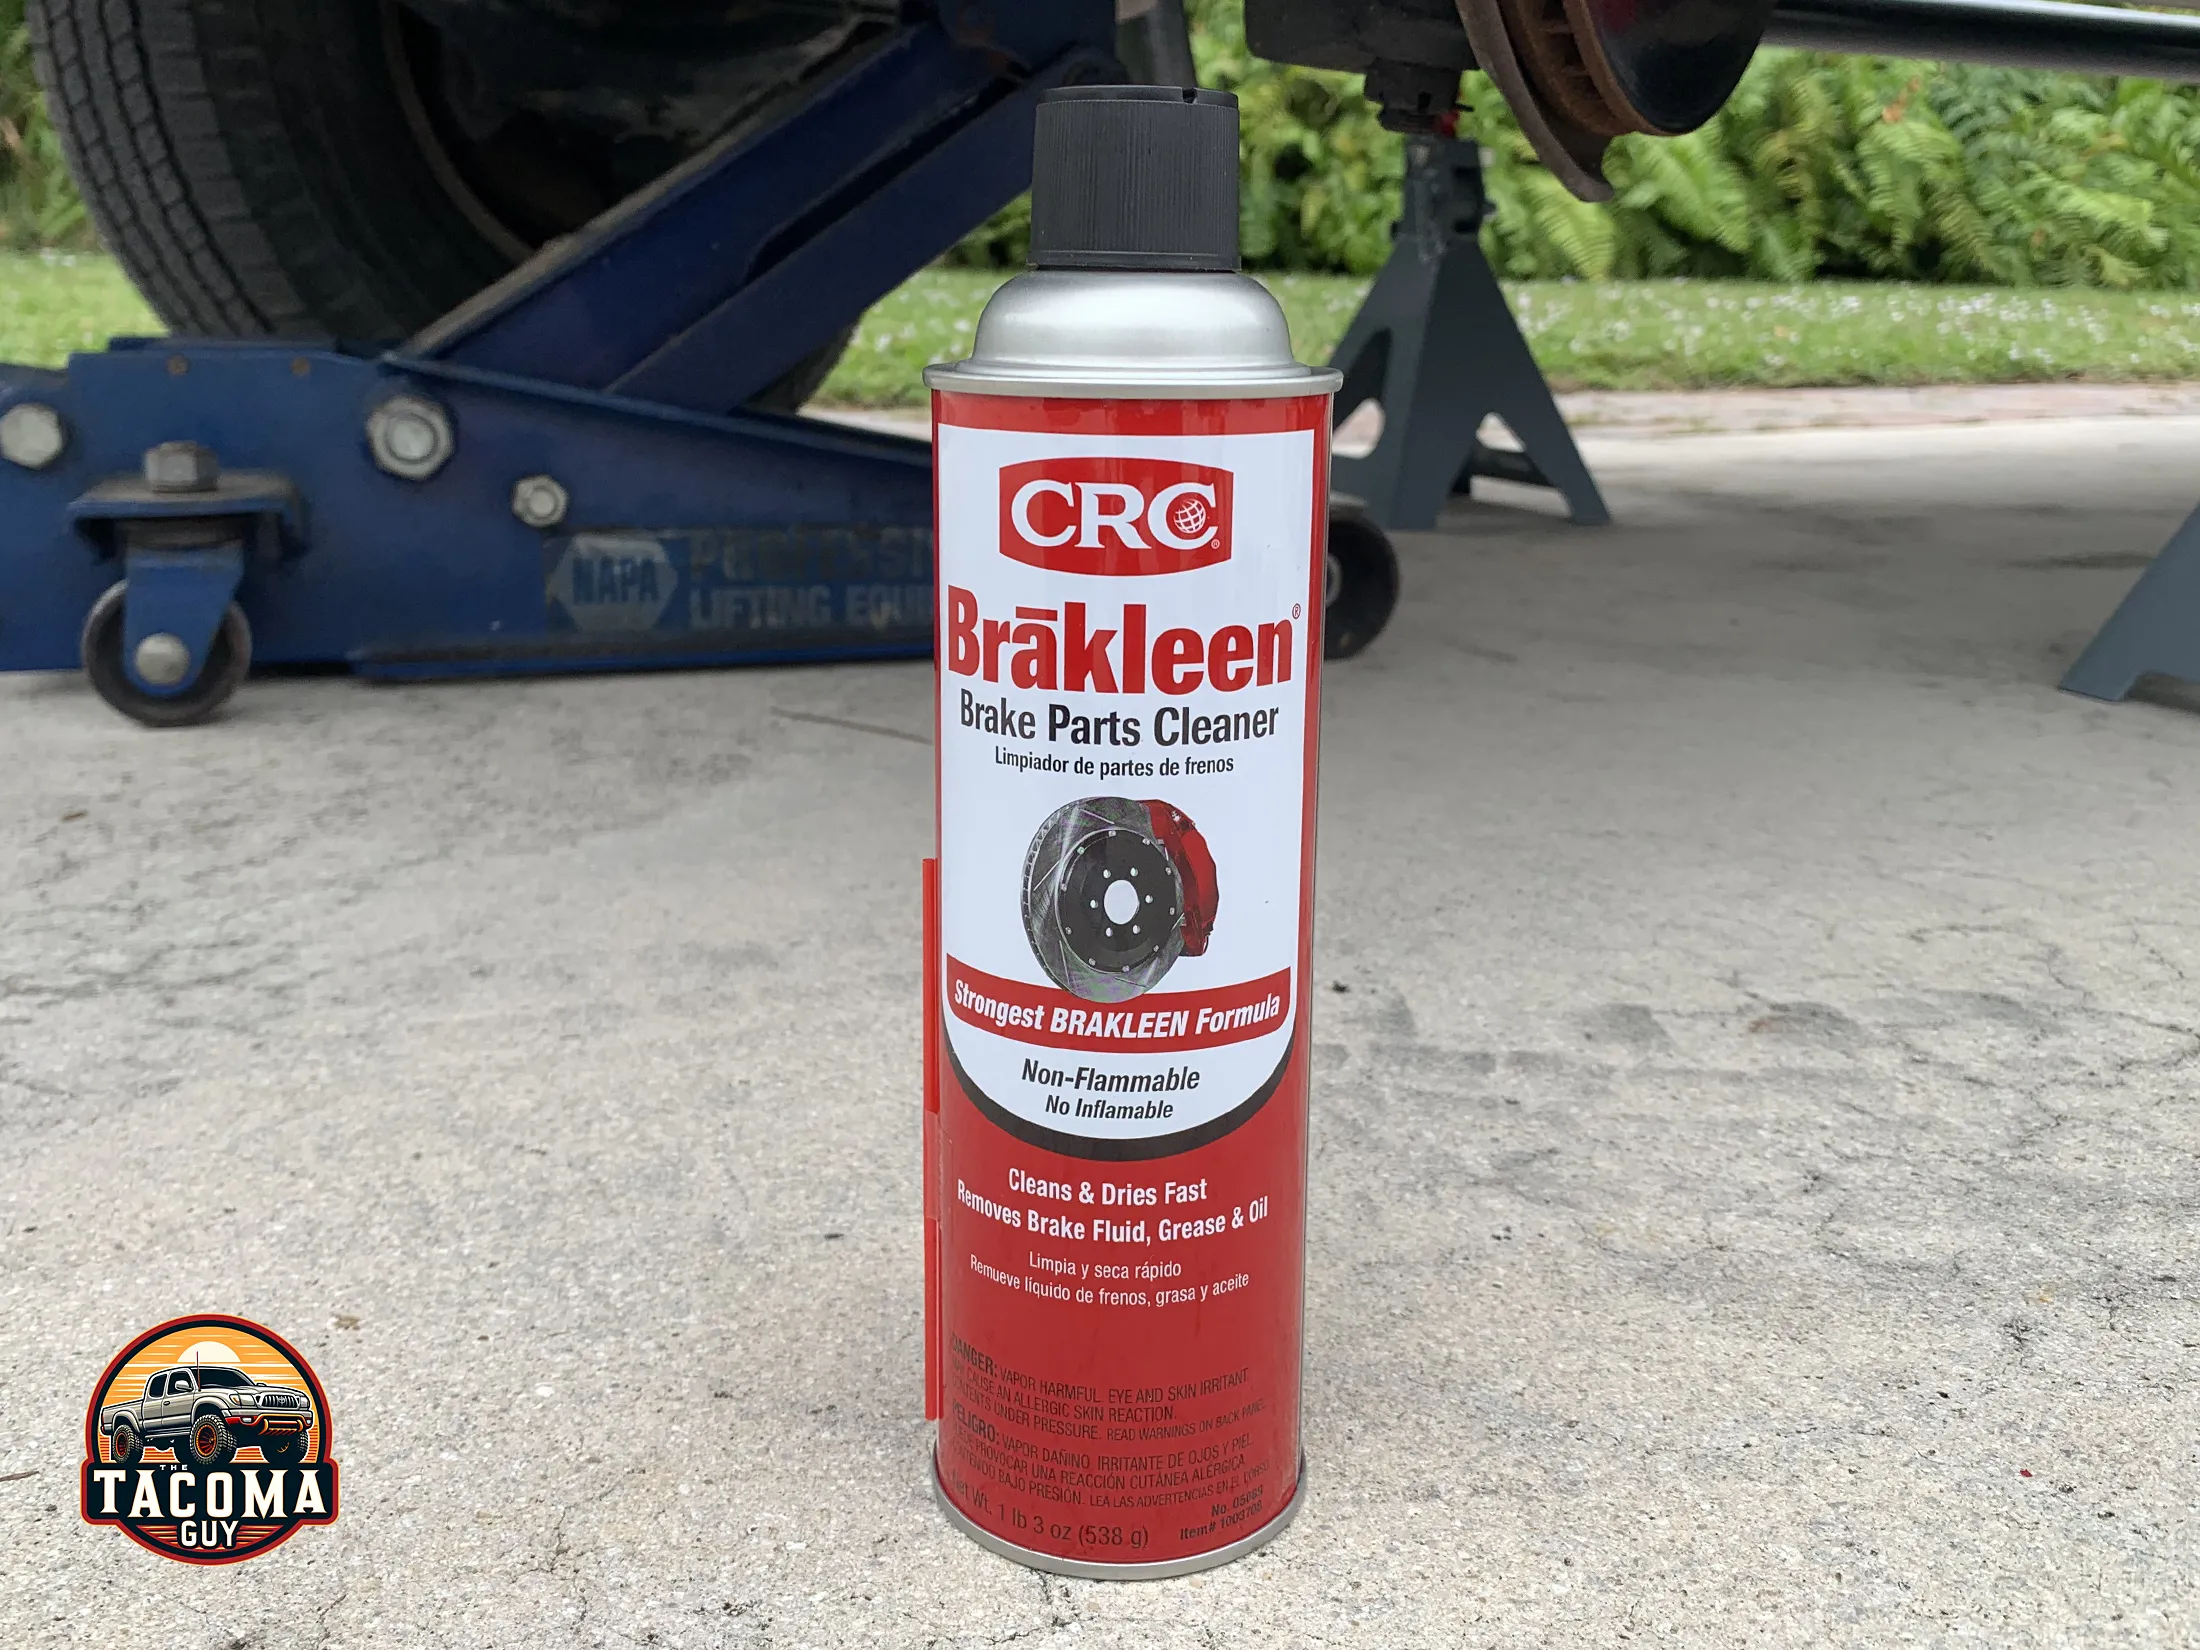
- Brake Cleaner: To clean the brake assembly.
- New Brake Pads and Rotors: Specific to your 2004 Toyota Tacoma.
- Disc Brake Quiet: Keeps your brakes from squealing.
- Mechanic Gloves and Safety Glasses: For personal protection.
- Wire Brush: To clean the caliper pins and bracket.
- Drain Pan: To collect the spray runoff from the Brake Cleaner.
- Shop Towels: To clean the rotor and any mess you make w/ overspray.
- Bungee Cord or Wire: To support the caliper during work.
- Brake Fluid (optional): Check your fluid before and after. If you are low add some more DOT 3.
- Needle Nose Pliers: Helps remove the caliper pin retaining wire.
- Pin Punch Set: Helps remove the caliper guide pins.
- N95 Mask: Brake dust can be carcinogenic, don’t breath that crap in!
Video Walk-Through:
Check out our step-by-step video tutorial first to get an idea of the process, then you can read the guide below and print it out if you want.
Step-by-Step Guide:
Descriptive pictures below this guide!
Preparatory Work:
- Safety First: Park on a level surface, engage the parking brake, and place wheel chocks behind the rear wheels.
- Loosen the Lug Nuts: Use the lug wrench or breaker bar to slightly loosen the lug nuts on the front wheels before lifting the vehicle.
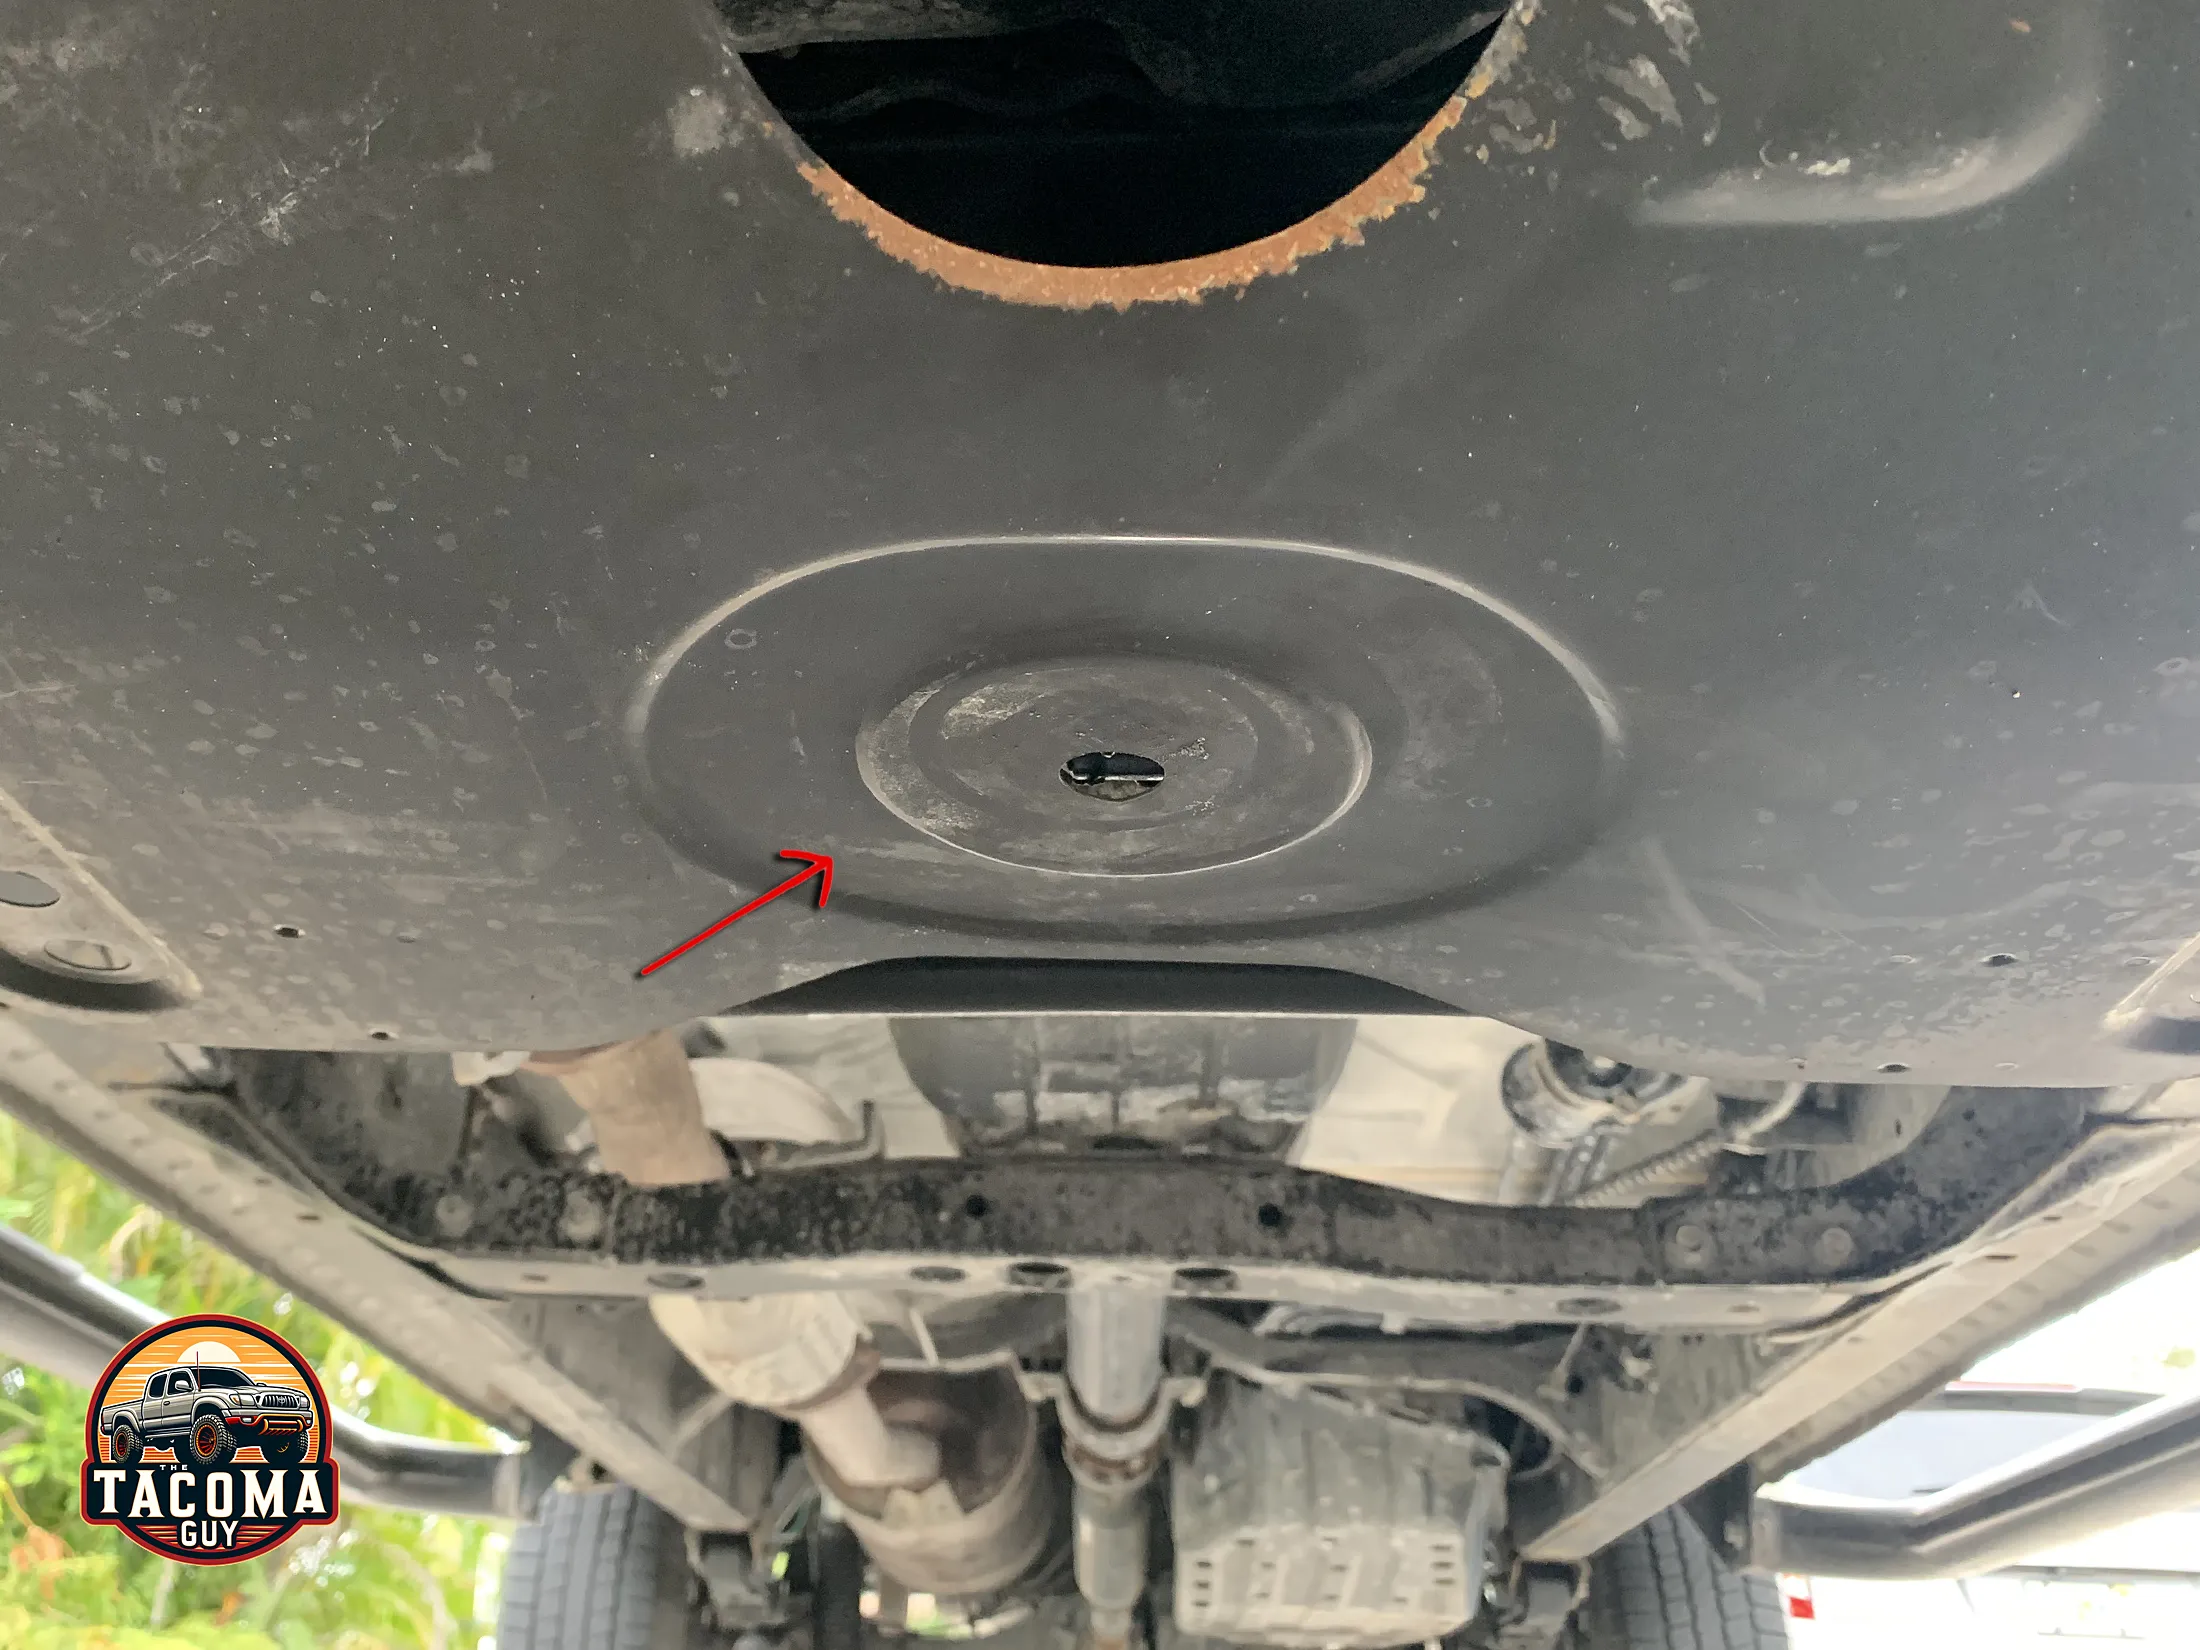
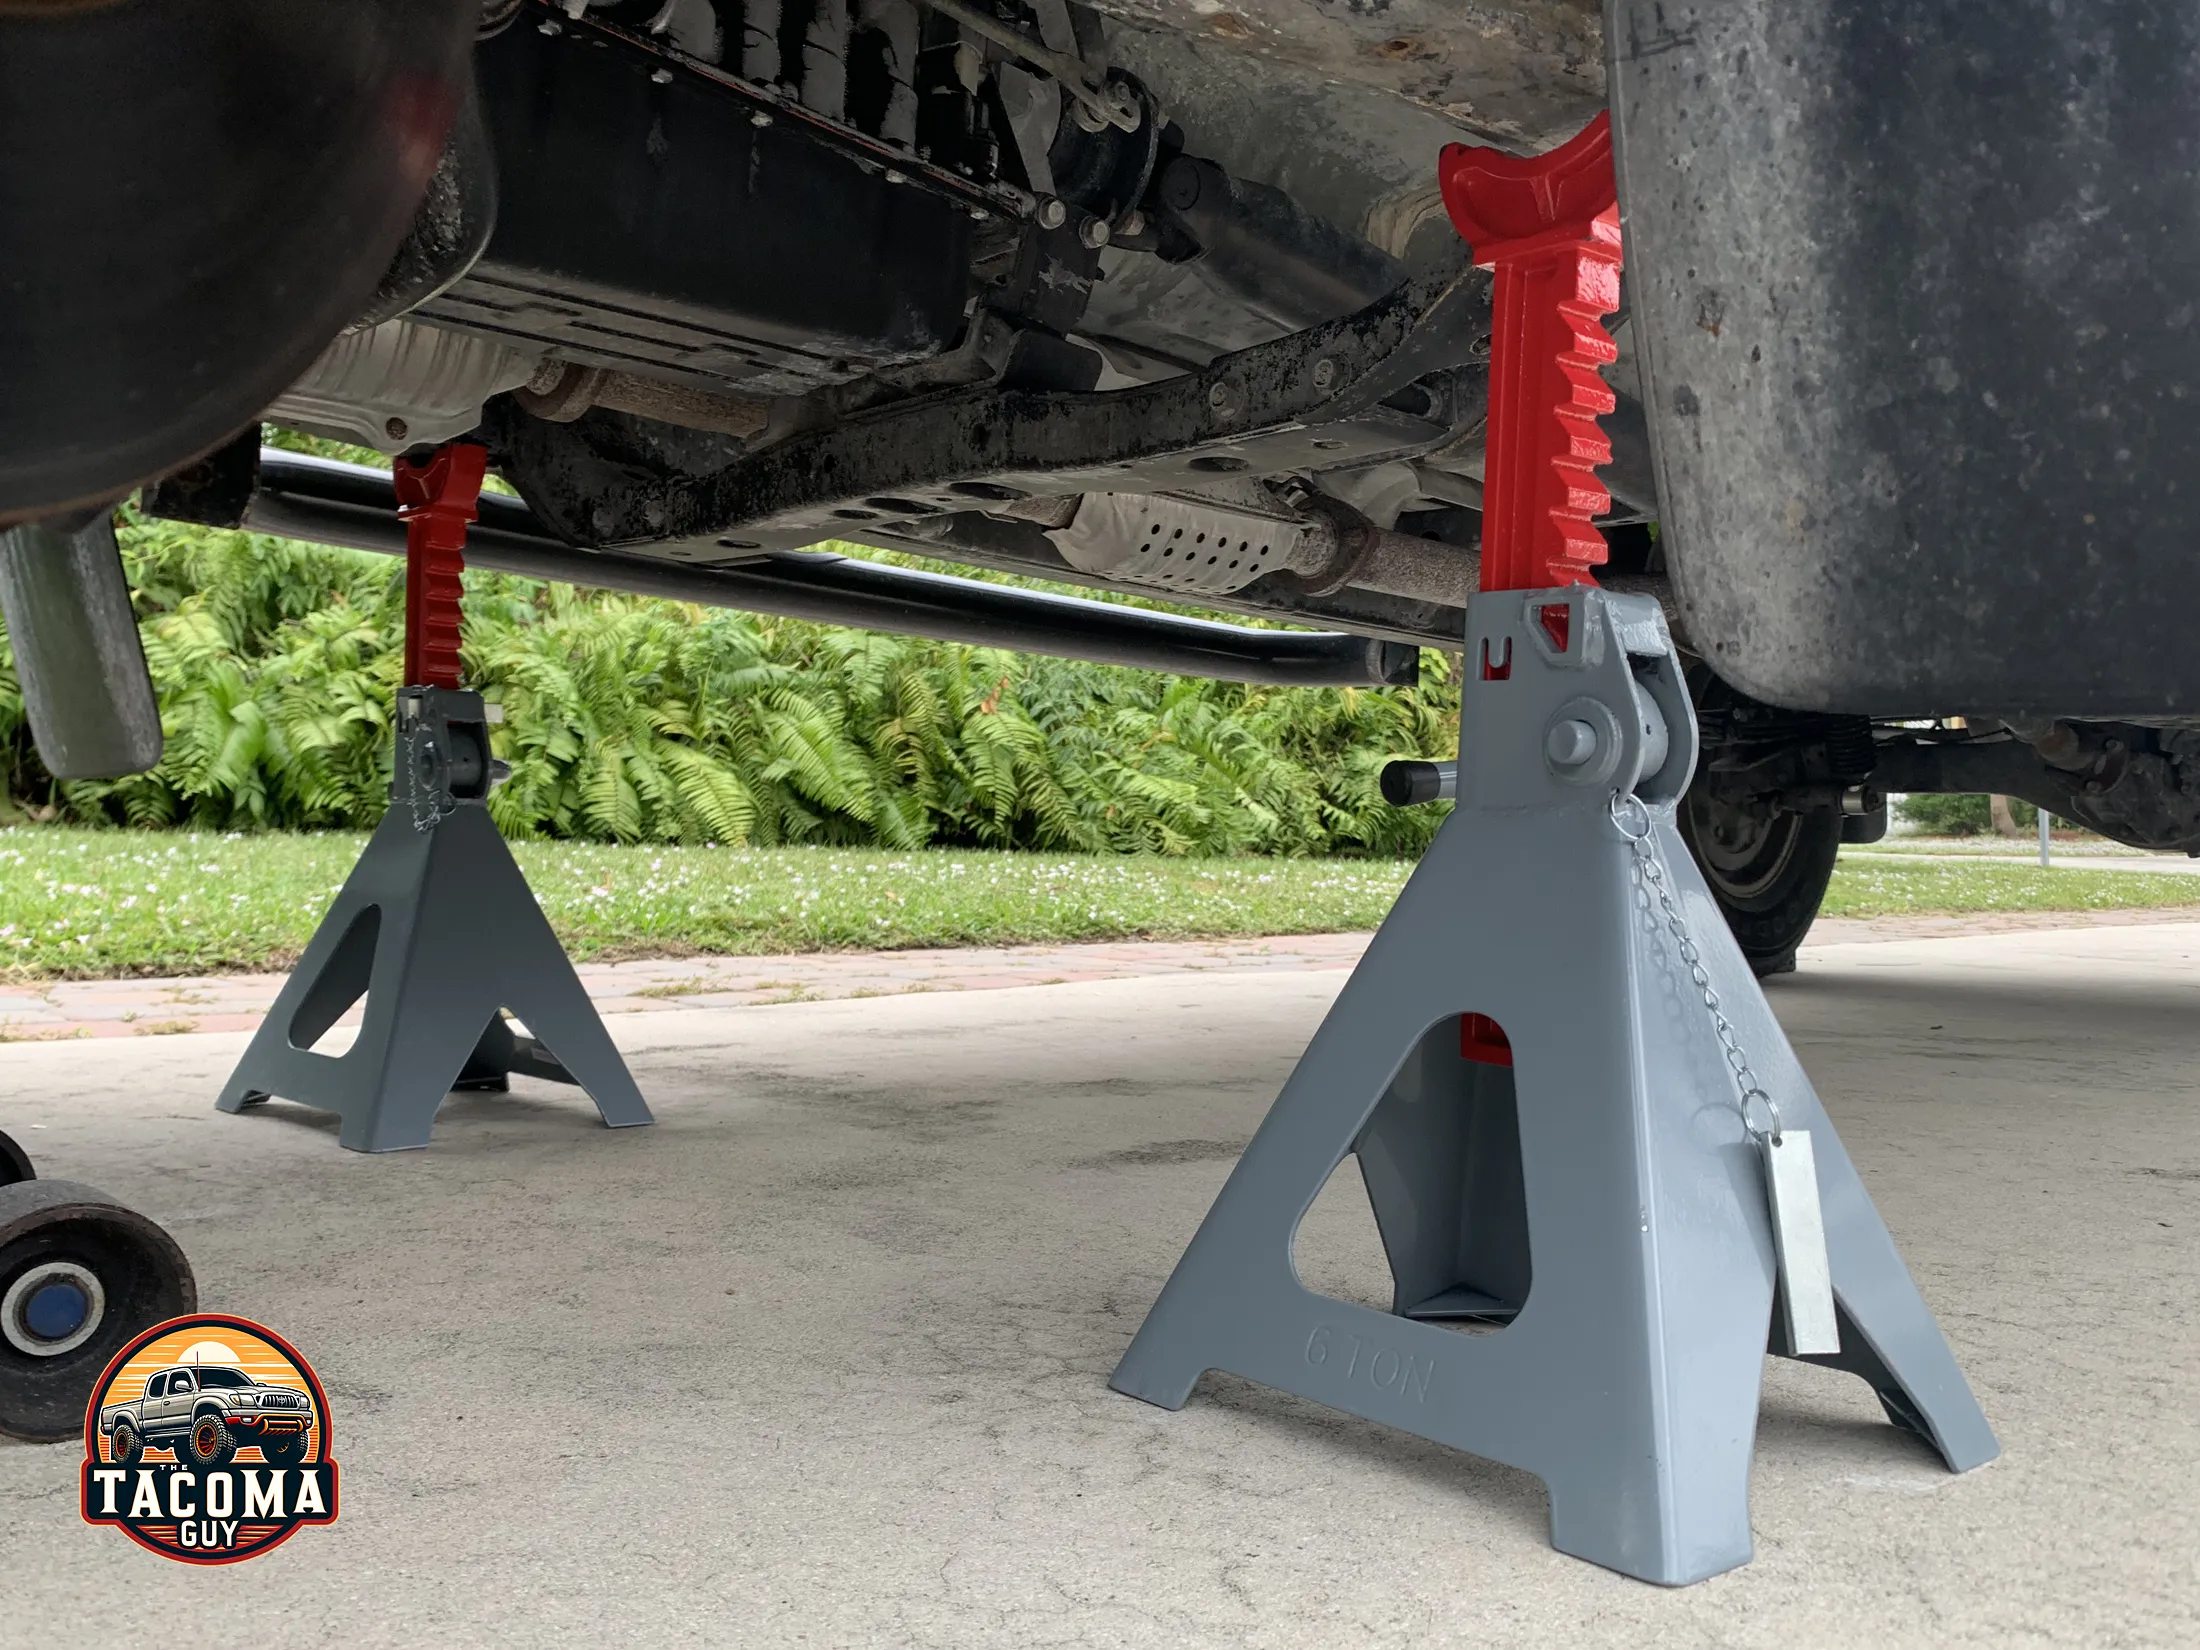
- Lift the Vehicle: Use the jack to lift the front of the Tacoma and then secure it with the 6 ton jack stands for safety. This tutorial will show you how to jack up your Toyota Tacoma, Tundra or 4Runner.
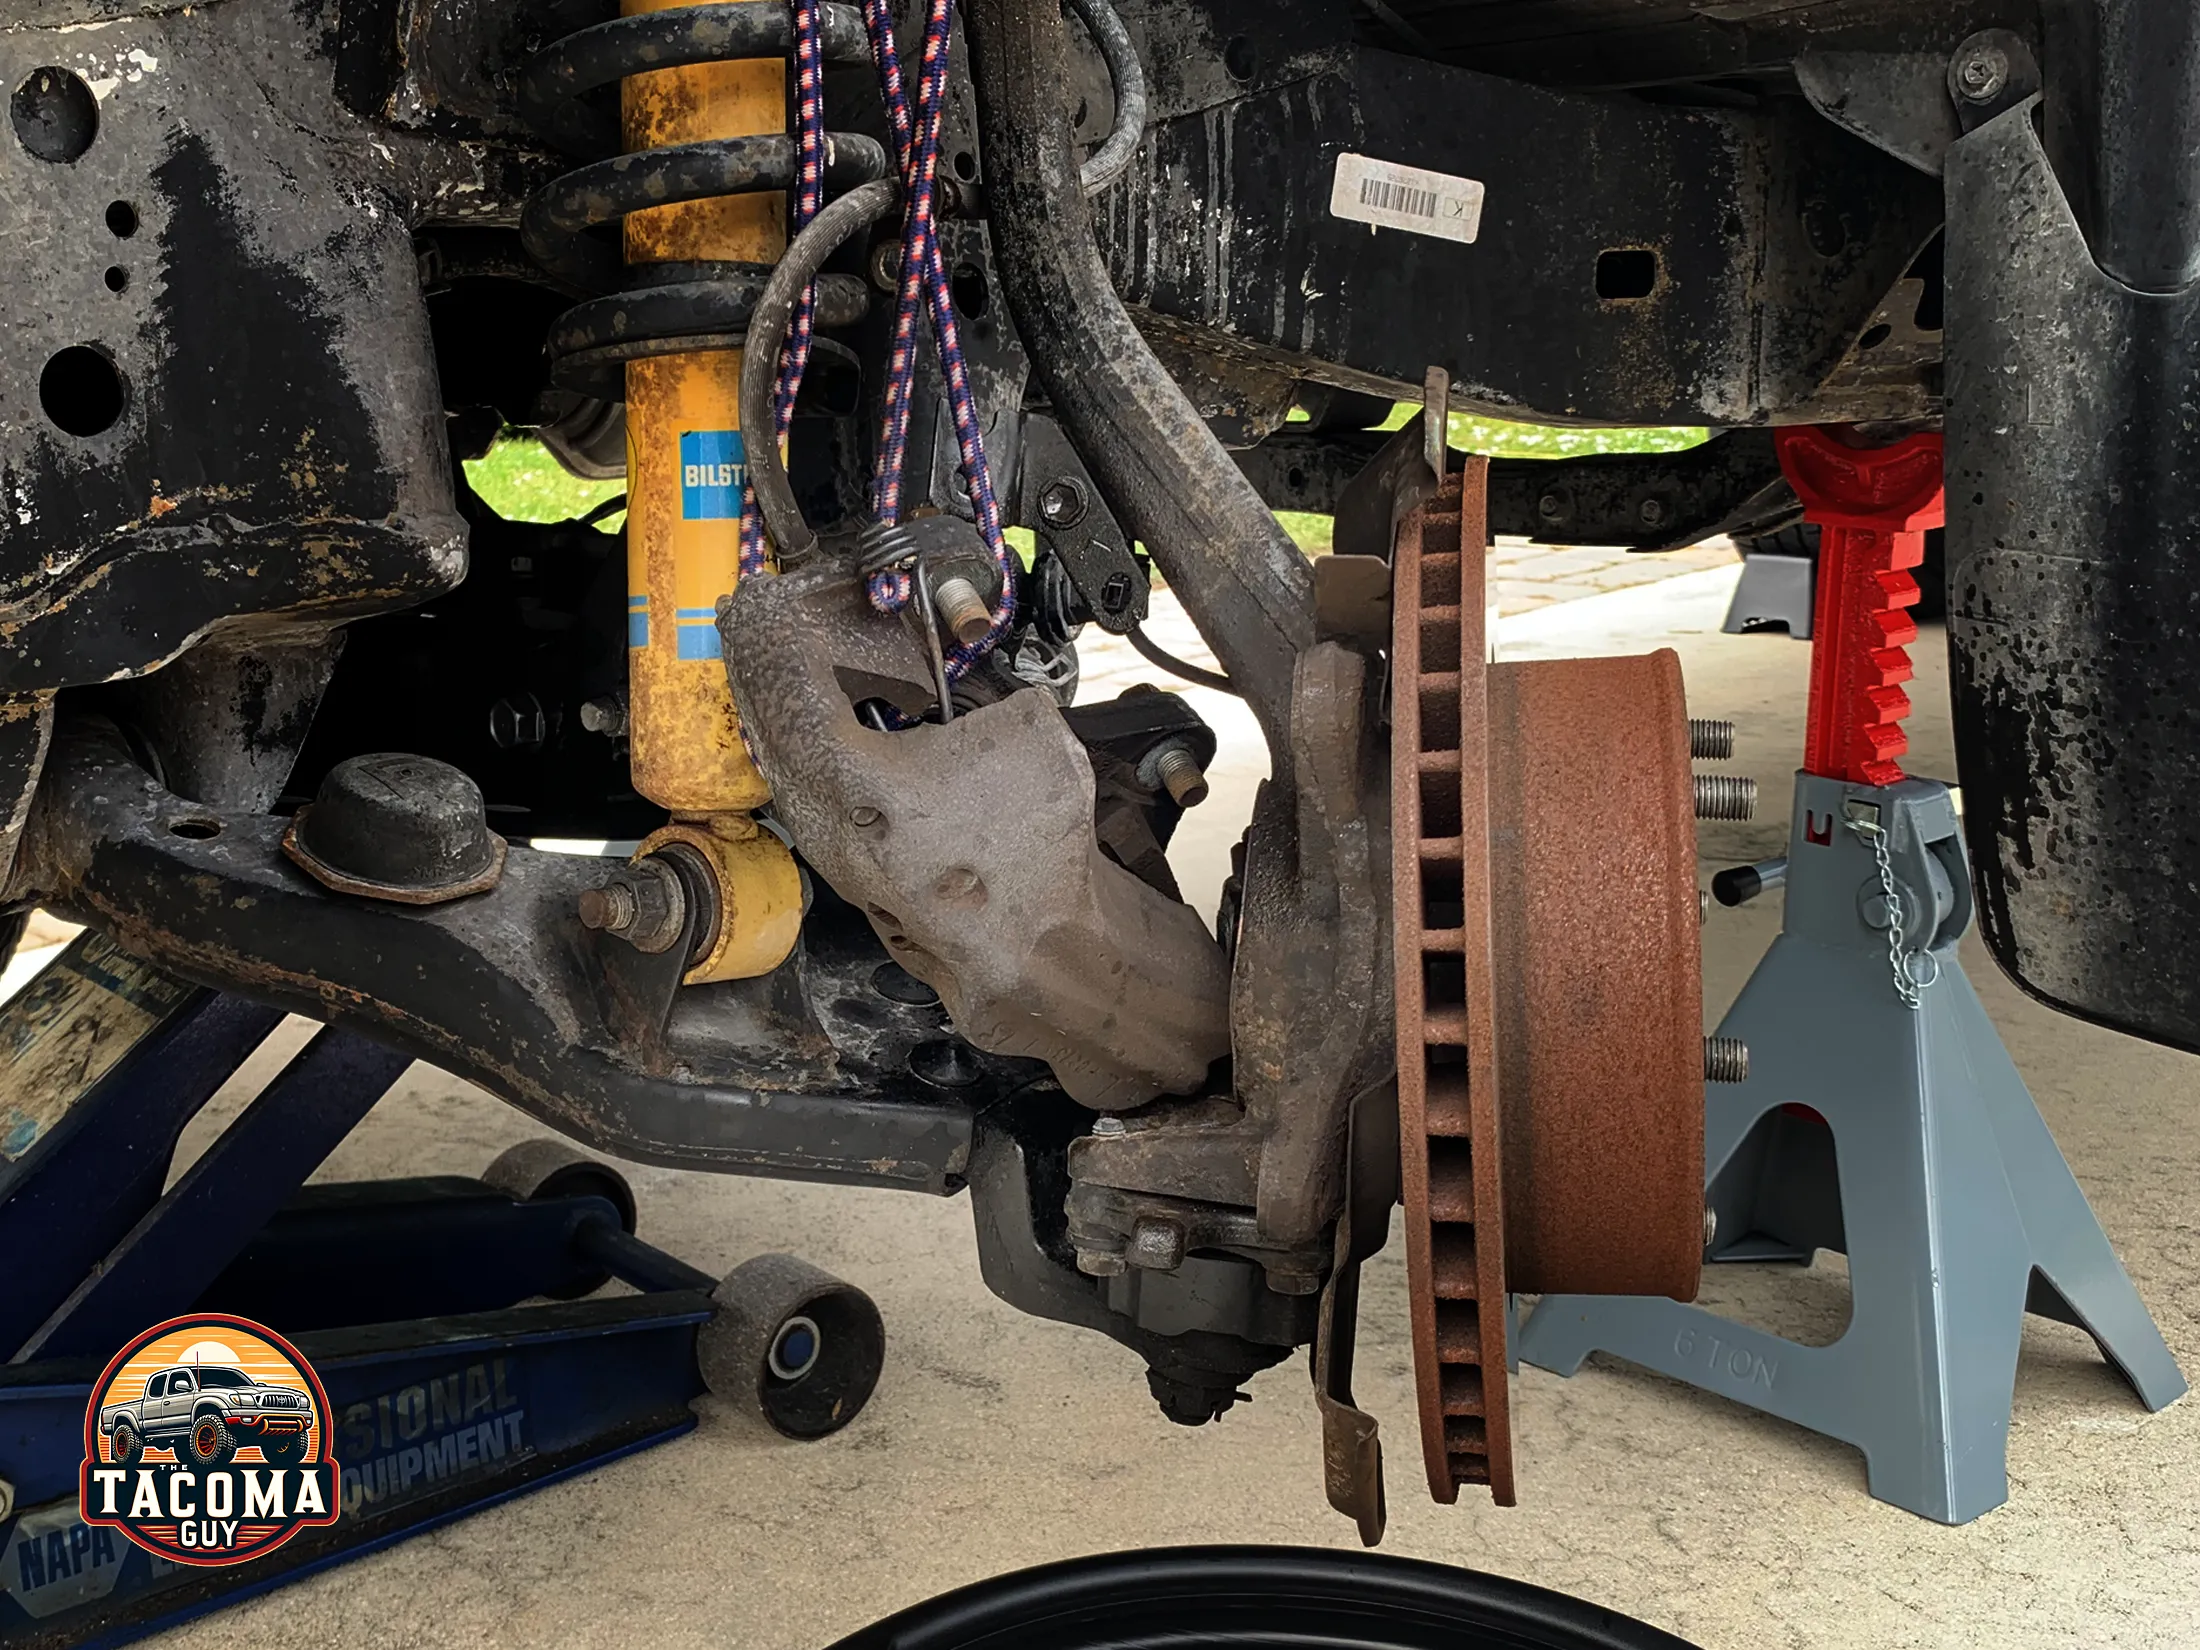
Removing the Old Brake Pads and Rotors:
- Remove the Wheels: Take off the front wheels to access the brake assembly. I like to turn the steering wheel out to make it easier to work on the caliper.
- Spray the Caliper with Brake Cleaner: Put your drip pan under the caliper and spray that puppy down. Give it a good soaking, don’t be shy. Let it dry for a moment then continue.
- Spray the Caliper Bolts: Get your PB Blaster and spray the two caliper bolts and the bolt that holds the brake line clip just above them. This will give it time to penetrate while you do the other work.
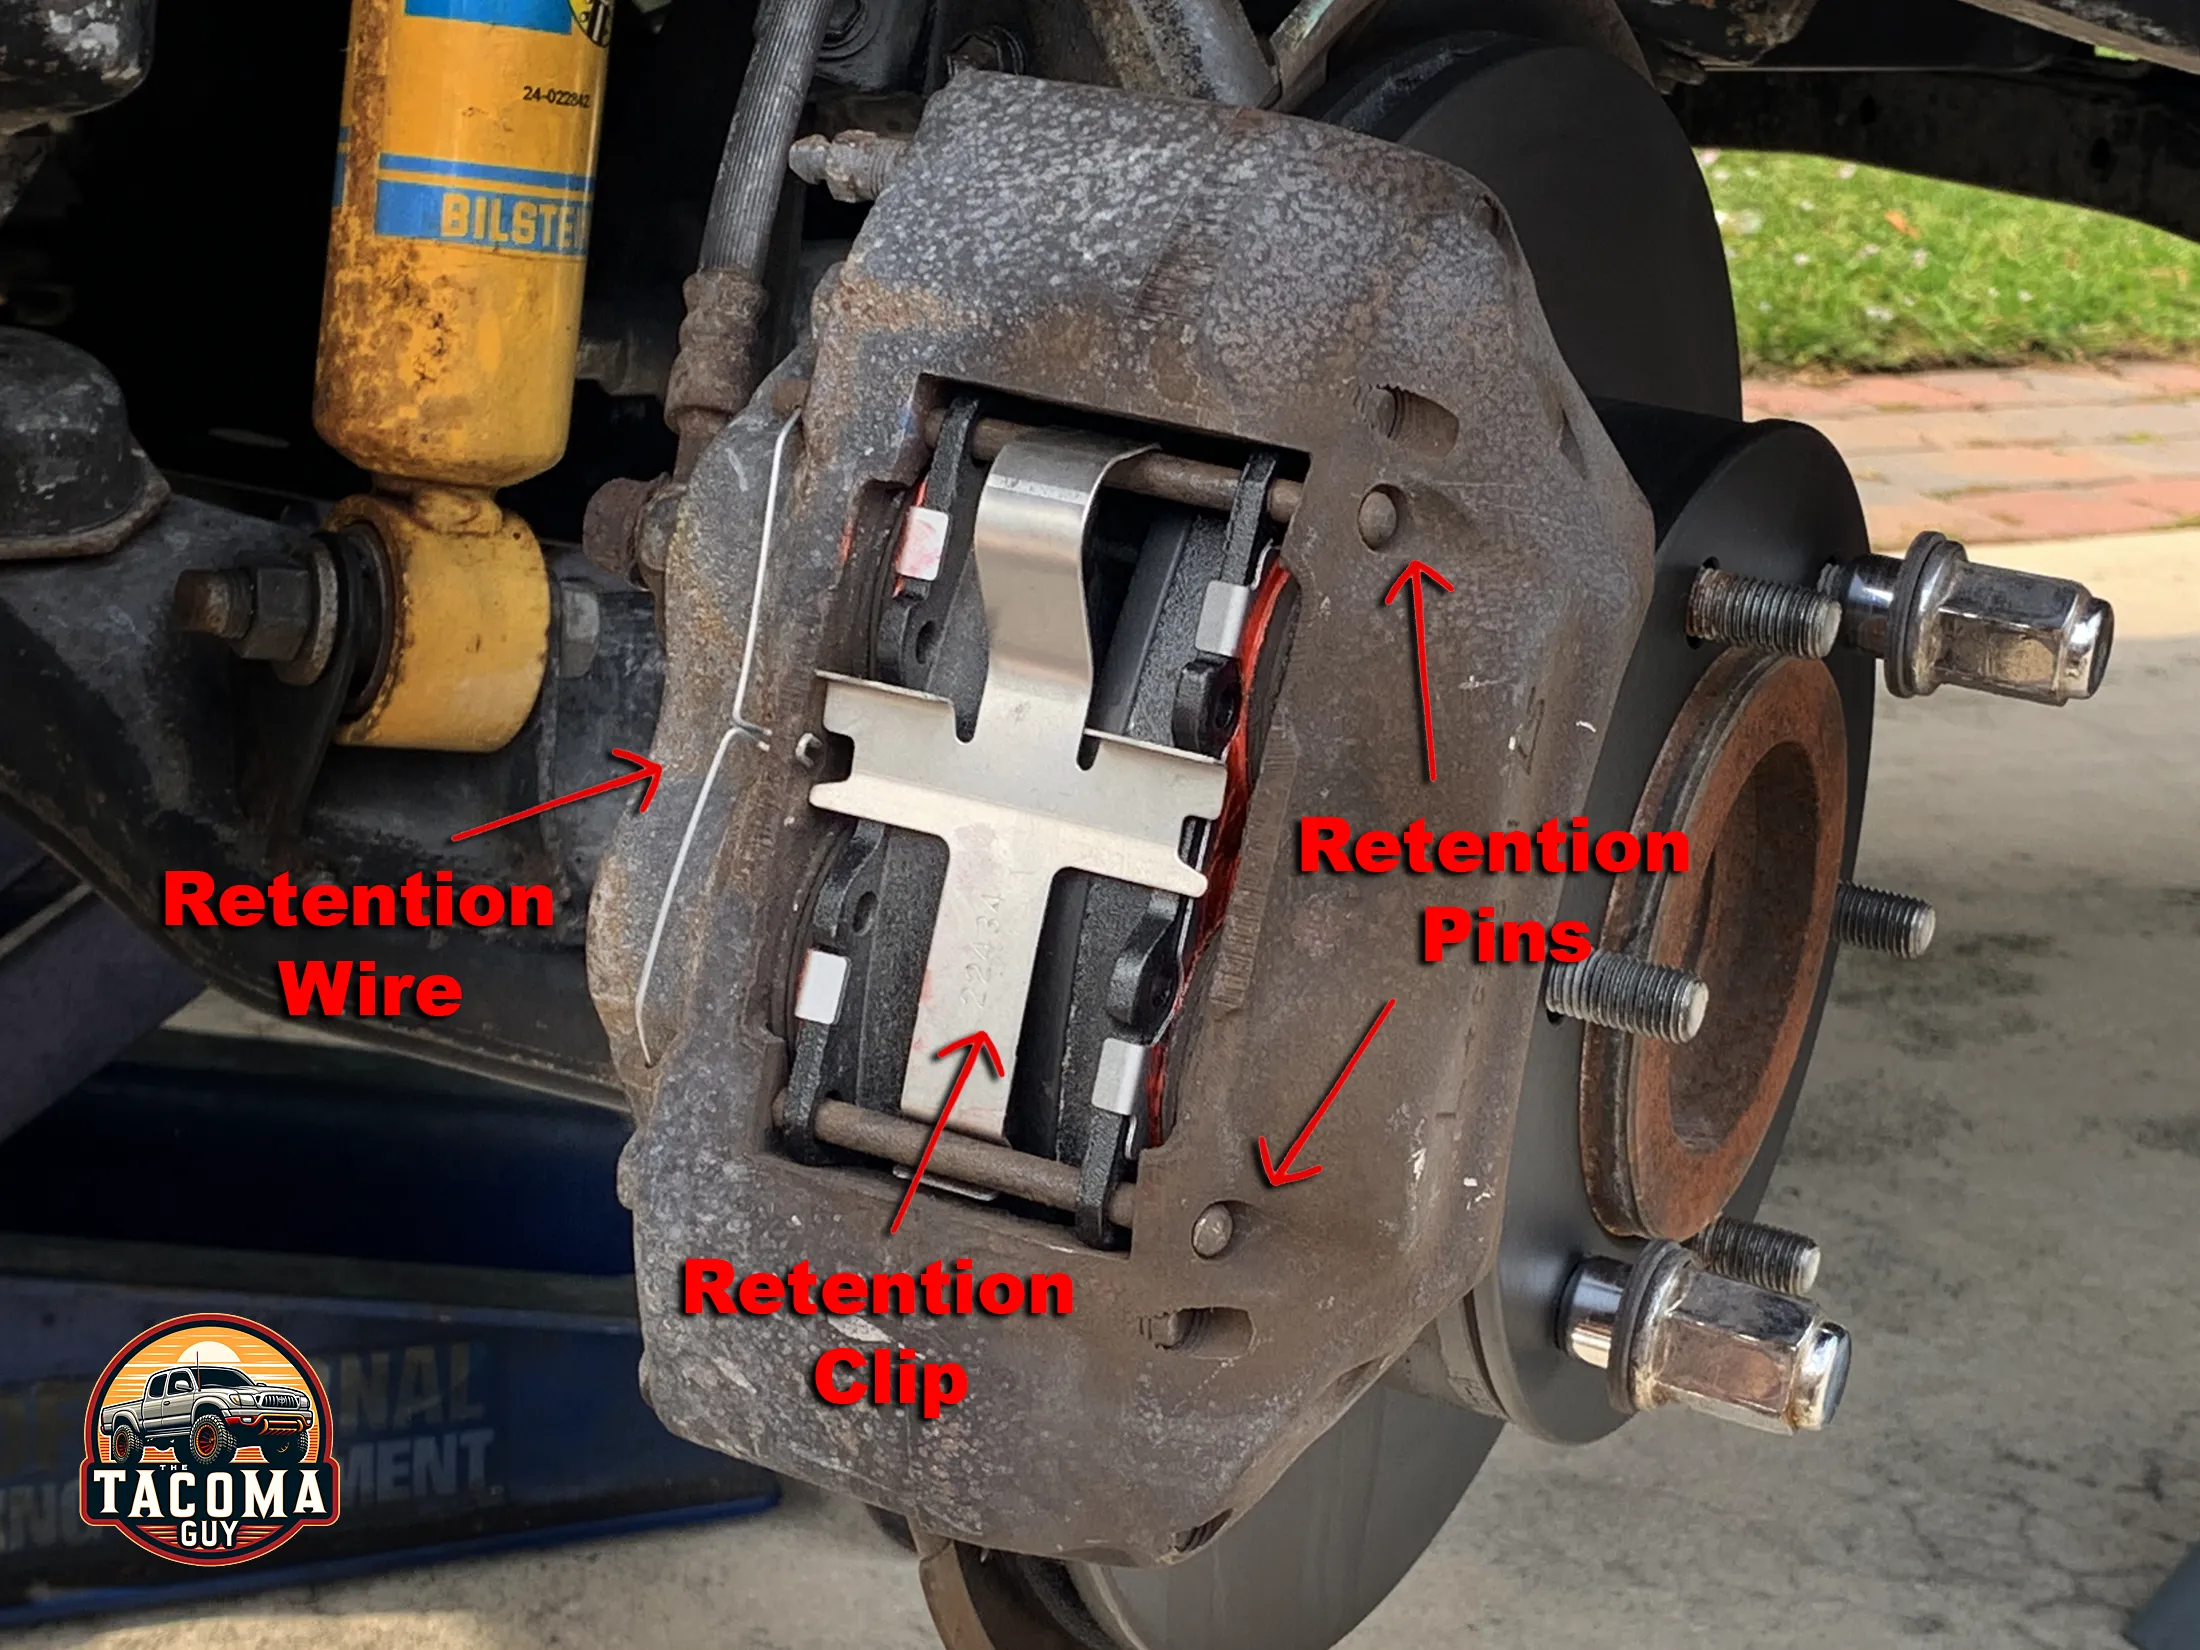
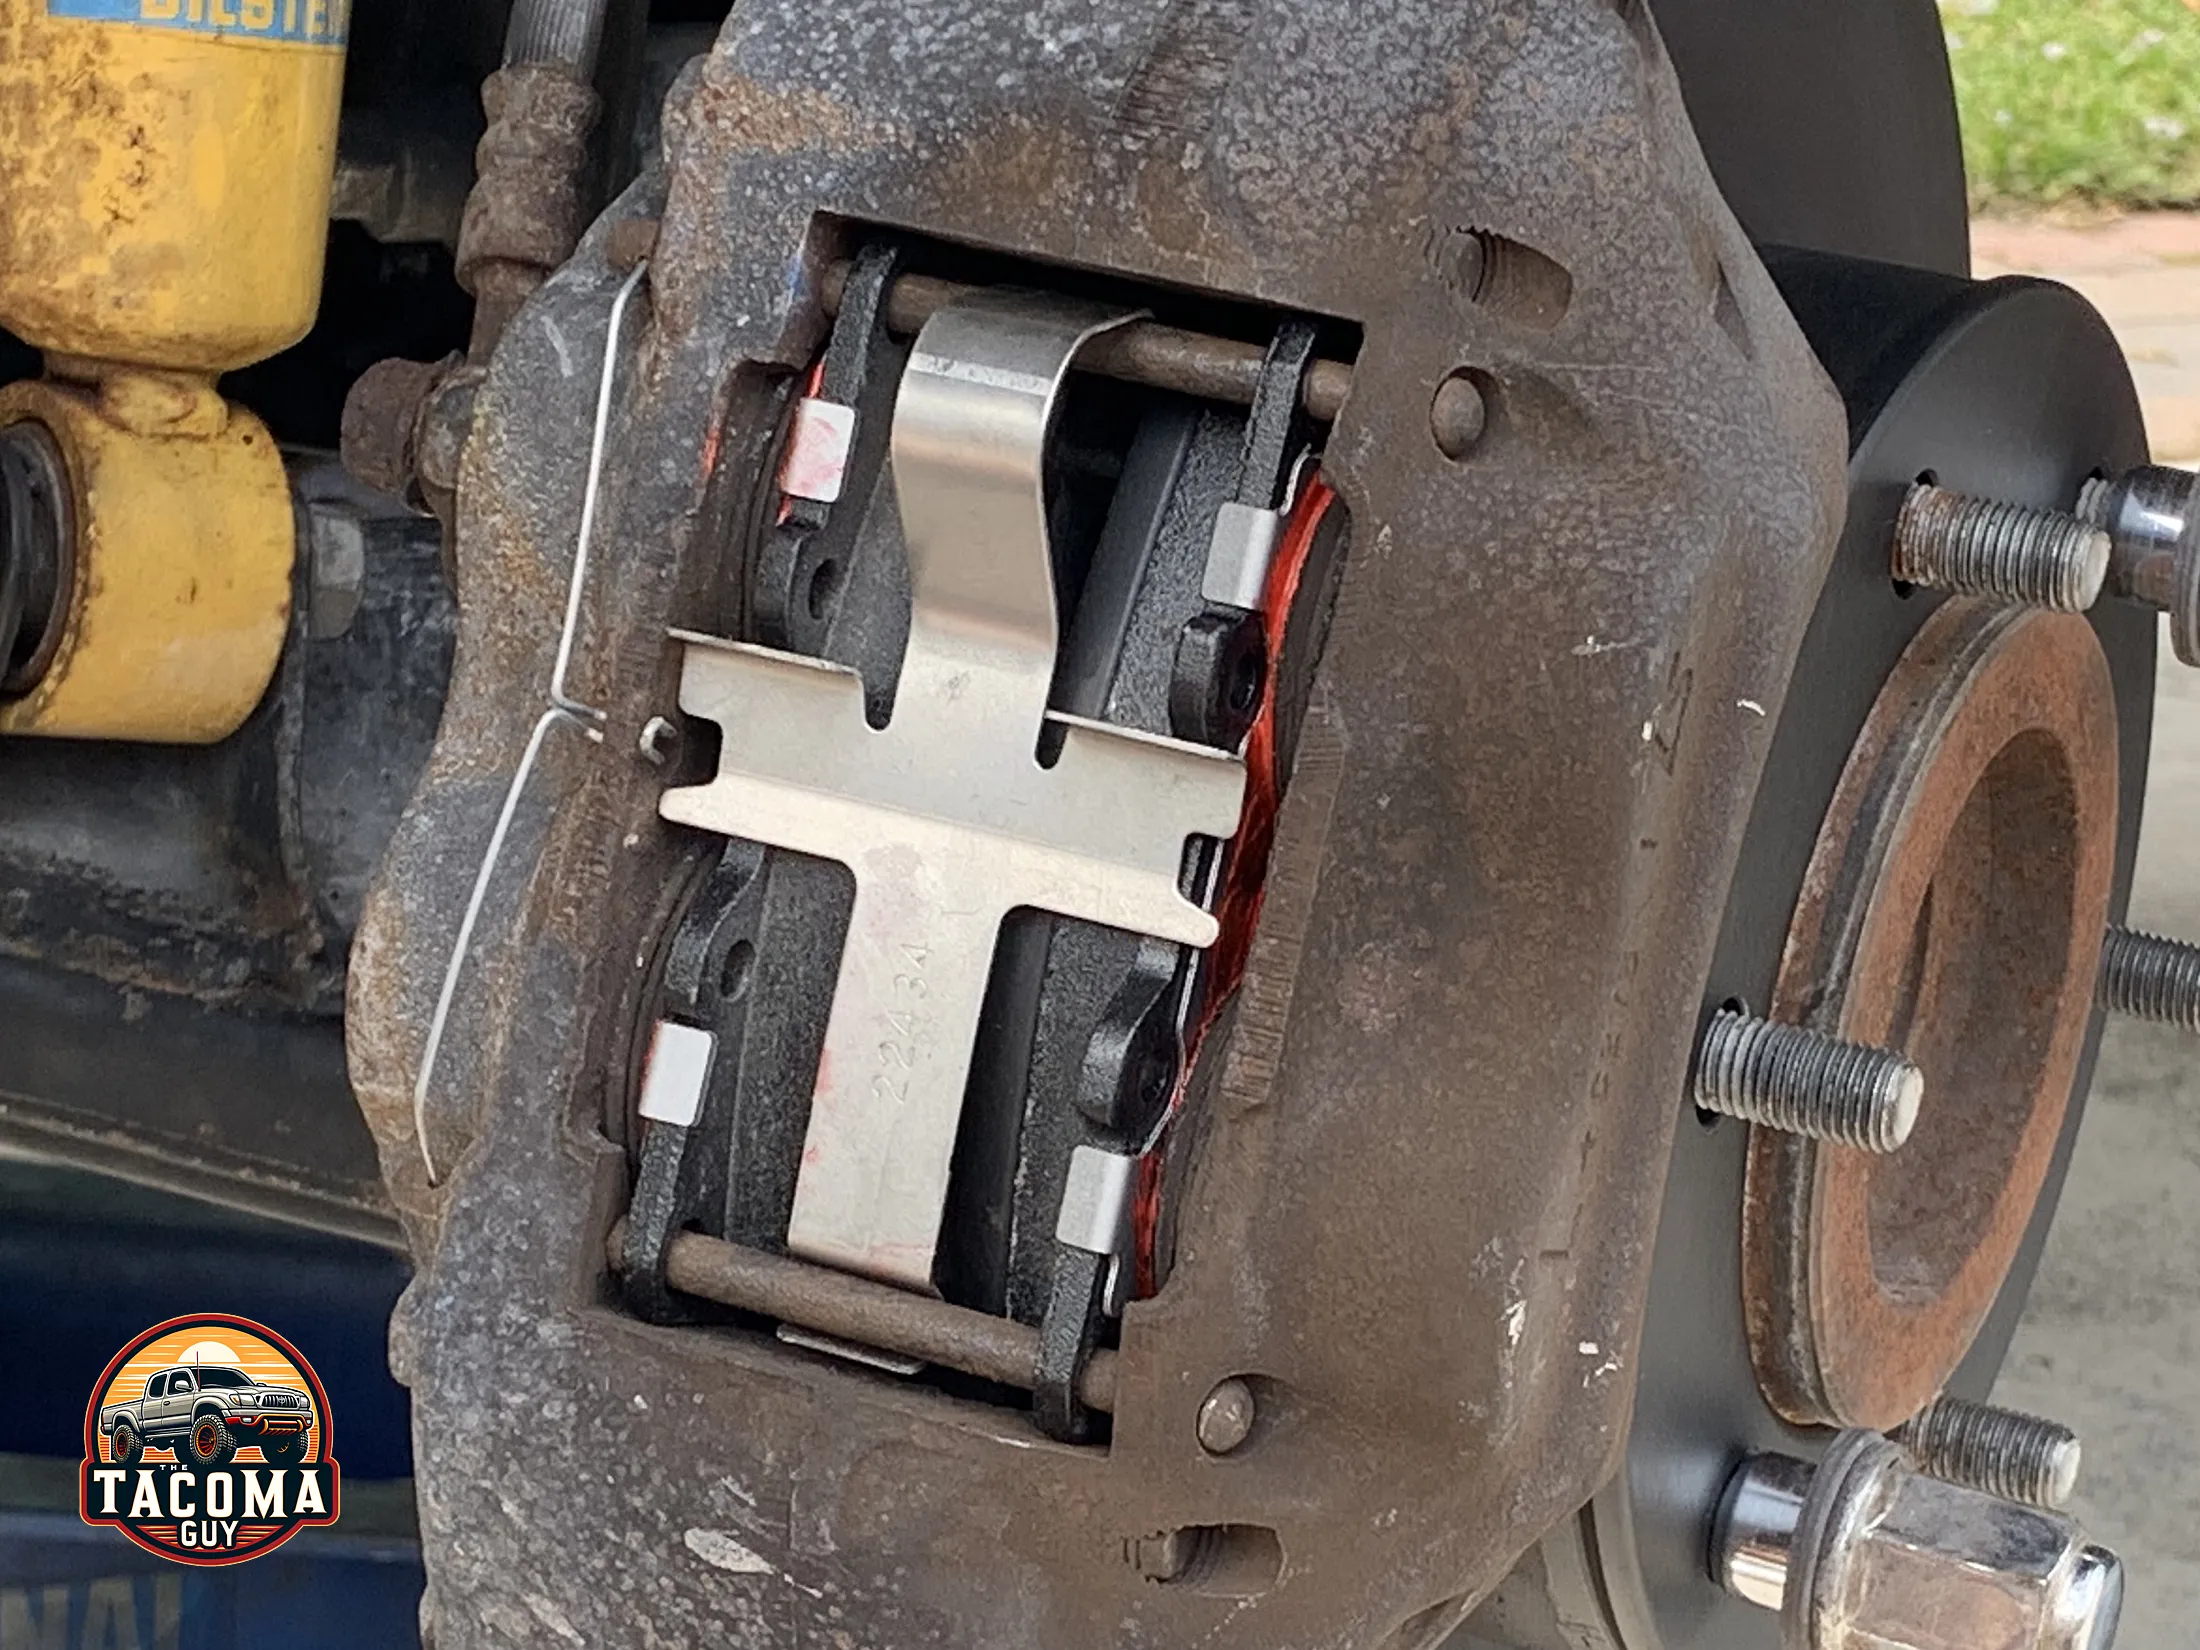
- Remove Wire Clip: Remove the retaining wire clip. You might need some needle nose pliers to take them off. Put it aside if re-using.
- Remove the Guide Pins: Using pliers on the ends, or a hammer and a pin punch, remove the 2 pins. Be careful to remove the side with the protruding curve on the retaining clip first, or it will fly out at you. Or just put your other hand over it as you remove the pins, it’s not under huge pressure.
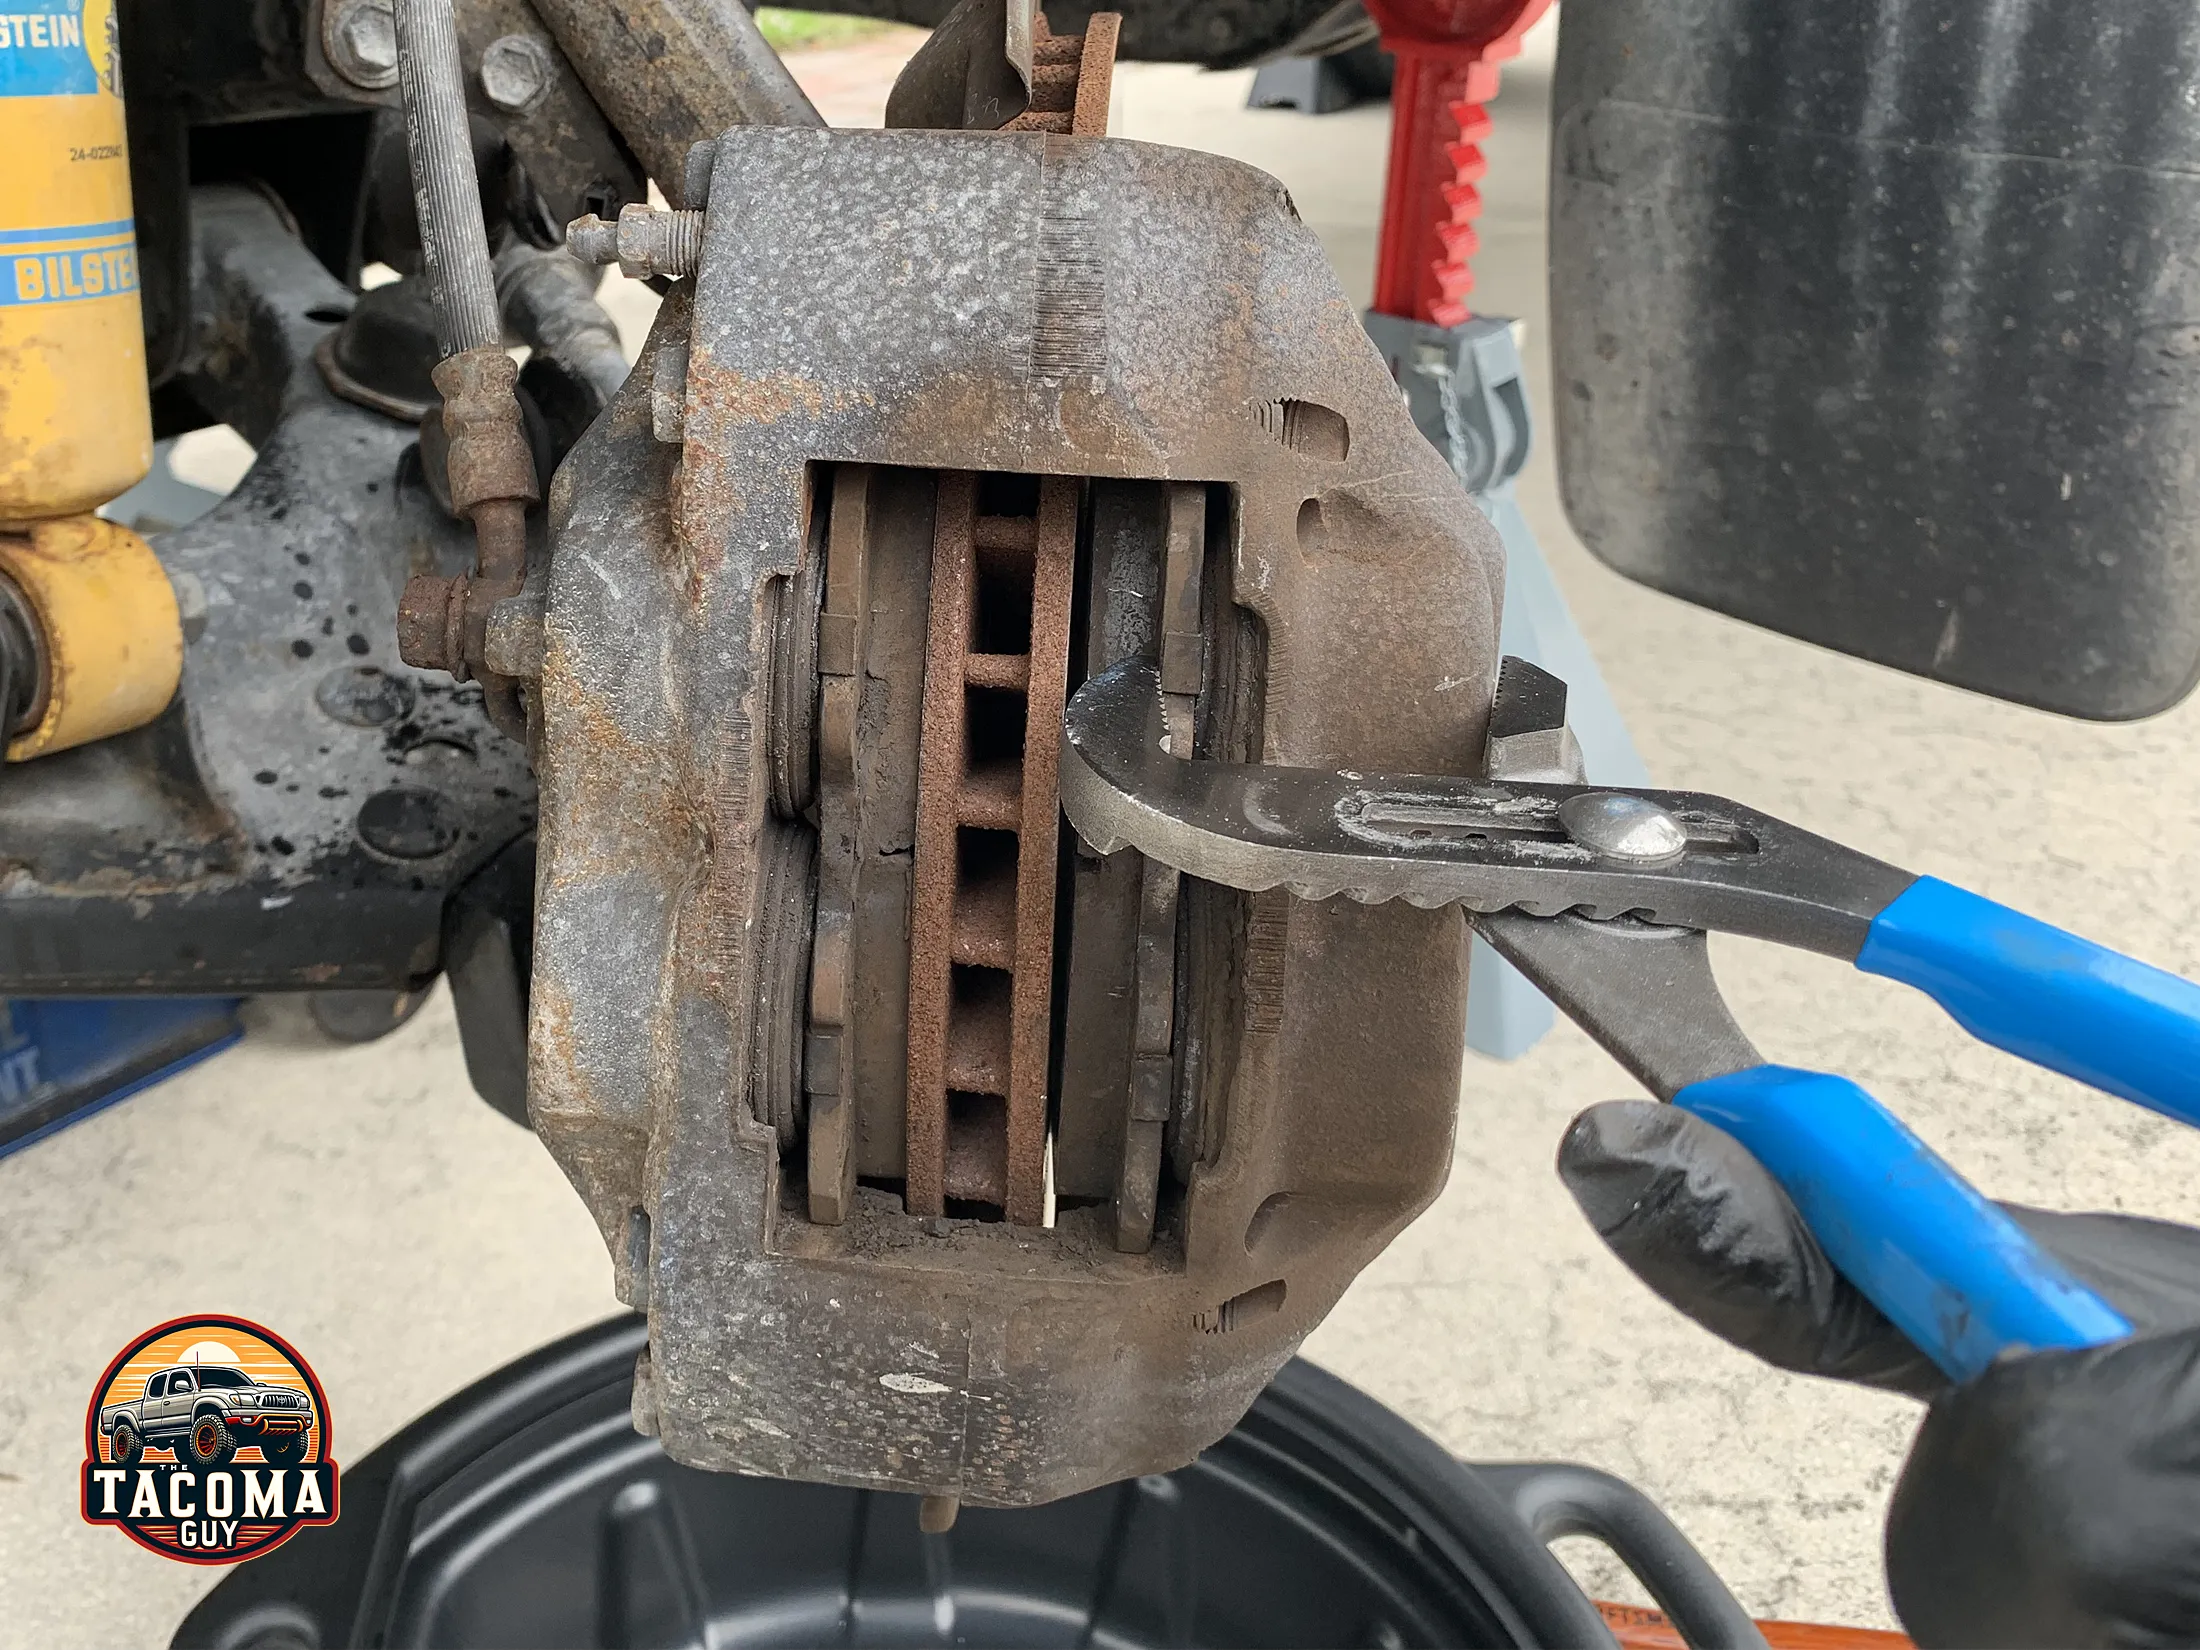
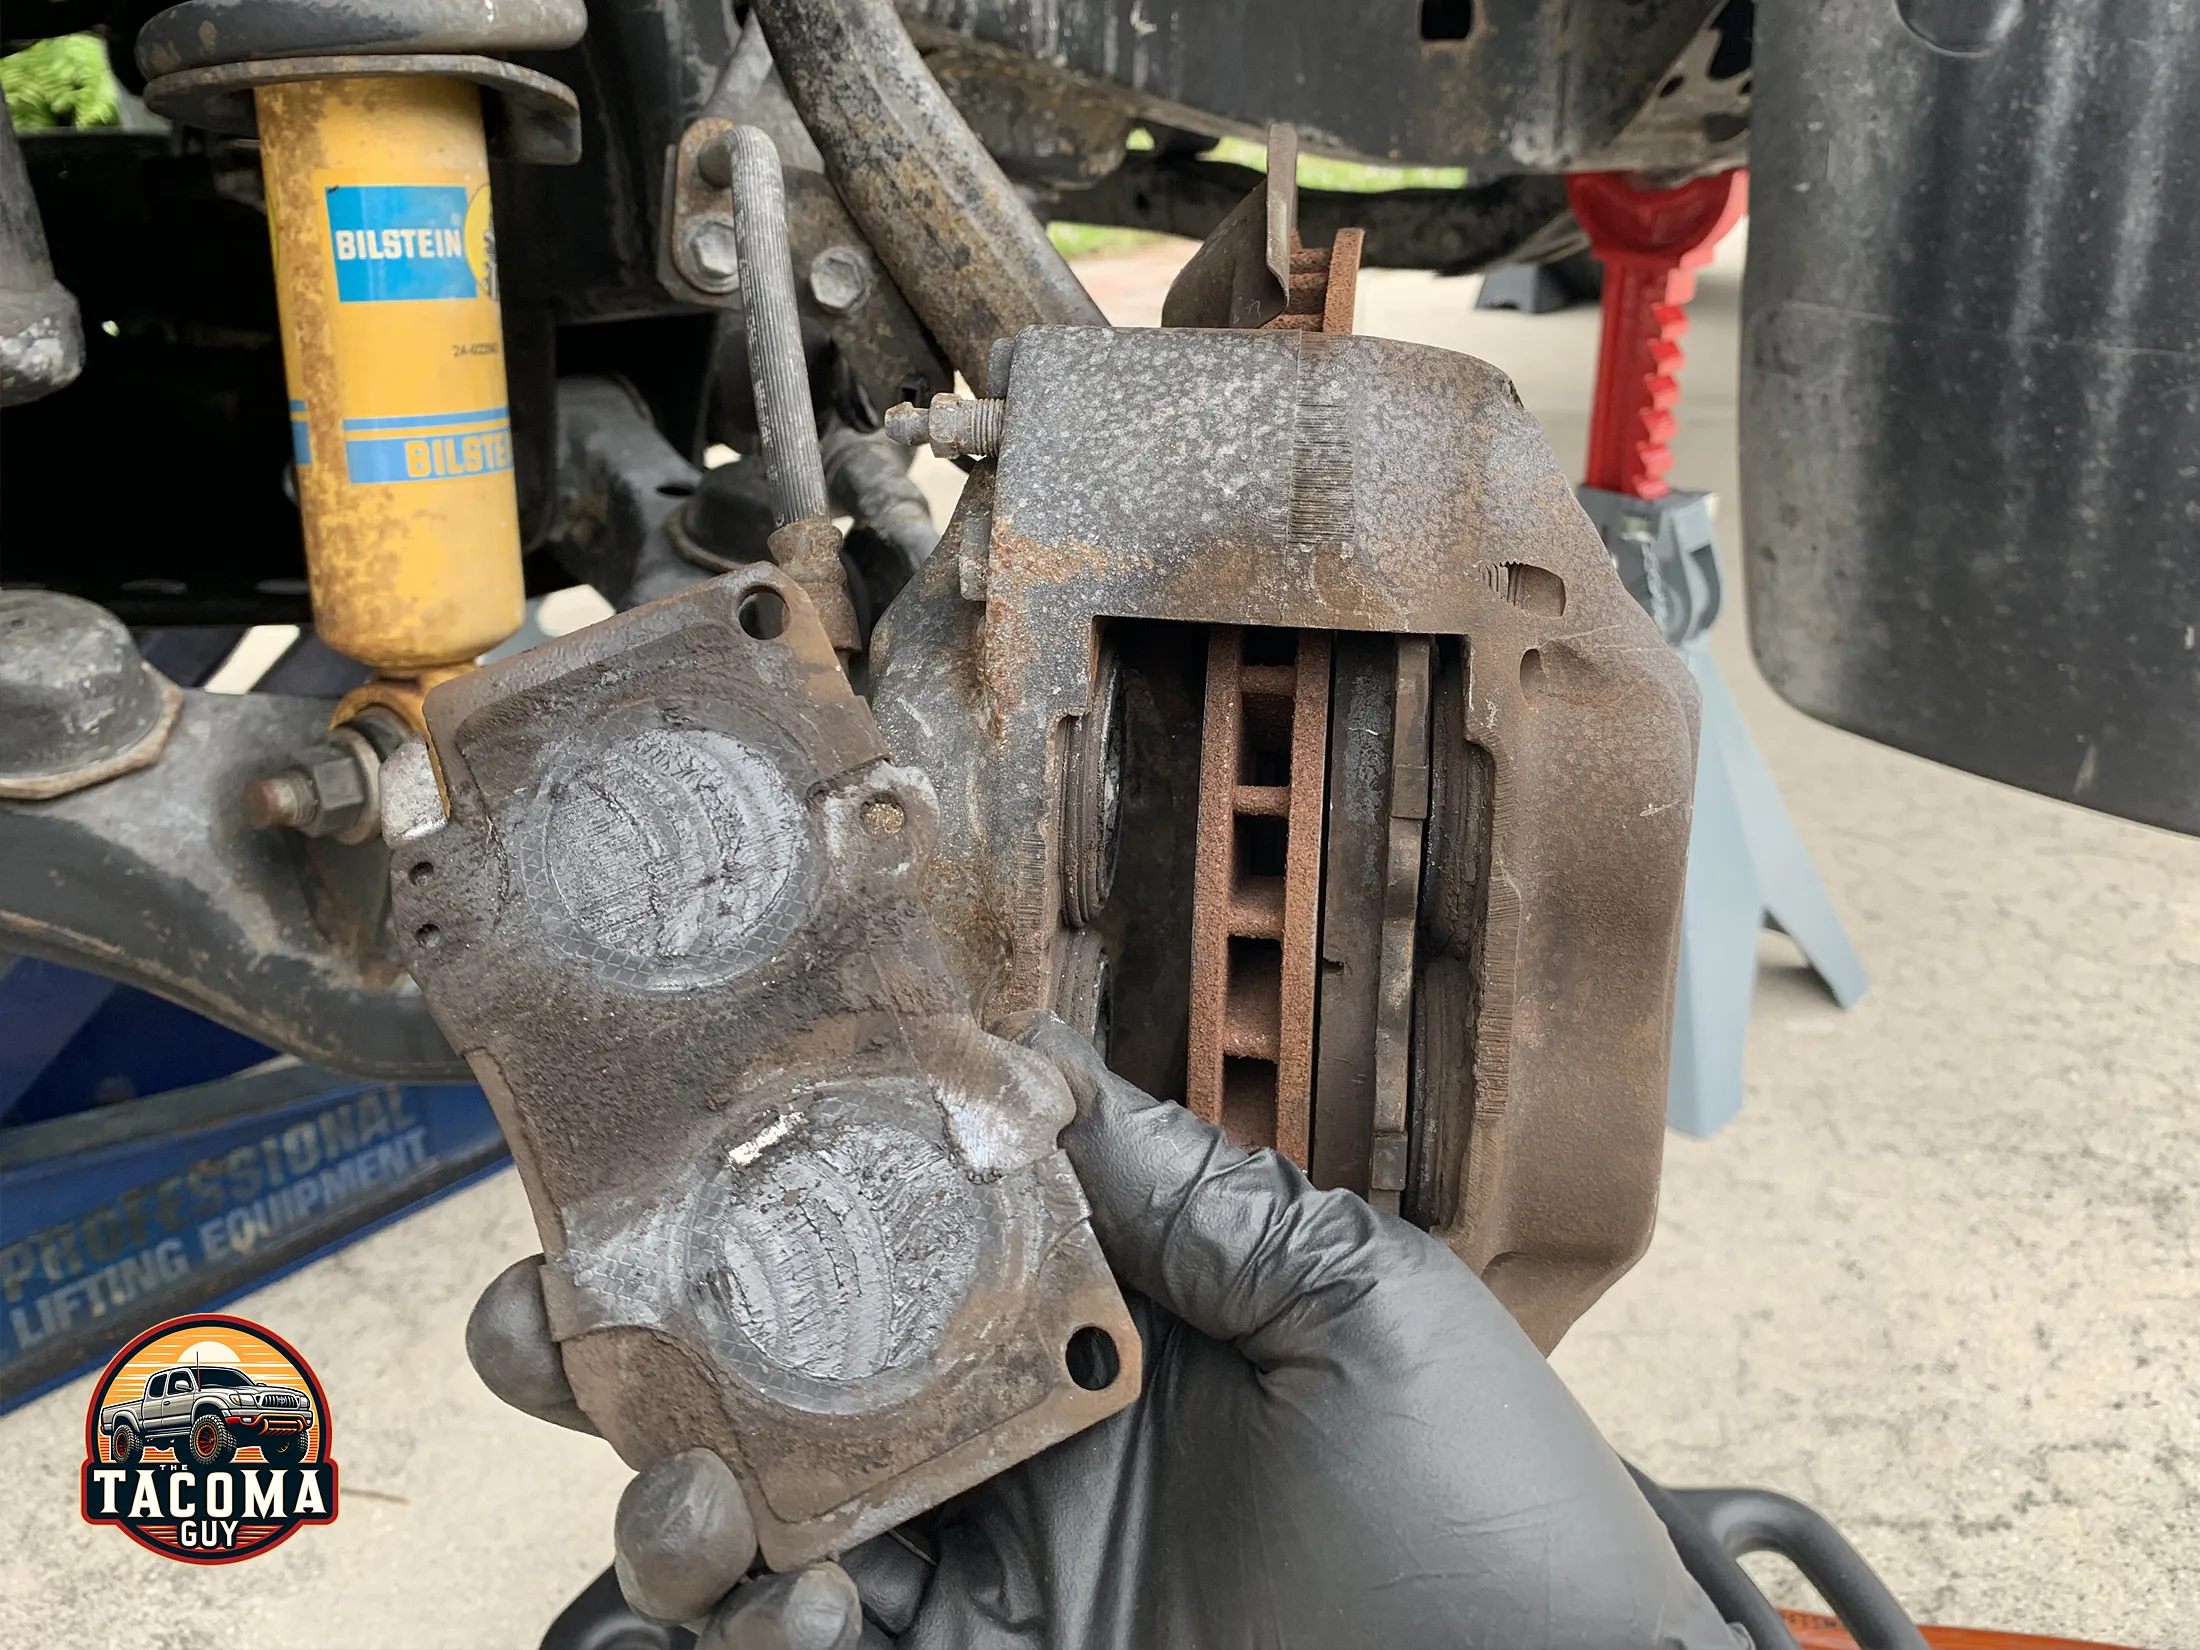
- Remove the Brake Pads: Using the channel locks, depress the pads into the pistons to loosen them up, and it will make it easier to pull the pads out. Do this but pressing against one side of the brake pad, and one side of the caliper with the channel locks, and squeeze. When you have wiggle room, remove the old brake pads. Inspect for damage.
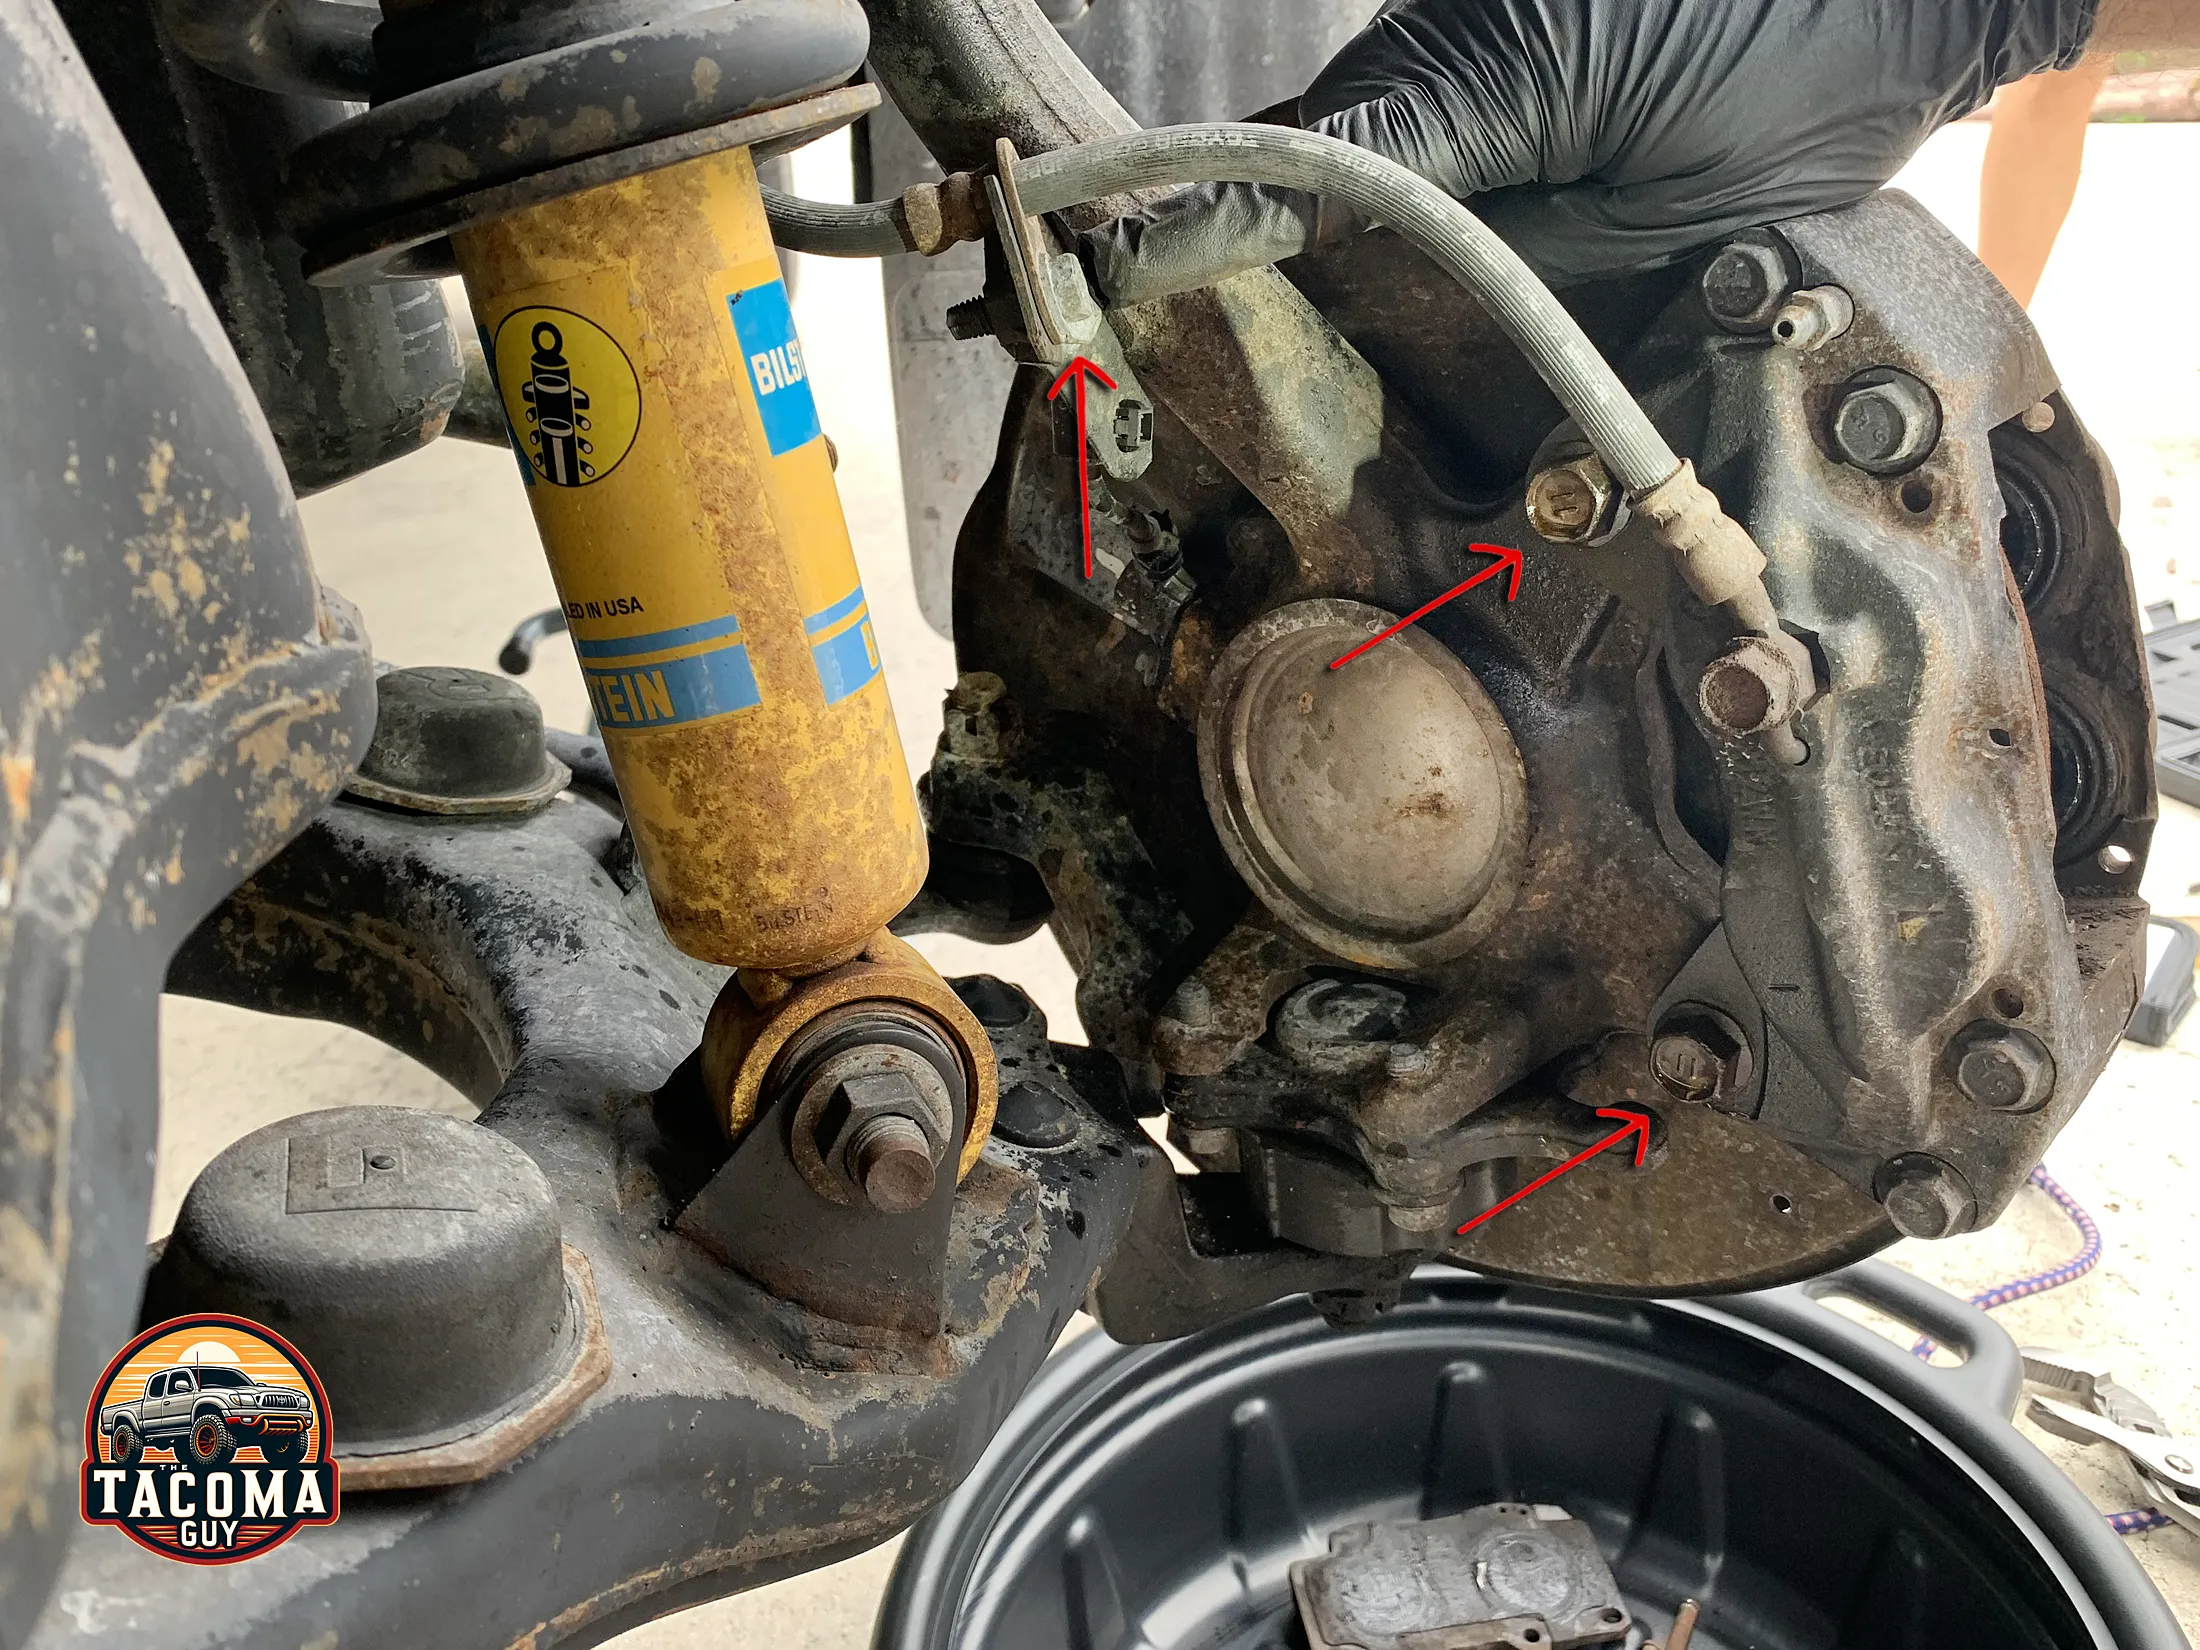
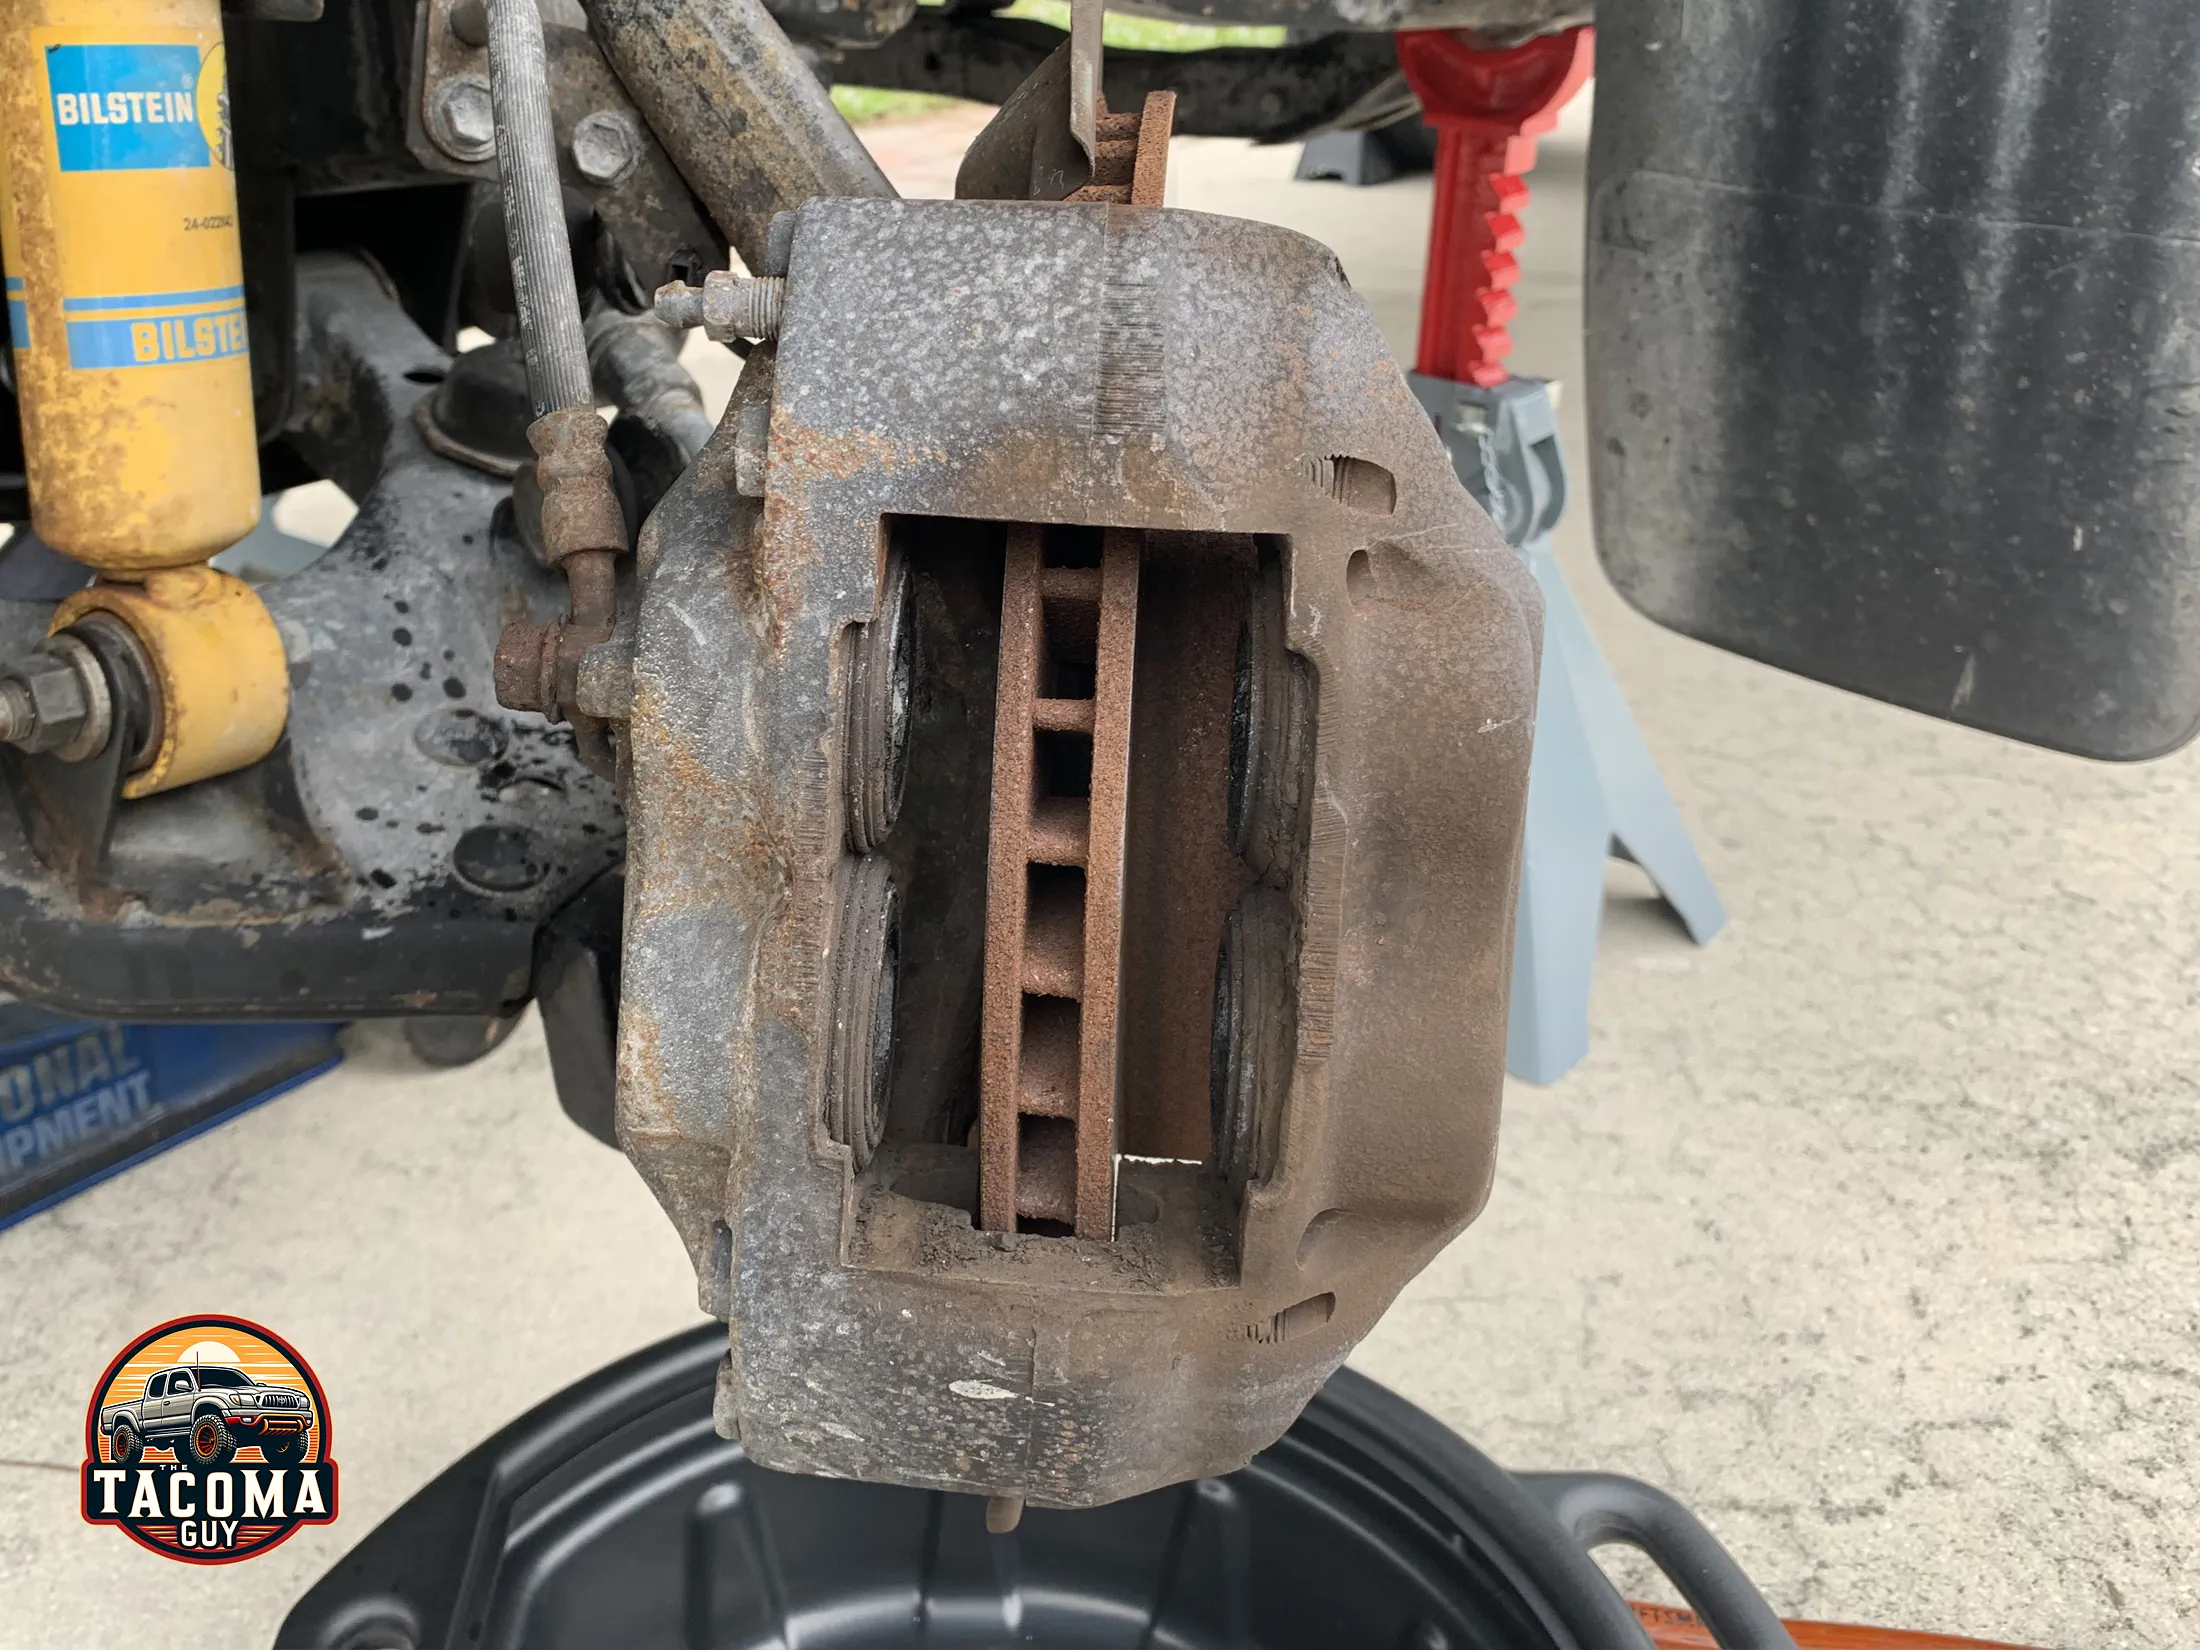
- Remove the Caliper: Use the ratchet and a 17mm socket to remove the two bolts holding the caliper. Hit them all with a spray of PB Blaster first and let it seep in, these will likely be tight. See the photos below for locations.
- Remove the Brake Line Bolt: There is a bolt holding the brake line to a bracket. Remove with a 12mm socket.
- Lift the Caliper off the Brake Rotor: and support it with a bungee cord or wire, ensuring it doesn’t hang by the brake line. I like to lay it on the lower control arm assembly and secure it with a bungee cord, that way its sitting on something rather than hanging in space.
- Remove the Rotor: Take off the old rotor; it may require a few taps with a rubber mallet if it’s rusted on. Pull it straight off.
- Clean the Area: Use brake cleaner, wire brush, or sandpaper to clean the surface area of the hub around the lugs to make sure the new hub sits well when installed.
Installing New Brake Pads and Rotors:
- Clean the New Rotor: Some rotors come with a protective oil coating on them so they don’t rust. You’ll need to remove it using brake cleaner and some rags before installing. The Duralast Gold Brake Rotor 31165DG I used doesn’t require this.
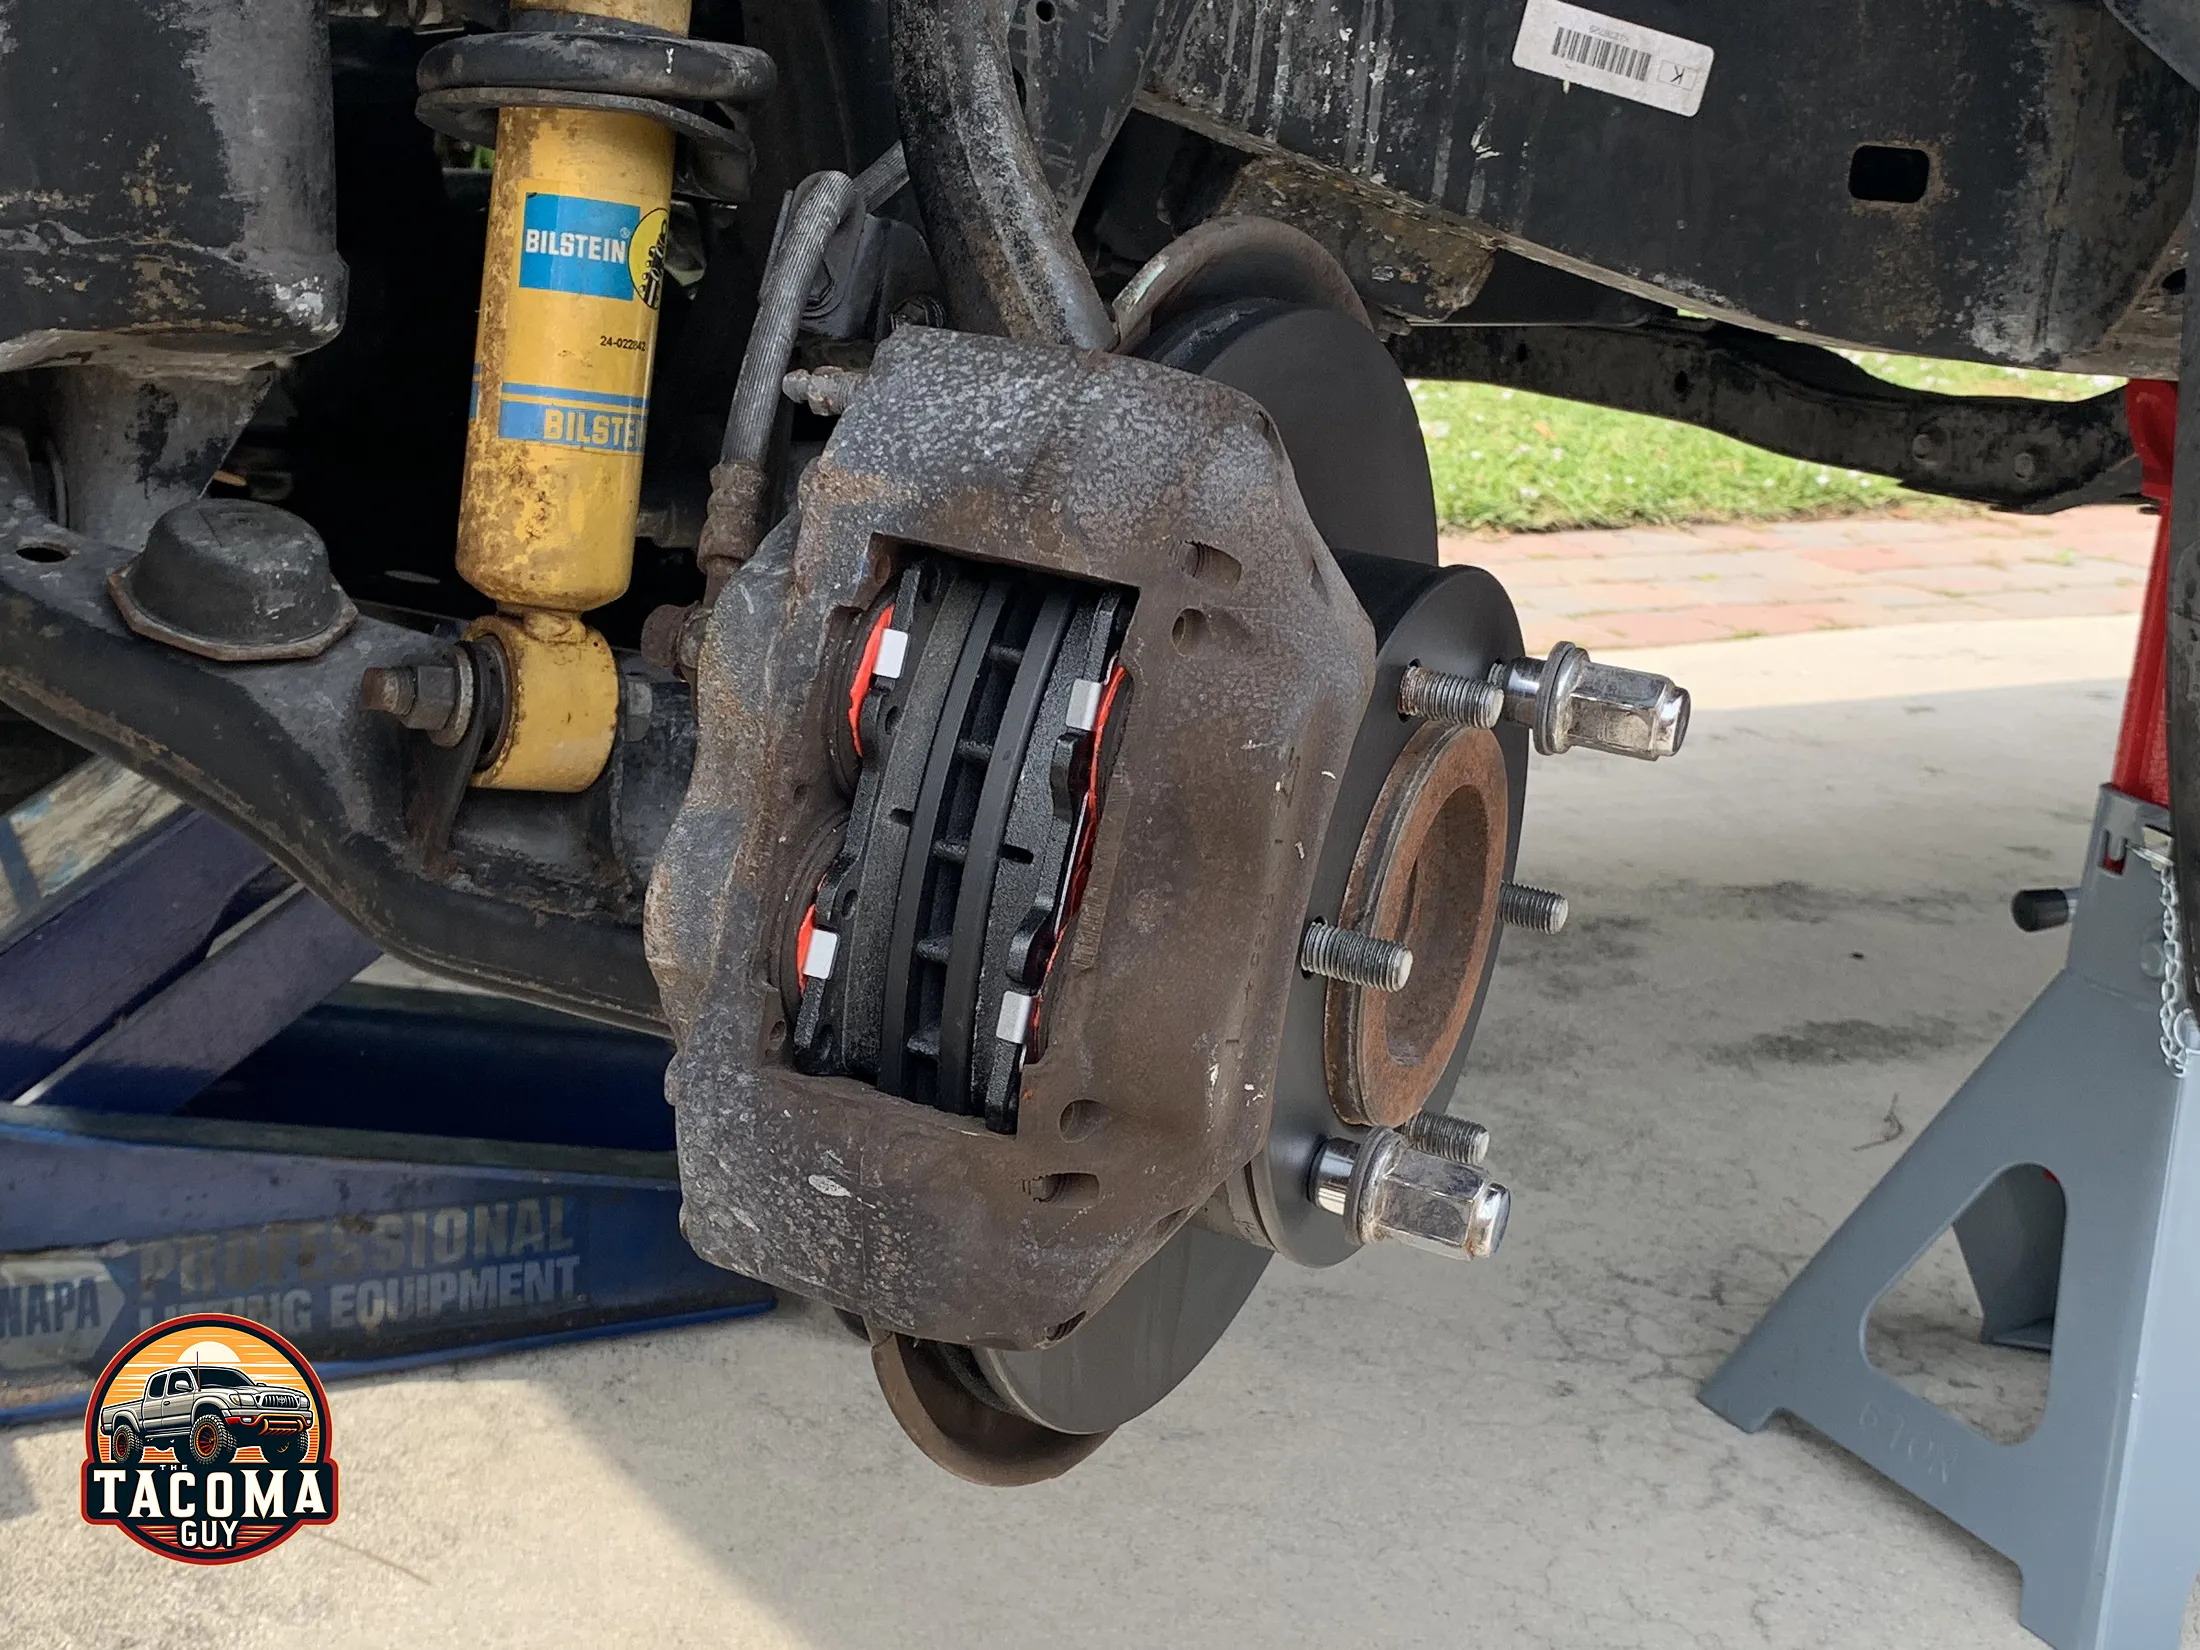
- Install the new Rotor: Should slide right on once you line it up with the lugs. Hold it in place by screwing on a couple of lug nuts so it won’t move around when you re-install the caliper.
- Reattach the Caliper: Slide it over the new rotor and into place. Then tighten the bolts. Use a torque wrench and torque to 90 ft lbs.
- Reattach the Brake Line Retention Clip: Just hand tighten it, don’t go overboard.
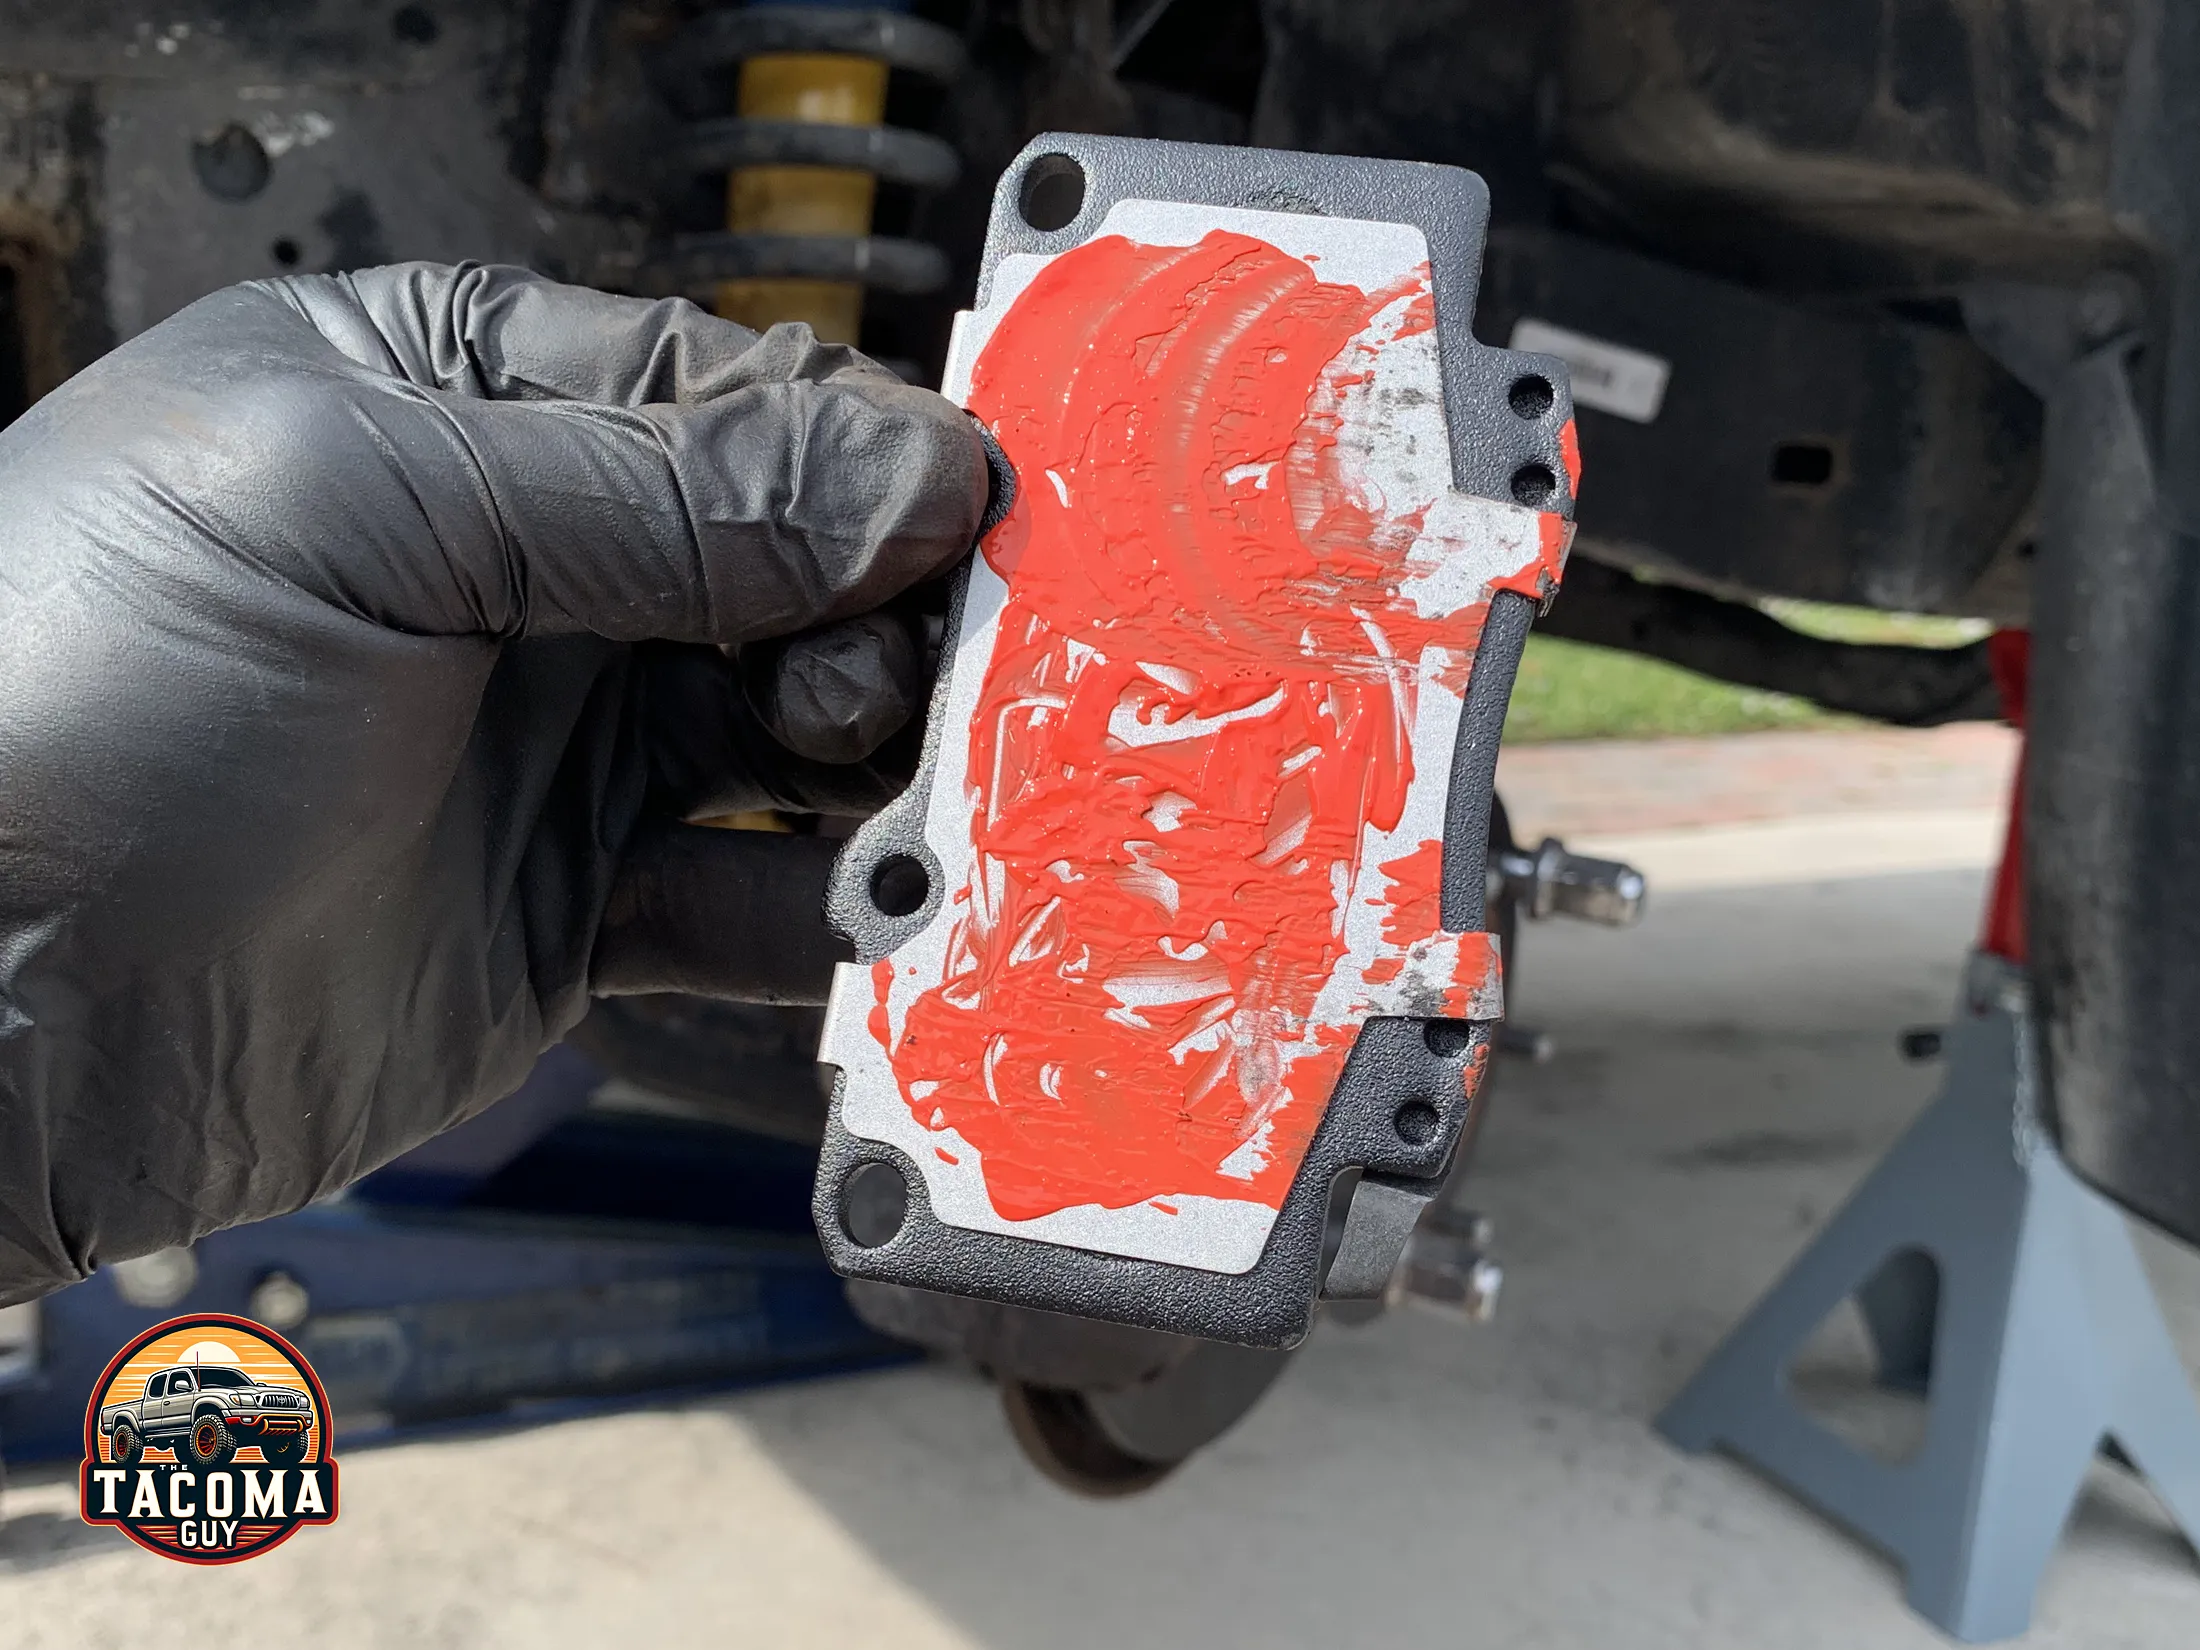
- Install the New Brake Pads: Put Brake Quiet on one side of the brake pads, the metal part which touches the pistons. Do not get any on the pad side or on the rotor! If you do clean with Brake cleaner. Slide the new pads into the caliper bracket.
- Replace the Guide Pins: Slide in the pins while holding the retention clip in position so that it is secured by the pins after they are in completely. Use a rubber mallet to drive the guide pins in if necessary. Make sure they go through the holes in the new brake pads.
- Replace the Retention Wire: You might need to turn the guide pins to make the holes line up correctly with needle nose pliers. Reinsert the retention wire into the 2 pins and into the hole in the caliper.
- Repeat for the Other Side: Perform the same steps on the other front wheel.
Finishing Up:
- Reattach the Wheels: Put the wheels back on and only hand-tighten the lug nuts at this point.
- Lower the Vehicle: Carefully raise the floor jack so you can remove the jack stands, then lower the truck. Use a torque wrench to tighten the lug nuts to the manufacturer’s specifications of 83 ft lbs.
- Test Your Brakes: Before driving normally, press the brake pedal several times to seat the brake pads against the rotors. Then go for a ride and break them in, try getting your speed up then brake hard a couple of times (make sure no ones behind you!)
Important Notes:
- Check the brake fluid level after replacing the pads and rotors.
- Dispose of the old brake pads and rotors properly.
- If you’re not comfortable performing these steps, consult a professional mechanic – but you wouldn’t be here if you couldn’t do it!