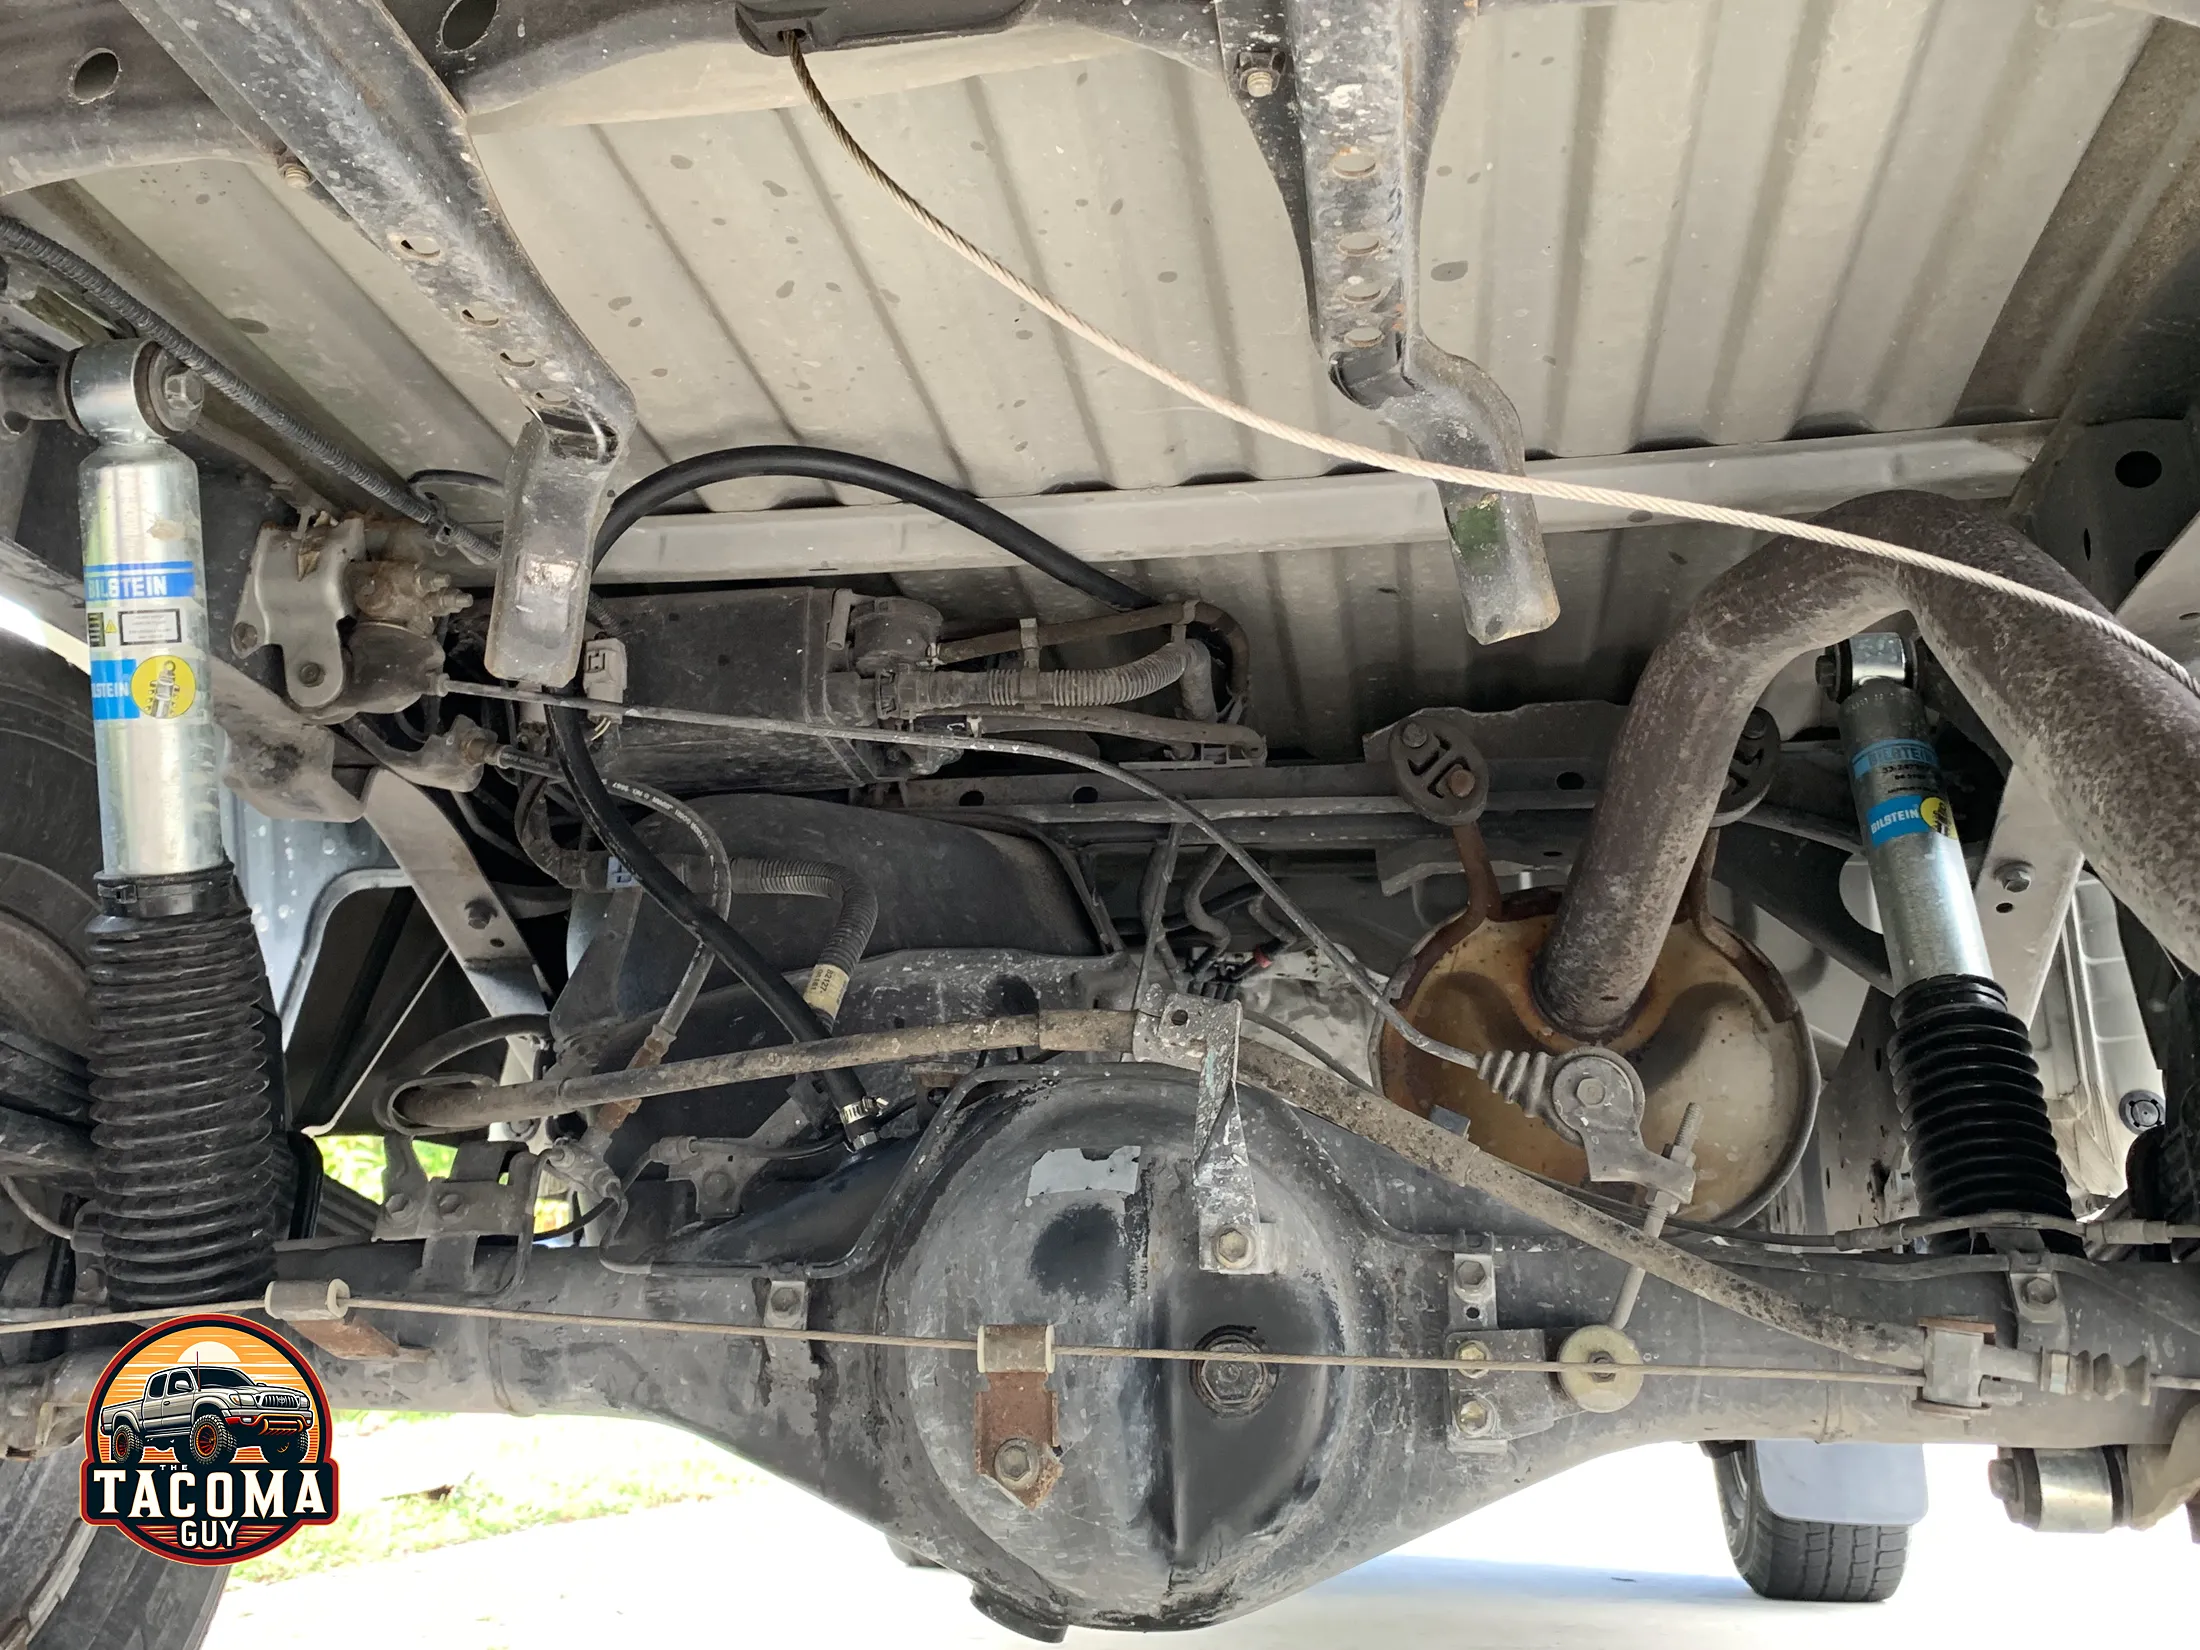
I noticed a few months ago that the leaf-springs on my 2003 were nearly inverted from their original shape. Nearly 2 decades of hauling heavy stuff in the bed finally took its toll on the OEM springs and shocks.
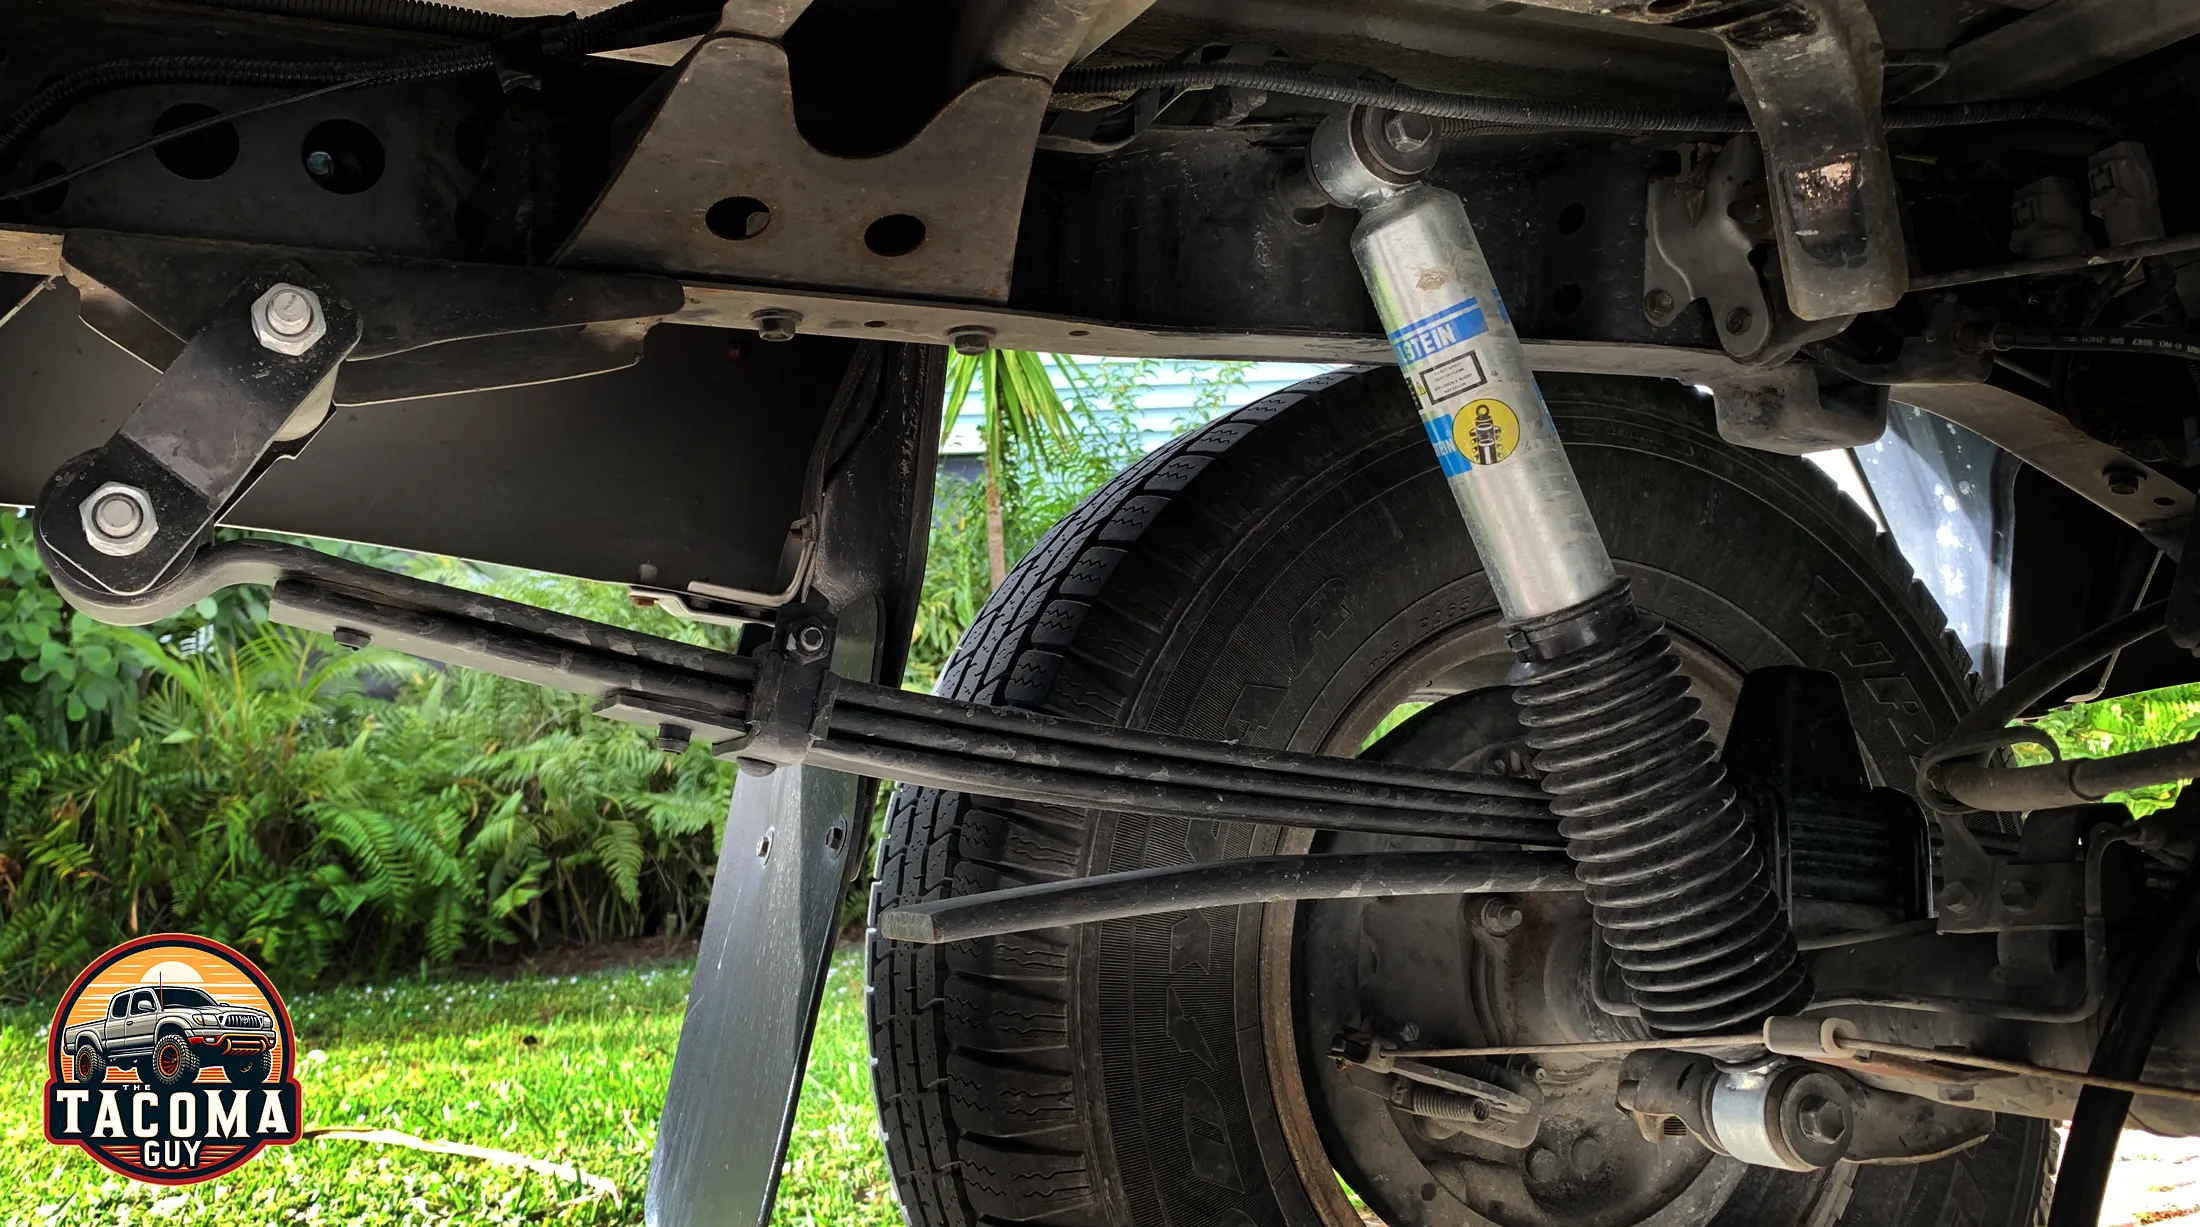
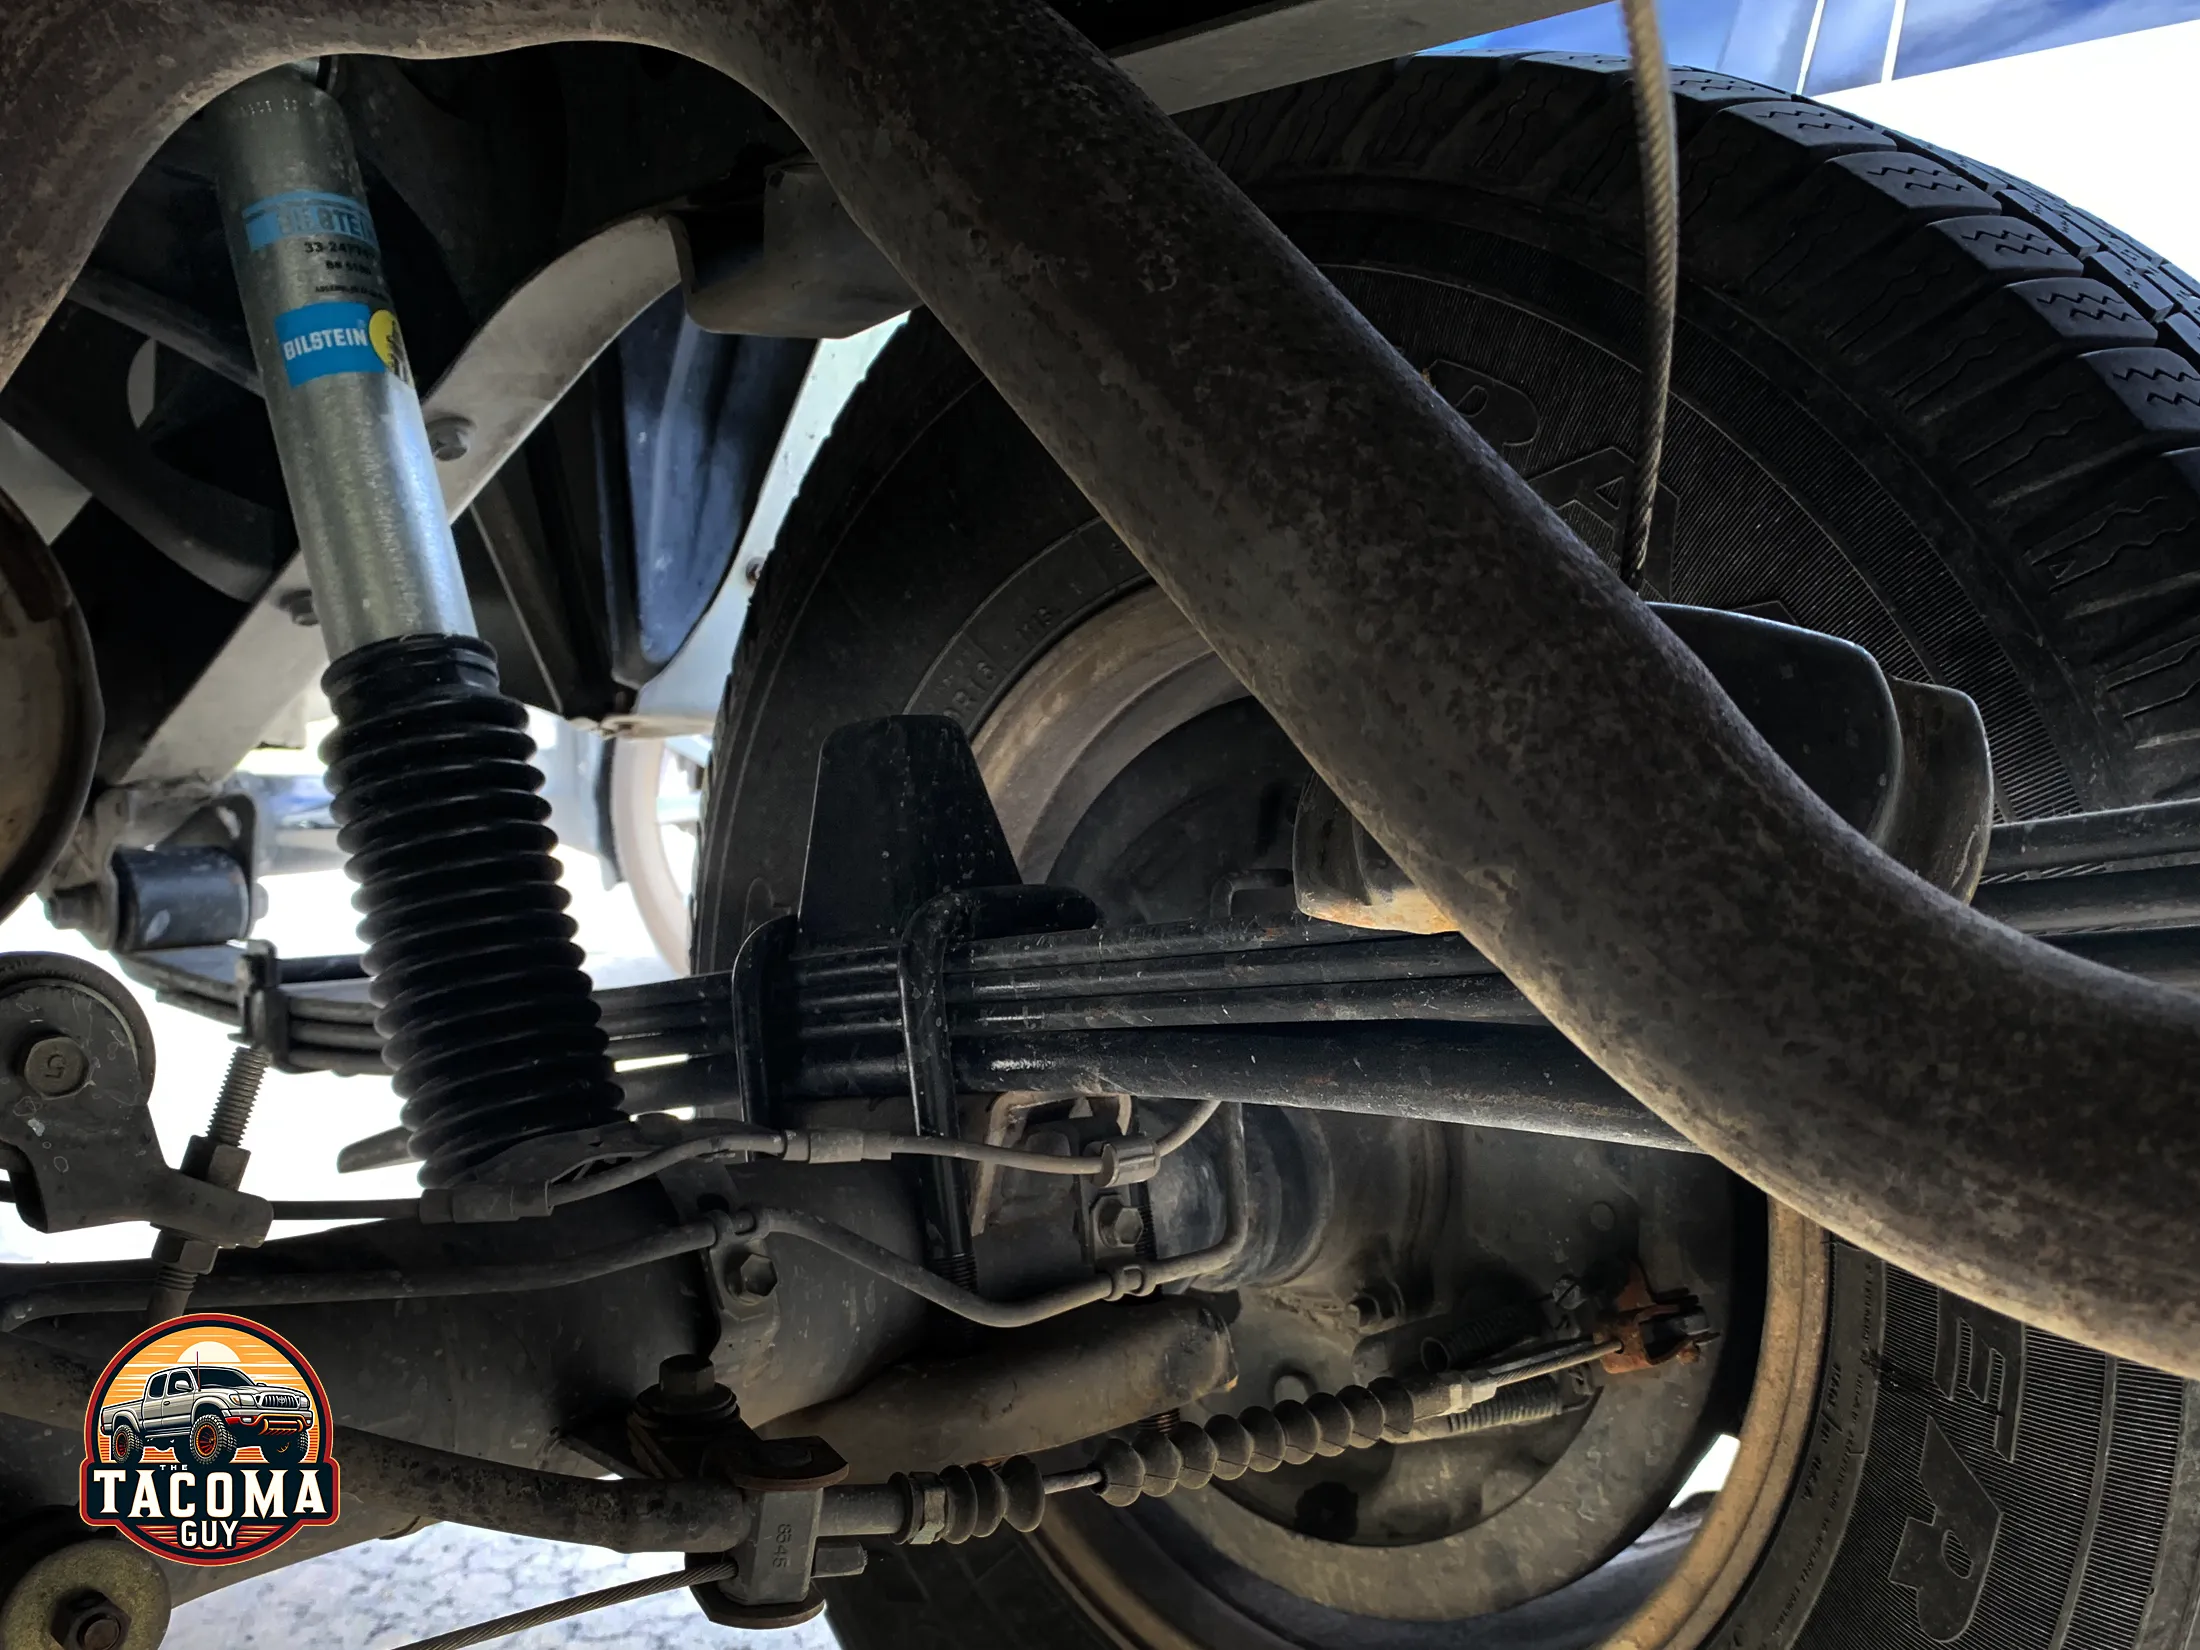
So I decided it was time for an upgrade. I decided to go with two General Springs 4×4 / Prerunner Heavy Duty rear leaf spring, with 4(3/1) leaves and with Bilstein 5100’s because I wanted to stay near OEM specs, but carry a full time topper on the truck.
Affiliate notice: The Tacoma Guy is an Amazon and eBay Affiliate. That means we get a small percentage from them if you use the links to purchase the product. It doesn’t increase your cost! If you found this tutorial helpful, please consider using these links to help support this mom & pop business, thank you! Learn more.
Parts List
Here’s the product I decided to go with, there are many options out there and you’ll need to decide what you are trying to do: keep the OEM specs, add a little more to OEM or go full 3″ lift or more.
I wanted what I call OEM +, so not to much off the OEM spec, but something that would give me better weight handling in the rear, 1-2″ lift, and good off-road performance for occasional (not-heavy) use.
- General Springs 4×4 / Prerunner Heavy Duty rear leaf spring, with 4(3/1) leaves (90-237HD)
- Bilstein 5100 Shock Absorber (Rear Left) (33-247724)
- Bilstein 5100 Shock Absorber (Rear Right)(33-247717)
- (4) U Bolts: (Bend Type: Square, Diameter (A): 9/16, Inside Length (B): 2-1/2″, Length (C): 7)
Note: you should not reuse your U-Bolts when installing new leaf-springs. I bought the ones listed above, they were a little too long, I wound up having to cut about 1 1/2″ off them.
I decided while I was down there to also replace some other parts, these aren’t necessary to replace if yours are OK
- (2) Rear Shackles for 1995 – 2004 Toyota Tacoma 4×4 (330-412)
- (2) 14mm x 2.0 x 110mm Leaf Spring Bolts (334-790)
- (2) Top U Bolt Plate (M9019)
If you are looking for something else, or want to learn more about OME leaf springs, check out this excellent write up about many of the available options out there on AdventureTaco.
After the install I wound up with a little more than 2″ additional clearance between the tire and the top of the wheel well than i had before. A lot of that had to do with the new leaf springs. It raked the truck out pretty aggressively, so after the rear settled for a few weeks I picked up Bilstein 6112 complete strut assembly for the front to replace the front shocks on my gen 1 tacoma and give me a 1″ of lift in the front to balance out the stance a little.
It’s not a hard install to do, and I did most of it by myself, only getting help to get the leaf springs into place because they are a little awkward due to their weight.
Tools Required:
- 1/2″ Breaker Bar: To get the stuck bolts off. Will need 19mm and 21mm sockets.
- Ratchet & Wrenches: 19mm, 21mm and 10mm/12mm if you want to remove the brake line.
- Torque Wrench: 1/2″ to tighten the nuts back on to spec.
- Floor Jack and 6 Ton Jack Stands: To lift and support the vehicle.
- PB Blaster: Penetrating catalyst for seized bolt removal.
- Ratchet straps: Helps position the leaf spring into the rear axle.
- Ratchet extension: to get to the top bolt on the passenger side shock around the muffler pipe.
Helpful but not 100% necessary:
- Impact Wrench: I use 1/2 sockets mostly, and I like the Ryobi series of products.
- 3 Ton Jack Stands: If you want to use them to hold up the rear axle, although if you are careful you can get away with just using a floor jack.
Step-by-Step Guide:
Descriptive pictures below this guide!
NOTE: Make sure to only work on one side of the truck at a time, finish the spring and shock on one side, replace the tire and then move onto the other side.
Preparatory Work:
- Safety First: Park on a level surface, engage the parking brake, and place wheel chocks behind and in front the front wheels.
- You’ll have a a lot more room if you lower and remove your spare tire.
- Loosen the lug nuts on the tire you the side of the truck are going to work on first using a breaker bar if you have one. Remember only remove one tire at a time.
- Thoroughly soak the four nuts that secure the u-bolts (to the U-bolt plate which holds the axle to the leaf spring) and the 3 bolts that hold the leaf spring to the truck (and the rear shackle) with PB Blaster or other penetrating oil.
Lifting The Truck
- Put the floor jack underneath the rear differential in the middle of the rear axle. This is where you will begin to lift the truck. This tutorial will show you how to jack up your Toyota Tacoma, Tundra or 4Runner.
- Put 6 ton jack stands on both sides of the truck along the frame to support it, about 12″ before the front leaf hanger. Put the stands at their highest position, you will want the rear of the truck up as high as you can get it.
- Remove the tire on the side you are working on.
- You can put 3 ton stands at their lowest position underneath the rear axle as a backup so you don’t drop the axle with the floor jack and pop your rear brake line.
- Watch the tension on your brake line as you slowly lower the axle with the floor jack onto the 3 ton stands. If it starts to pull too much, jack the axle back up and readjust the stands higher, or at this point you can consider replacing your rear brake line.
Disconnecting the Leaf Pack from the Rear Axle:
- Use a 19mm socket or wrench to remove the bolt that secures the lower shock absorber bolt to the shock mount. You might need a breaker bar. Leave the top bolt attached for now so the shock can hang.
- Pull the lower shock eye off of the lower shock mount and move it aside.
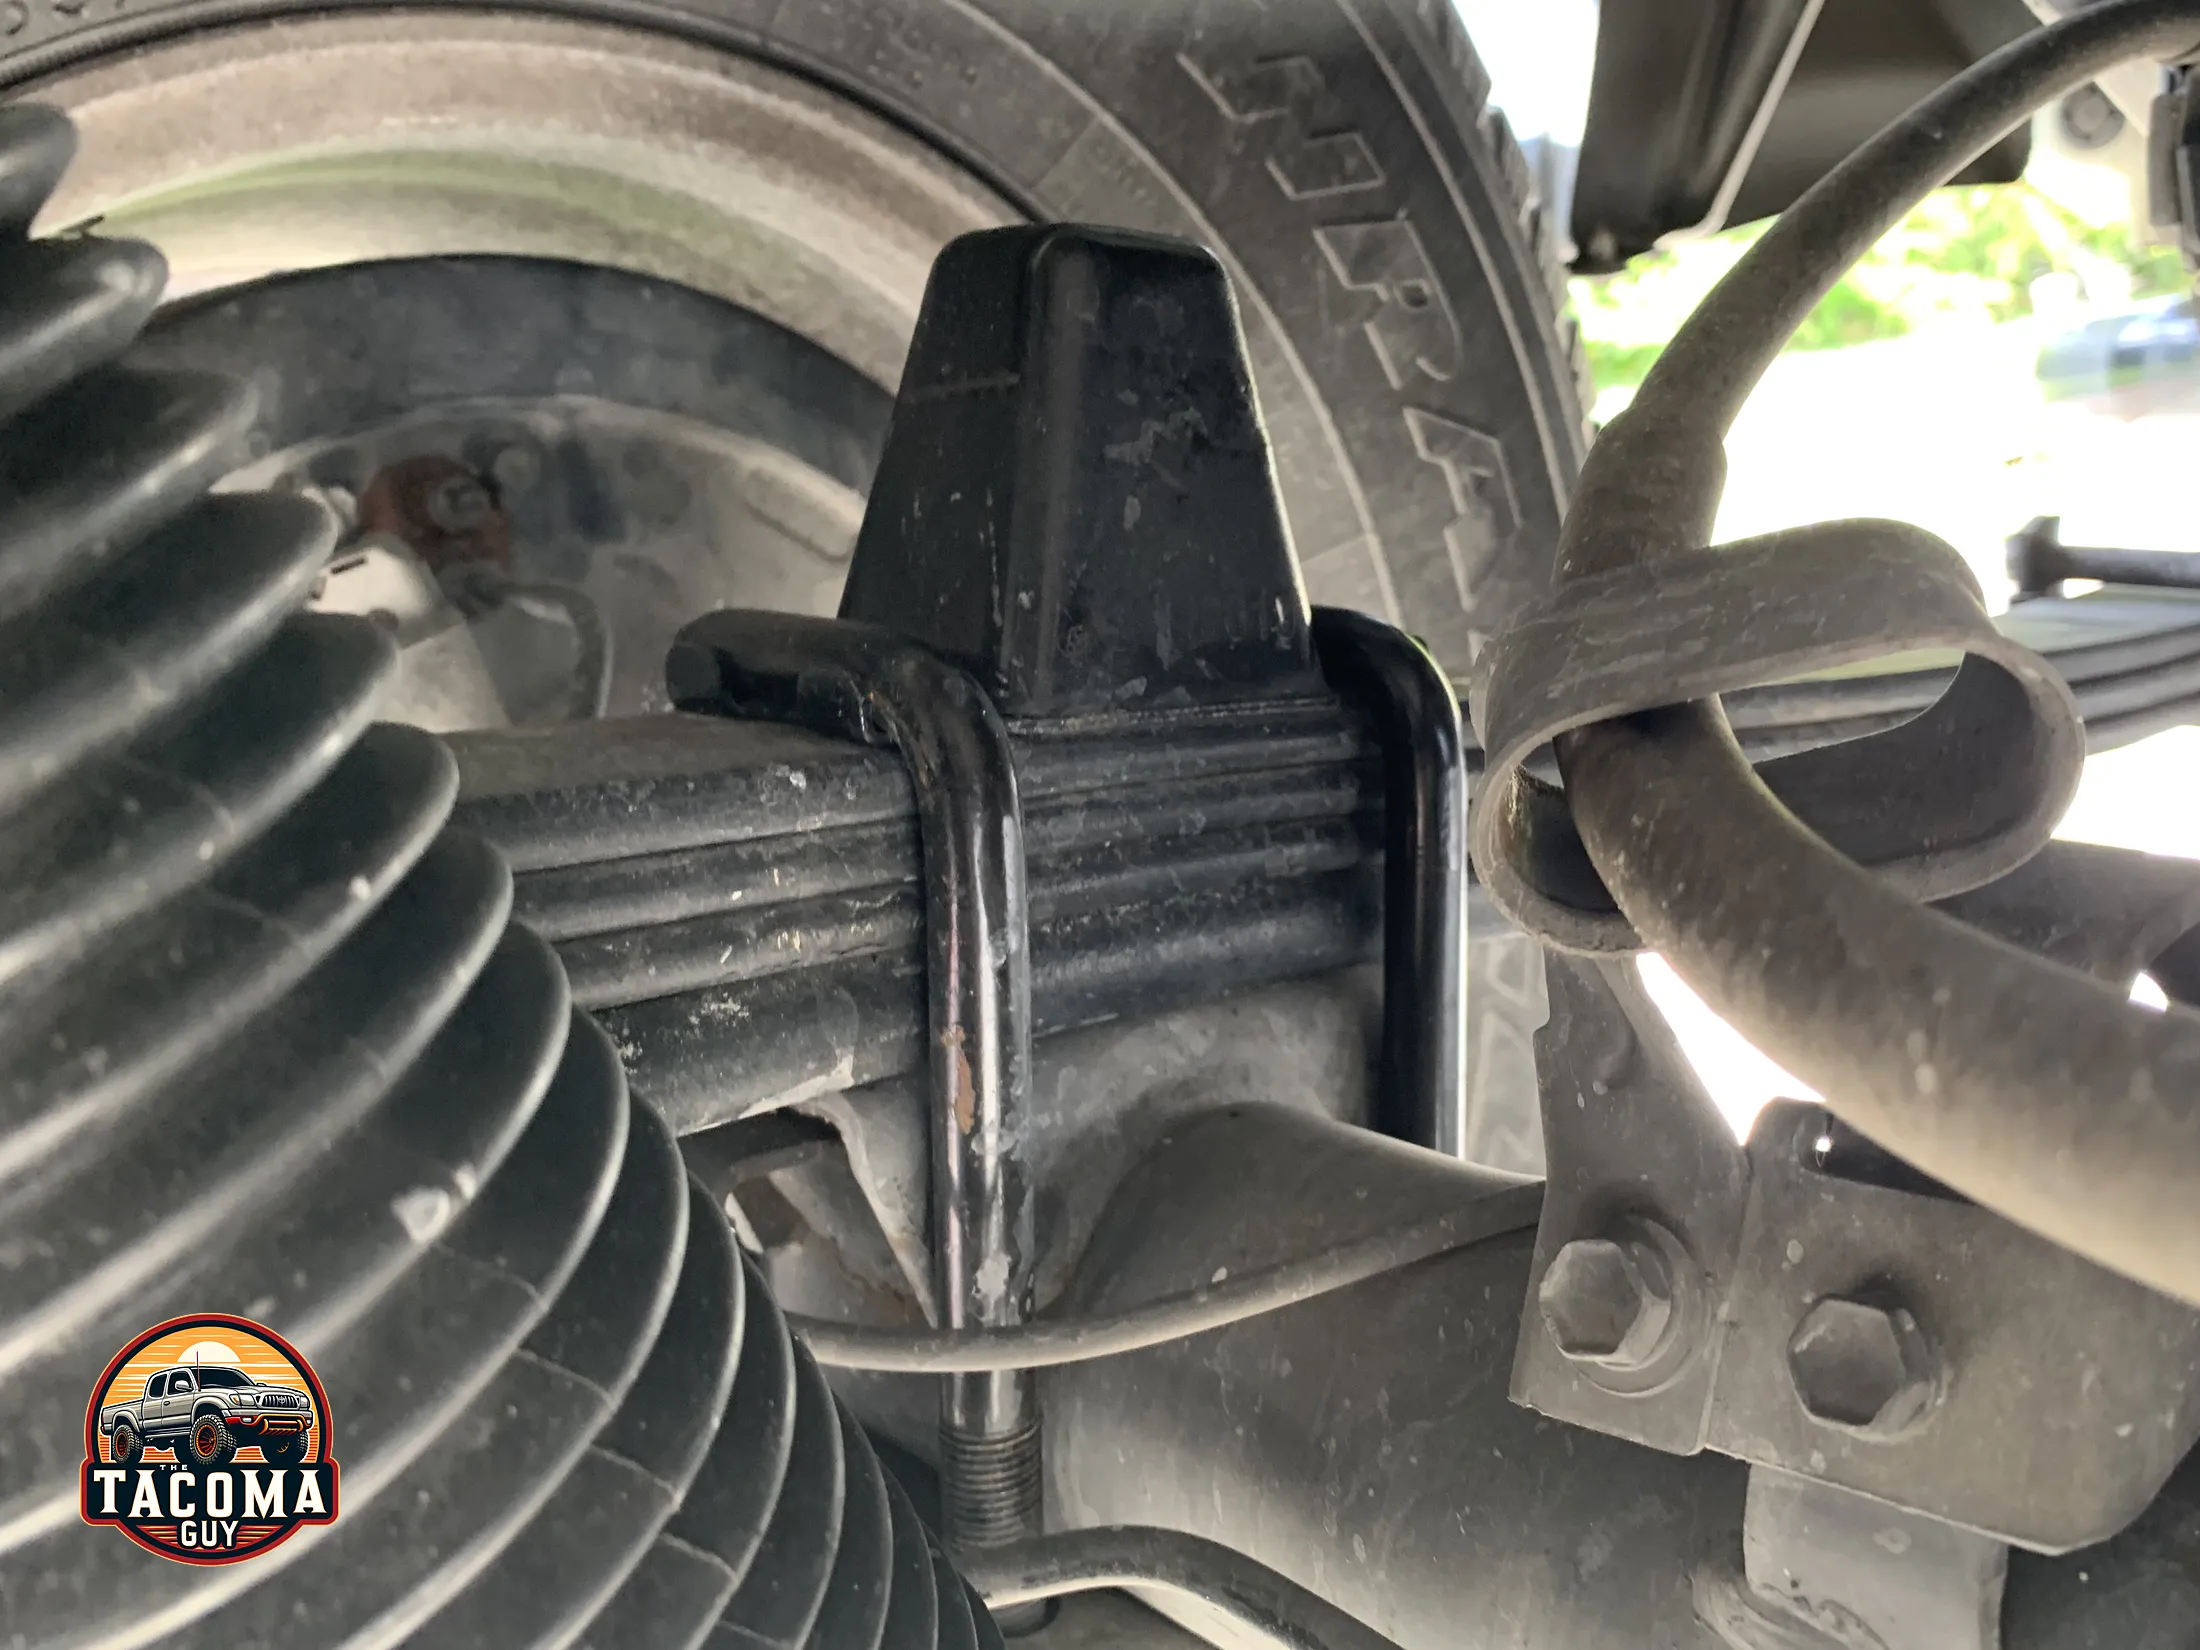
- Using a breaker bar, remove the four nuts that secure the u-bolts which are located underneath (or on top) of the u-bolt plate.
- Remove the bolts, u-bolts, bump stop, and plate and put aside. You are not reusing the u-bolts, you should always get new ones when replacing leaf springs.
- Now you can remove the tension between the leaf spring and the axle, which makes removal possible: remove the 3 ton stand and (while keeping an eye on your brake line!) lower the floor jack slowly to move the rear axle downward.
- Watch the area where the leaf spring touches the perch on the axle. Once you see a little bit of daylight between them (a gap) stop lowering the axle, and then lift it back slightly so they are just touching. Then replace the 3 ton jack stand under the axle (adjust the height of it to match the new height of the axle.)
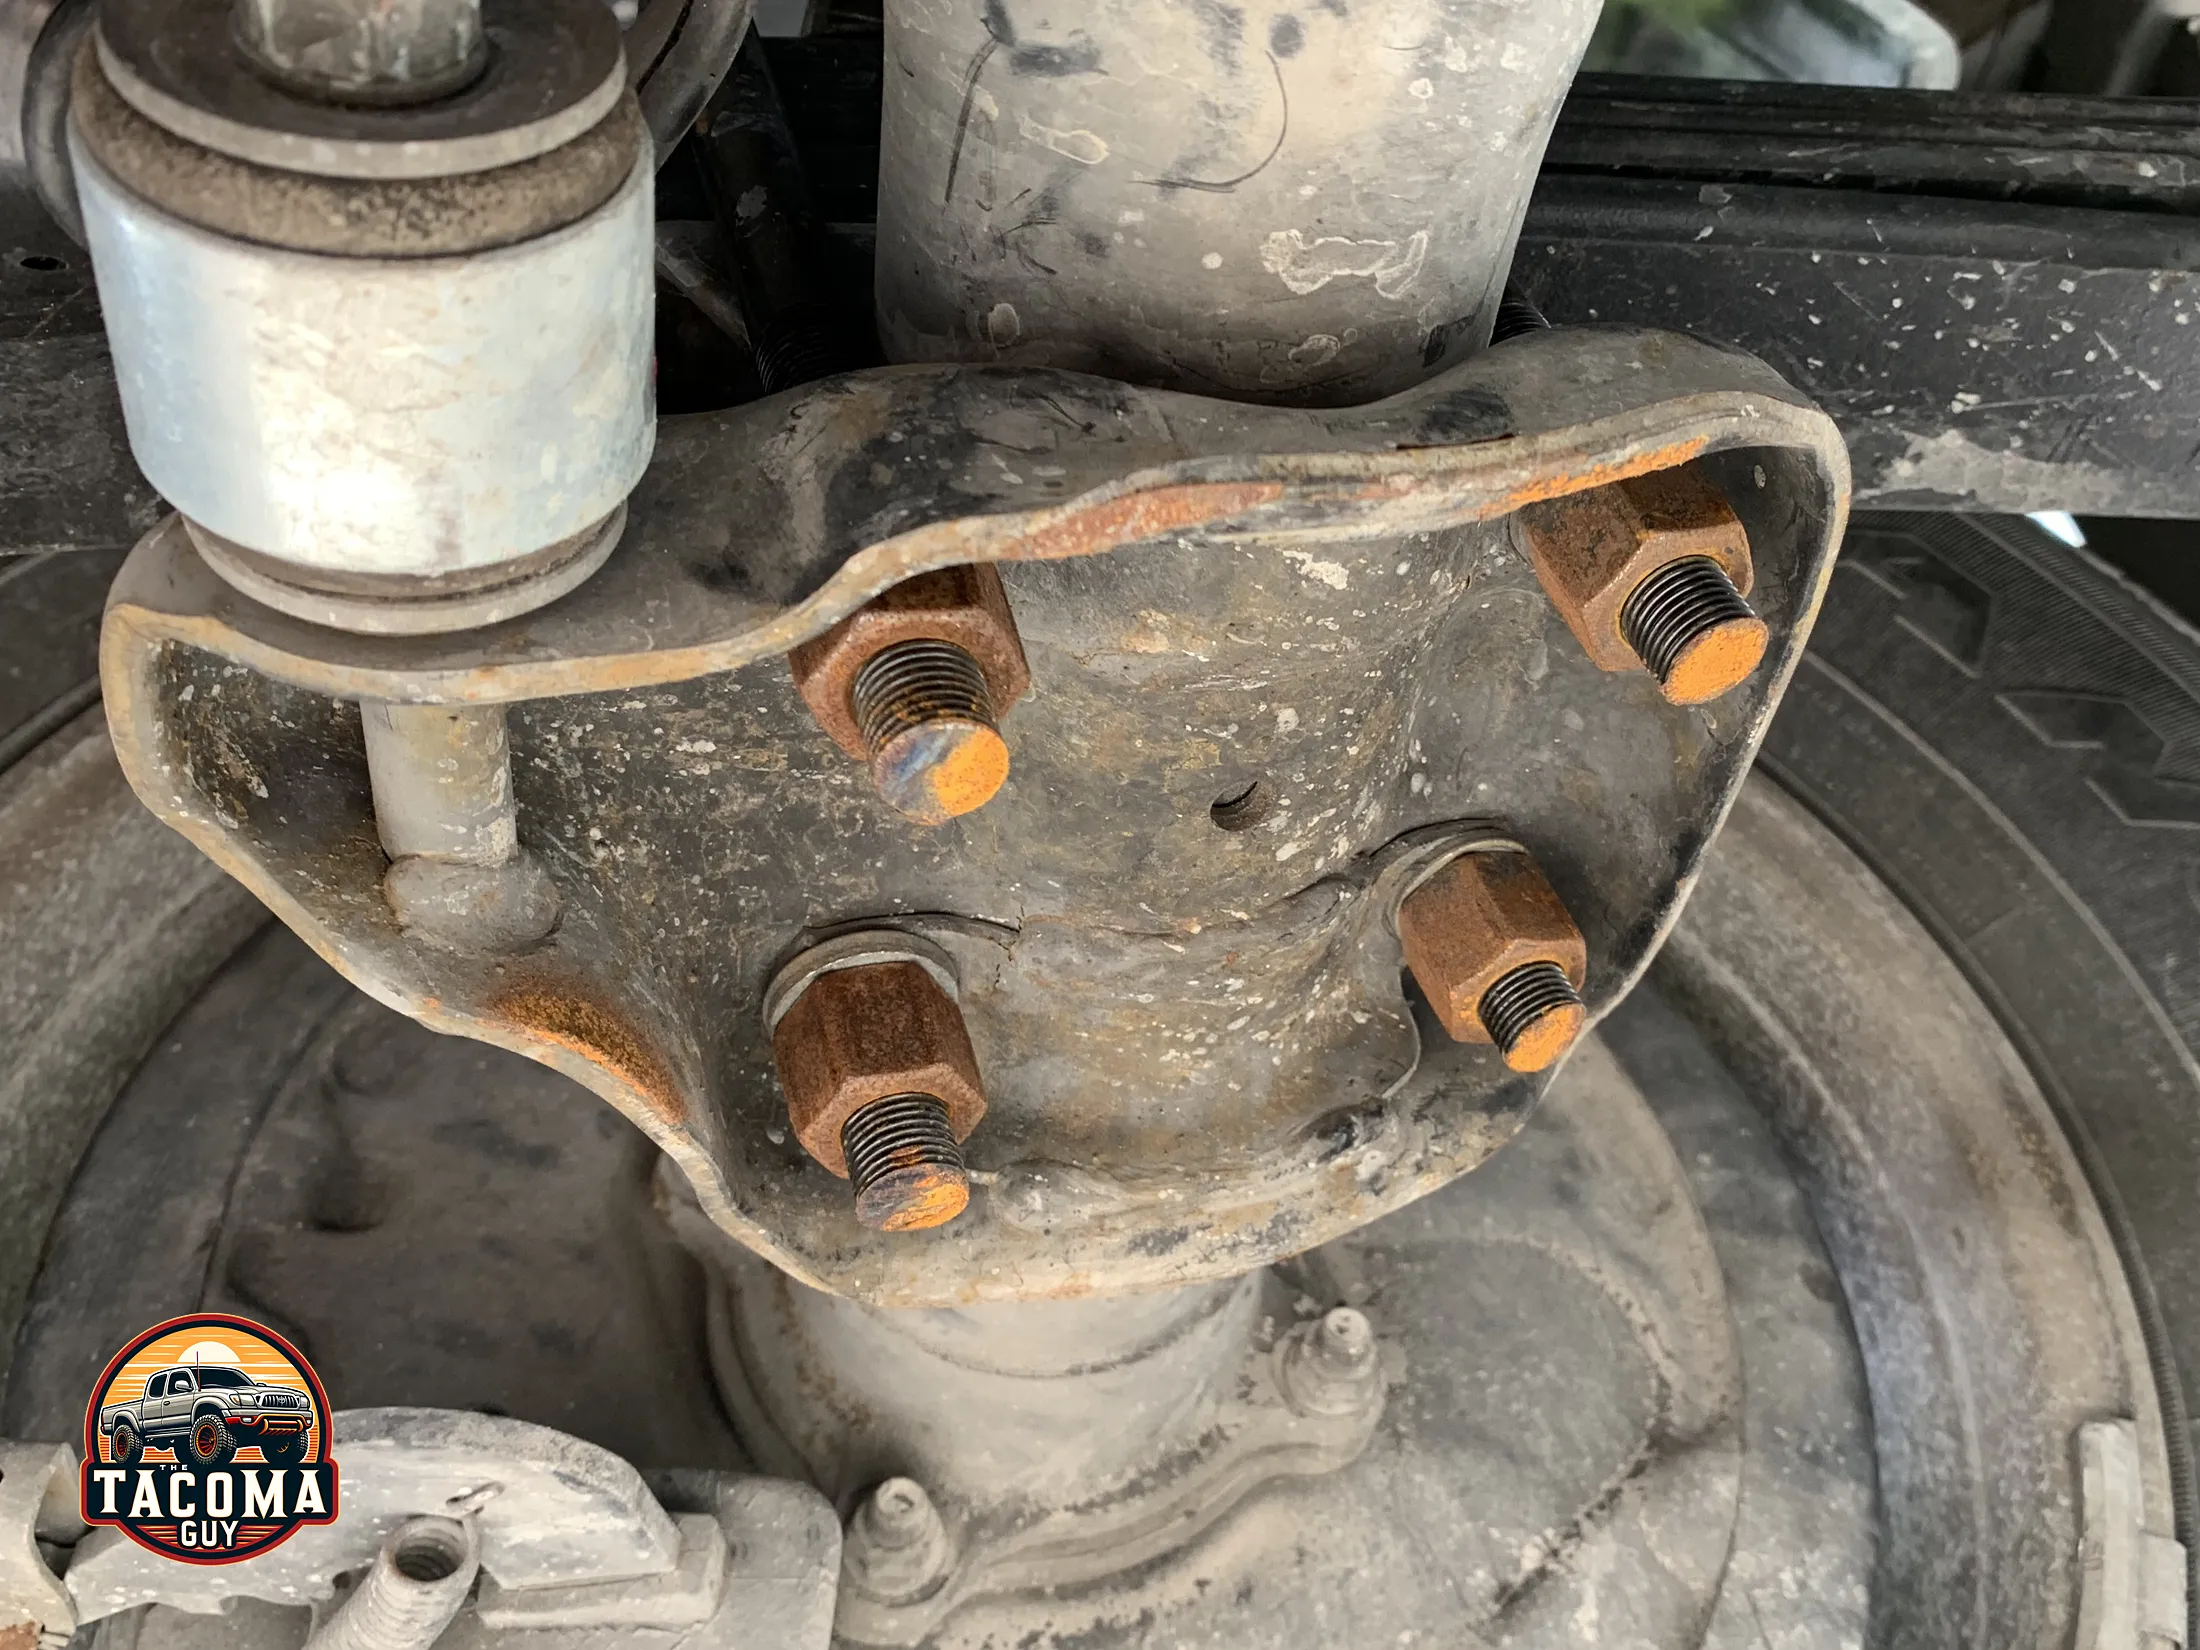
- Now you can loosen and remove the two nuts and the rear shackle with a 19mm socket. Remember which way they were installed – or just go look at the other shackle if you forget.
- Using a 19mm wrench and socket remove the bolt at the front of the spring. If the bolt isn’t budging, double check your tension on the spring, make sure there isn’t pressure from it fighting you.
- Carefully remove the old leaf spring while making sure you don’t get it caught up on any hoses or cables.
Installing the New Leaf Spring:
- Make sure you have the correct orientation of the spring, there is usually some indication which side is the front side. Once you have confirmed that, lift and place the new spring into place and place the center bolt of the spring into the center hole on the axle temporarily.
- If you need to create extra space because your new spring is taller than the old one, you might need to lower the axle or raise the truck higher. Do so carefully and make sure you have your 6 ton stands placed where they can catch the truck if the floor jack fails.
- Bolt up the rear shackle and the front bolt, but do not torque yet, just get them tight enough so they are a little snug. Make sure there is still little to no tension on the spring from the axle, make adjustments to the truck height again if necessary.
- You might now notice that the bolts on the spring aren’t sitting correctly in the holes on the axle, this is where the ratchet strap comes into play. Figure out if you need to move the axle forward or backwards.
- Pick a point on the frame in the direction you need to move, loop the strap around the axle then tighten slowly until you are able to get the spring into the holes. Keep the strap on for now.
- Jack up the axle now, so that you are putting tension on the spring and have it nearly in its “resting position” as if it were on the ground.
- Now put on your new u-bolts, attach the u-bolt plate and don’t forget your top u-bolt plate (with the bumper on it.) Hand tighten and make sure the bolts are all even, then torque them to 80 ft lbs. (You are going to torque to 90 ft lbs once the truck is on the ground at the end of the install.)
Changing Out the Shocks
- If you are changing out your shocks too, now is the time to do that. Remove the top 19mm bolt of at the top of the shock and get the old shock off. You will likely need a ratchet extension to reach the bolt on the passenger side.
- Install the new shock from top to bottom. You may need to compress the shock to get it onto the bottom bolt, having another set of hands here can help, one person can push the shock up while the other gets the bolt into the bushings and tightens.
Half way done! Repeat steps 10 thru 25/27 for the other side.
Finishing Up & Torque Specs:
- Make sure both tires are on, with the lug nuts hand tight (don’t torque yet.)
- Lower the truck to the ground so it’s sitting on its own weight. No more floor jack or stands.
- Torque the u-bolts to:
- Toyota OEM u-bolts: 90 ft lbs.
- 9/16″ Heavy Duty u-bolts: 110 ft lbs.
- Front leaf spring mount: 116 ft lbs.
- Rear leaf spring shackle: (both nuts) 67 ft lbs.
- Wheel lug nuts: 89 ft lbs.
- Lower shock mount: 53 ft lbs. (Check the paperwork that came with the shocks, it could be different.)