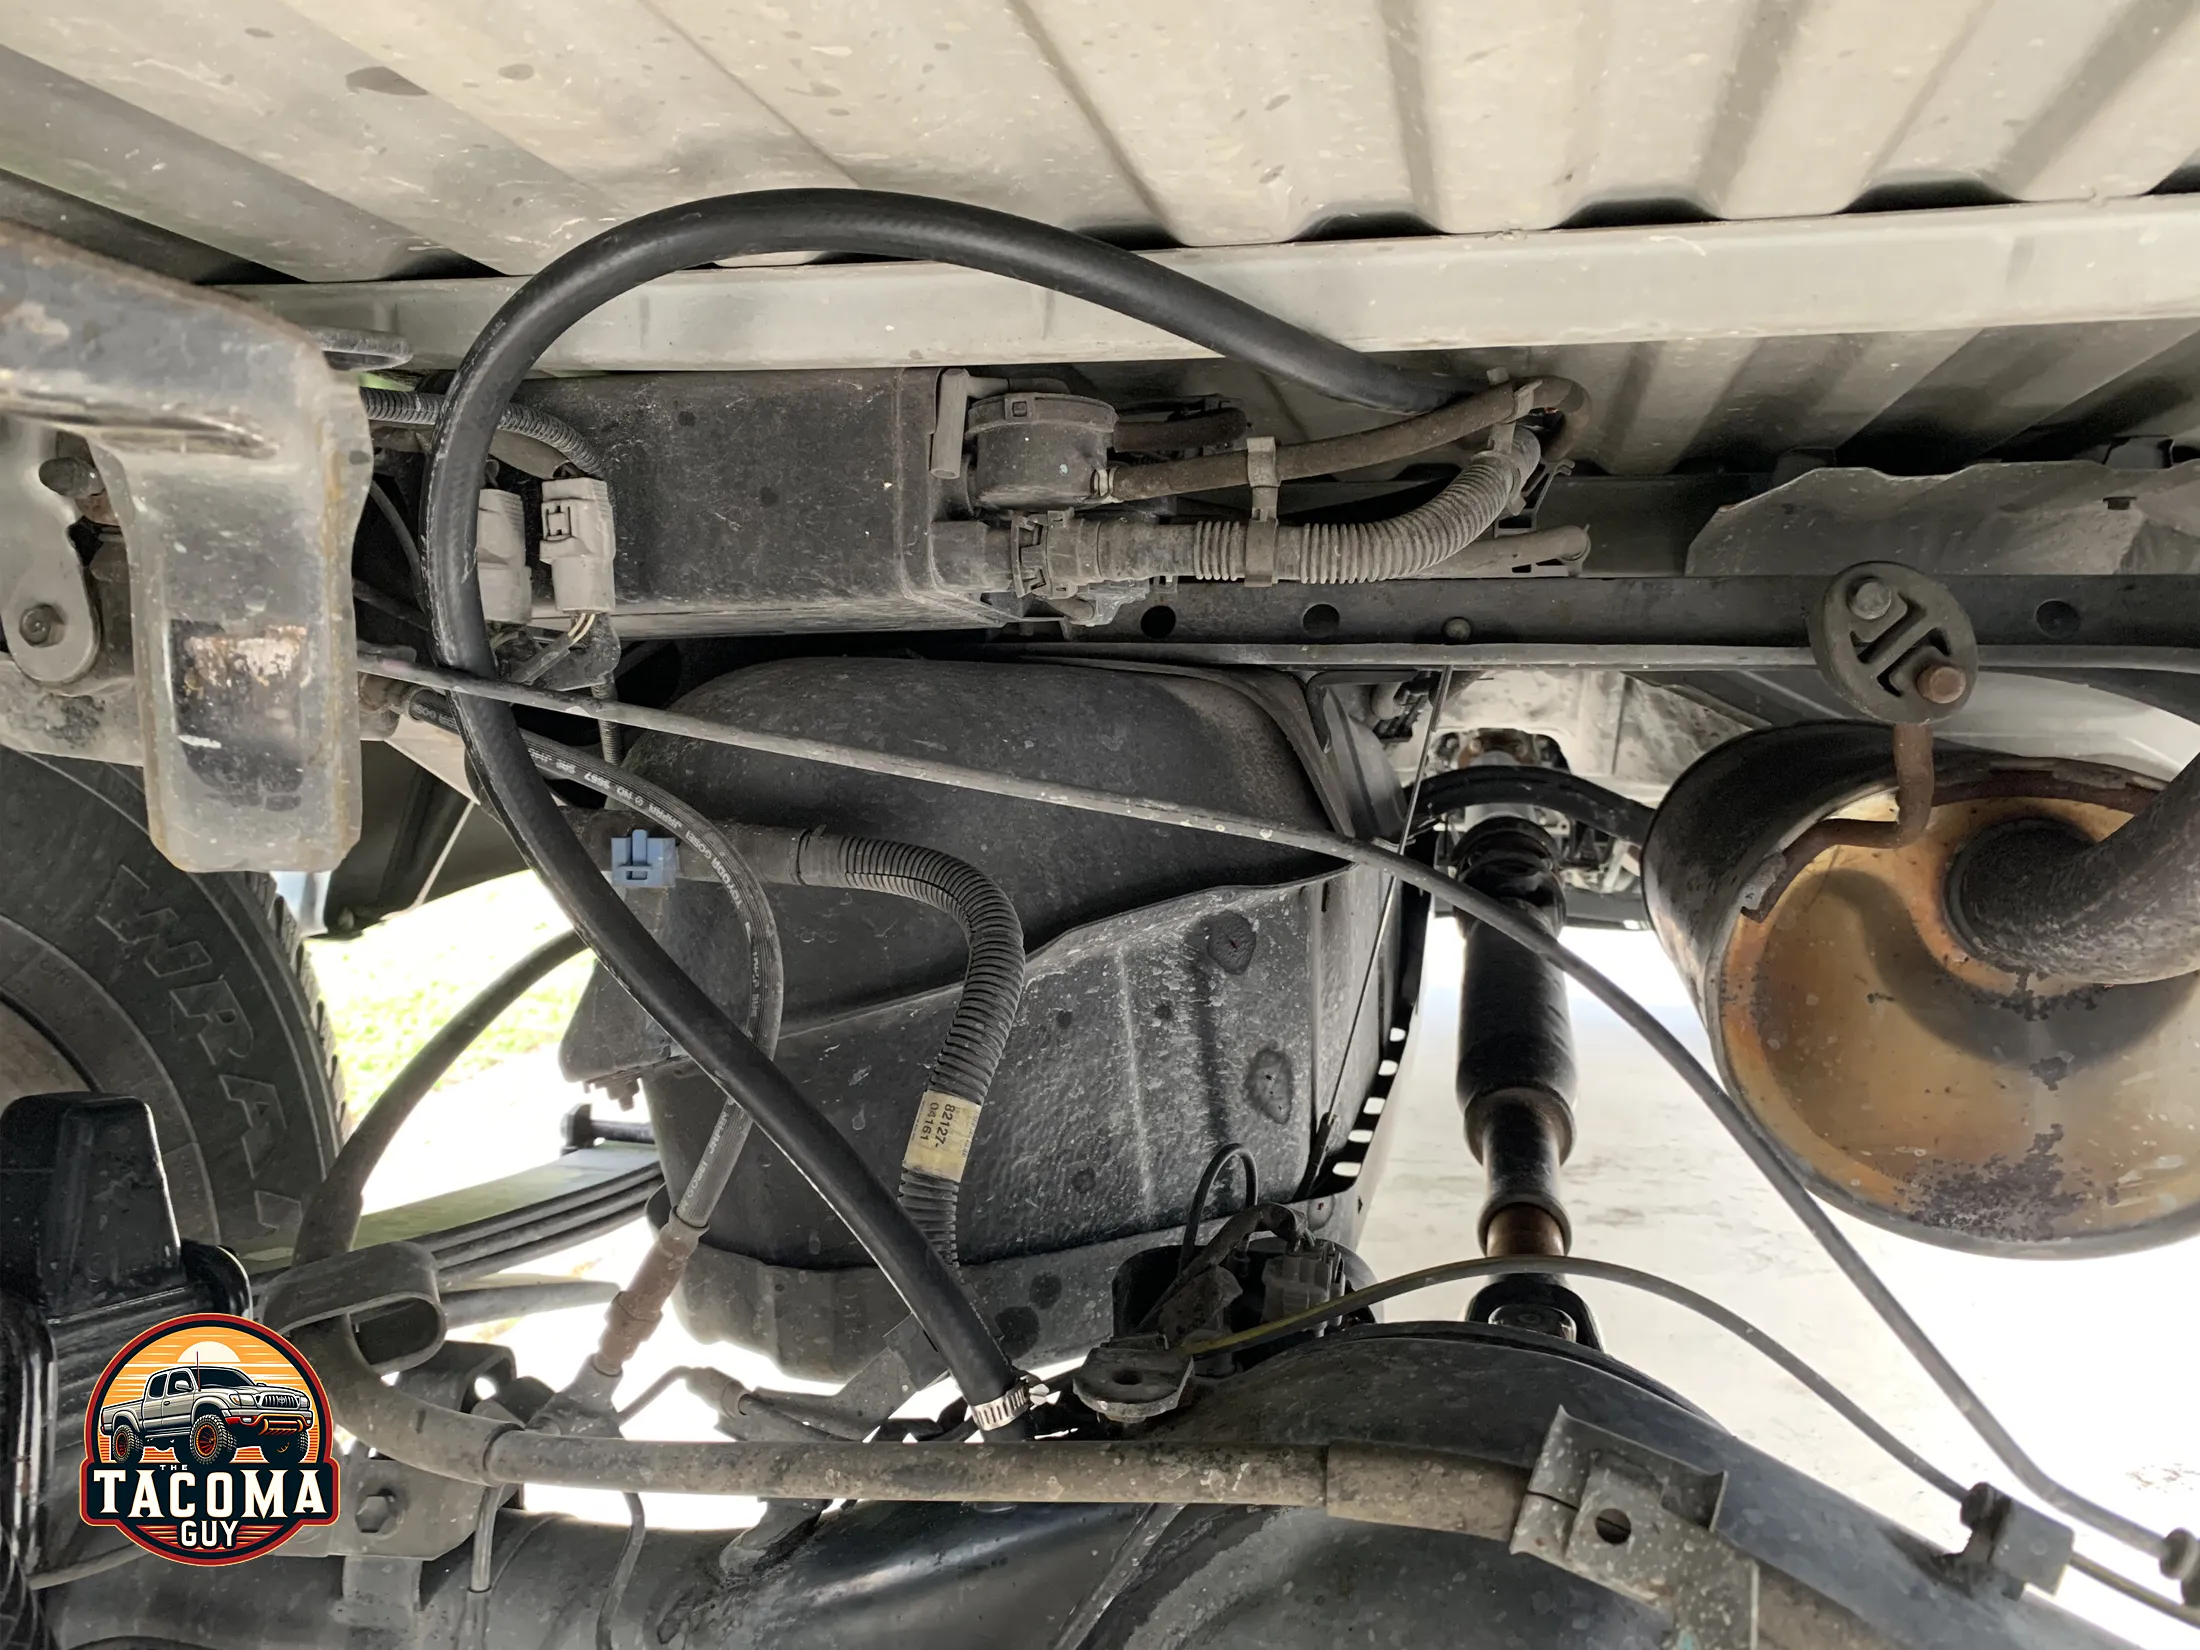
This is a popular modification people like to make, because the breather for the rear differential is directly on top of the differential itself, which means, if it’s submerged water could potentially be pulled into the differential.
That’s bad by the way.
Is it 100% necessary? Nope. You do this when you’ve run out of other mods to do on your truck :^)
This is a super easy to do, costs very little and only takes a little bit of time, maybe 30 minutes.
So what are we doing?
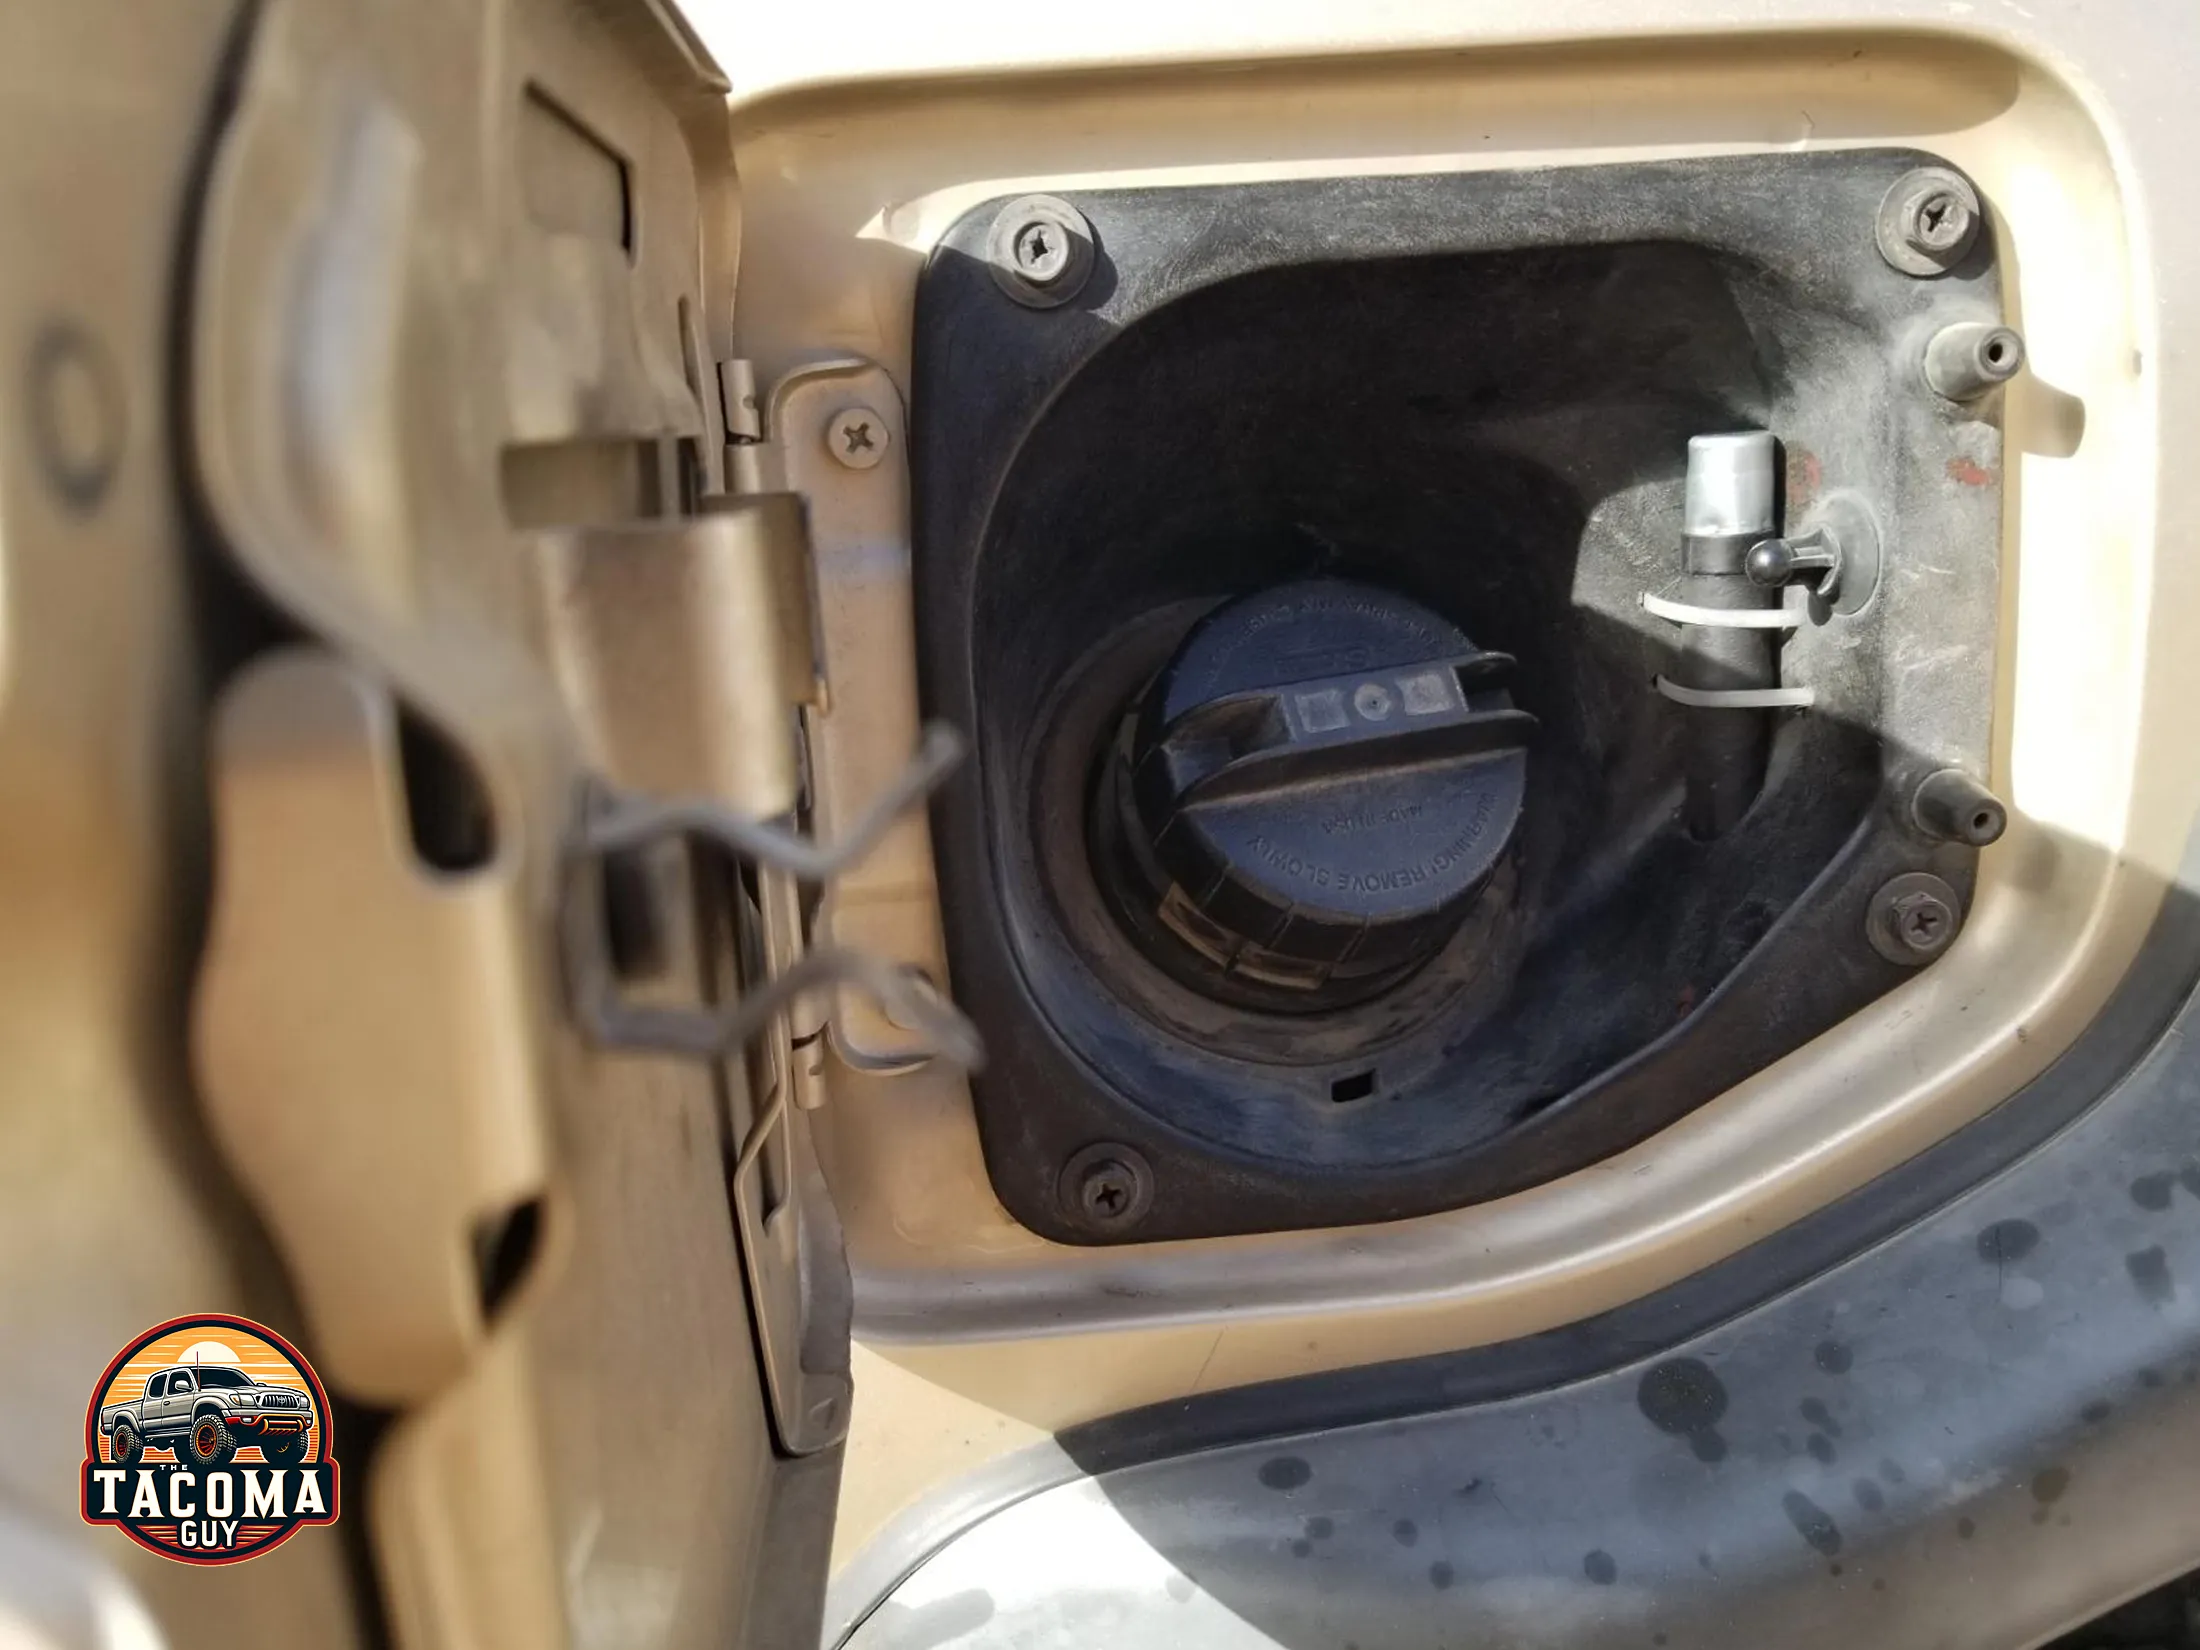
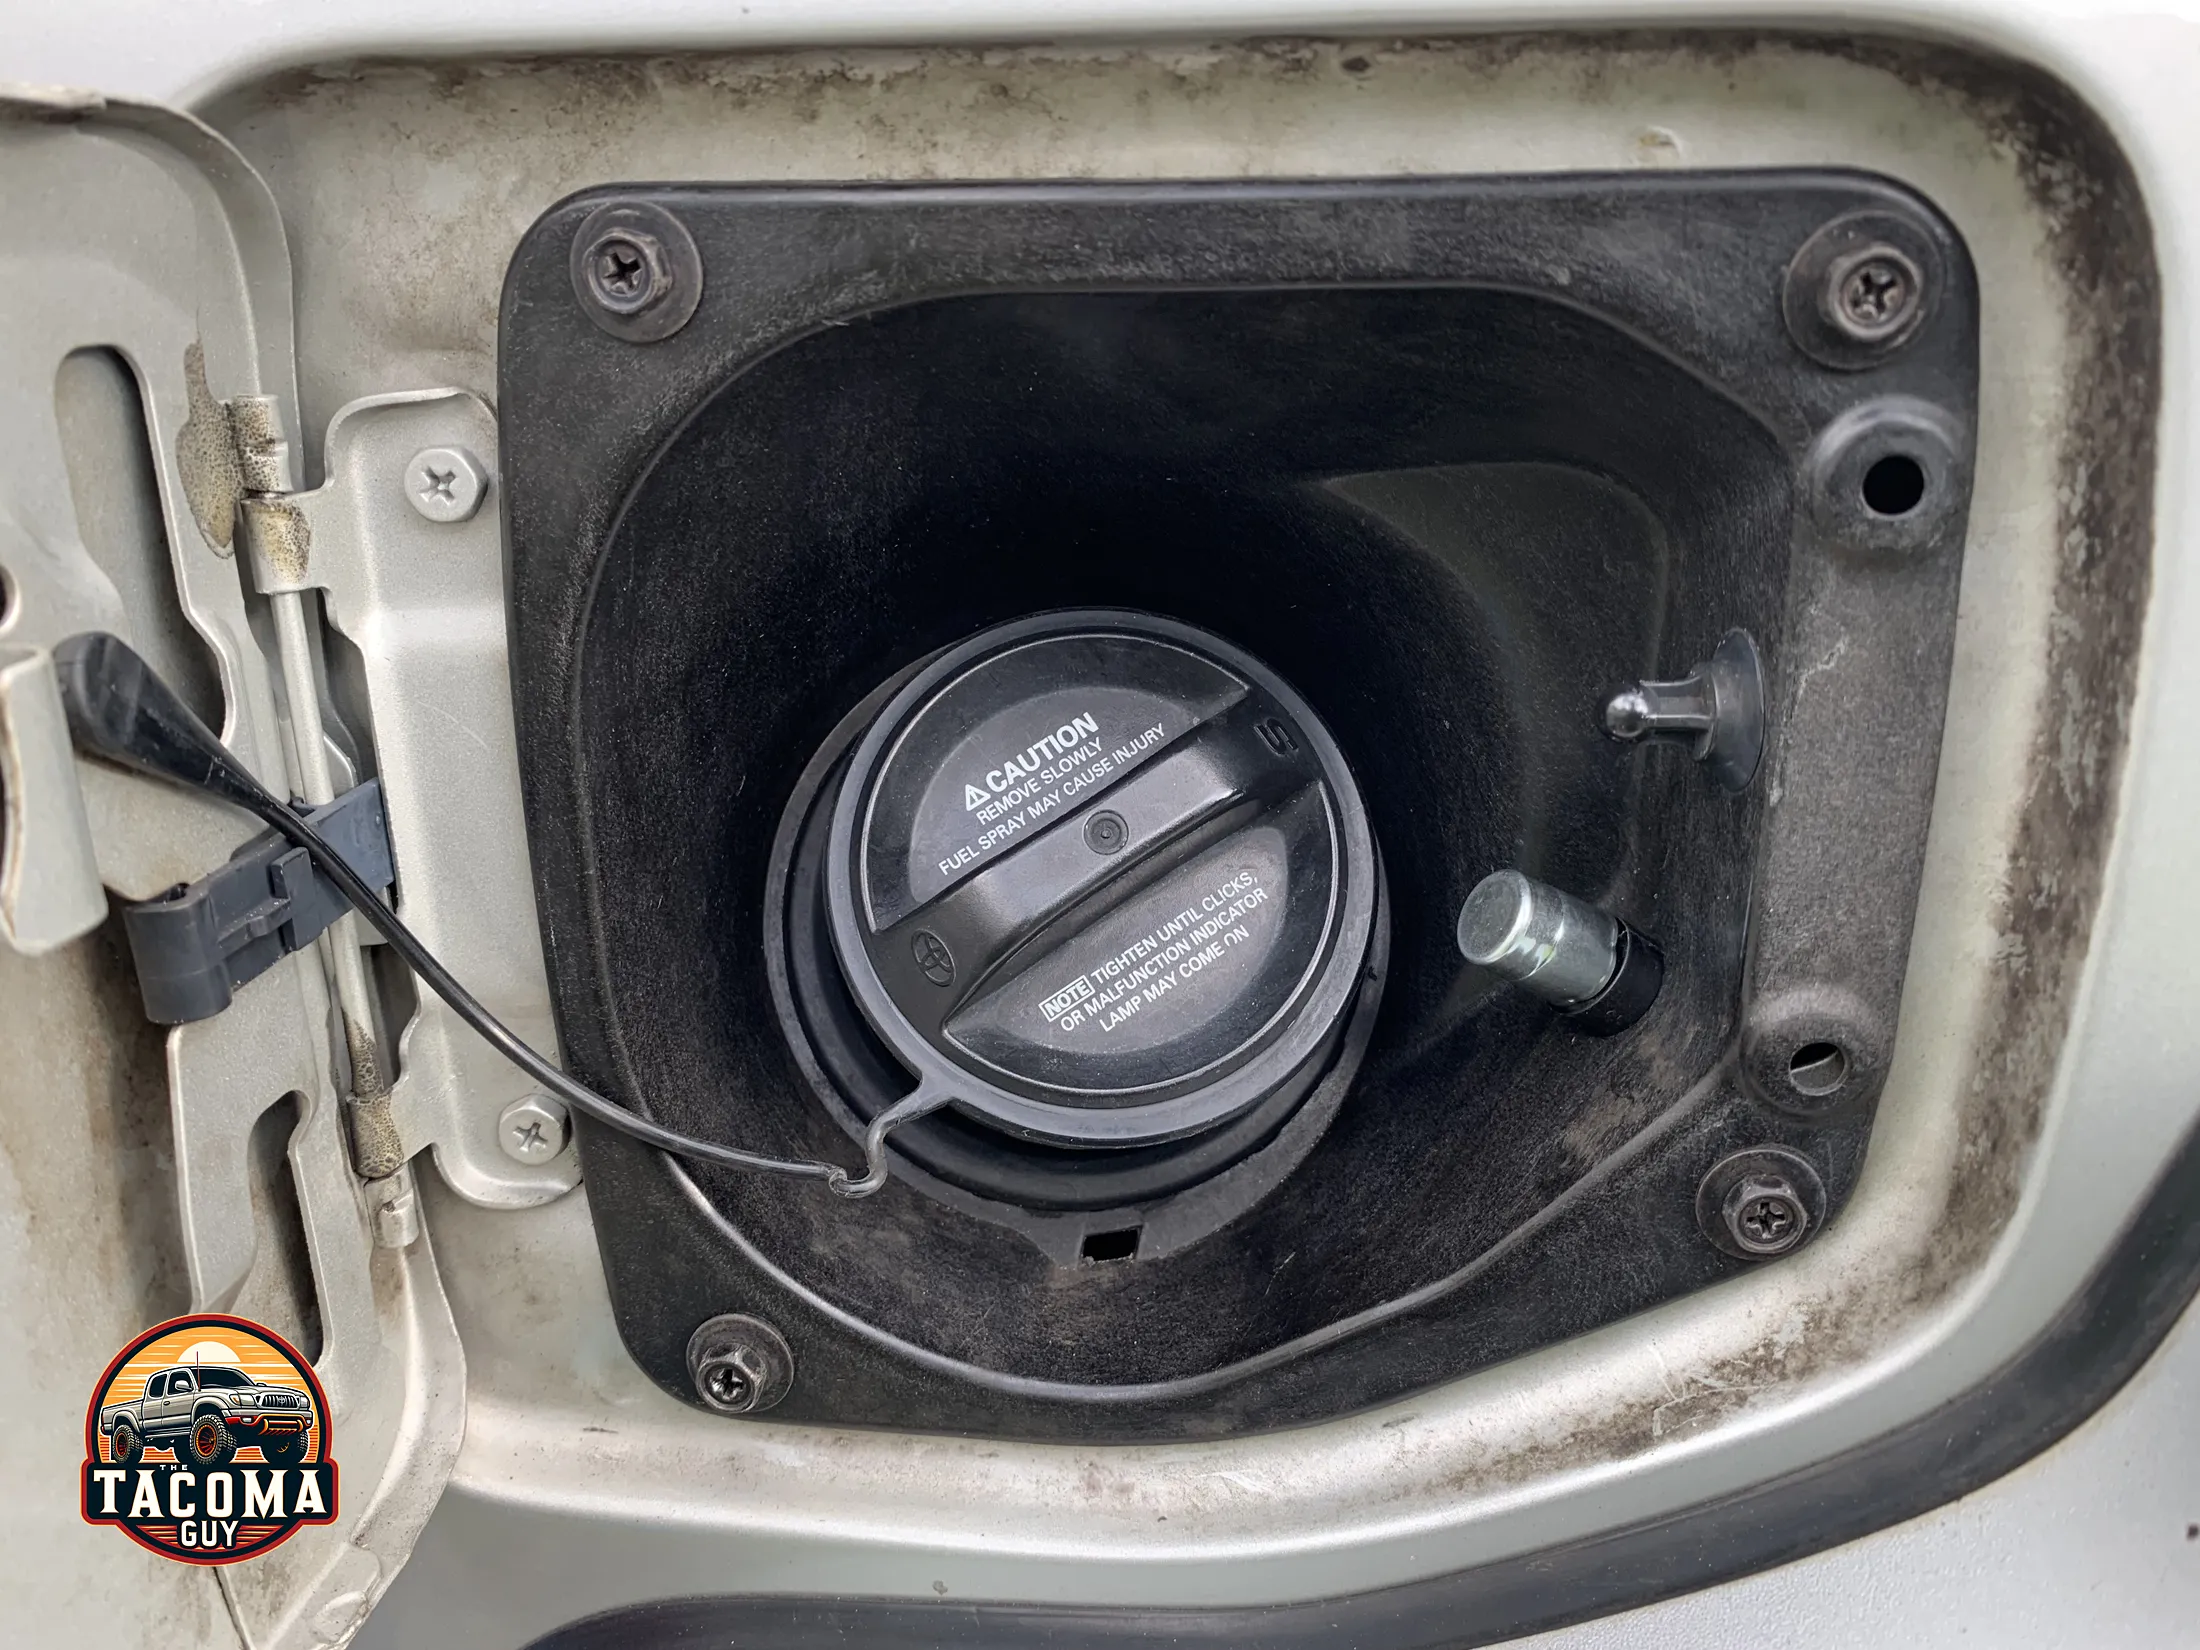
You’re going to replace the breather valve with a hose attachment, route a hose, and attach a new breather valve higher up somewhere else. You can put it behind the fuel door as I did, or up behind a rear taillight or somewhere else.
Parts required:
90930-03136 Plug Breather
90404-51319 Union
3/8 Inch (10mm) ID Fuel Line Hose 10FT (I used about 8 feet)
Tools Needed:
14mm wrench to remove the breather from the case
A screwdriver or wrench to tighten the hose clamps
A drill if you plan on making a hole
Steps to Replace the Differential Breather
Step 1: Prepare the Vehicle
- Drop the Spare Tire: You’ll want the extra room to move around under the truck. Don’t know how to do that? Here is how to drop the spare tire on your Tacoma.
- Clean around the Plug: make sure the area around the plug breather you are about to remove is free of dirt and grease. I used Formula 88 Cleaner & Degreaser and some blue shop towels to make it all shiny. Don’t skip this step, you do NOT want dirt or contaminants in your gear box.
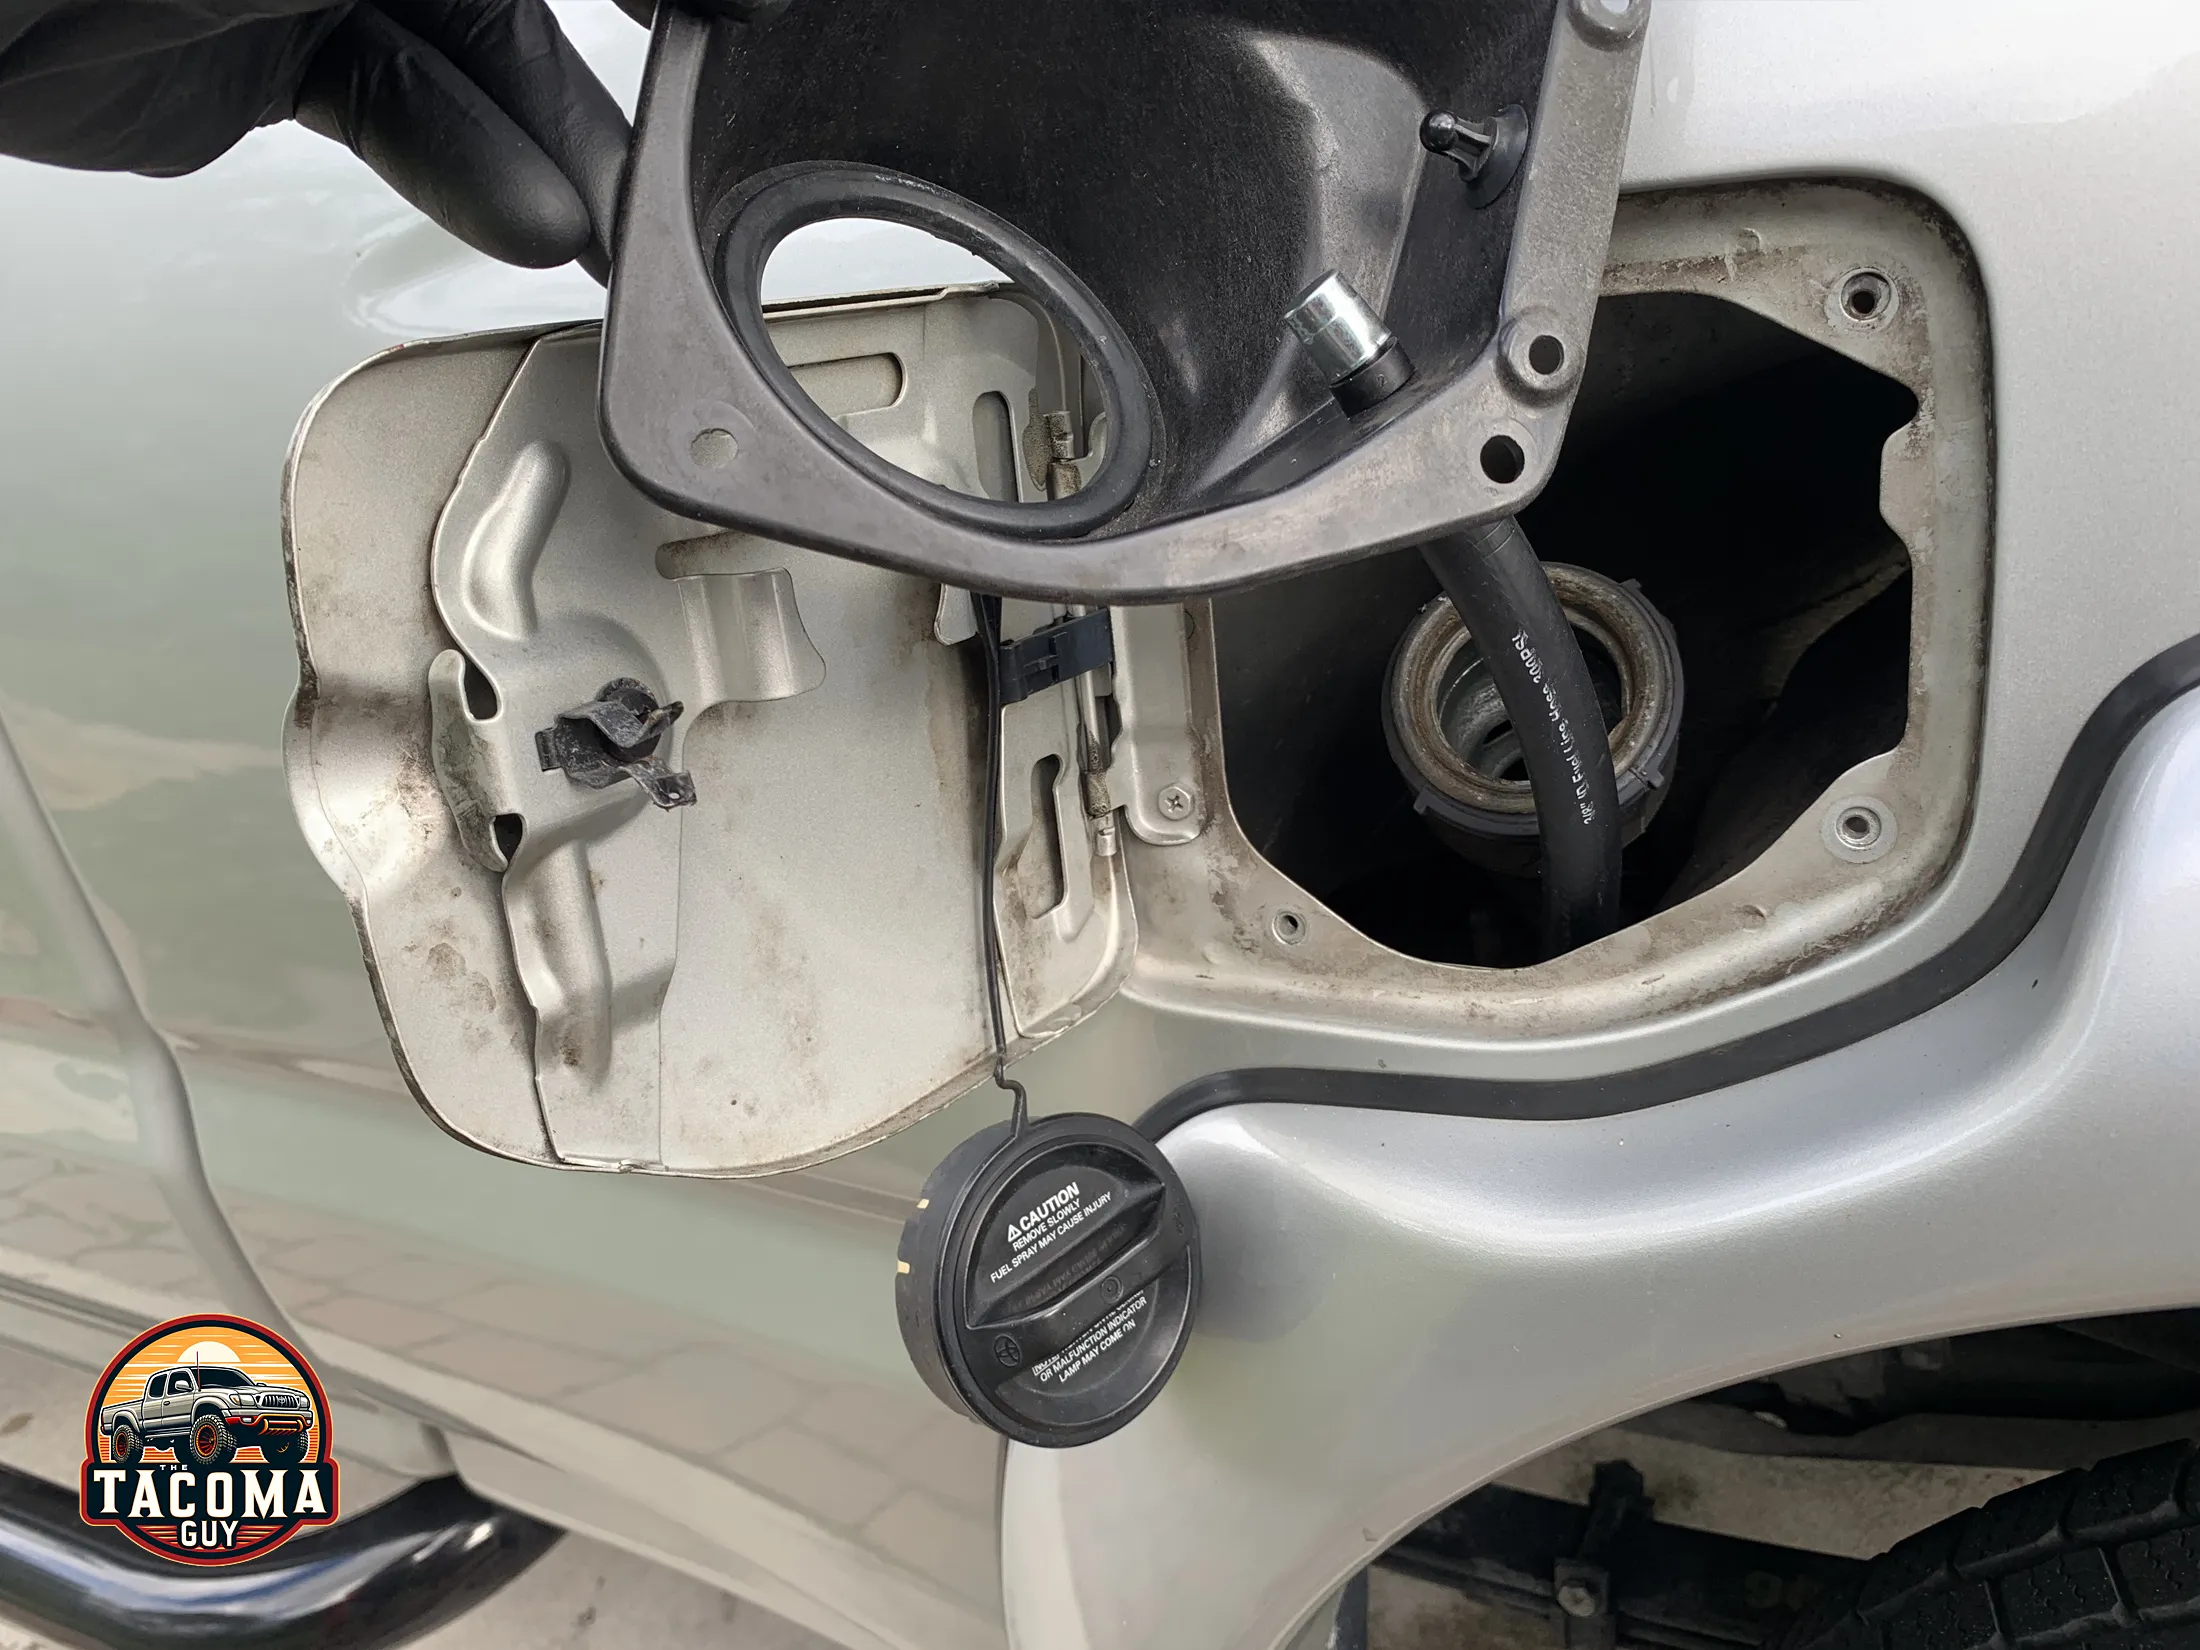
Step 2: Remove and Prep the Fuel Shield
- Remove the Fuel Tank Shield Assembly: there are 4 screws holding it in place (90159-50339) that you can use a screwdriver or socket wrench to remove. I preferred the socket wrench. Wiggle this part out over the fuel tank inlet pipe and take it to your workbench. It’s easier to work with when its off the truck.
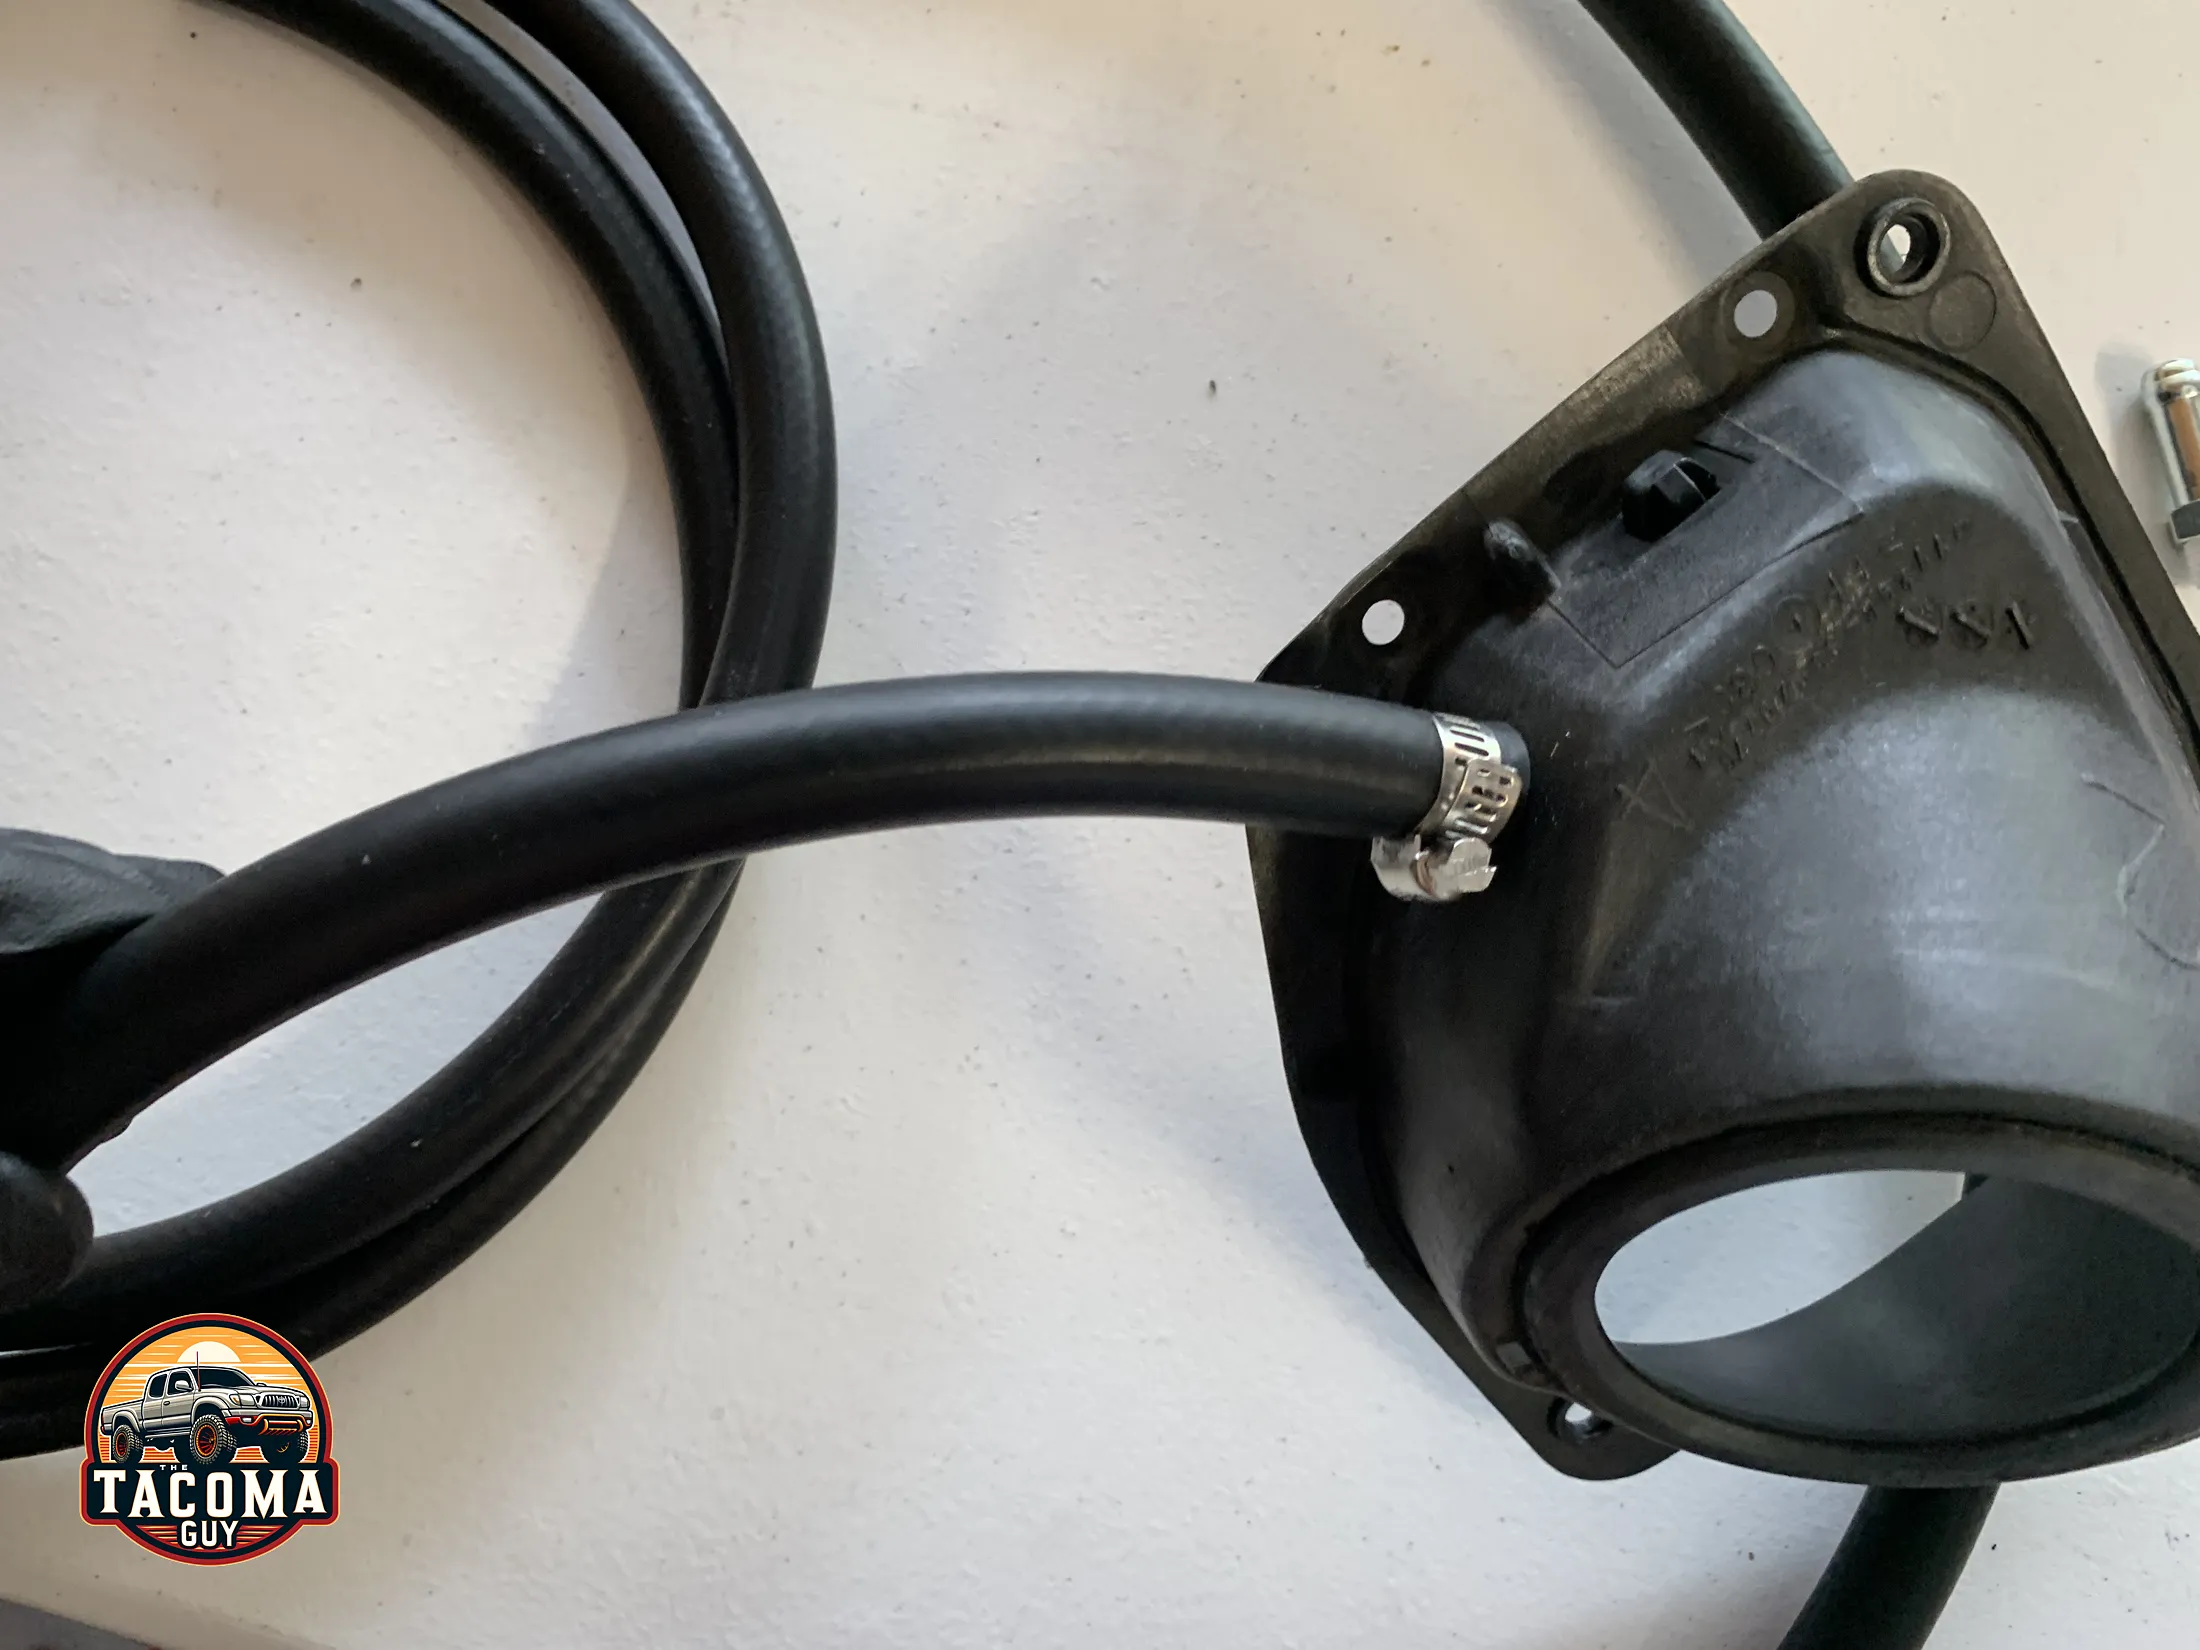
- Locate Plug Breather Location: Now pick a spot on the shield where you want to install the new plug breather. I wanted mine to still stay somewhat vertical (as the existing one) since gravity pulls the plug breather cover down, so I opted for the lower right hand corner.
- Drill a hole: I forget what size bit I used, just hold it up to the plug and make sure its the same size or a little bigger.
- Mount the Breather: you can do what I did (photos below) and mount the breather directly into the shield or do what somebody I found did, make the hole big enough to pull the hose through and mount the breather truly vertical. I like the way he did it a little better and think this is the way to go, I’ll fix mine later.
- Secure the hose to the Breather: Now put your clamp on the hose, attach the hose to the breather and clamp it down.
Step 3: Install the Shield and Hose
- Feed the hose: Feed the hose line thorough the opening down into the body of the truck. Get it all in there.
- Reinstall the shield: You’re gonna have to wiggle it on there, the hose will get in the way a little bit, but with a little finagling you’ll get it back into place and over the fuel intake.
- Reattach the shield: Screw the shield back into place.
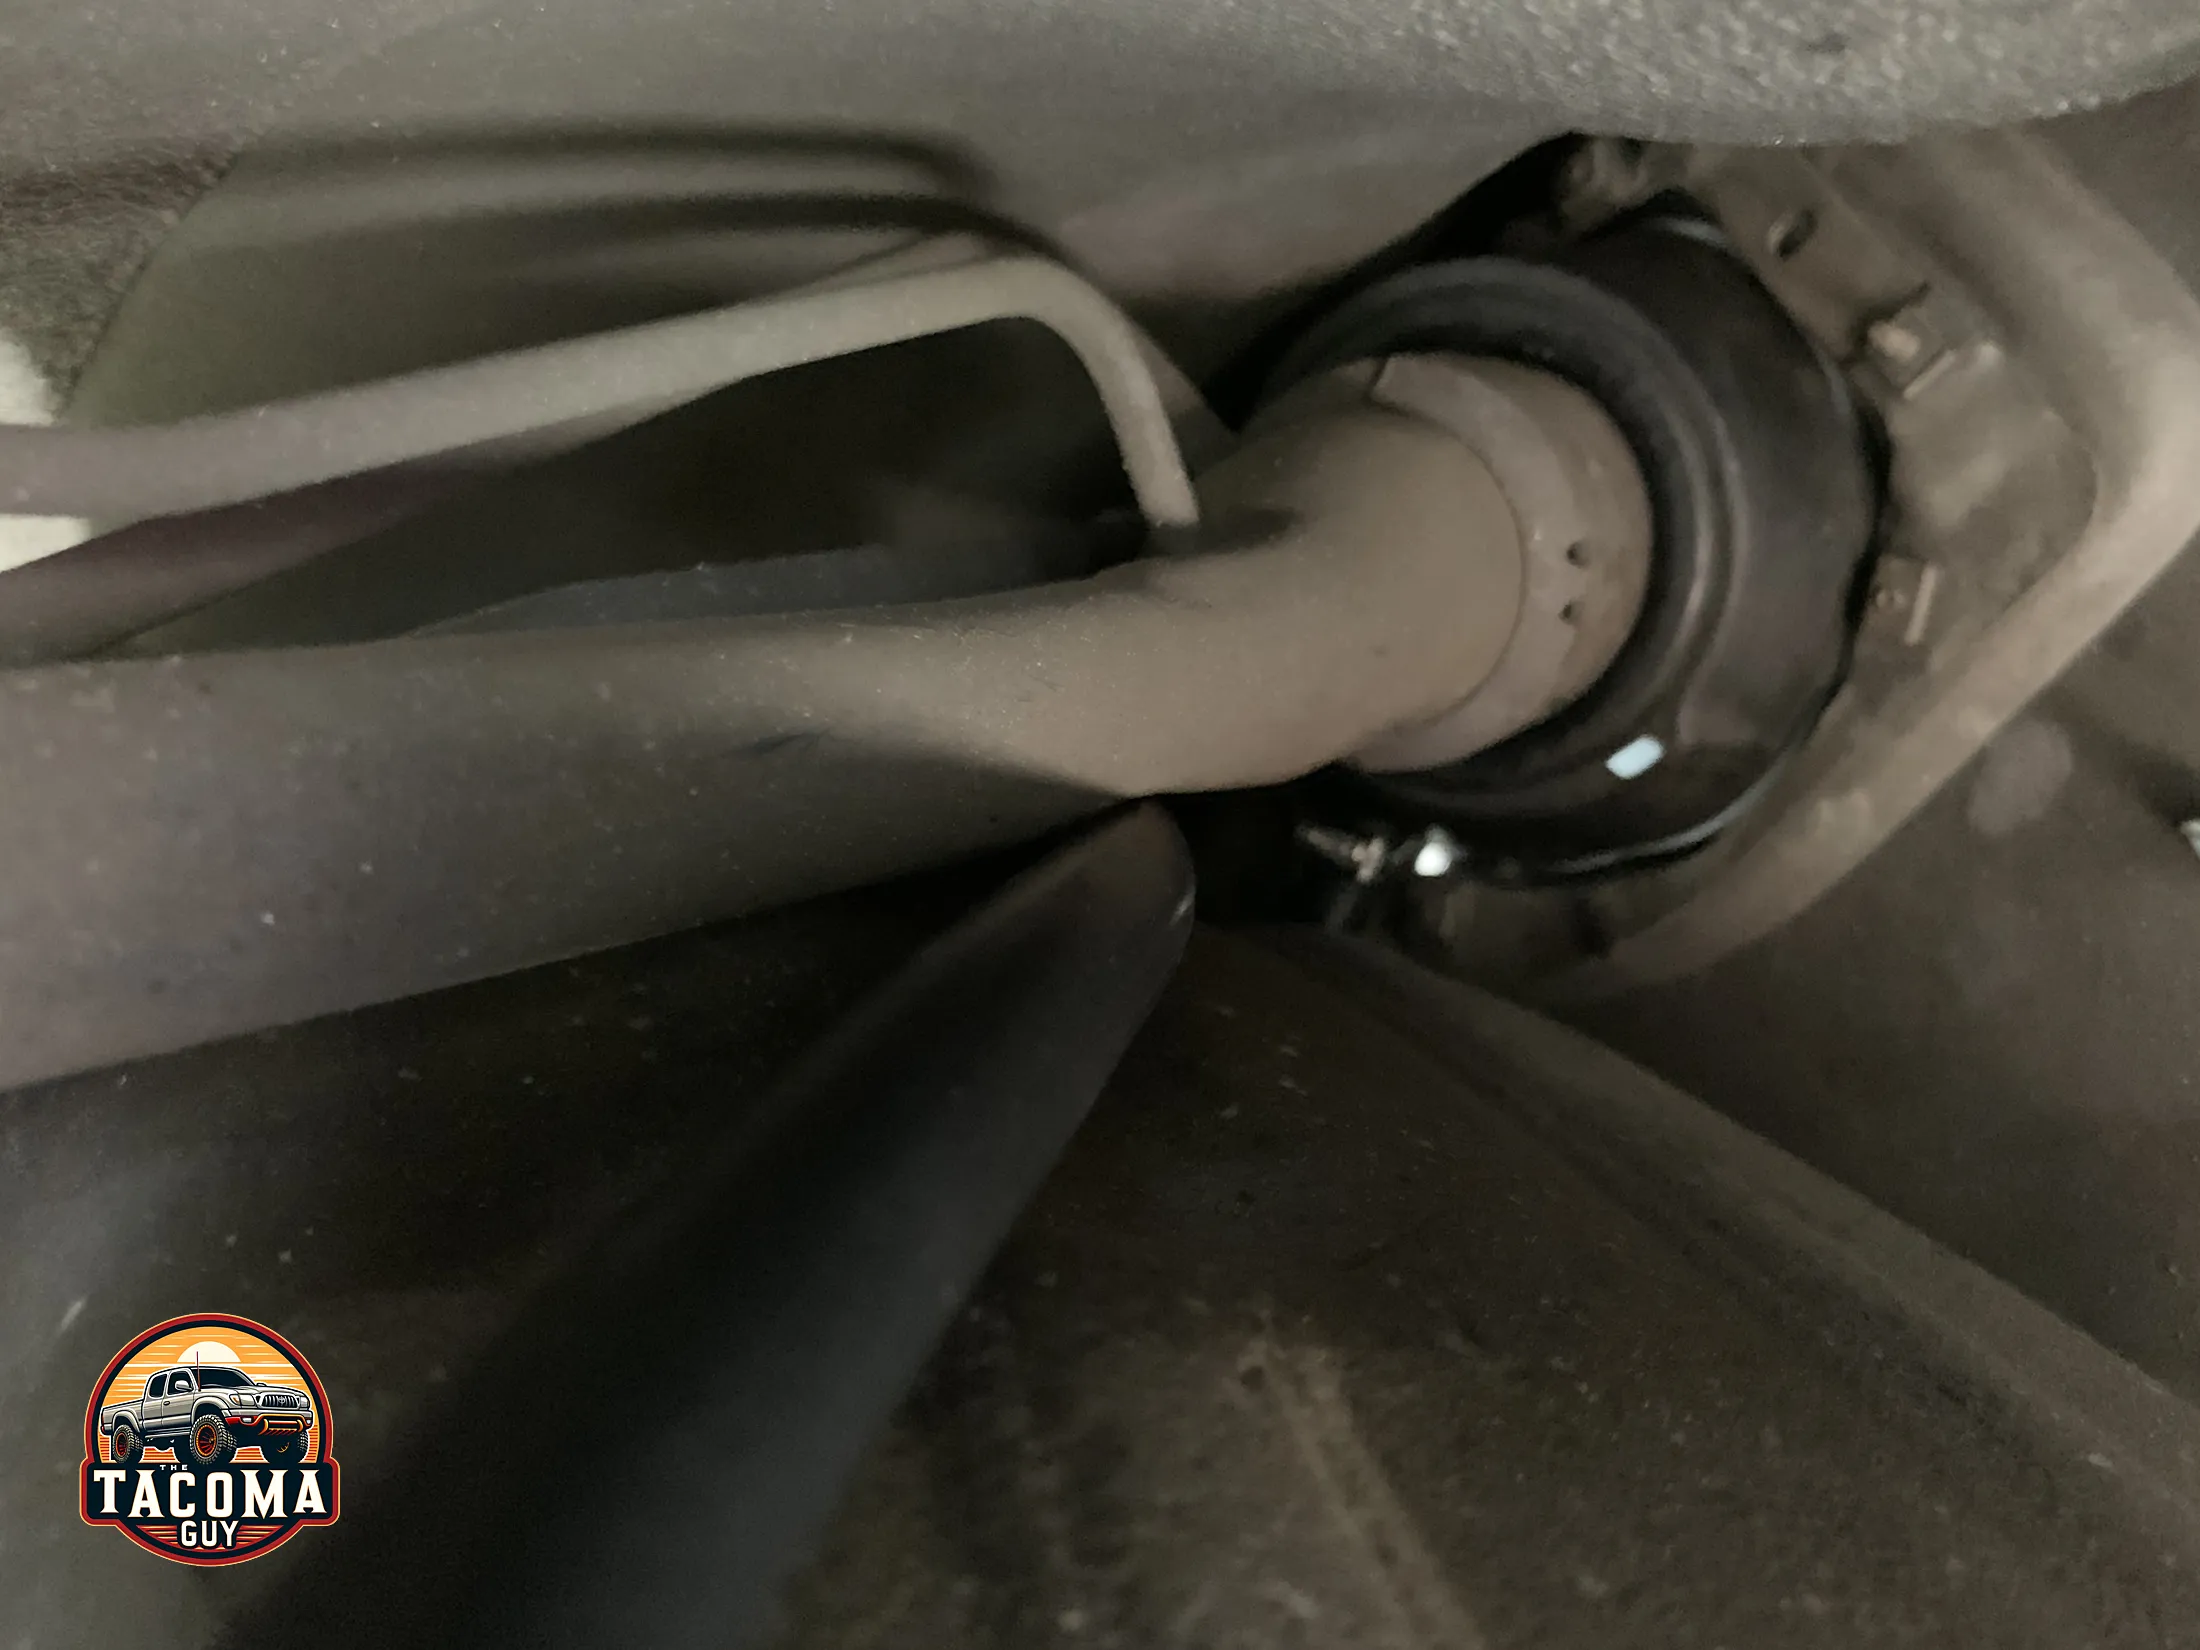
- Route the hose: Now, get under the truck and figure out where you want to hose to route. I looped mine up and over the fuel tank and over the bracket that hold it in place.
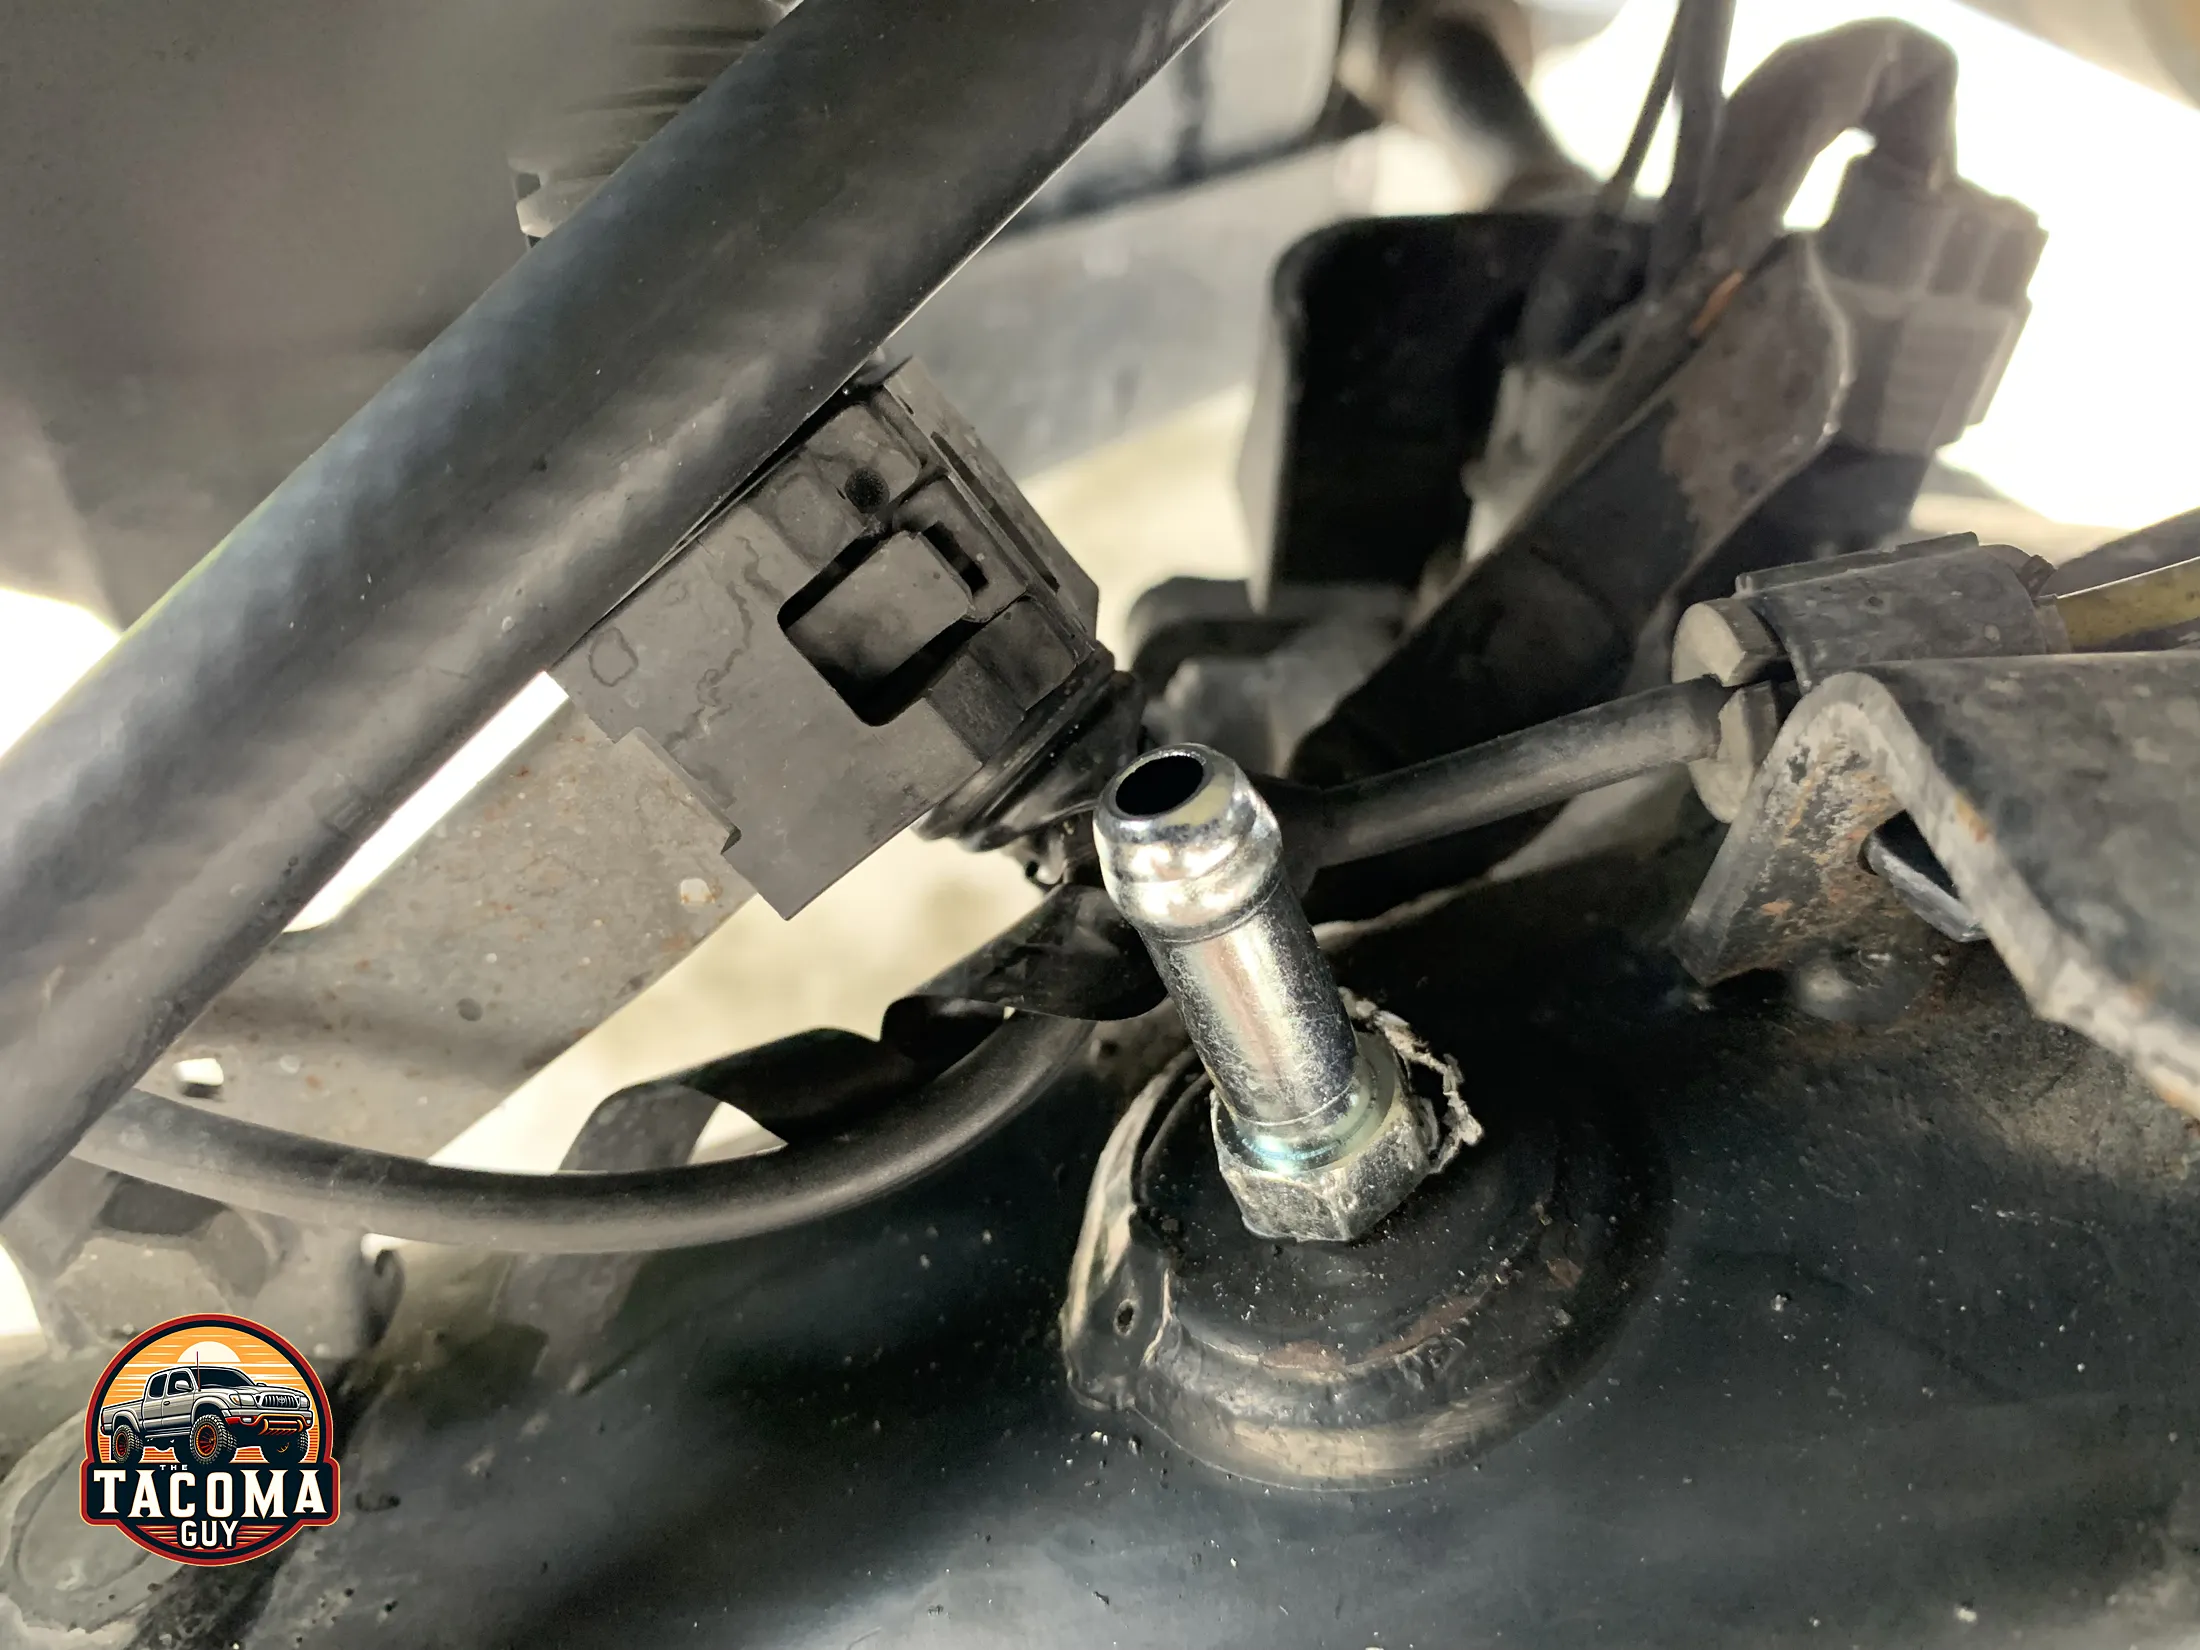
Step 4: Install the Union
- Remove the old breather plug: Get your wrench out and remove the old breather plug. You cleaned around it, right?
- Install the new union: I wrapped some plumbers tape around the threads of the union. IDK if you need to do that or not but it makes it more waterproofy to me. Bolt the union on.
Step 5: Install the Hose
- Measure and cut: Figure our how long you want to hose to be. Make sure you leave enough slack to that it wont get pulled when your rear axle drops. Then cut the hose to size.
- Install to Union: slide your hose clamp onto the hose, then install the hose over the union and tighten it up. You’re done!
Here’s some pictures to help you out a little bit. Enjoy!