I wanted to add Bluetooth audio and calling to my 2003 Tacoma Prerunner but didn’t want to replace the factory radio – ours works fine and I felt to reason to replace the entire thing since GTA Car Kits offers a solution for $140.
It’s a module that you plug into an open port on the back of the OEM radio which gives you Bluetooth, a microphone for wireless calling, a USB port (for charging) and an Auxiliary cable (for those still using cable.)
It’s an easy install that doesn’t take any special tools or expertise, and there are a couple of videos online to walk you through the process, including ours below.
Affiliate notice: The Tacoma Guy is an Amazon and eBay Affiliate. That means we get a small percentage from them if you use the links to purchase the product. It doesn’t increase your cost! If you found this tutorial helpful, please consider using these links to help support this mom & pop business, thank you! Learn more.
Tools Required:
- Philips Screwdriver: there are 3 screws to remove
- 10mm Socket and Wrench: to remove the panel under the steering wheel
- Plastic Body Tools (optional): A nylon trim kit that can help you get some of the trim off
Parts Required:
- GTA Car Kits Bluetooth and iPhone/iPod/AUX Kits for Toyota Tacoma 1998-2004: They have 2 versions, a wired version and Pure Bluetooth with Aux, that’s the one you want.
Video Walk-Through:
Check out our step-by-step video tutorial first to get an idea of the process, then you can read the guide below and print it out if you want.
Step-by-Step Guide:
- Remove the trim panel underneath the steering wheel. There are 4 bolts and one screw holding it on. I didn’t remove the hood latch, just left that on and rested the trim panel on the floor.
- Remove the panel underneath the radio. There are two plastic pins that hold either side on. The pry tool can help you remove them. They might break. We just left ours off as we’re in and out of that panel all the time.
- Pull off the ac/heat knobs. They come straight off with gentle pressure. Then remove the plate for the temperature gauges by prying it out with your fingers.
- Remove the ash tray by pulling it out, then pushing down on the metal tab at the top.
- There are 2 Philips screws holding on the trim panel around the radio. One behind the temperature gauge cover on the right, and one behind where the ash tray was.
- Now you have to remove the 4 screws holding in the radio.
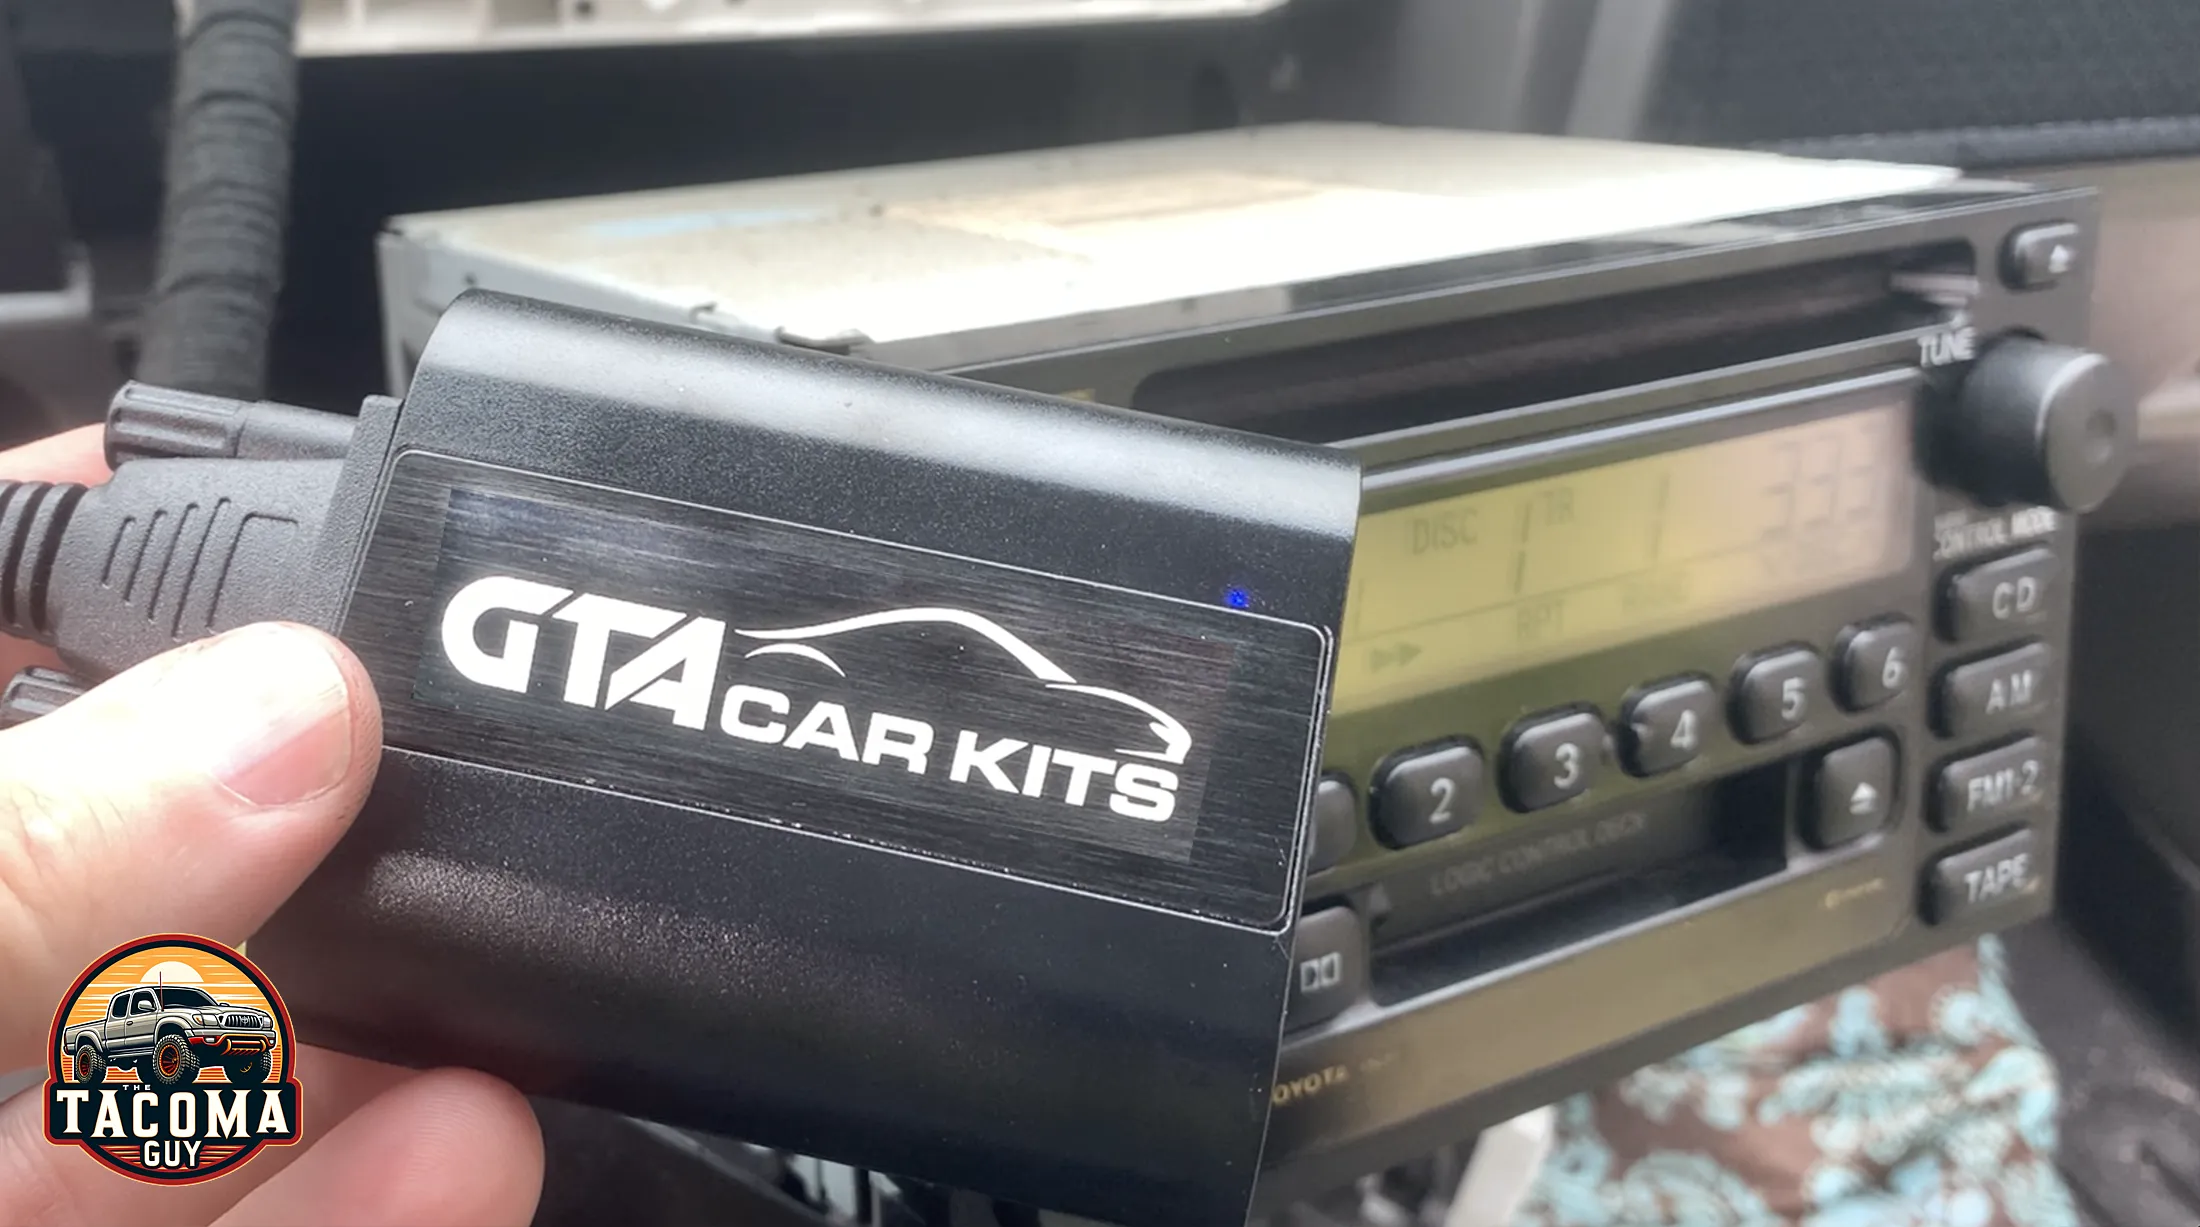
- Pull the radio straight out and find the white data port on the lower corner. It should be empty.
- Plug in the GTA Car Kits Bluetooth adapter and power it up to make sure everything works.
- If you want to attach a USB Charging cable or aux cable, now is the time. Route those cables where you want them.
- Tuck the GTA Car kit into the space behind the radio.
- Get down near the gas pedal and try to grab the GTA module so you can plug in your microphone cord.
- Route the microphone cord up and above all the stuff under the steering wheel and get it around to where the weather strip gasket is for the drivers side door.
- Pull the gasket off (it pulls right out) and then place the microphone at the top corner of the plastic trim which covers the A-pillar near the windshield.
- Now route the cable under the plastic and down the gap where the weather gasket goes. Once you have the cable routed push the gasket back into place to secure the wire.
- Take out any slack from the wire and tuck it away somewhere.
- Now you can replace the radio. Put Blue Threadlocker on the screws if you have it.
- Put everything else back into place. You’re done! Enjoy your tunes.