We wanted to upgrade the stock headlights on our Gen 1 2003 Toyota Tacoma. We tried upgrading the bulbs first, using Sylvania 9003 SilverStar Ultra High Performance Halogen Headlight Bulbs and they did a pretty good job, but after about a year of those I wanted something even more powerful.
Affiliate notice: The Tacoma Guy is an Amazon and eBay Affiliate. That means we get a small percentage from them if you use the links to purchase the product. It doesn’t increase your cost! If you found this tutorial helpful, please consider using these links to help support this mom & pop business, thank you! Learn more.
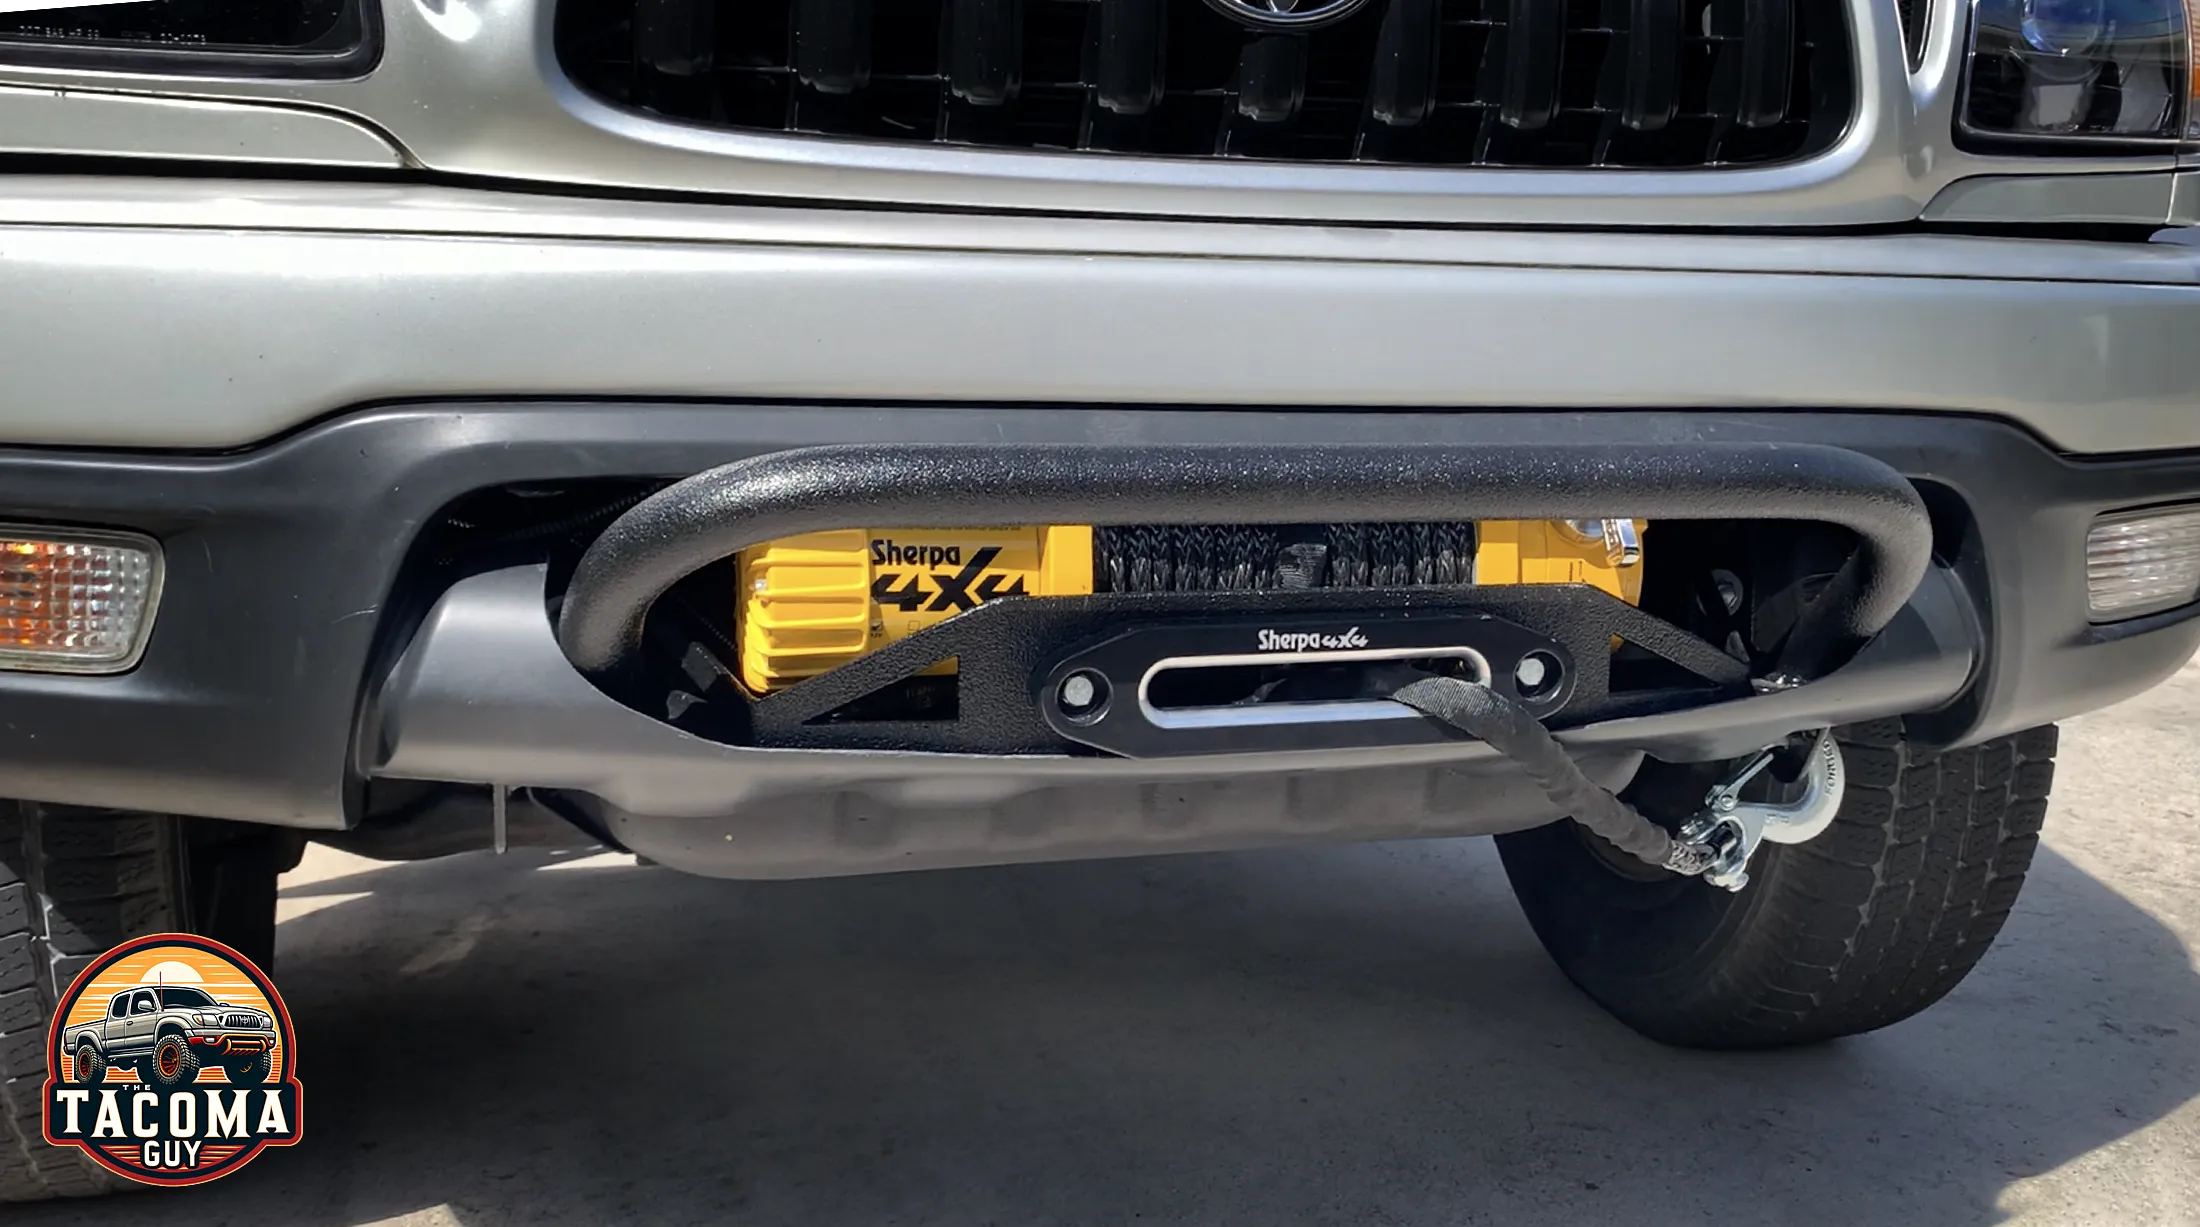
Rather than going with an LED light bar, I wanted to see what I could do with the stock location since my main desire was to have increased light on the public roads around town. That led me to TEQ Customs and their Gen 1 Tacoma Retrofit LED Headlights which they offer for all makes and models of vehicles.
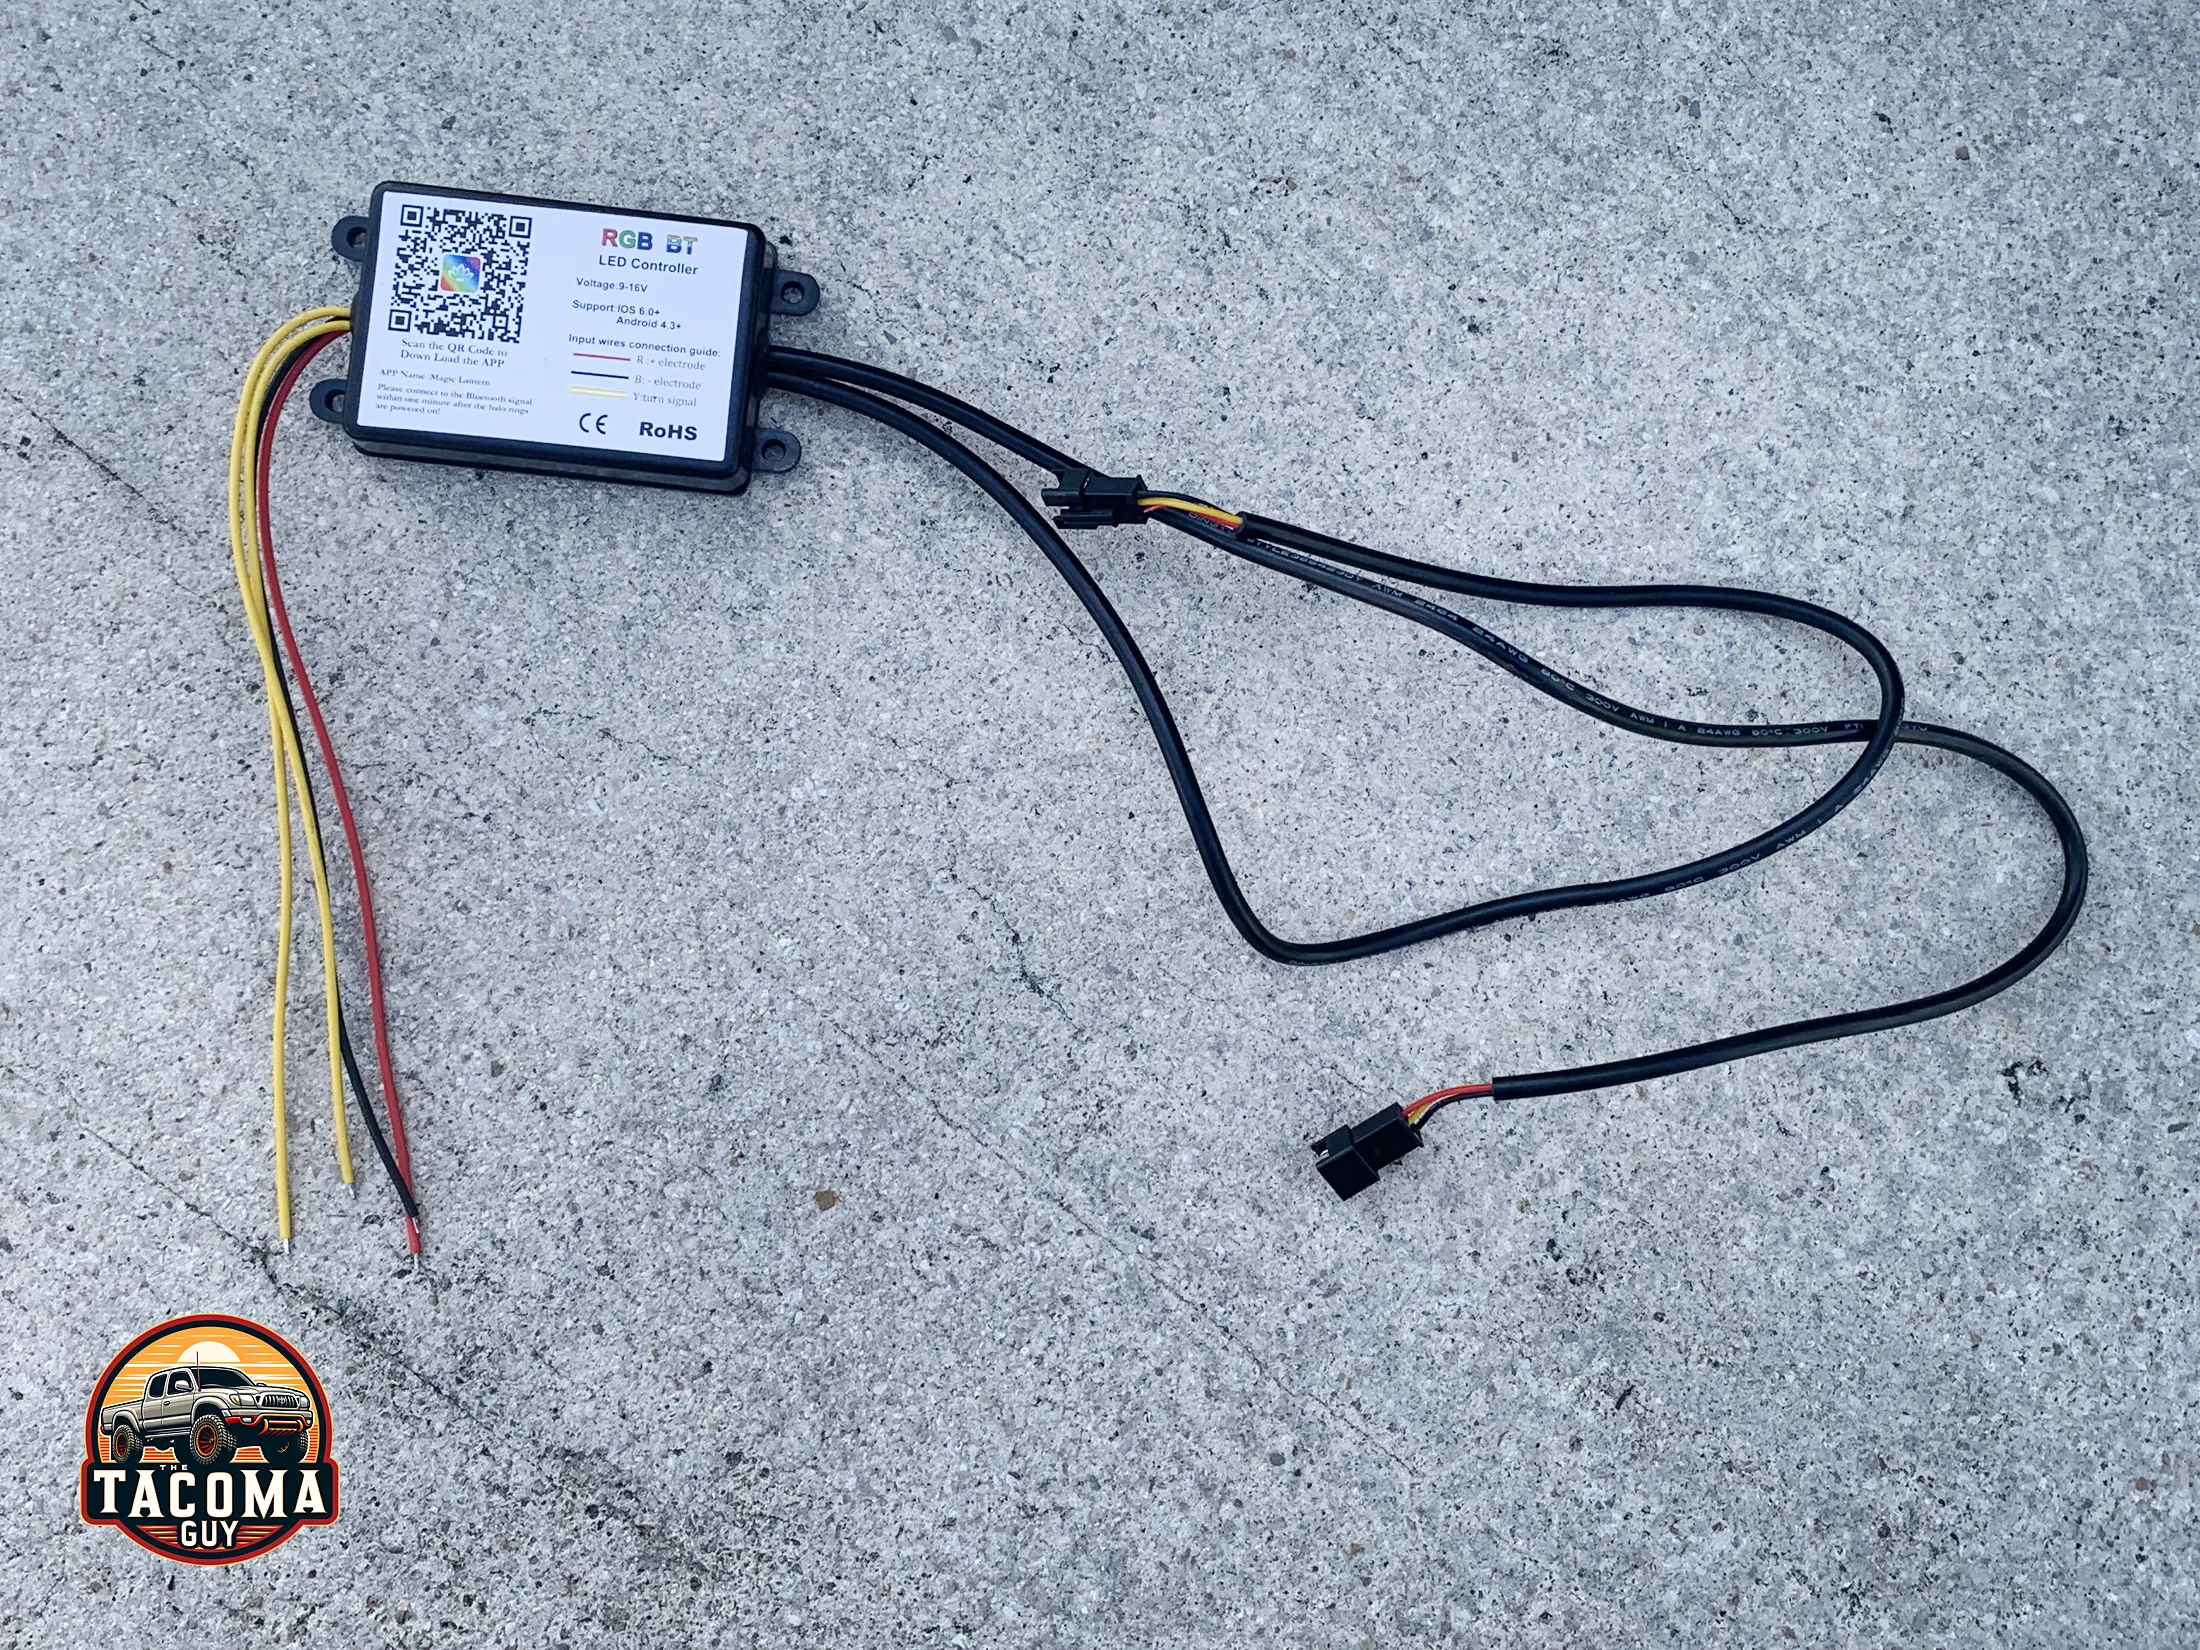
There are dozens of options, and I don’t remember all the ones I chose, but I got BiLED projectors with black Apollo 3 shrouds with rear halos (which can change colors around the ring via bluetooth and an app.) I’m pretty pleased with the choices I made, though maybe I would get front halos if I were to buy them again.
TEQ offers installation videos on their website, and they do a general overview of how to do the install. What this article will do is provide you with a more comprehensive step-by-step guide so you know exactly what the install looks like and what issues you might run across while doing it yourself.
Tools Required:
- Ratchet: 10mm socket for the nuts and bolts that hold the lights.
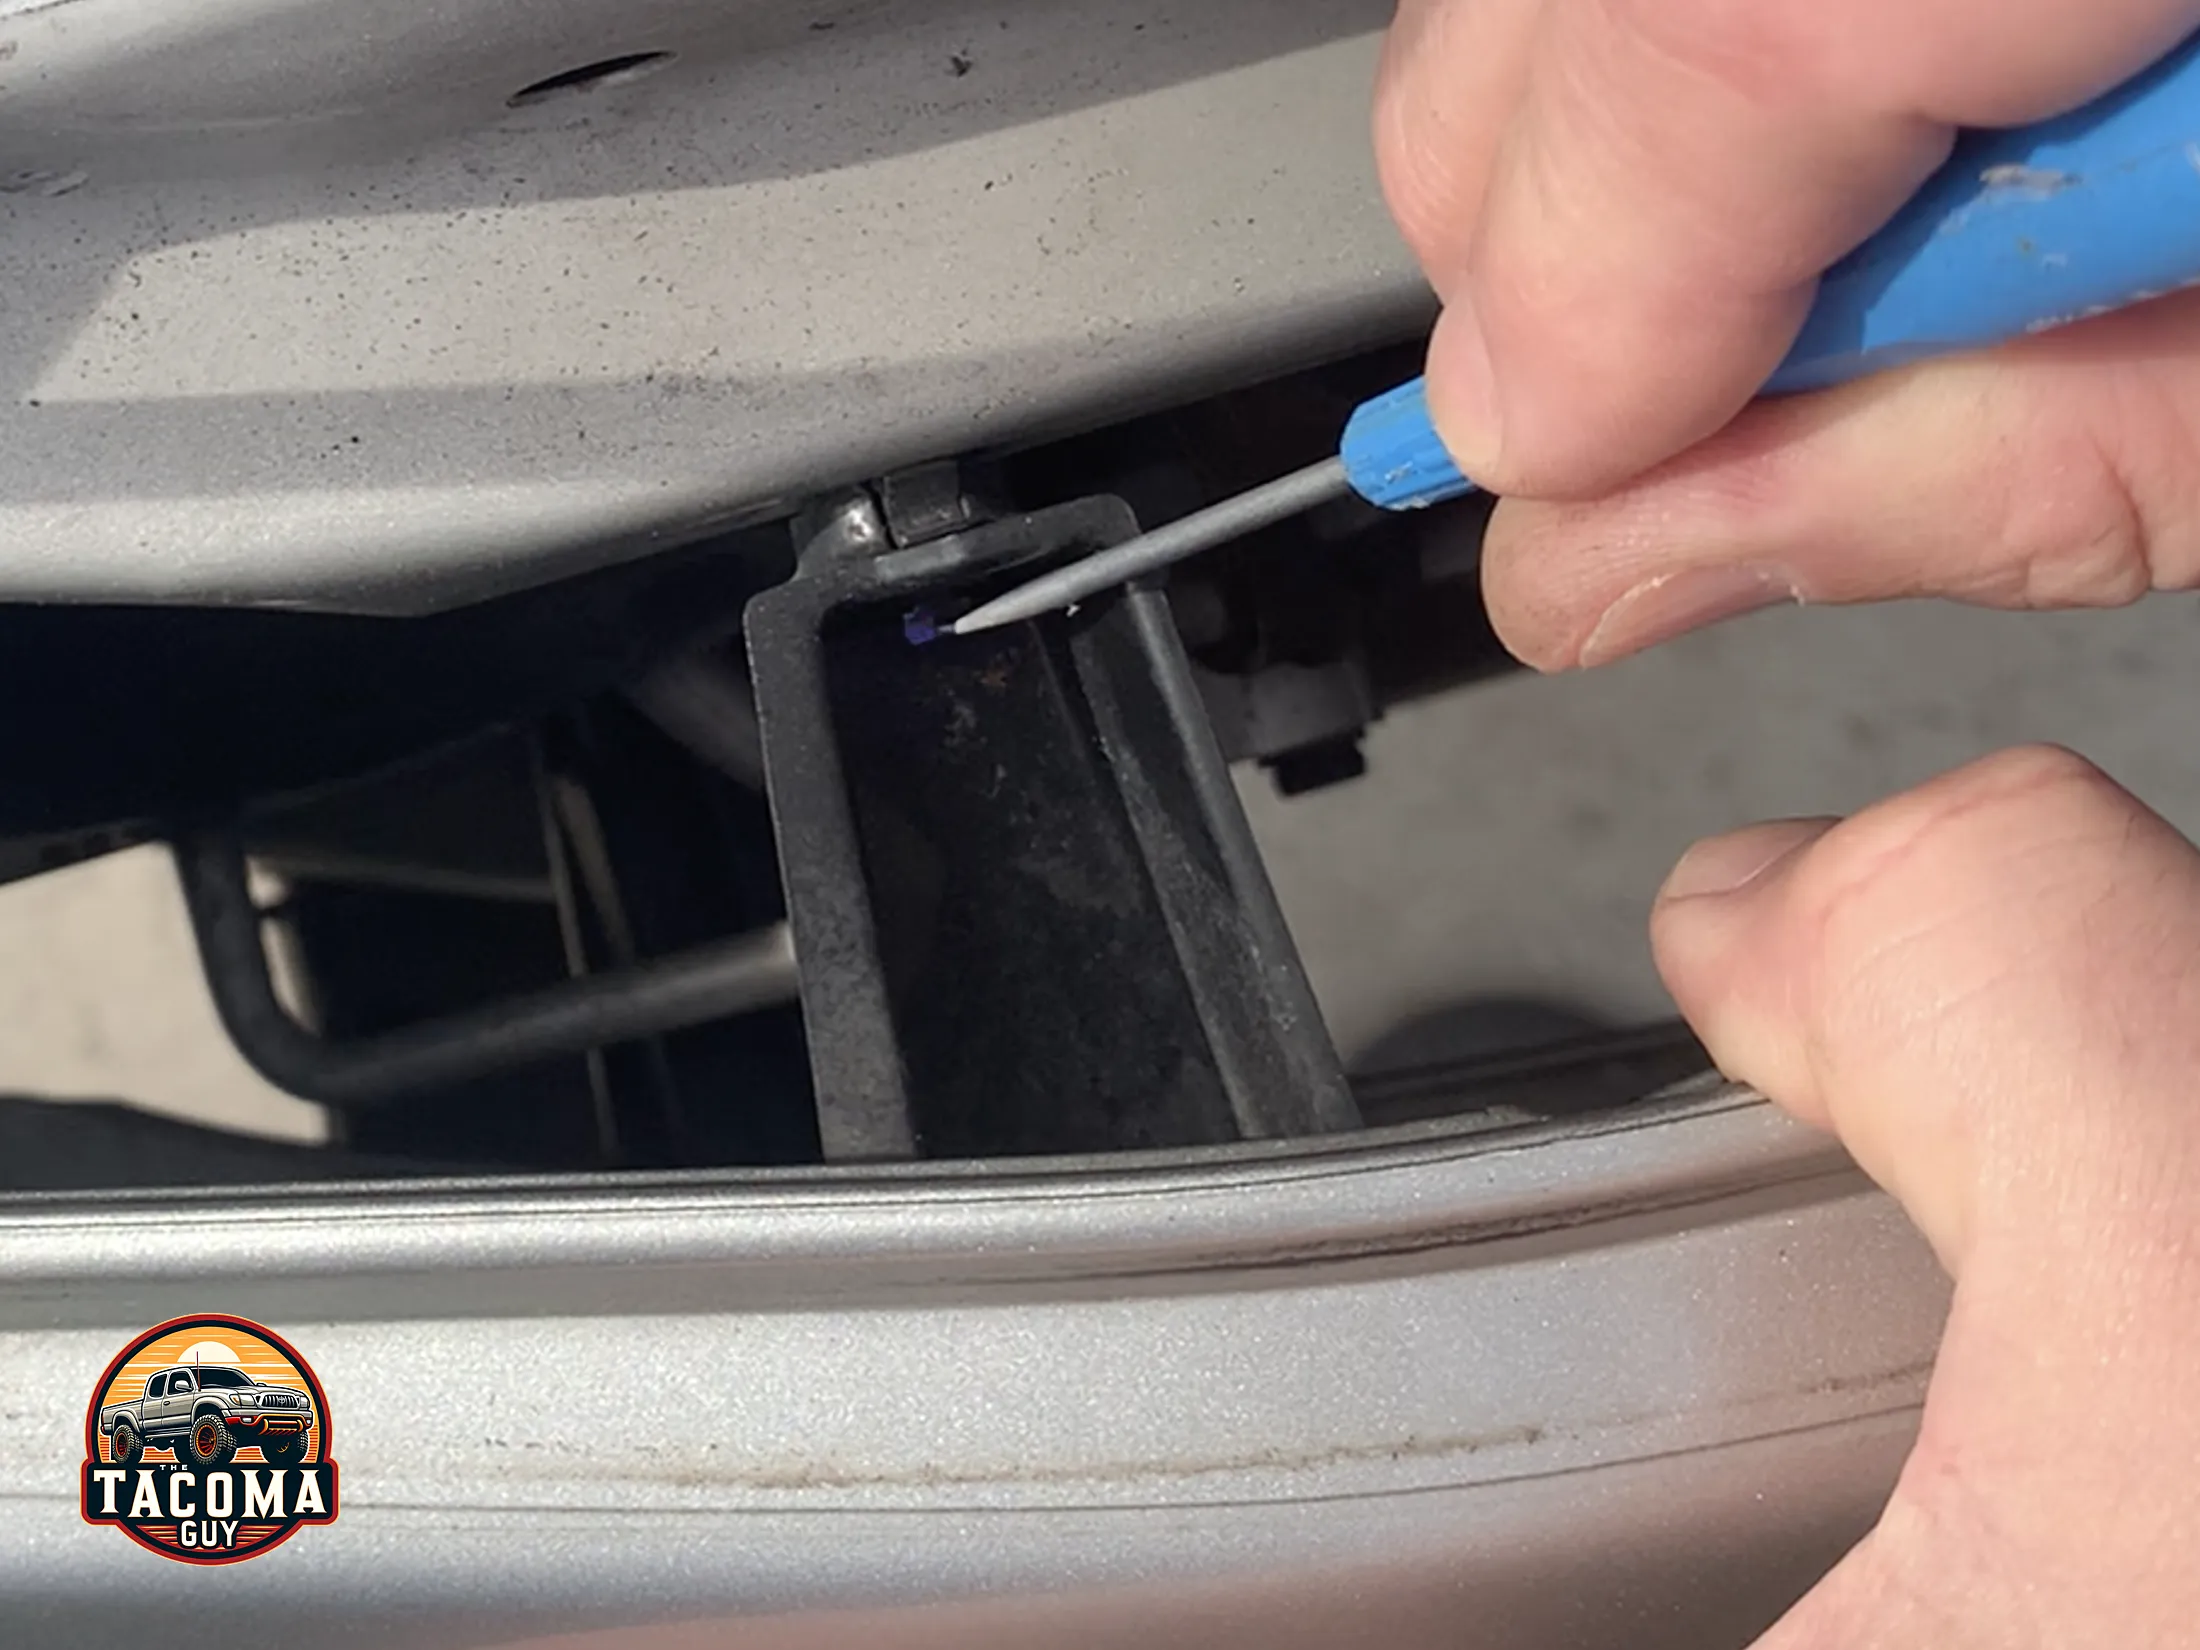
- Small Flat Screwdriver: to push down the tabs on the grille.
- Philips Screwdriver: To remove the grille screws on the sides.
- Wire Cutter / Stripper: For the turn signal wires. This Klein tool my favorite.
- Crimp tool: To secure the butt connectors. I use a cheap one like this, but there are nicer ones out there.
- Plastic Body Tools: A nylon trim kit will help you get lower headlight molding trim off without ruining the paint.
- Heat gun: To melt the heat shrink tubing around the butt connectors.
- Pliers: To squeeze the wire splice connectors closed.
- Steel wool pad: Or something else to remove a little bit of paint around a fender bolt to make a good ground connection for one of the wiring harnesses.
Parts Required:
In addition to the light kit itself, there are a few items you’ll need to pickup to complete the installation not provided in the TEQ Customs kit. Good news is all this stuff is cheap and you’ll wind up with plenty left over for the next job.
- 18 Gauge Silicone Wire (Yellow): to extend the wire of the turn signal wires coming from the RGB module in the TEQ kit. Not sure why they didn’t include this in the box, you can’t finish the install without it.
- Low Voltage Wire splice connectors: makes tapping wires a breeze.
- 18-22 AWG Red Electrical Butt Wire Connectors: You’ll only need 2.
- Dorman 3/8 In. X 10 Ft. Black Flex Split Wire Conduit: Wrap your cables in this to prevent rubbing and potential electrical shorts if the wires get cut.
- XFasten Wire Harness Tape 3/4 Inch x 50ft Cloth Tape: To close up the conduit.
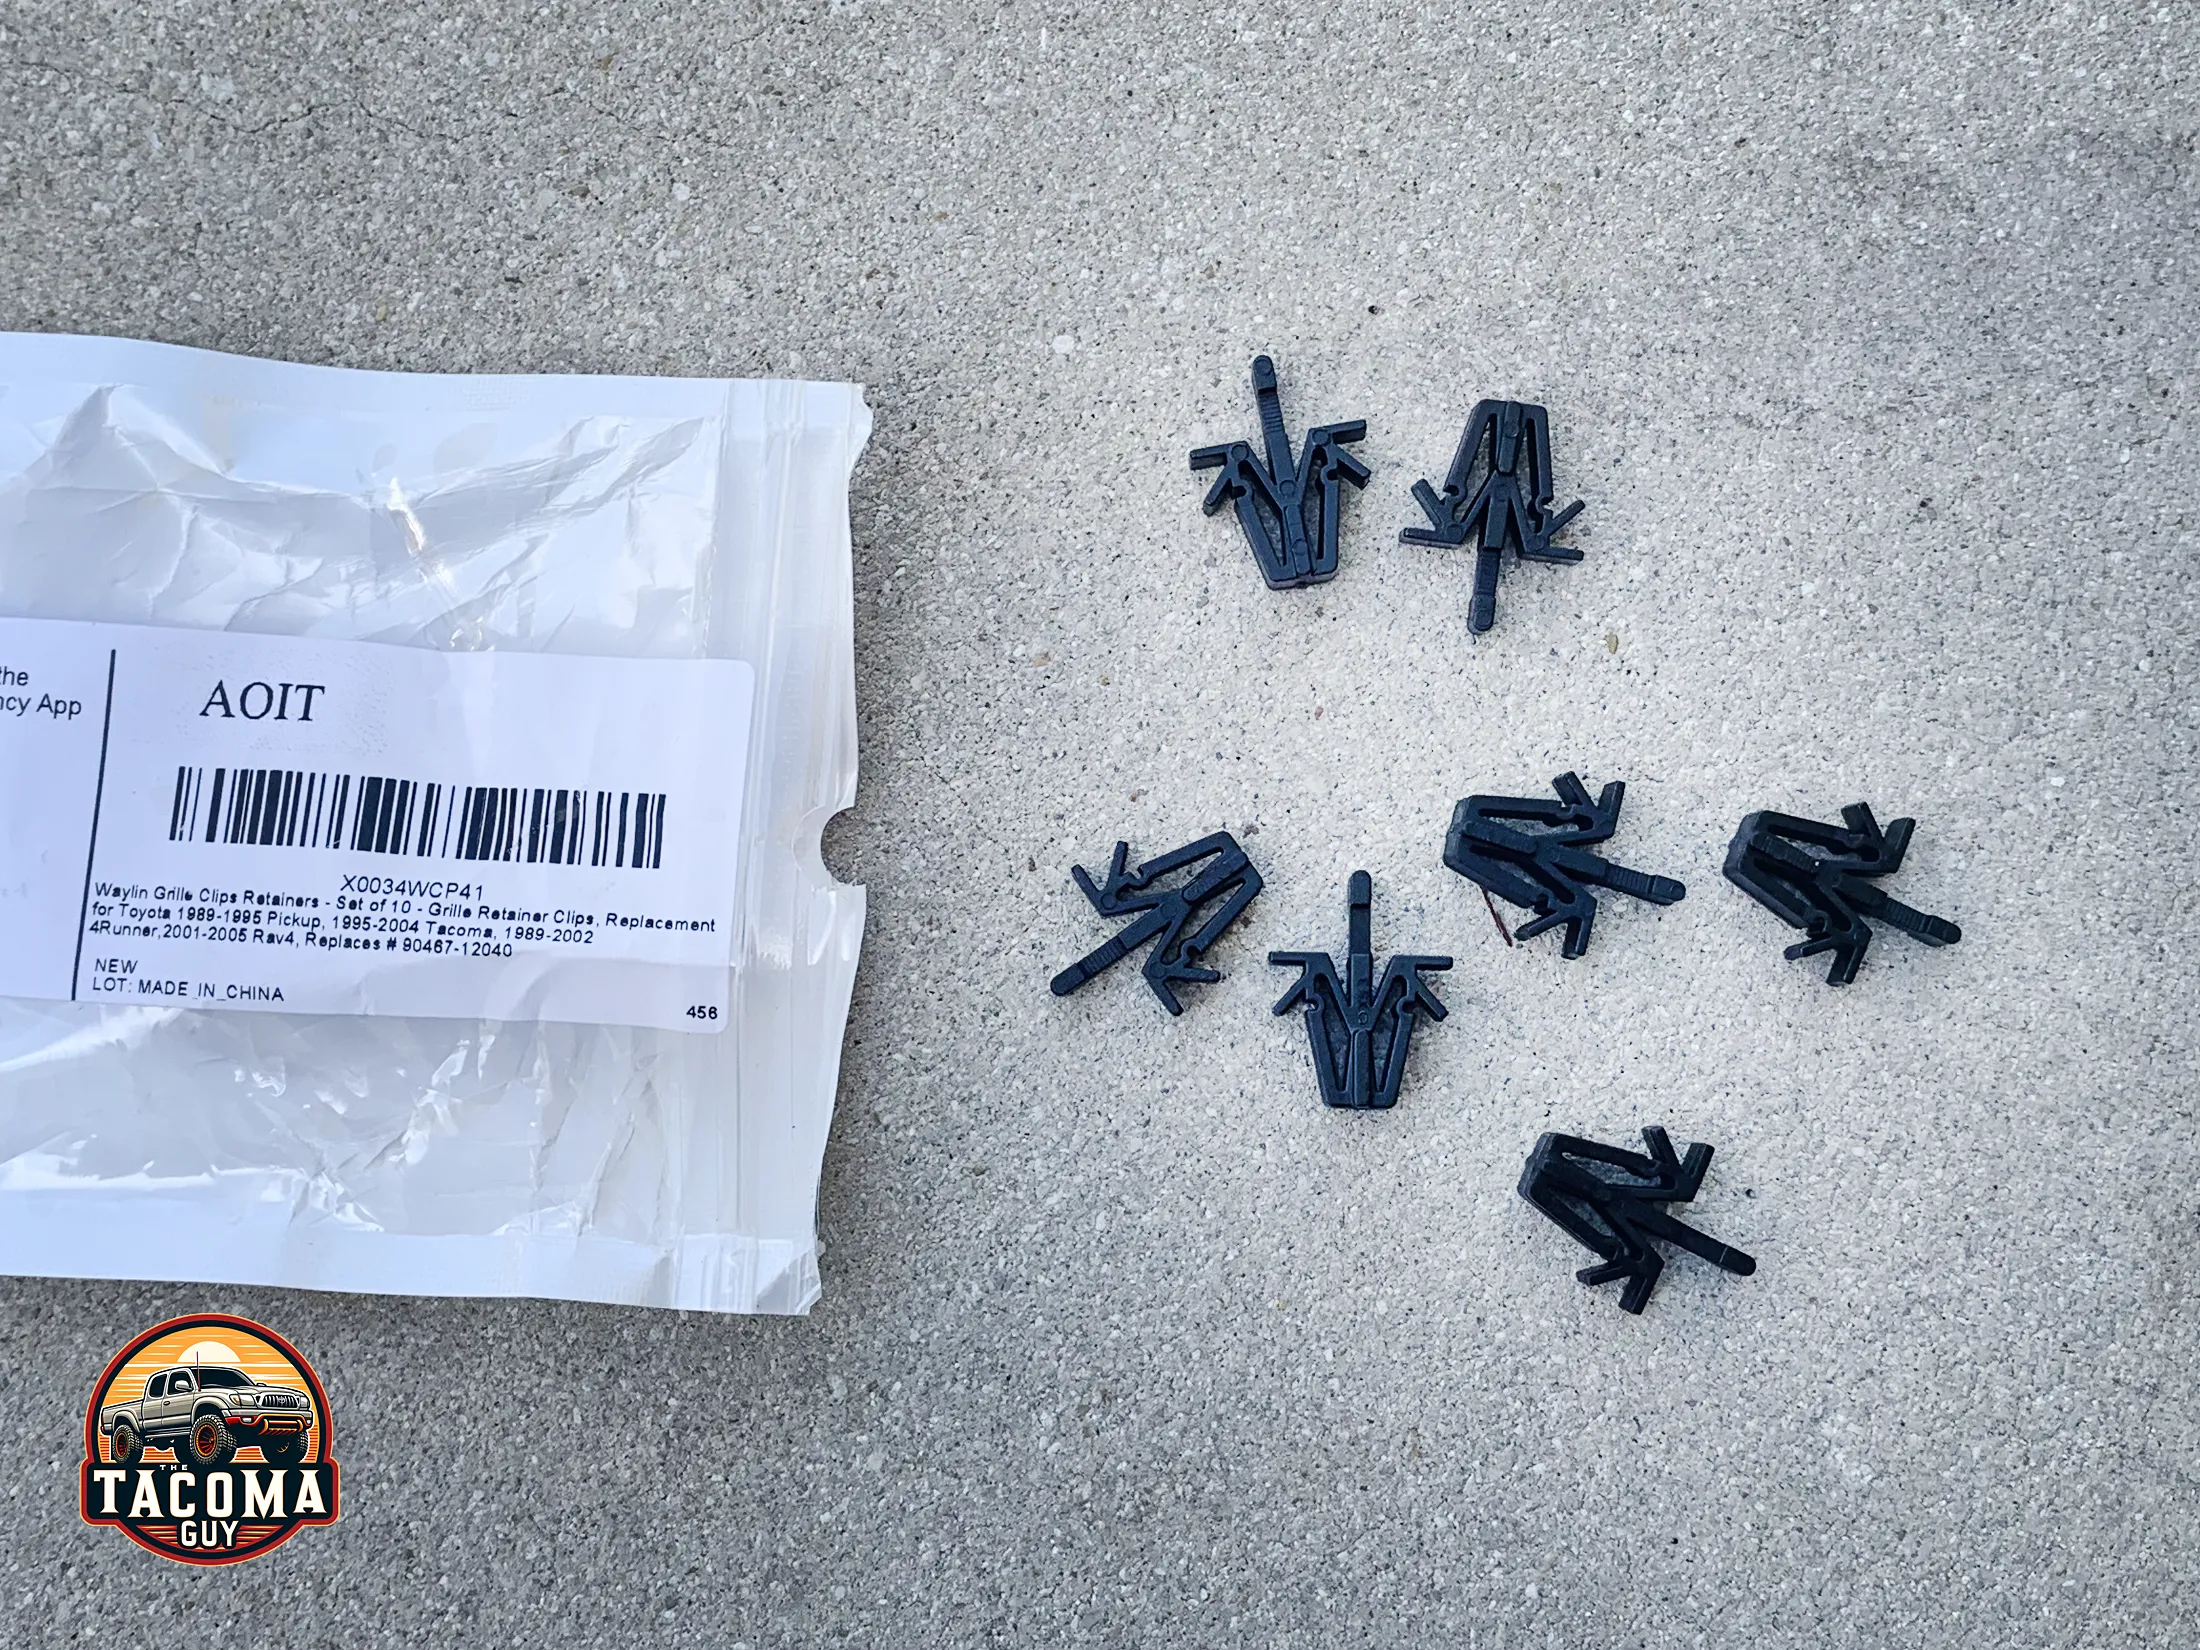
- Grille Clips Retainers – Set of 10: I broke nearly every retention clip holding the grille to the truck when trying to put it back on. Over time these clips get old. For $6 you get a whole new set and save yourself the headache of trying to zip tie the grille on when you are done.
- Dialectic Grease: There are 2 grounds and a power connection you have to make with one of the harnesses. Add a little grease on the connectors to make sure you have adequate contact. Not completely necessary but will prevent future issues.
Video Walk-Through:
Check out our step-by-step video tutorial first to get an idea of the process, then you can read the guide below and print it out if you want.
Step-by-Step Guide:
Descriptive pictures below this guide!
Remove the Grille and Lights:
- Open the hood of the truck and prop it up open.
- Locate the two black Phillips screws on the left and right sides of the grille. Remove and put aside for later.
- You can now pull each corner light off. Theres a tab on the bottom that might give you a little resistance, just take your time and pull them straight out. I found it easier to then remove the lights from the wiring harness and put them aside.
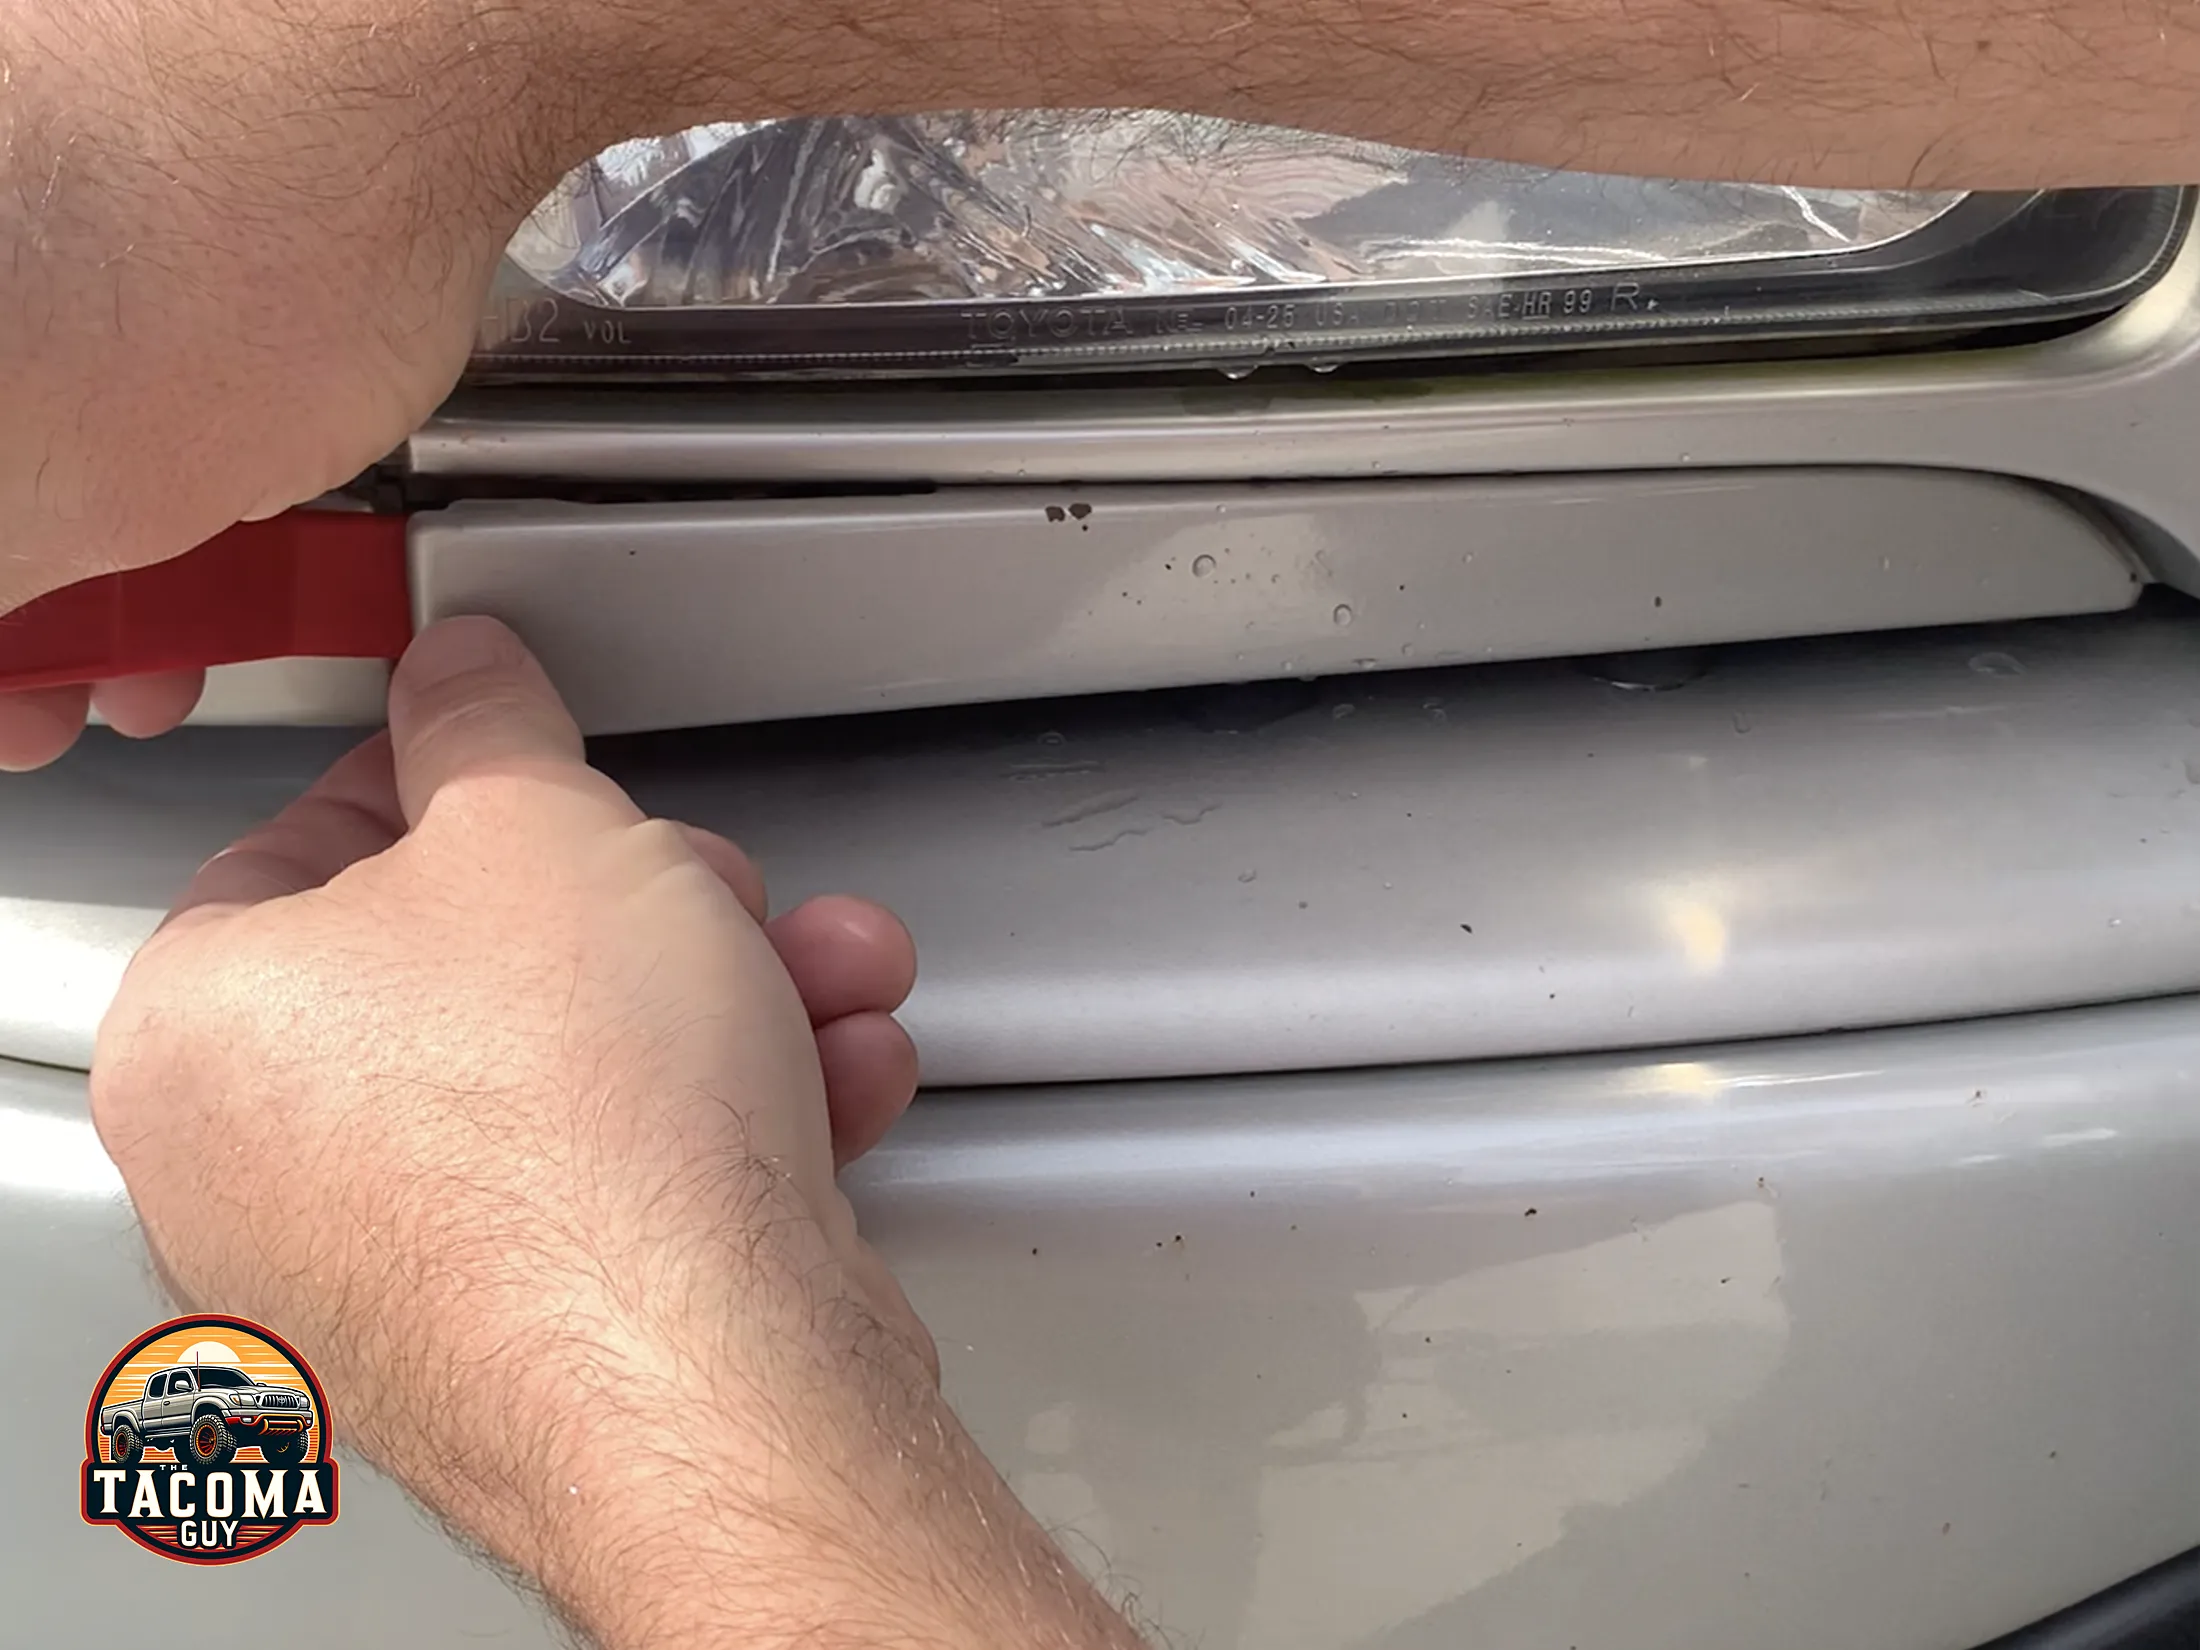
- Using the nylon pry tool, pull off the lower headlight molding trim on both sides underneath the headlamps. They come more or less straight out, pulling from the outside of each I found made them easier to take off.
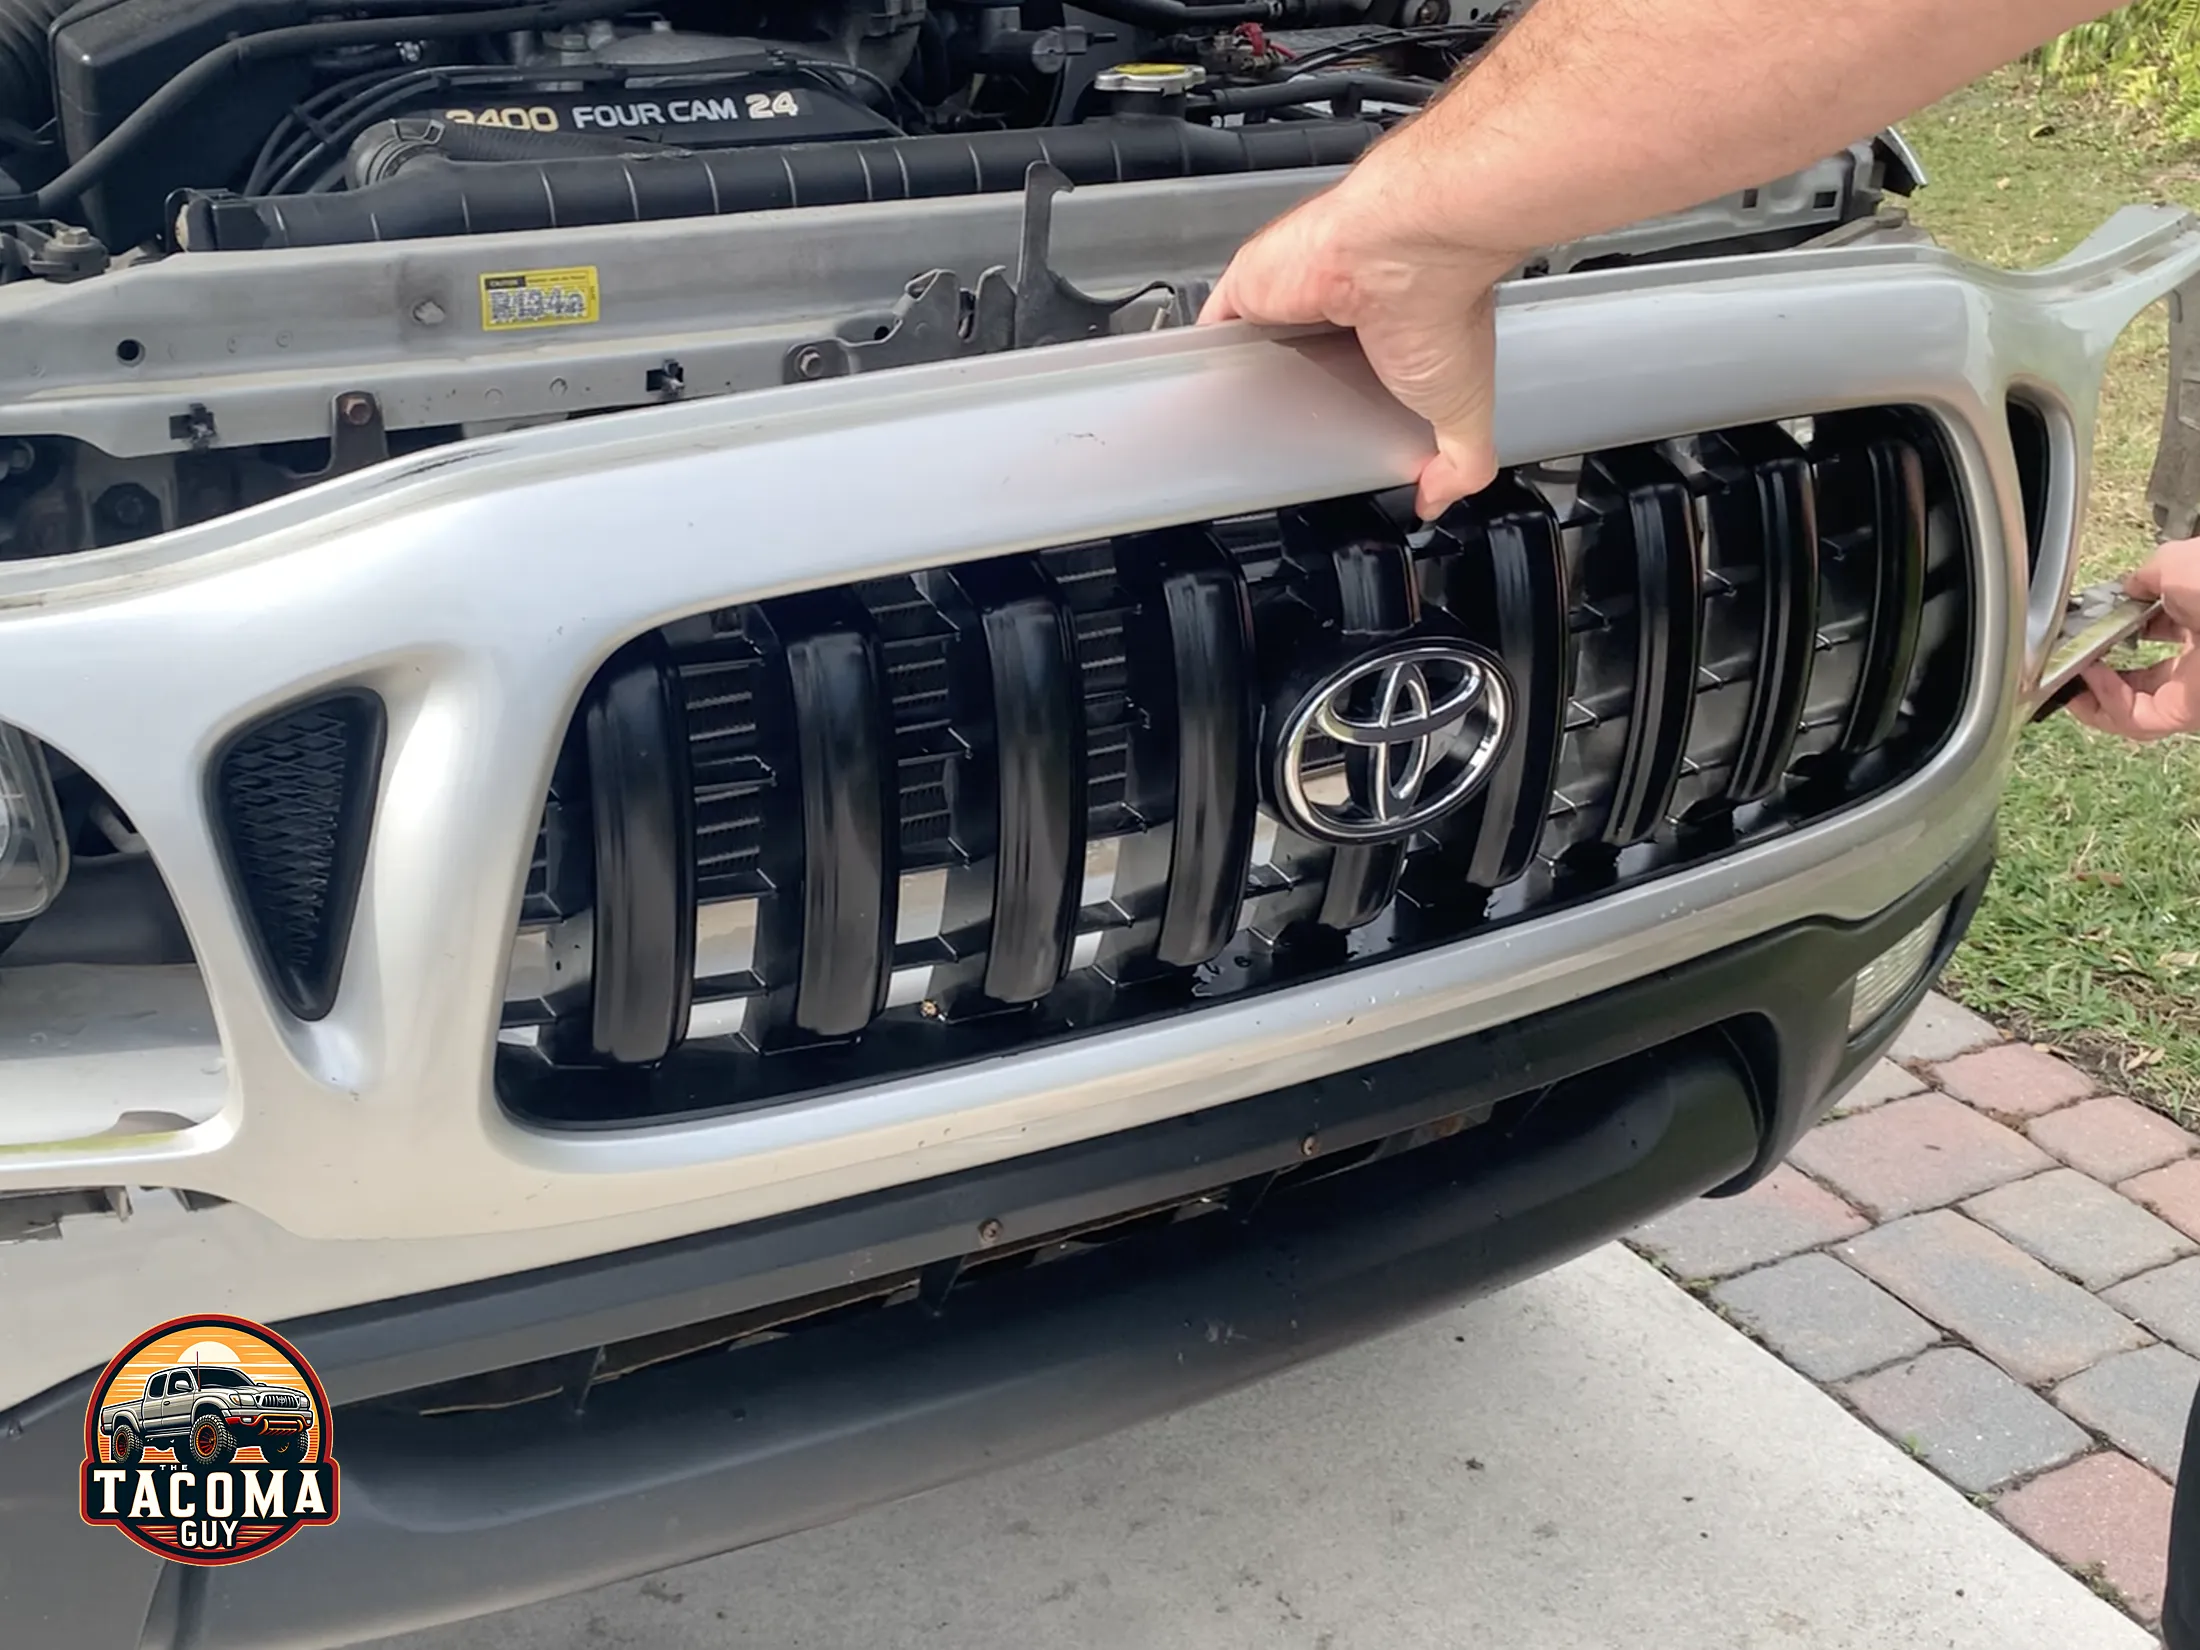
- Now you can start removing the grille. There are 7 places where you have to push down on the clip tabs to release them. The 4 on the top are easy. The one in the lower middle is dooable, but for the ones of the left and right bottoms I needed smaller hands to reach in there so my kid helped me out.
- Gently pull the grille towards you wile removing the clips so the don’t re-engage, and watch around the lights as you remove it, there are some tabs there that can get snagged. Put the grille aside.
- Now you have access to the 10mm bolt that holds each light into place, and the 2 nuts on the side. Remove and put aside for later. Pull the headlight straight out and detach from the wiring harness with gentle but firm pressure. Put the lights aside, you wont need them anymore.
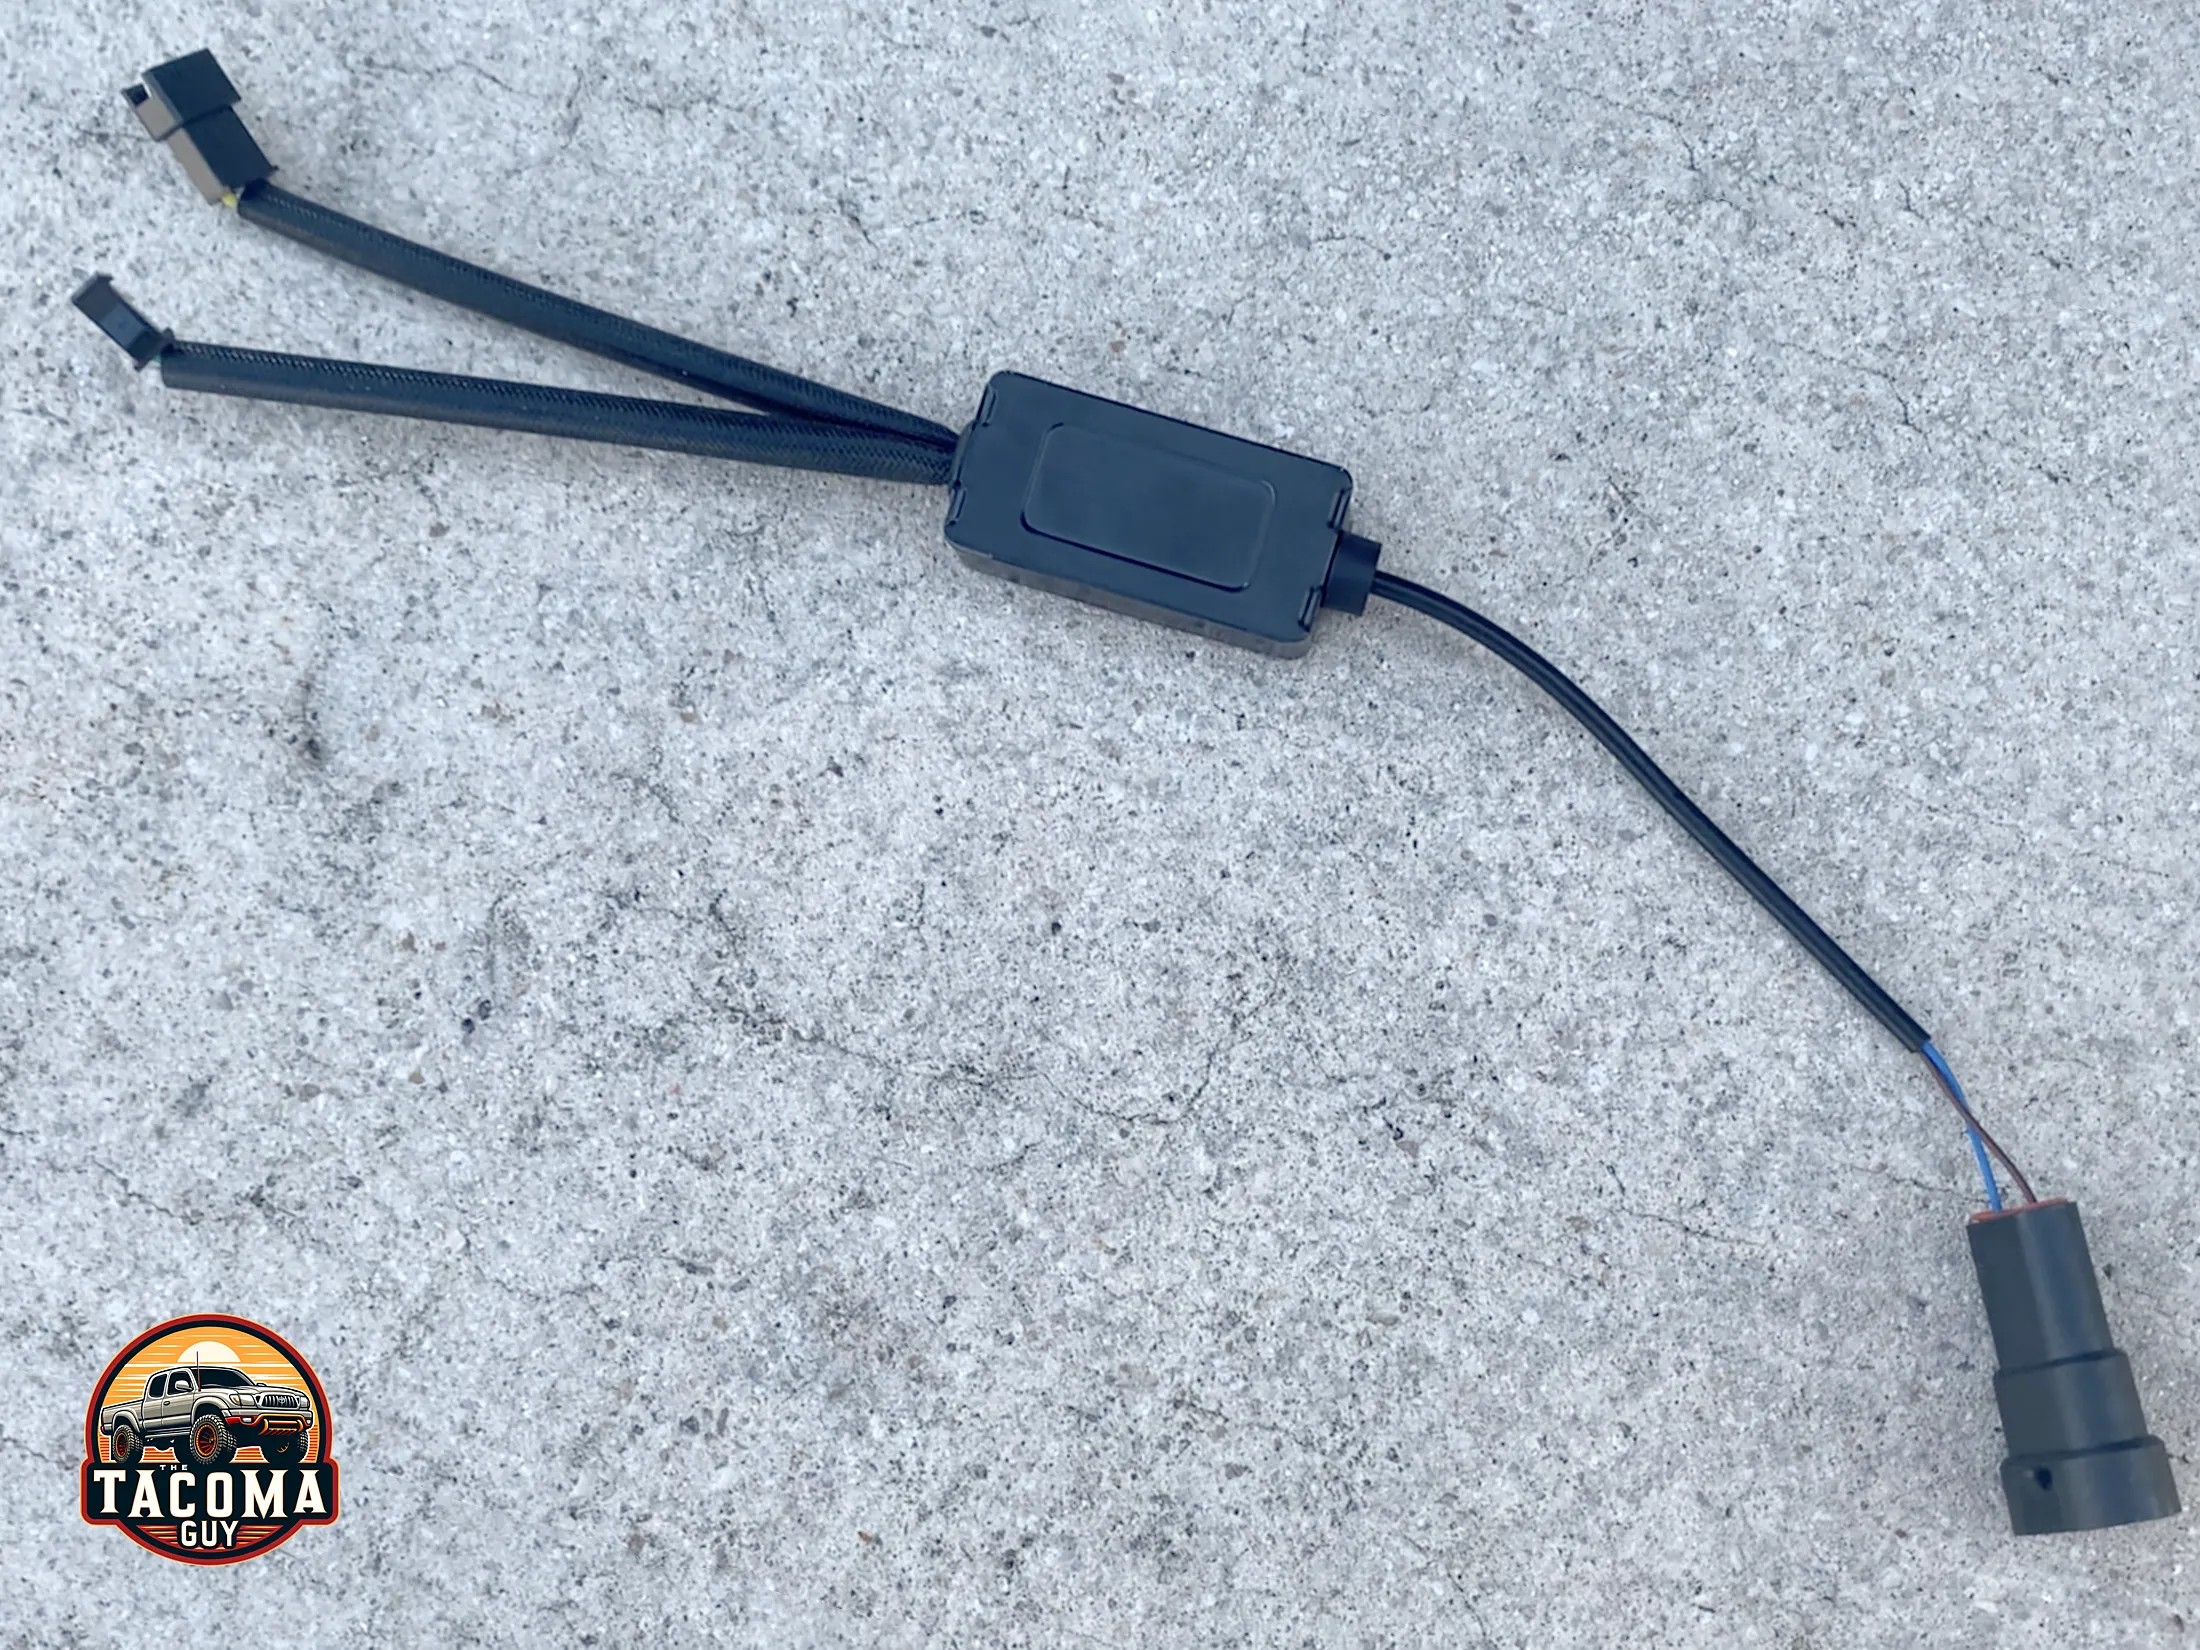
Wiring Up the RGB Controller:
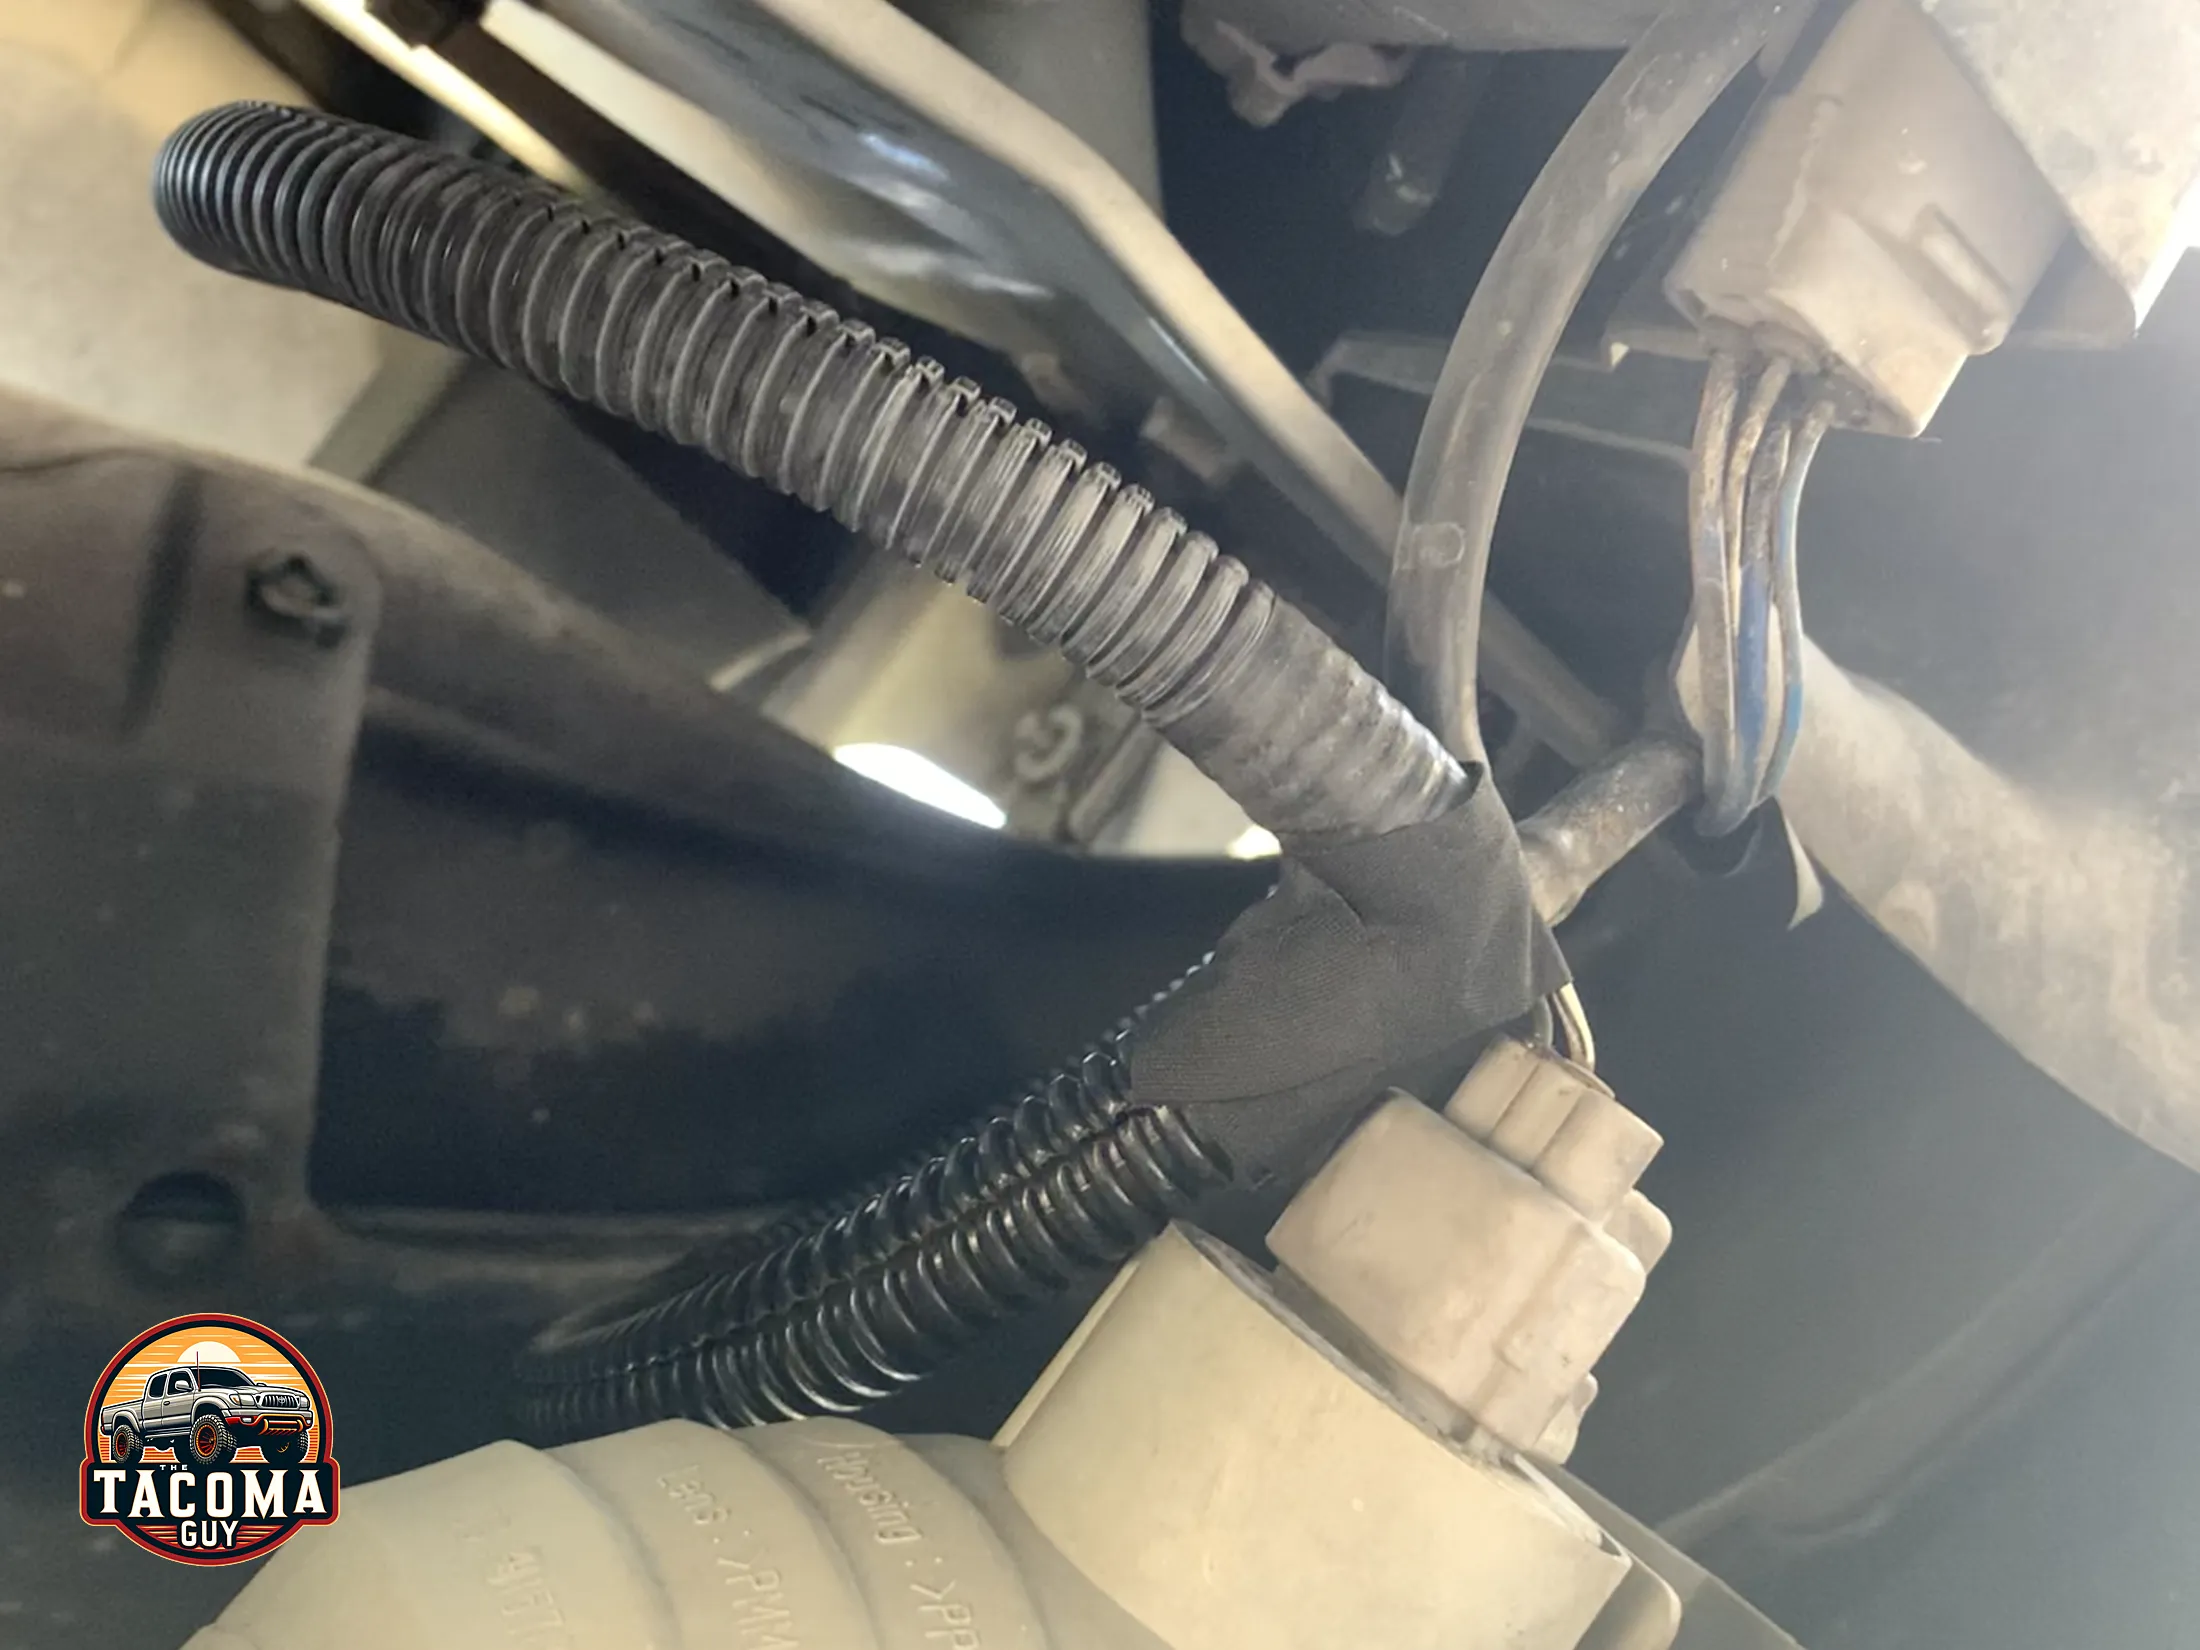
- The RGB controller will live near the battery on the drivers side of the truck, so place it into the hole where the headlamp was. Feed the red and black wire through the small hole where the conduit for the side lights run.
- You might need a little more room to work with on the existing conduit of the side light in order to tap into the green and white/black wires. If so, just trim off some of the end of the conduit.
- Using a wire splice connector, put the single side onto the red wire, then squeeze it closed with a pair of pliers.
- Put another wire splice connector onto the black wire of the RGB controller, then splice that onto the white wire (with black stripe.)
- Crimp a butt connector onto each of the two yellow 20 gauge wires coming from the controller.
- Measure out 2 lengths of 20 gauge wire: one to go down to the turn signal light on the bumper on the drivers side, and the other over to the passenger side turn signal light. You are going to run this wire in the channel above the radiator, then down into the frame along the same path as the existing conduit.
- Crimp one length of wire onto each of the butt connectors. Now you have nice and long turn signal indicator wires to. It doesn’t matter which yellow wire goes into which turn signal wire, you will connect the turn signals later using the leads which come out of the RGB controller, and you can switch the leads around to get the sides lined up. This will become clearer later.
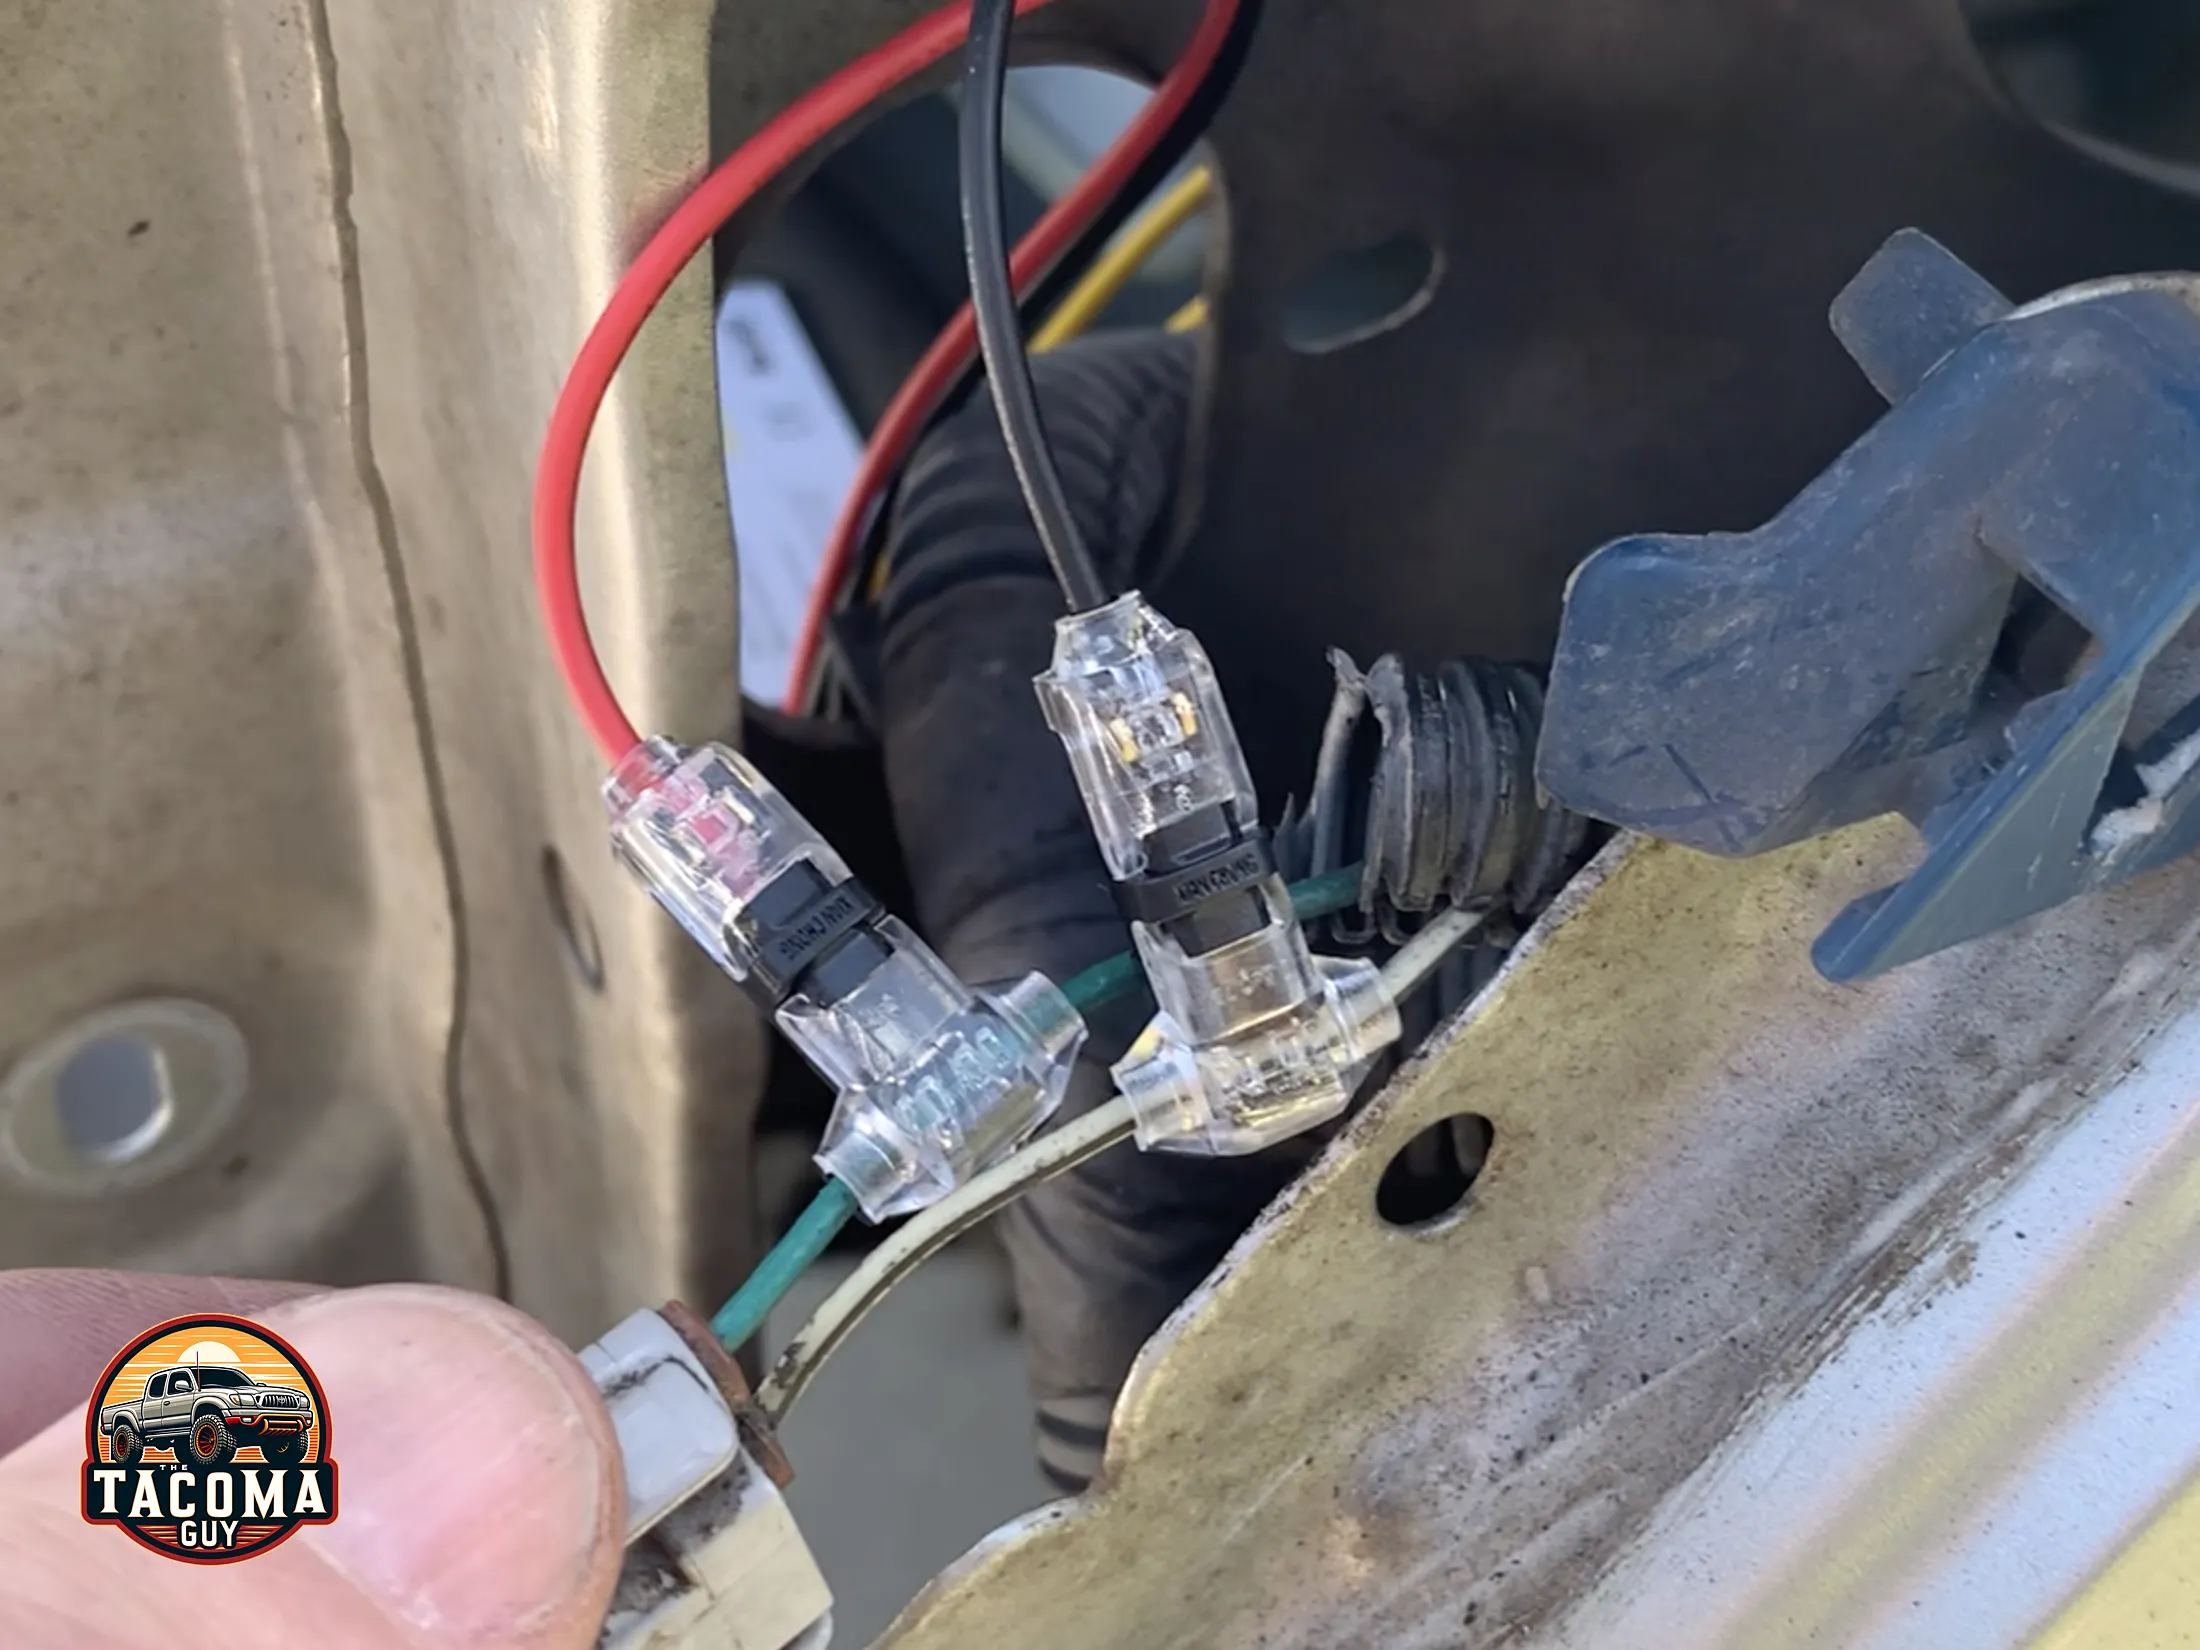
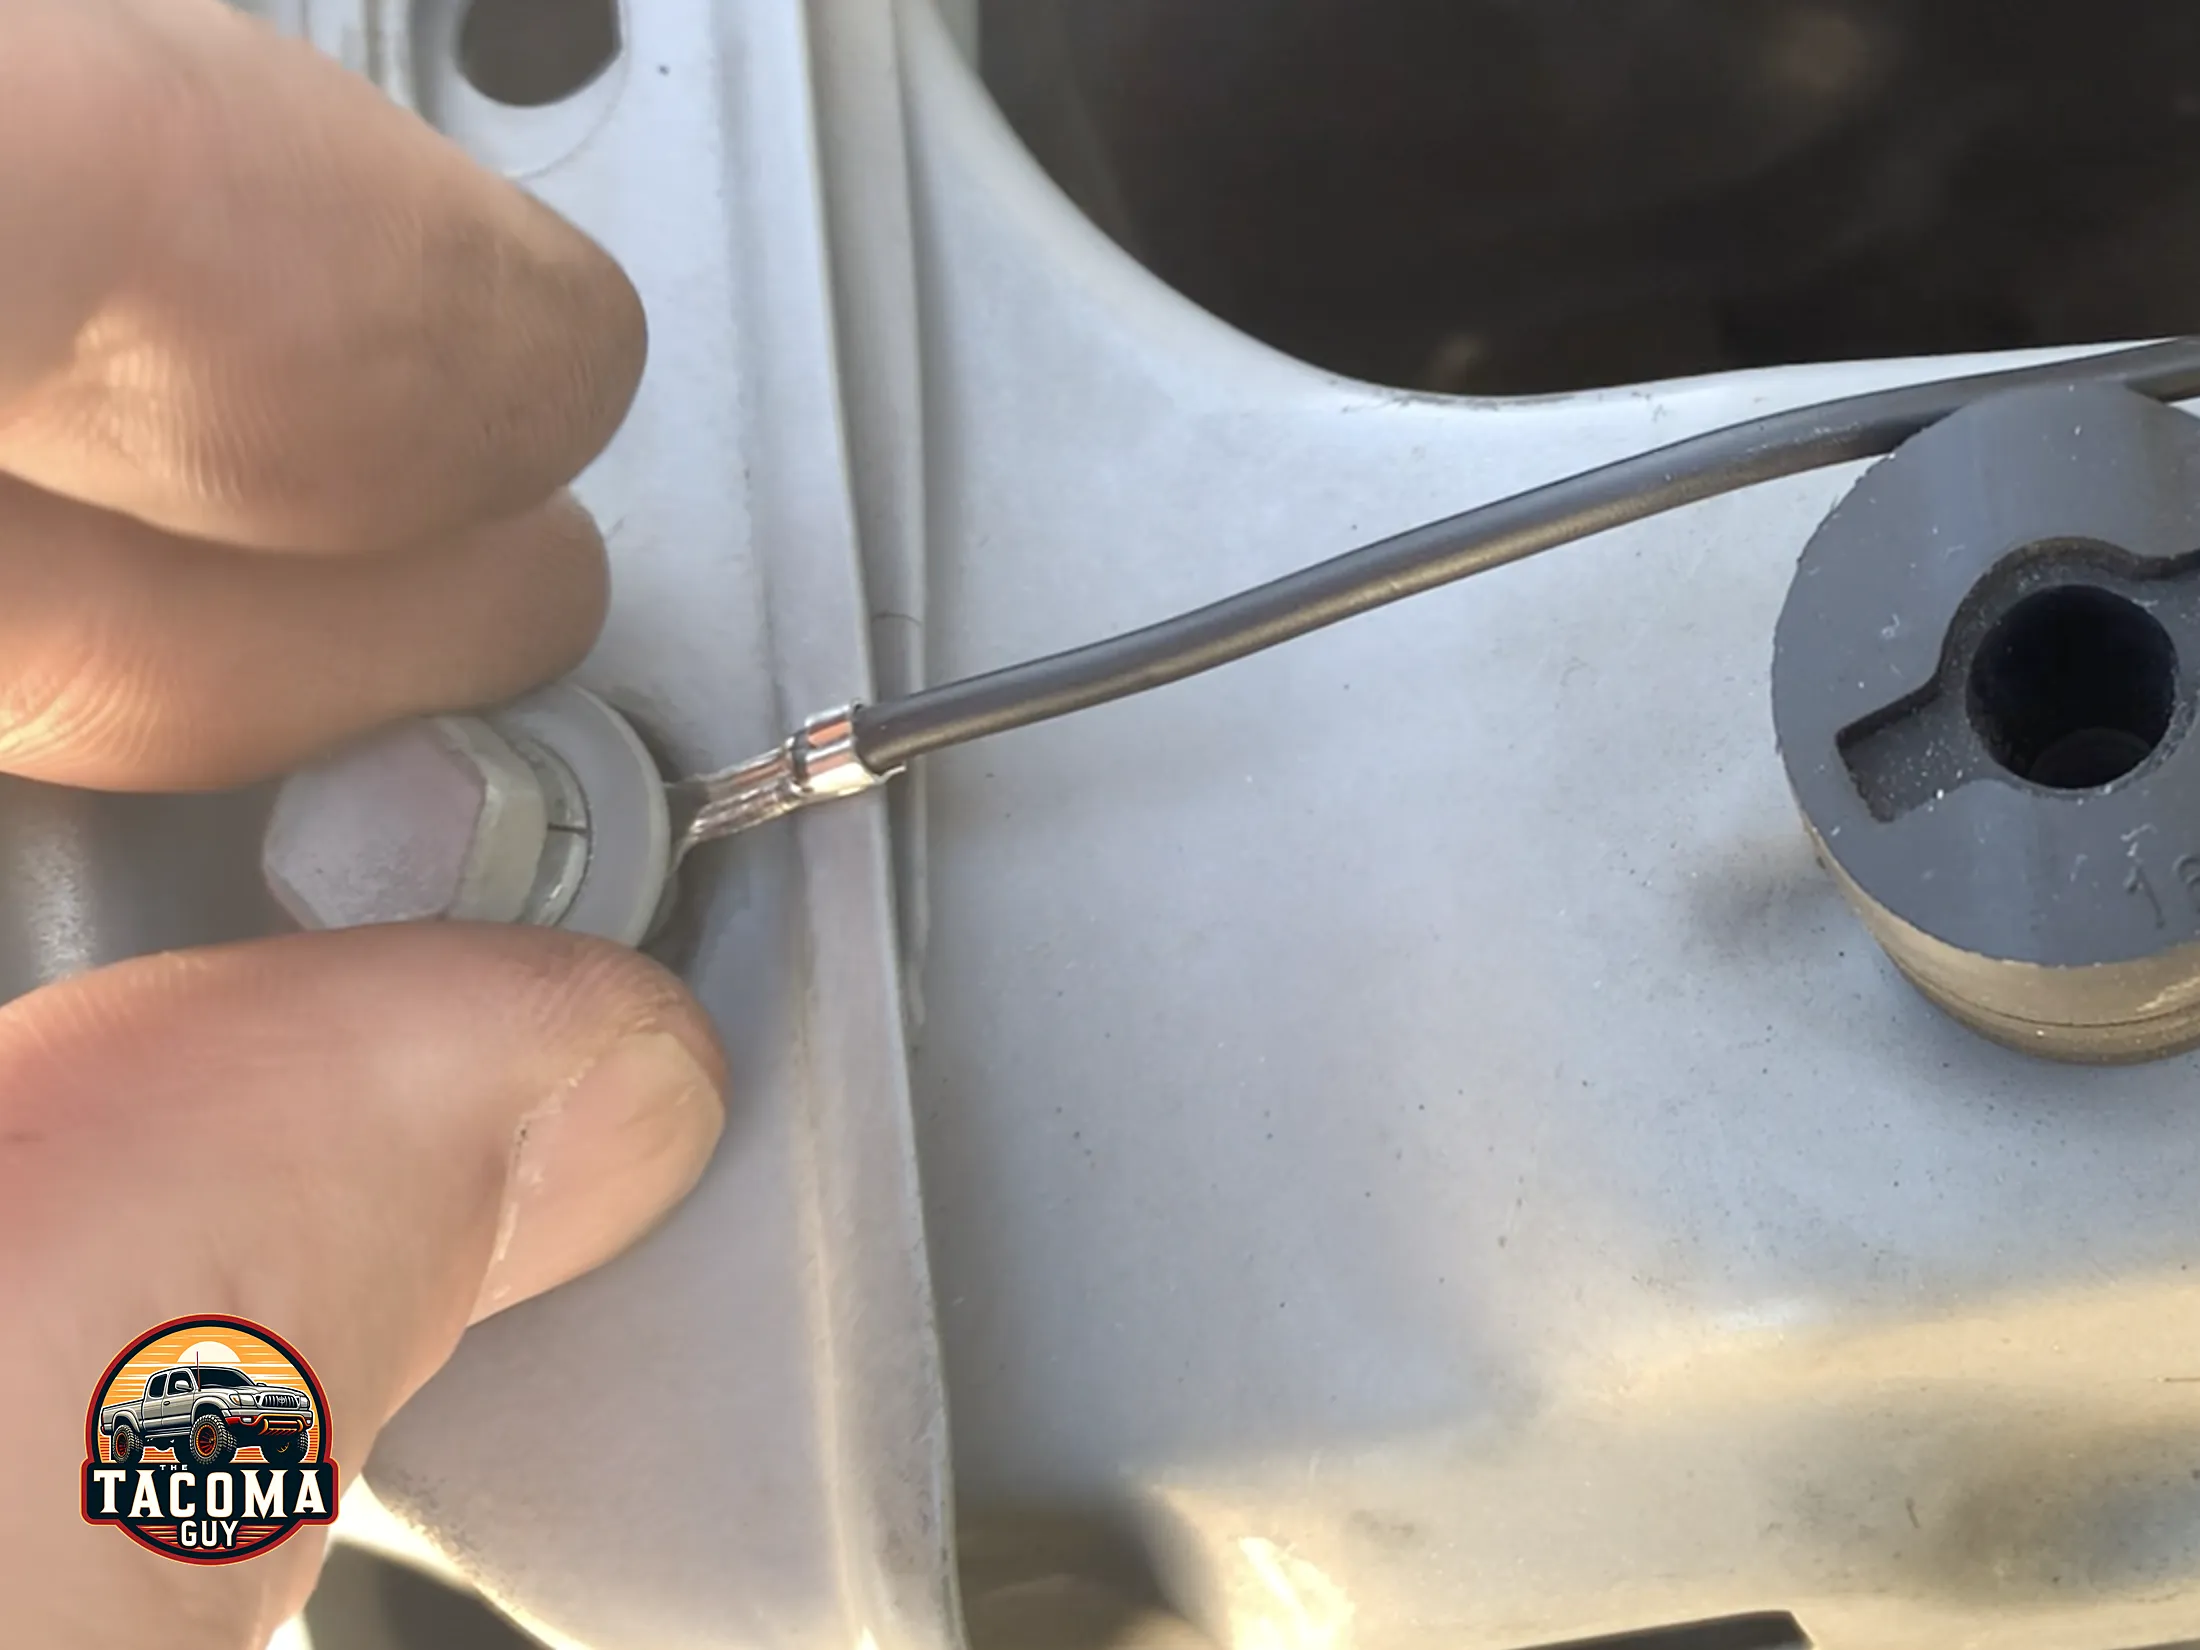
- Run the drivers side wire down towards the drivers side turn signal then put a wire splice connector onto the end. Tap it into the green wire near the turn signal wiring harness.
- Run split wire conduit along the yellow wire and make sure its completely covered, so the wire cannot rub against any metal and get frayed. Tape up any areas which need a little extra security, like the ends.
- Don’t tap up the passenger side yet, it will be easier to do later.
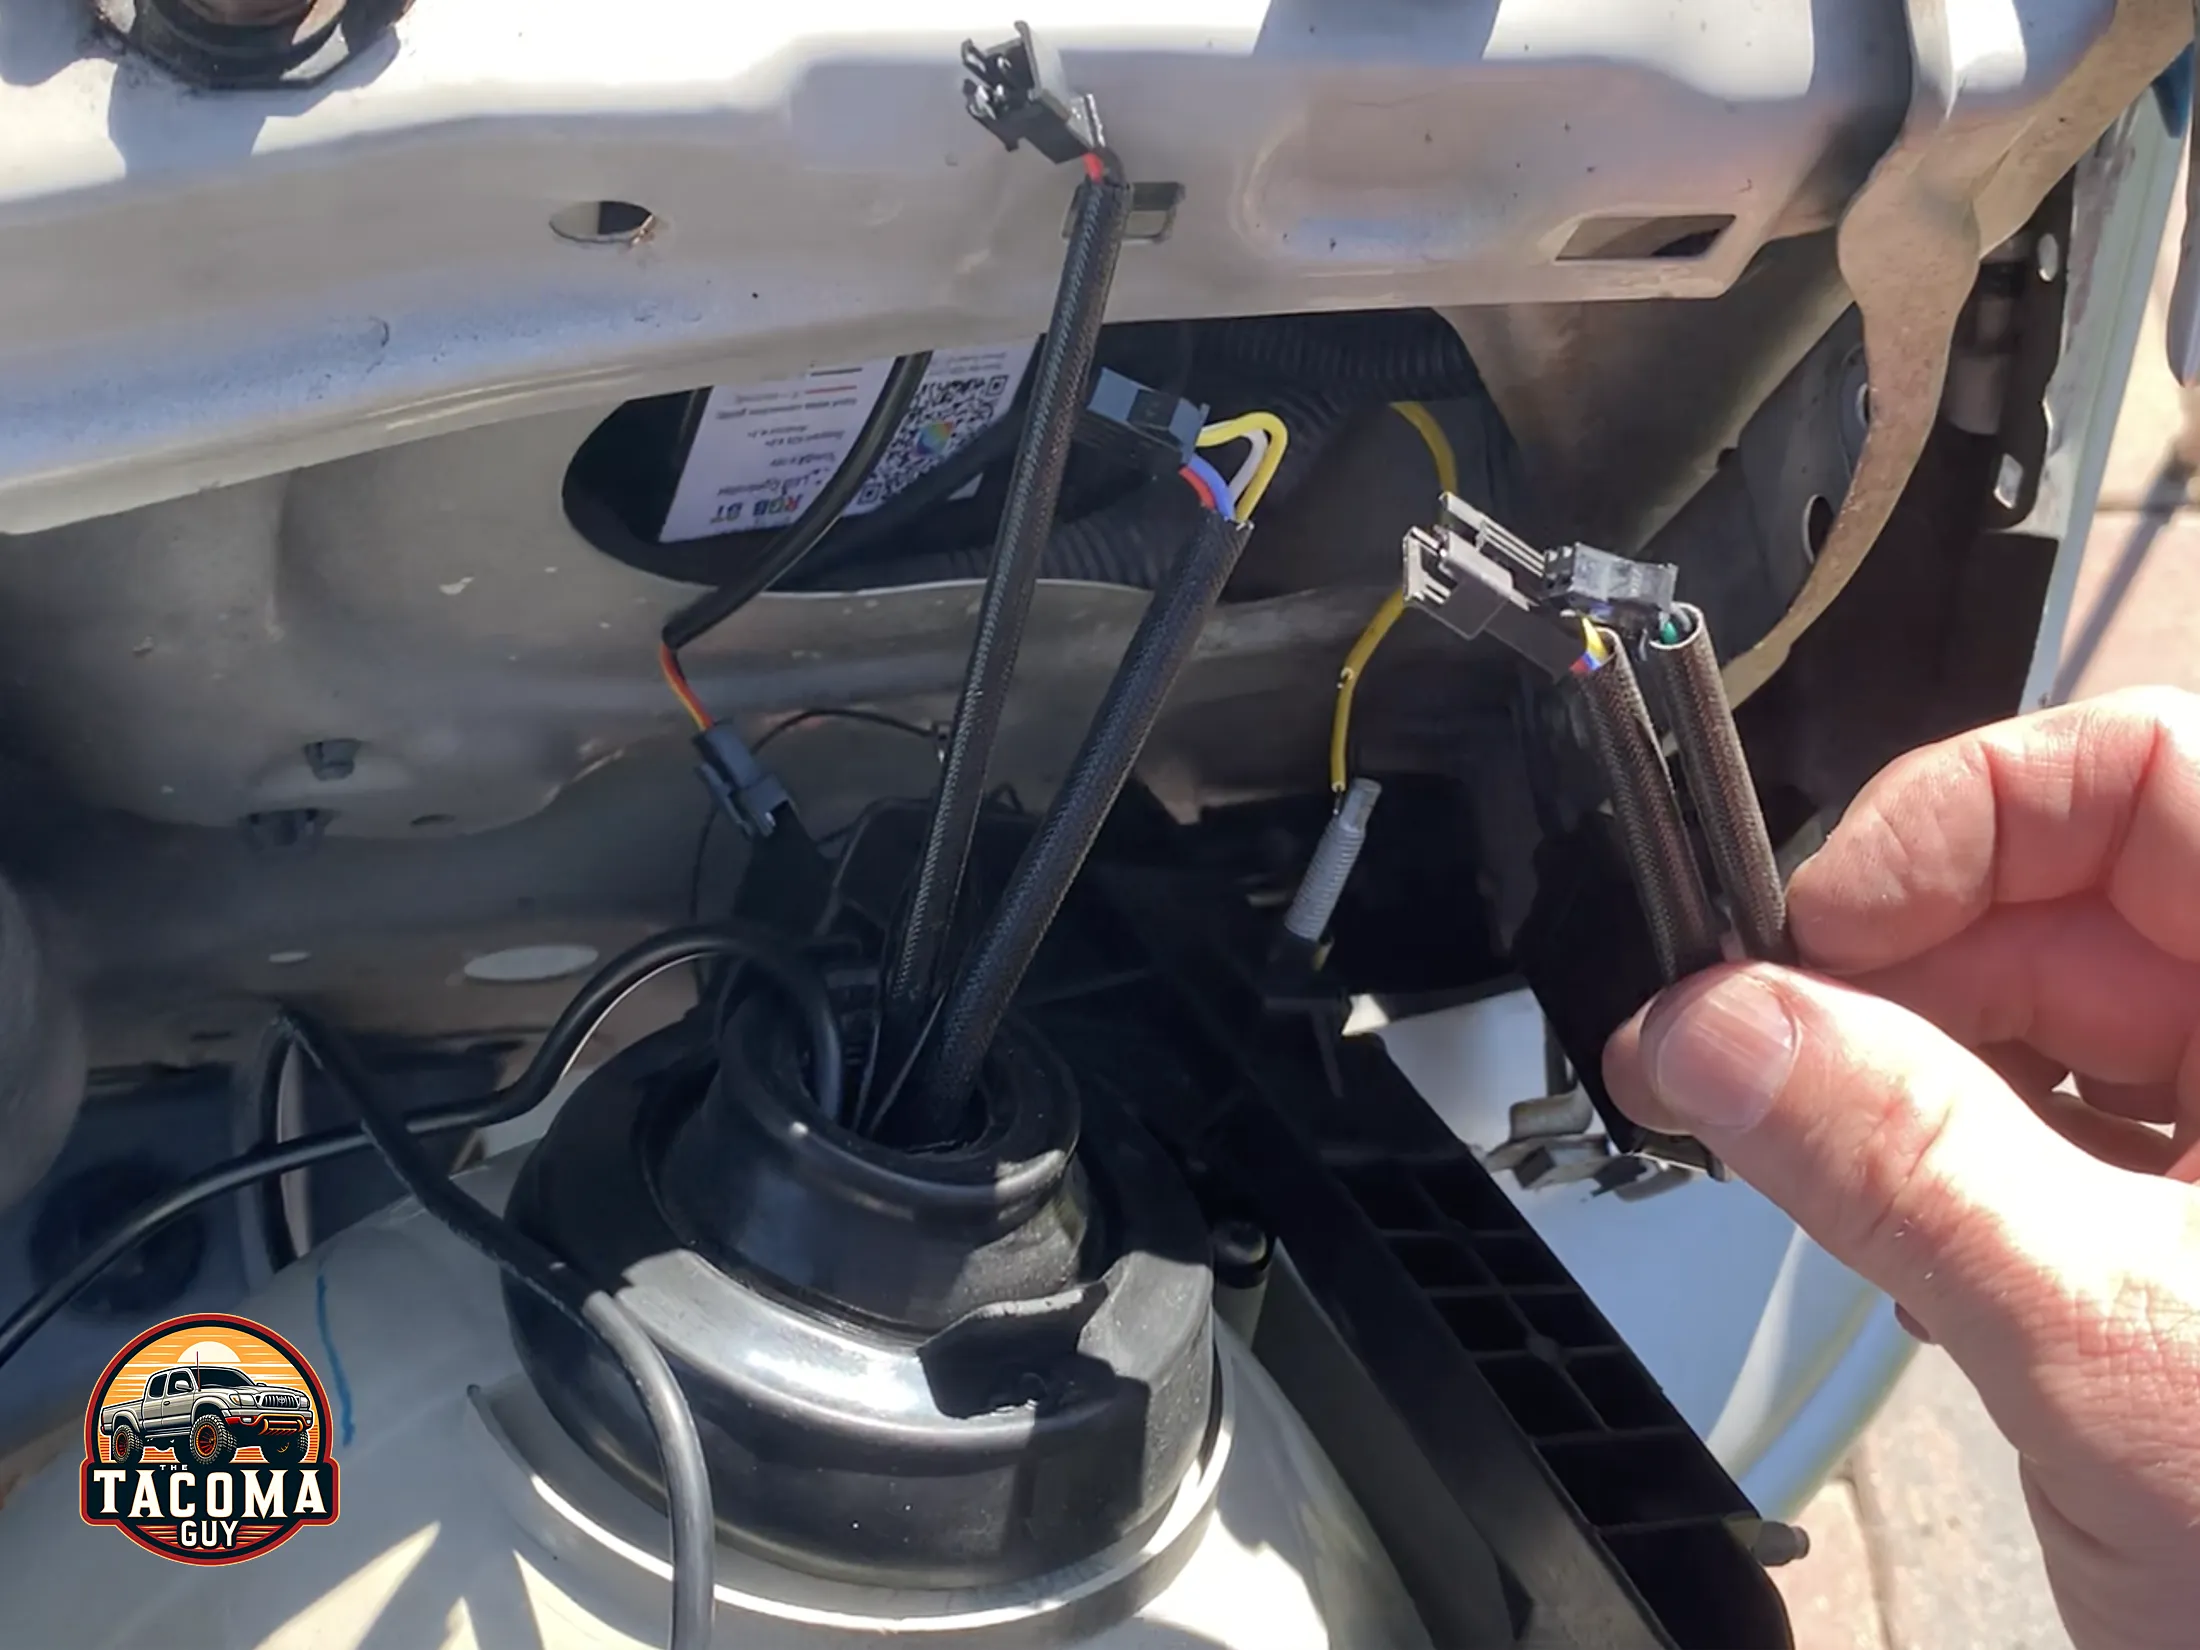
Wiring Up the H4 Harness:
- The H4 harness will live over by the battery. Plug the male H4 plug supplied with the TEQ lighting kit into the drivers side female H4 plug that was plugged into your old headlight. You will only do this on one side, the passenger side H4 harness can be tucked away, and will be unused.
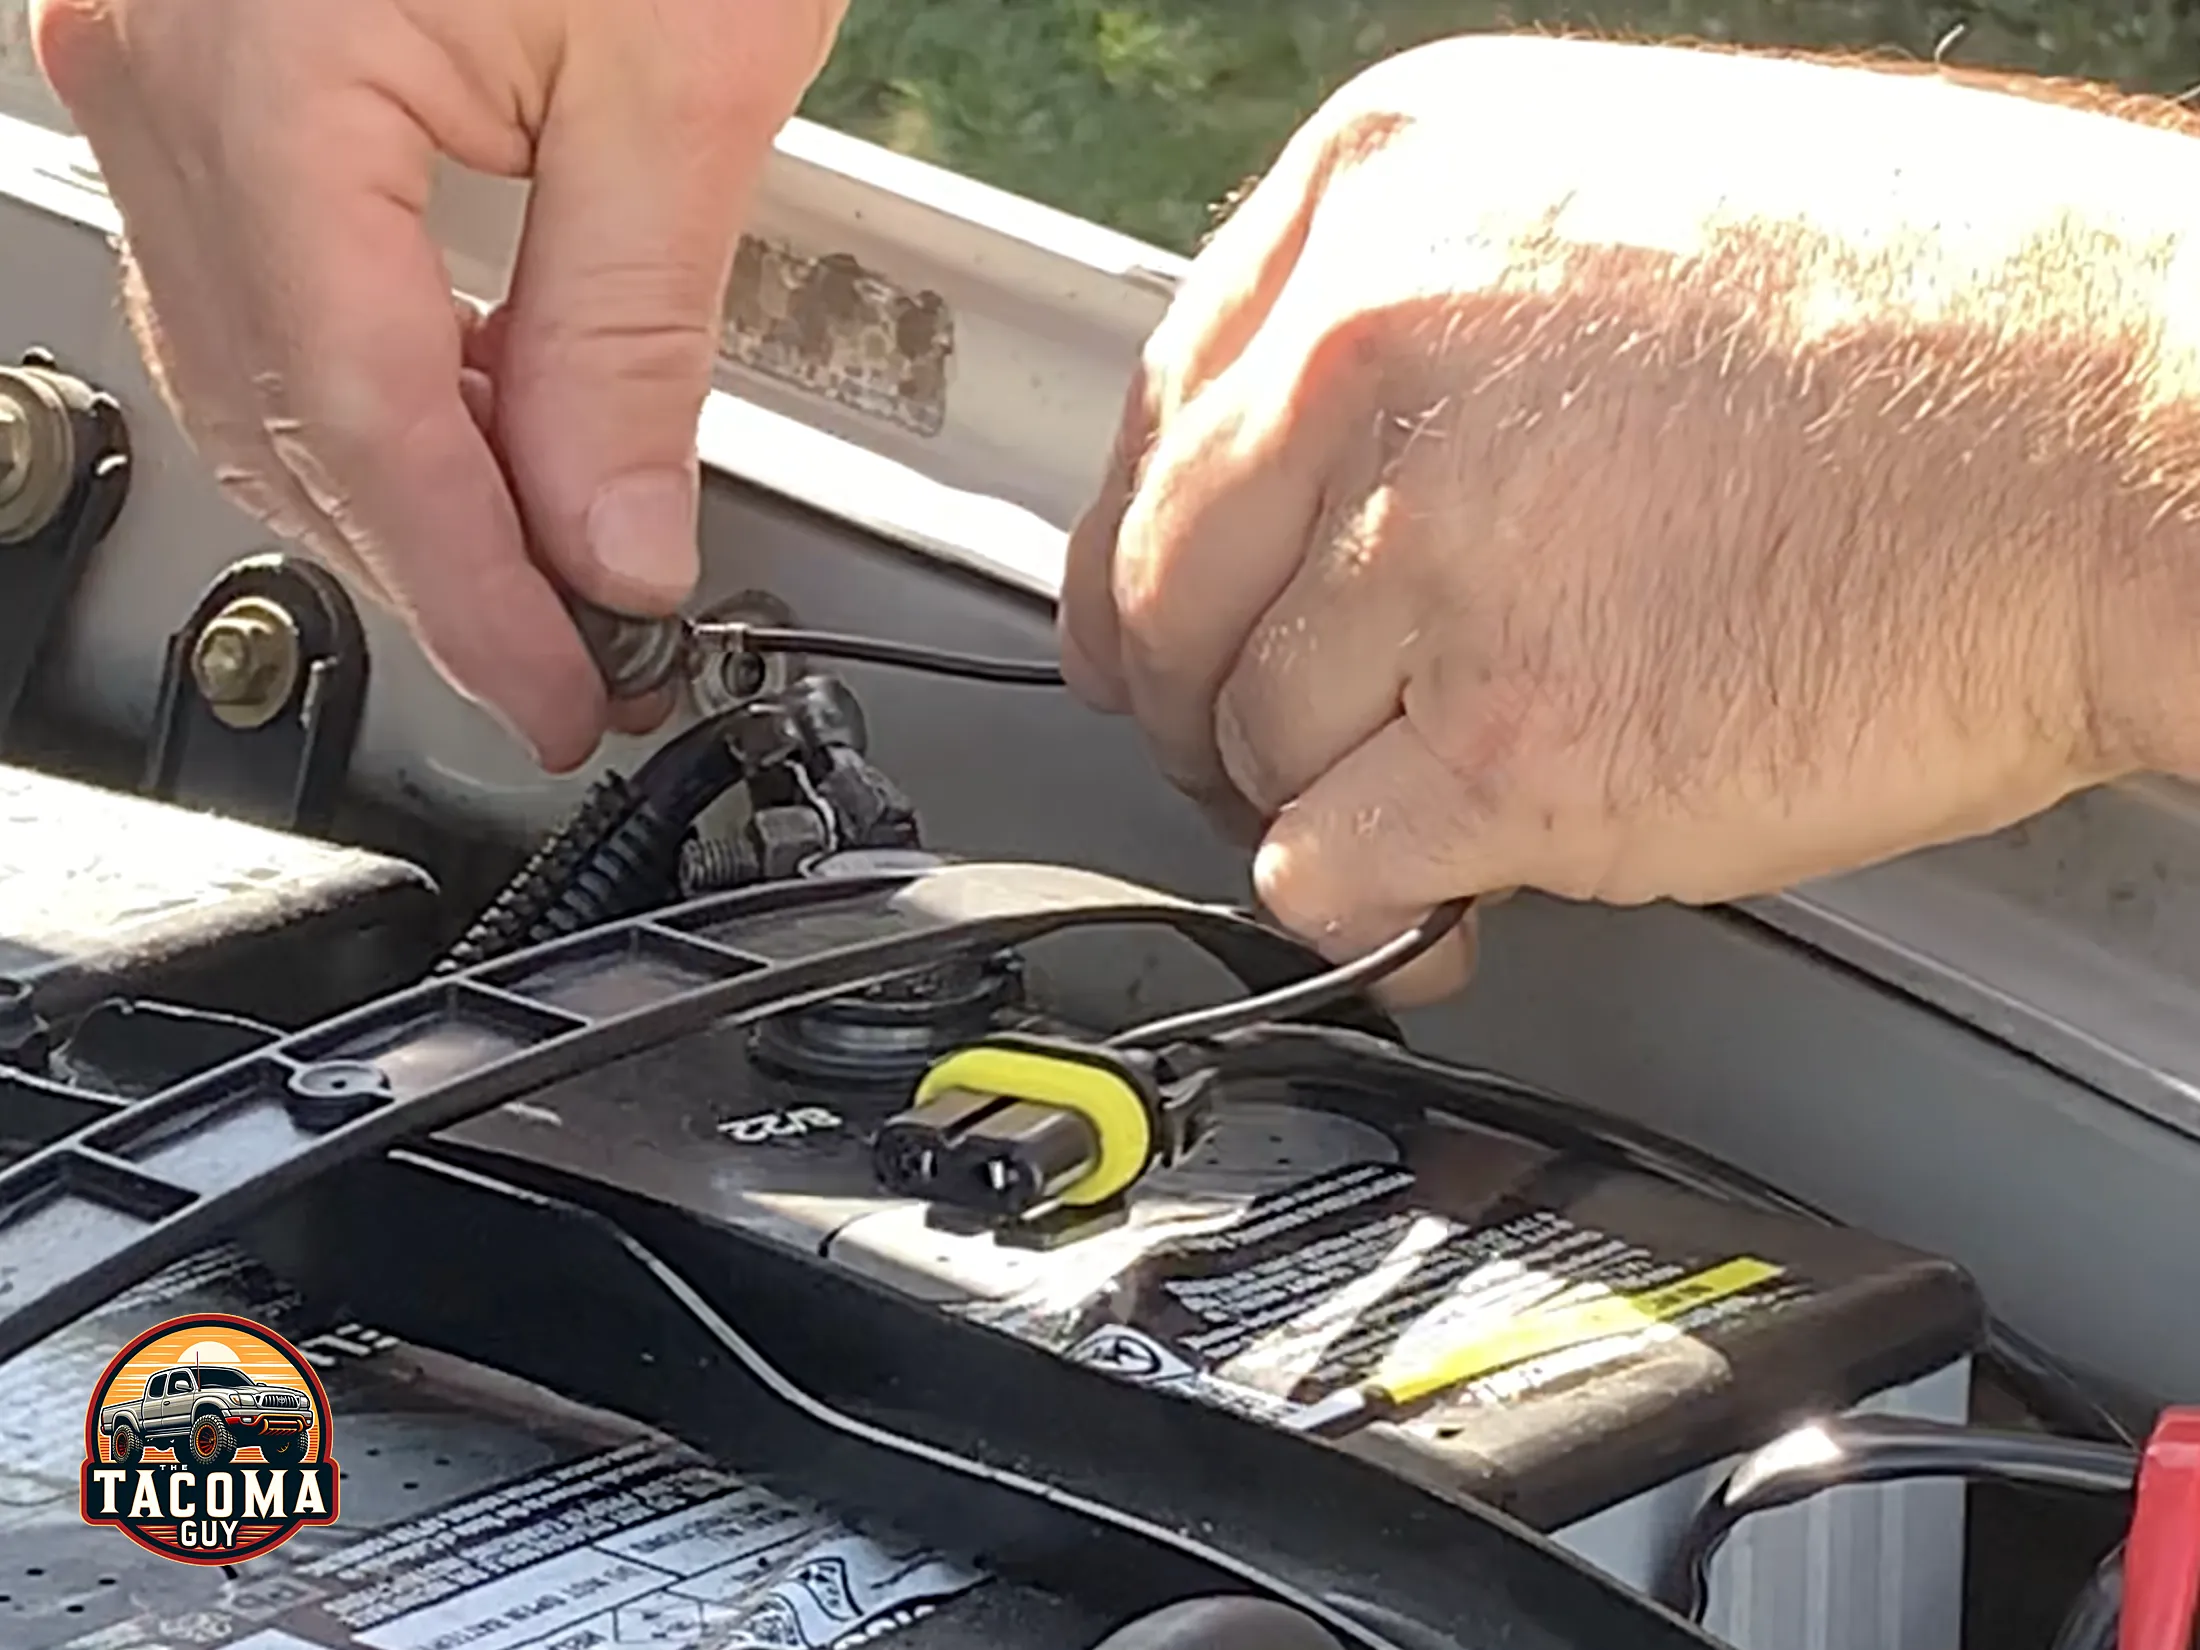
- There is a 9006 connector on the TEQ harness with a black ground wire and ring terminal attached. Remove the ground nut next to the battery and attach it there. You might want to put a little dialectic grease on the connector to ensure its got a good contact.
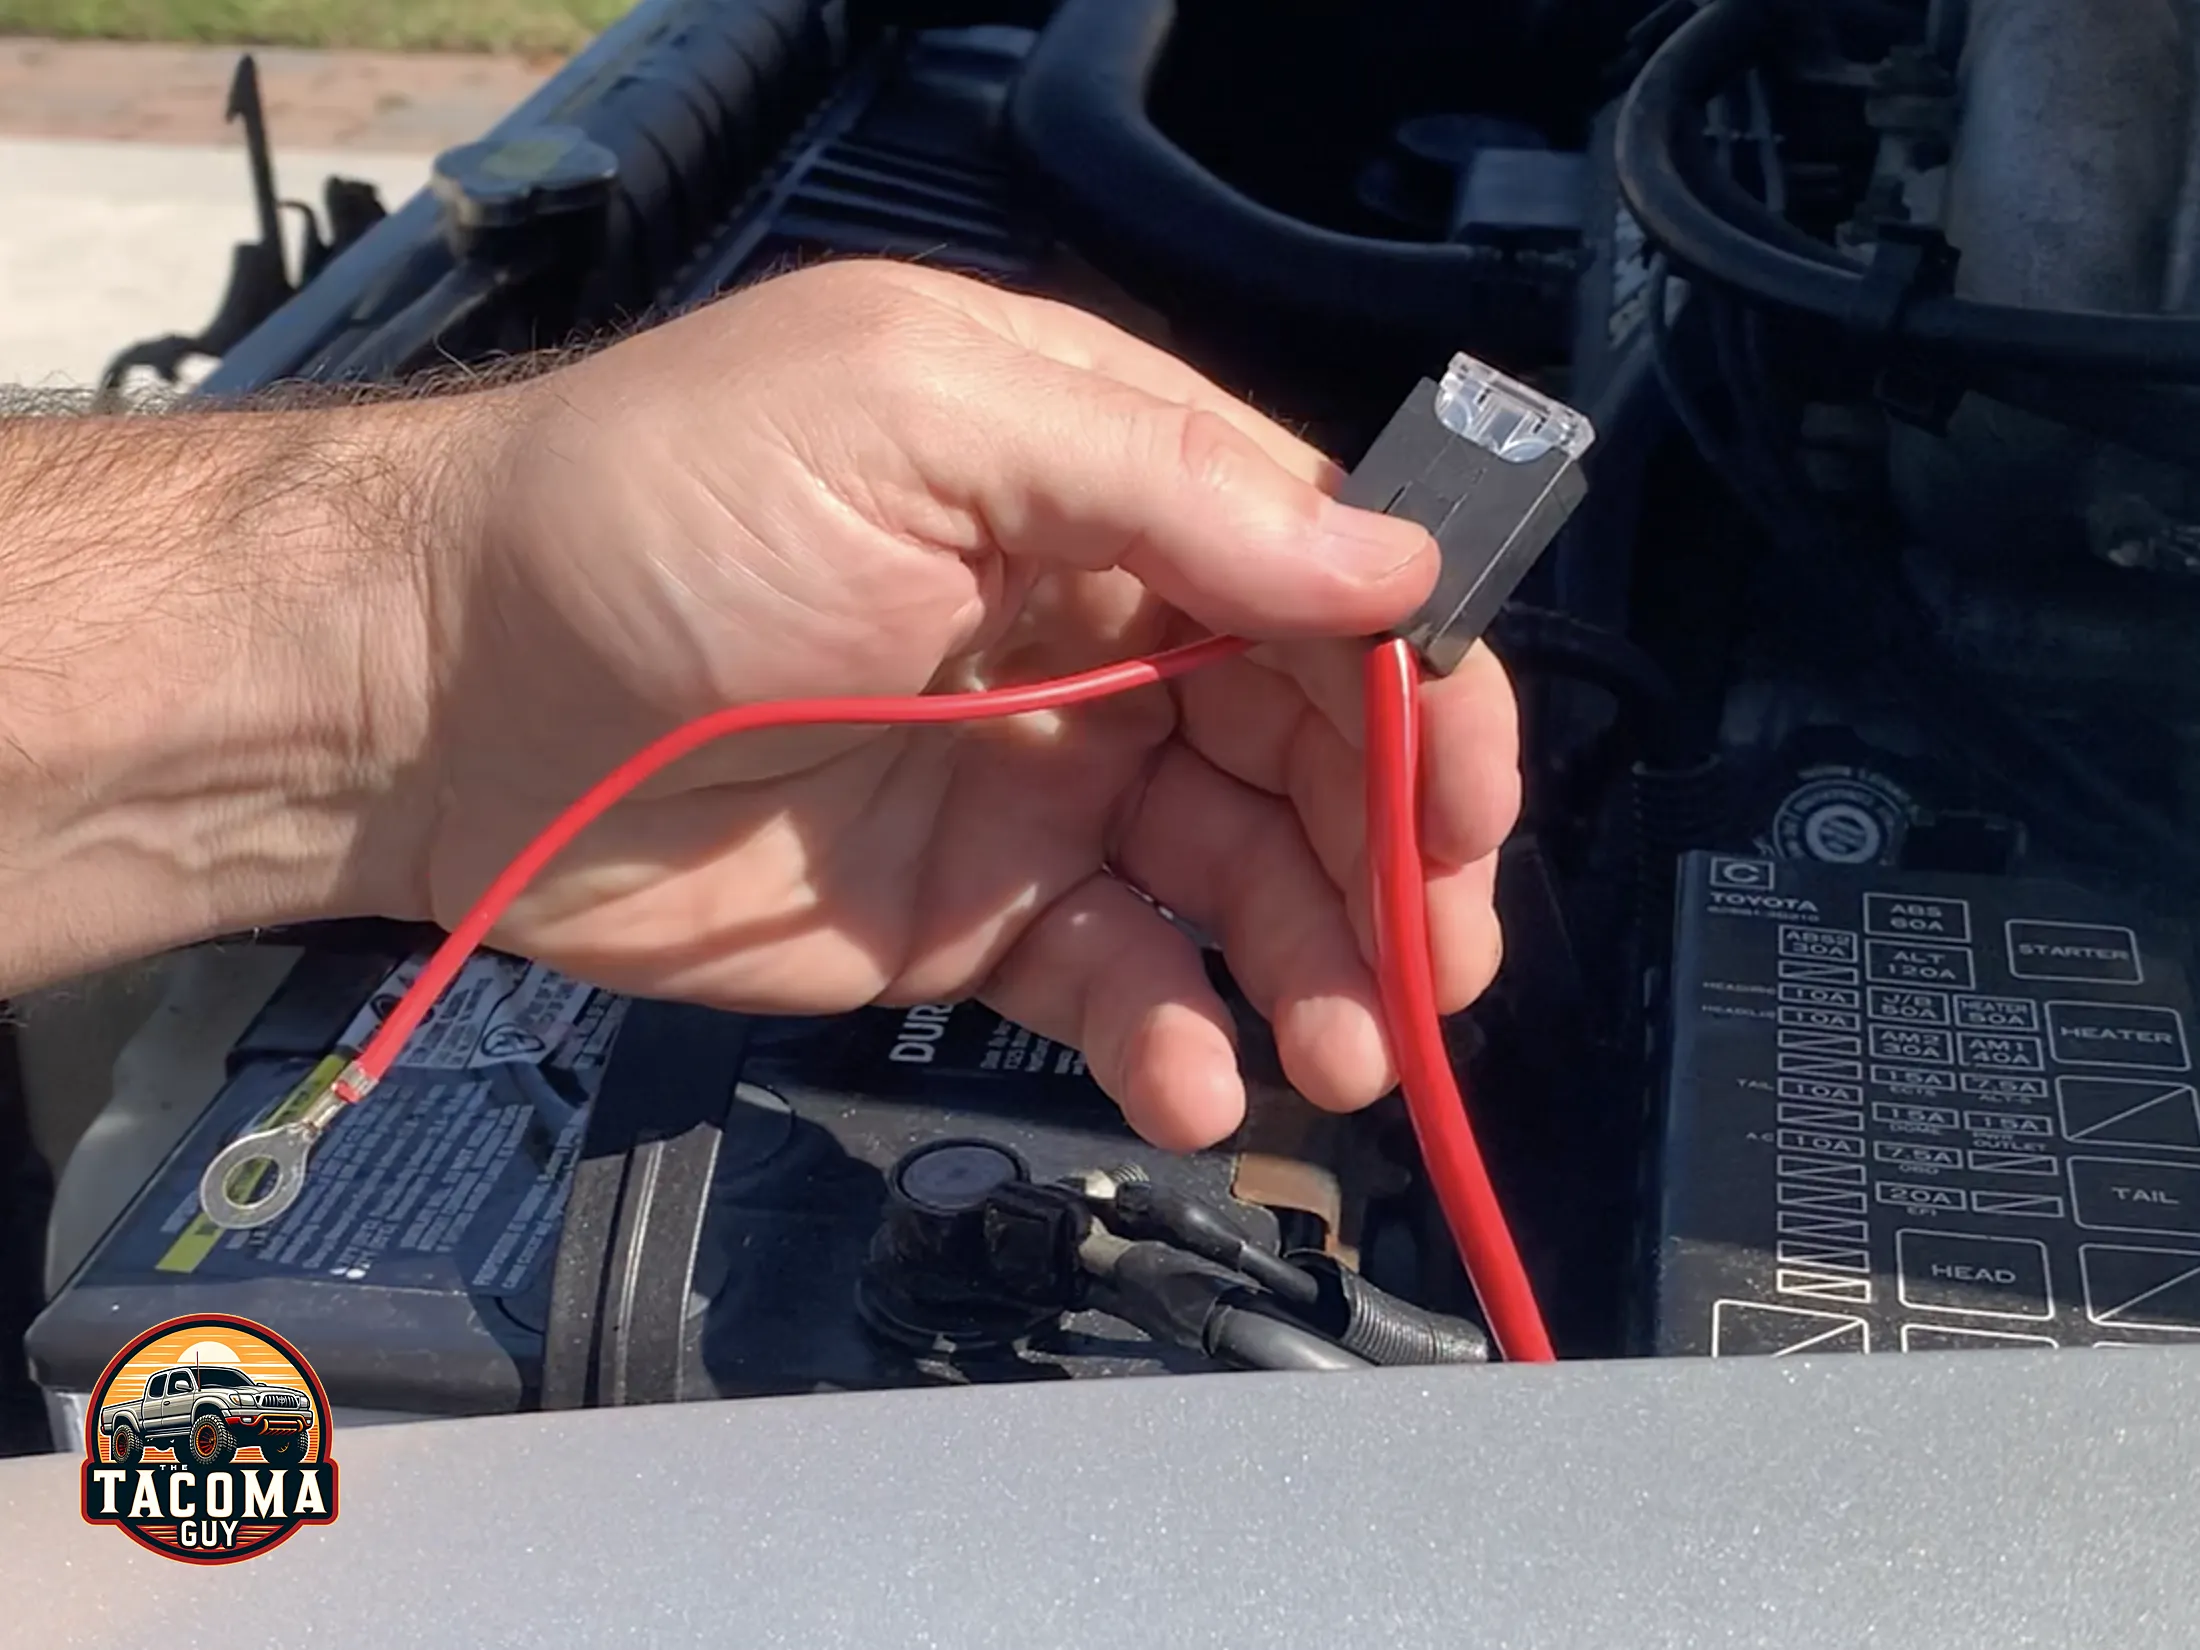
- Now look for the red power cable on the harness with the fuse and a ring terminal. Wire that up to the positive side of your battery terminal.
- Now pull the long wire of the harness over to the passenger side of the truck and just lay it there along the top of the radiator. Put your yellow turn signal wire along with it. Leave both there for now.
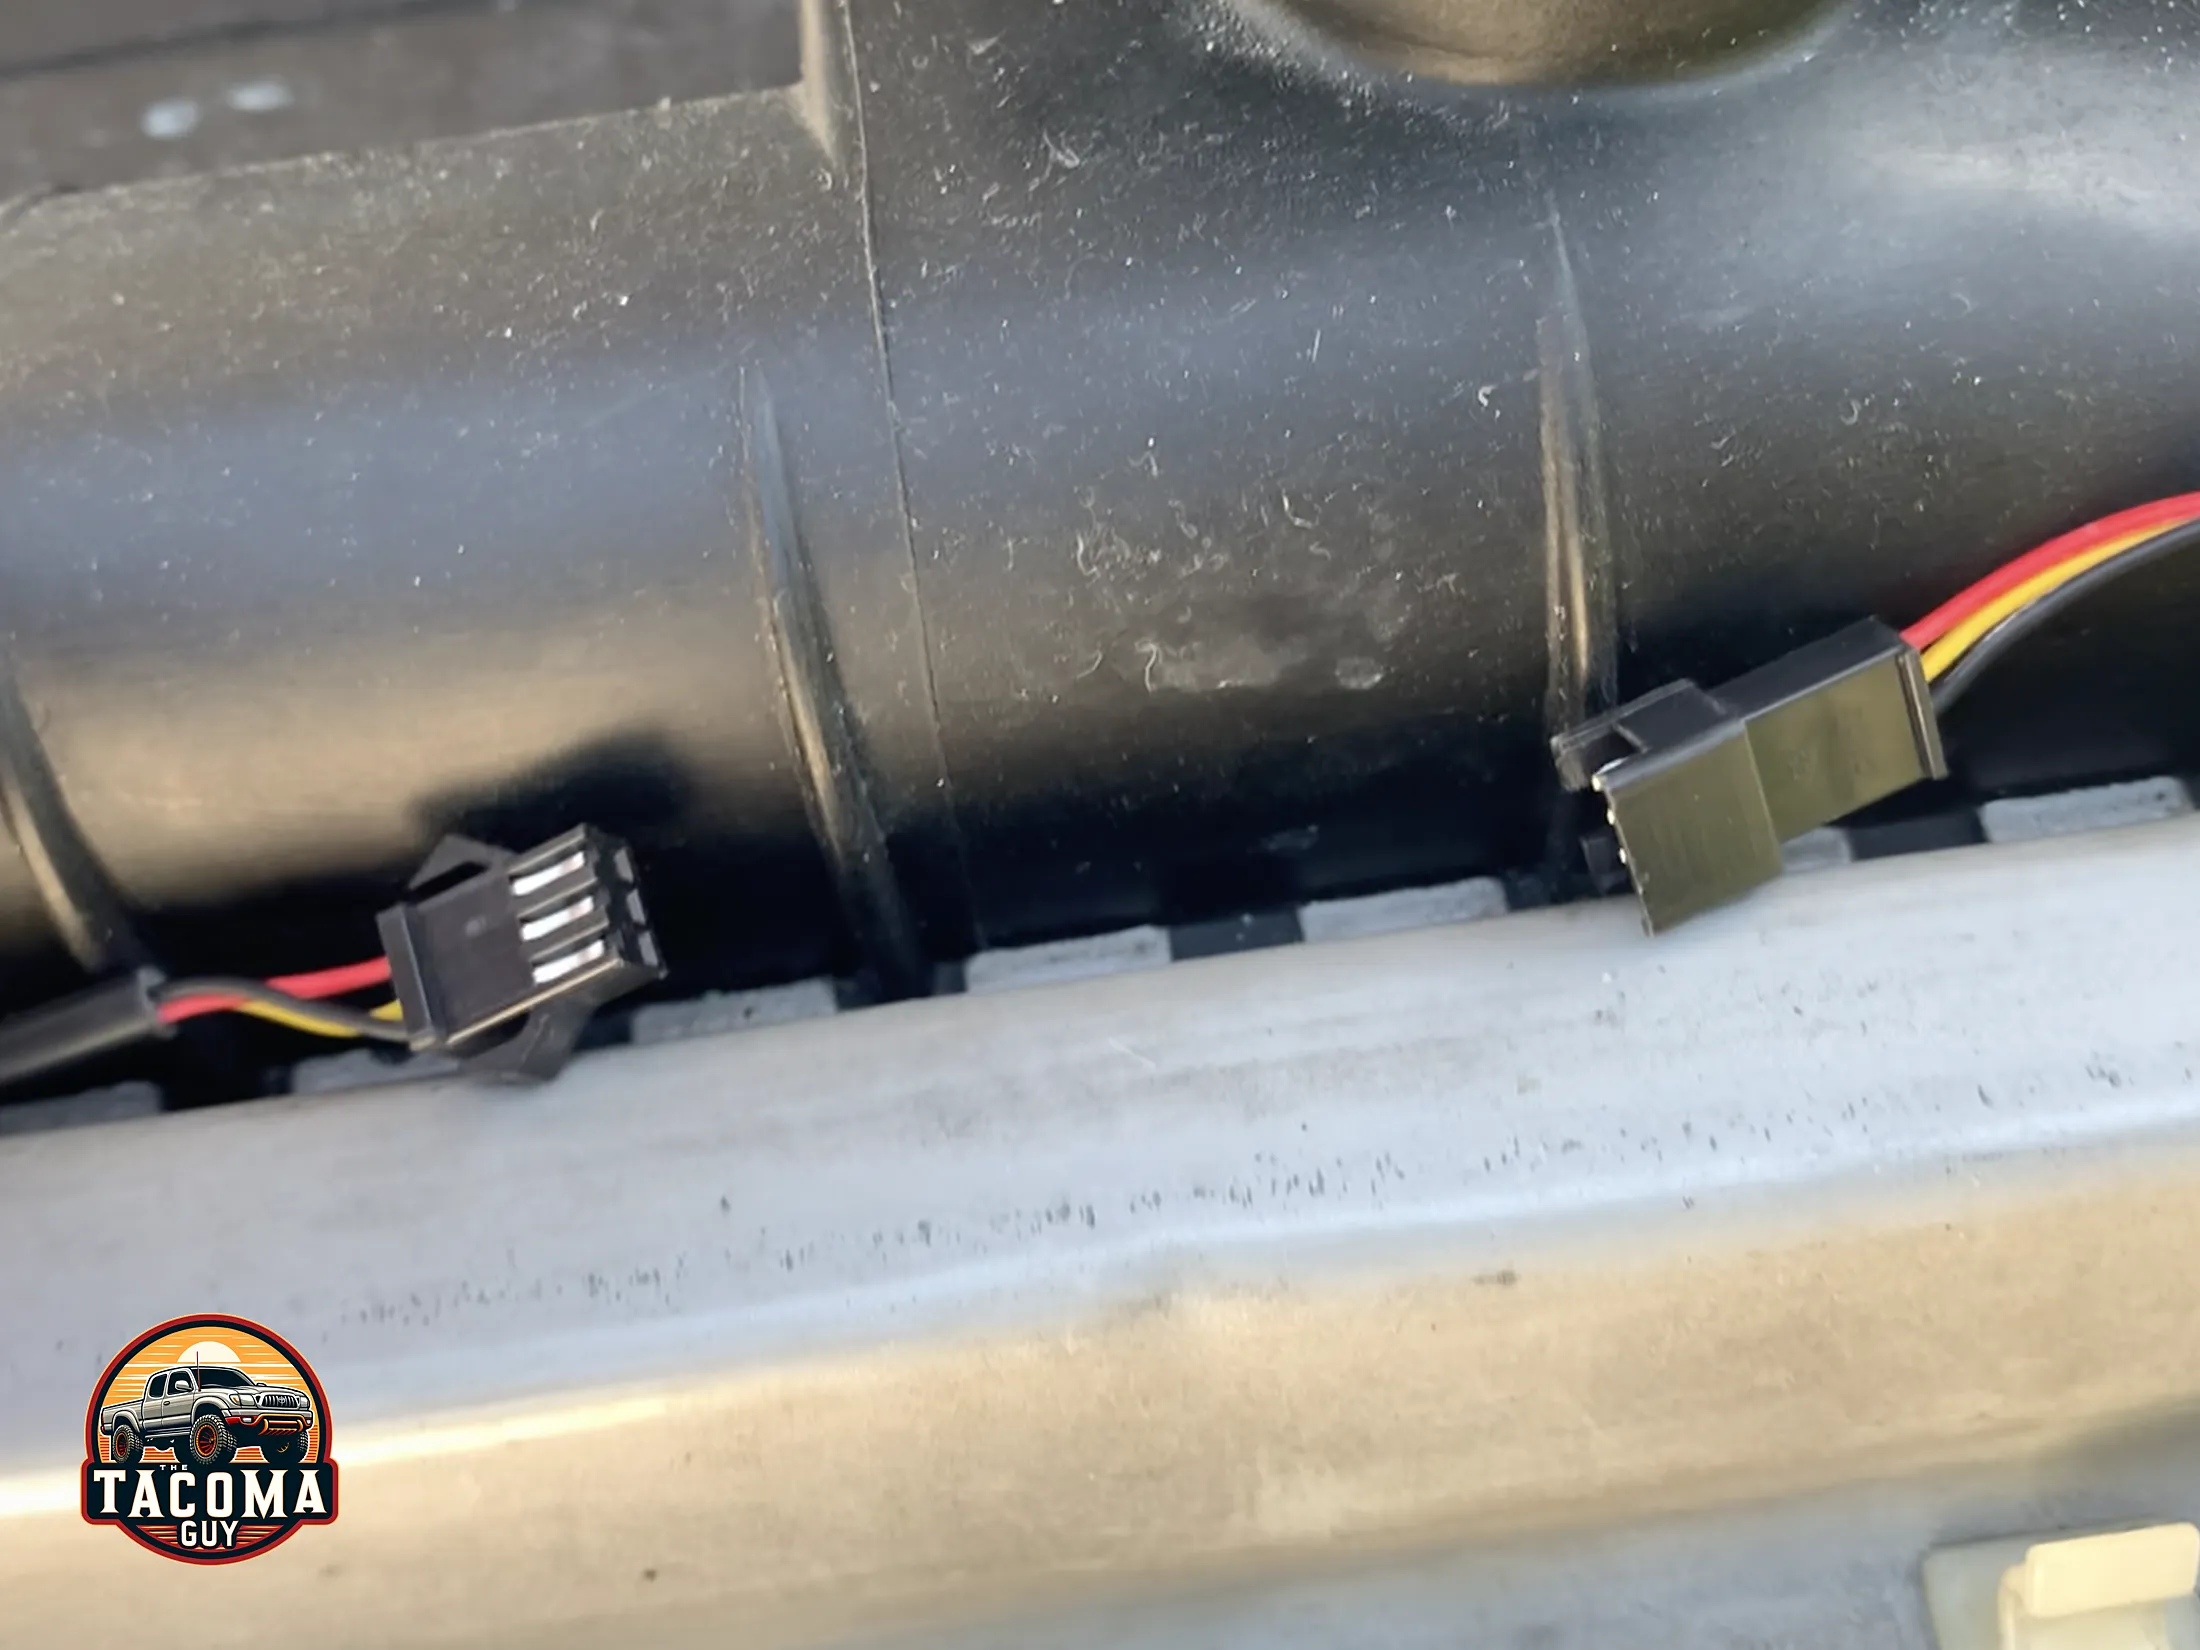
- Grab the new drivers side headlamp and wire it up. Our kit came with a separate 9006 connector with two leads on it. Wire the 9006 connector to the one on the H4 harness, and the two leads to the back of the headlight.
- Then connect the high-beam plug (one white connector off the back of the lamp to one on the H4 harness).
- Now plug in one of the two turn signal leads from the RGB controller to the headlight. Then put the headlight into place, and power up the lights (put key in the ignition and turn but you don’t need to start the truck) and try your drivers side blinker. If the halo in the headlight blinks, you’re all set. If it doesn’t swap that lead from the RGB controller with the other one and try again. Doing this ensures you don’t have to swap these wires later when you’ve tucked all your cables away, you will be mad if you have to do that.
- You can now install the drivers side headlight and secure it with the bolt and two nuts. Hand tight is OK.
- Connect the remaining turn signal lead from the RGB controller to the turn signal lead on the passenger side of the harness
- Now you want to put conduit on the cables running from the drivers side to the passenger side. I placed several wraps of wire harness tape to secure the conduit about every 6 inches. Once thats done you can tuck it all into the gap between the core support and the radiator (theres another conduit running in that space, just smash it on top of that, there’s room.)
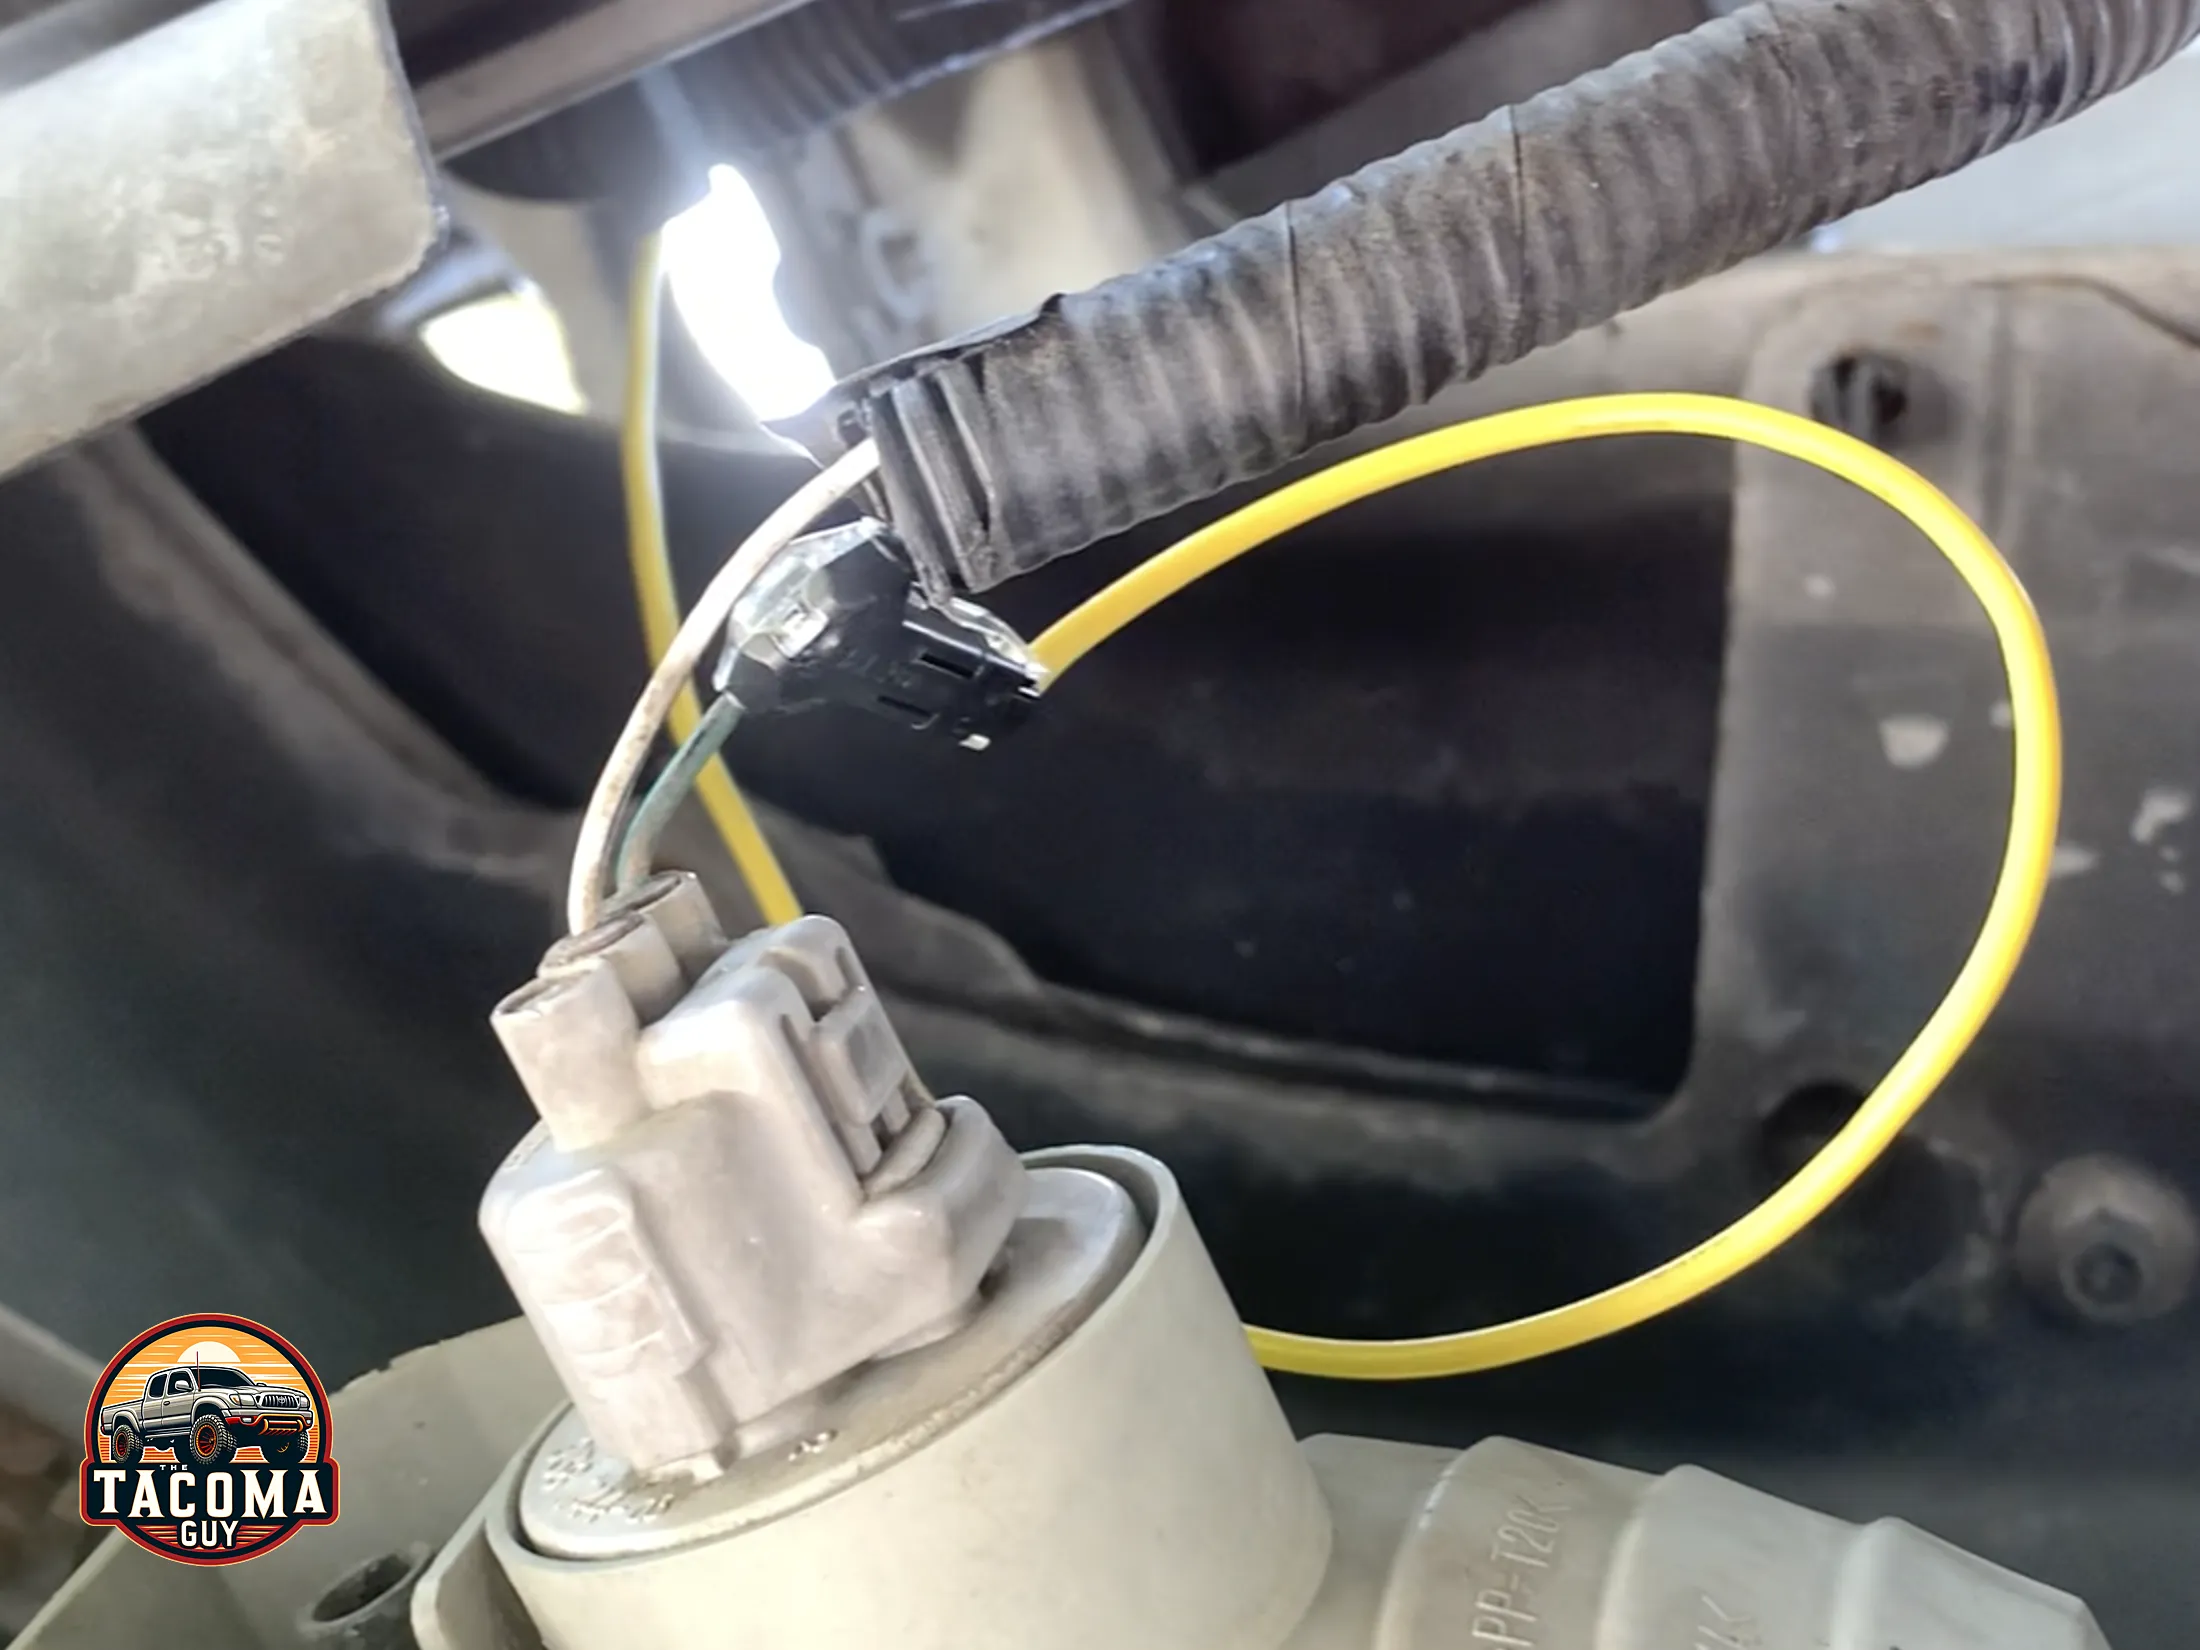
- There is another ground wire with a terminal ring connected to the 9006 connector. This can be attached to the fender bolt along the top left side of the truck – photos below. I used a steel wool pad to remove some of the paint there and a little bit of dialectic grease to ensure a good connection. I also put this wire into conduit to make sure it wouldn’t rub against the hood or the frame.
- Now you can run the other yellow turn signal wire down to where you are going to tap it near the turn signal light on the bumper. Tap it into the green wire and put conduit around it.
- Connect up the remaining leads, place the headlight into place, turn on the truck and test everything out. Do the high beams turn on? Do the turn signals work? Can you connect to the RBG module with Bluetooth and the App and change the colors?
- If all is well, secure the headlight with the 2 nuts and the bolt.
- If you want to change the grille clips, now is the time. Pull the old ones out and install the new ones onto the frame by pushing them into place. Look at the old ones to see how they sit. You cannot put them on the grille and try to get them into place that way, you have to put them onto the frame then push the frame onto the clips.
- Place the grill over the headlights and push onto the clips.
- Reconnect the lower headlight molding trim on both sides.
- Reconnect the corner lights. Watch the tabs and place into the slots on the frame.
- Reattach the top two screws which hold in the grille. You’re done!
Adjusting the Headlights on a Gen 1 Tacoma:
You might want to adjust the height and side by side orientation on the headlights after you install them. They might project too low or too high. These lights from TEQ are seriously bright, make sure they aren’t too high so you aren’t blinding other drivers and creating unsafe conditions for them and you.
There are two screw like metal nuts which come out of the back of the light. You’ll need a 4mm socket to turn them.
The screw on the bottom is for the up / down adjustments. Right turn lowers the light, left turn raises. Using the other adjustment nut can adjust left and right.
Point the truck at a wall about 20′ from the truck so you can see the beam pattern, then make your adjustments. Measure the distance from the ground to the middle of the LED beam. The beam pattern on the wall is typically 2-3 inches below that.